Increase Sales Conversion
Can’t turn your site traffic into sales?
Reduce Cart Abandonment
Your customers abandoning their carts?
Promote Products & Offers
Make potential customers notice special offers.
Collect Form Submission
Struggling to collect form submissions?
Get More Phone Calls
Let them call you directly via popups.
Grow Email List
Having trouble growing your email list?
Gamify Your Campaign
Choose your offer and let the game begin.
Make Announcement
Make sure important news unmissed.
Increase User Engagement
Keep visitors & customers on your site longer.
Collect Feedback & Surveys
Can’t draw attention to your surveys?
Facilitate Social Sharing
Grow social media followers and likes!
# On-Click Targeting
Did you know you can embed a code on a button, link, or image that opens your popup with a click?
Popupsmart’s on-click targeting feature makes it as easy as a finger snap.
Basically, it improves the user experience by not bombarding users with a popup immediately after landing on a page. The popup works on the condition of clicking the set element.
The on-click feature works anywhere on your website that supports JavaScript and HTML.
All you need to do is customize your button, link, or image and copy and paste the generated code snippet to where you want to show it.
🔔 Pro Tip: Leave this process to last when customizing your popup. Once your main popup is done, you can align your button based on it.
Additionally, think of this on-click targeting as an embed button. It’s possible to embed it anywhere on a JS-supported page, such as in a blog post.
# Creating On-Click Button
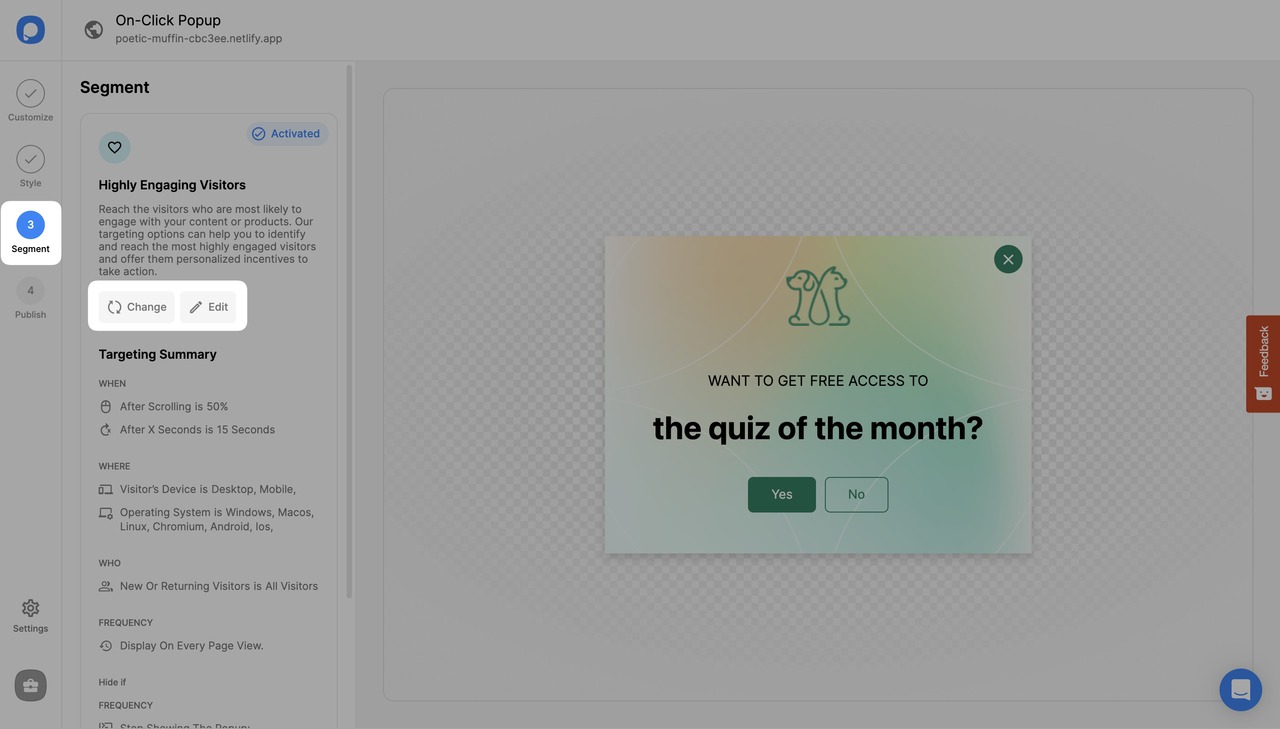
1. After logging into your Popupsmart account, create/edit a popup campaign. On the popup builder screen, navigate to the “Segment” section and click “Edit Segment.” (If it’s a new campaign, click the two circular arrows to choose a predefined segment or create one from scratch in “My Segment.”)
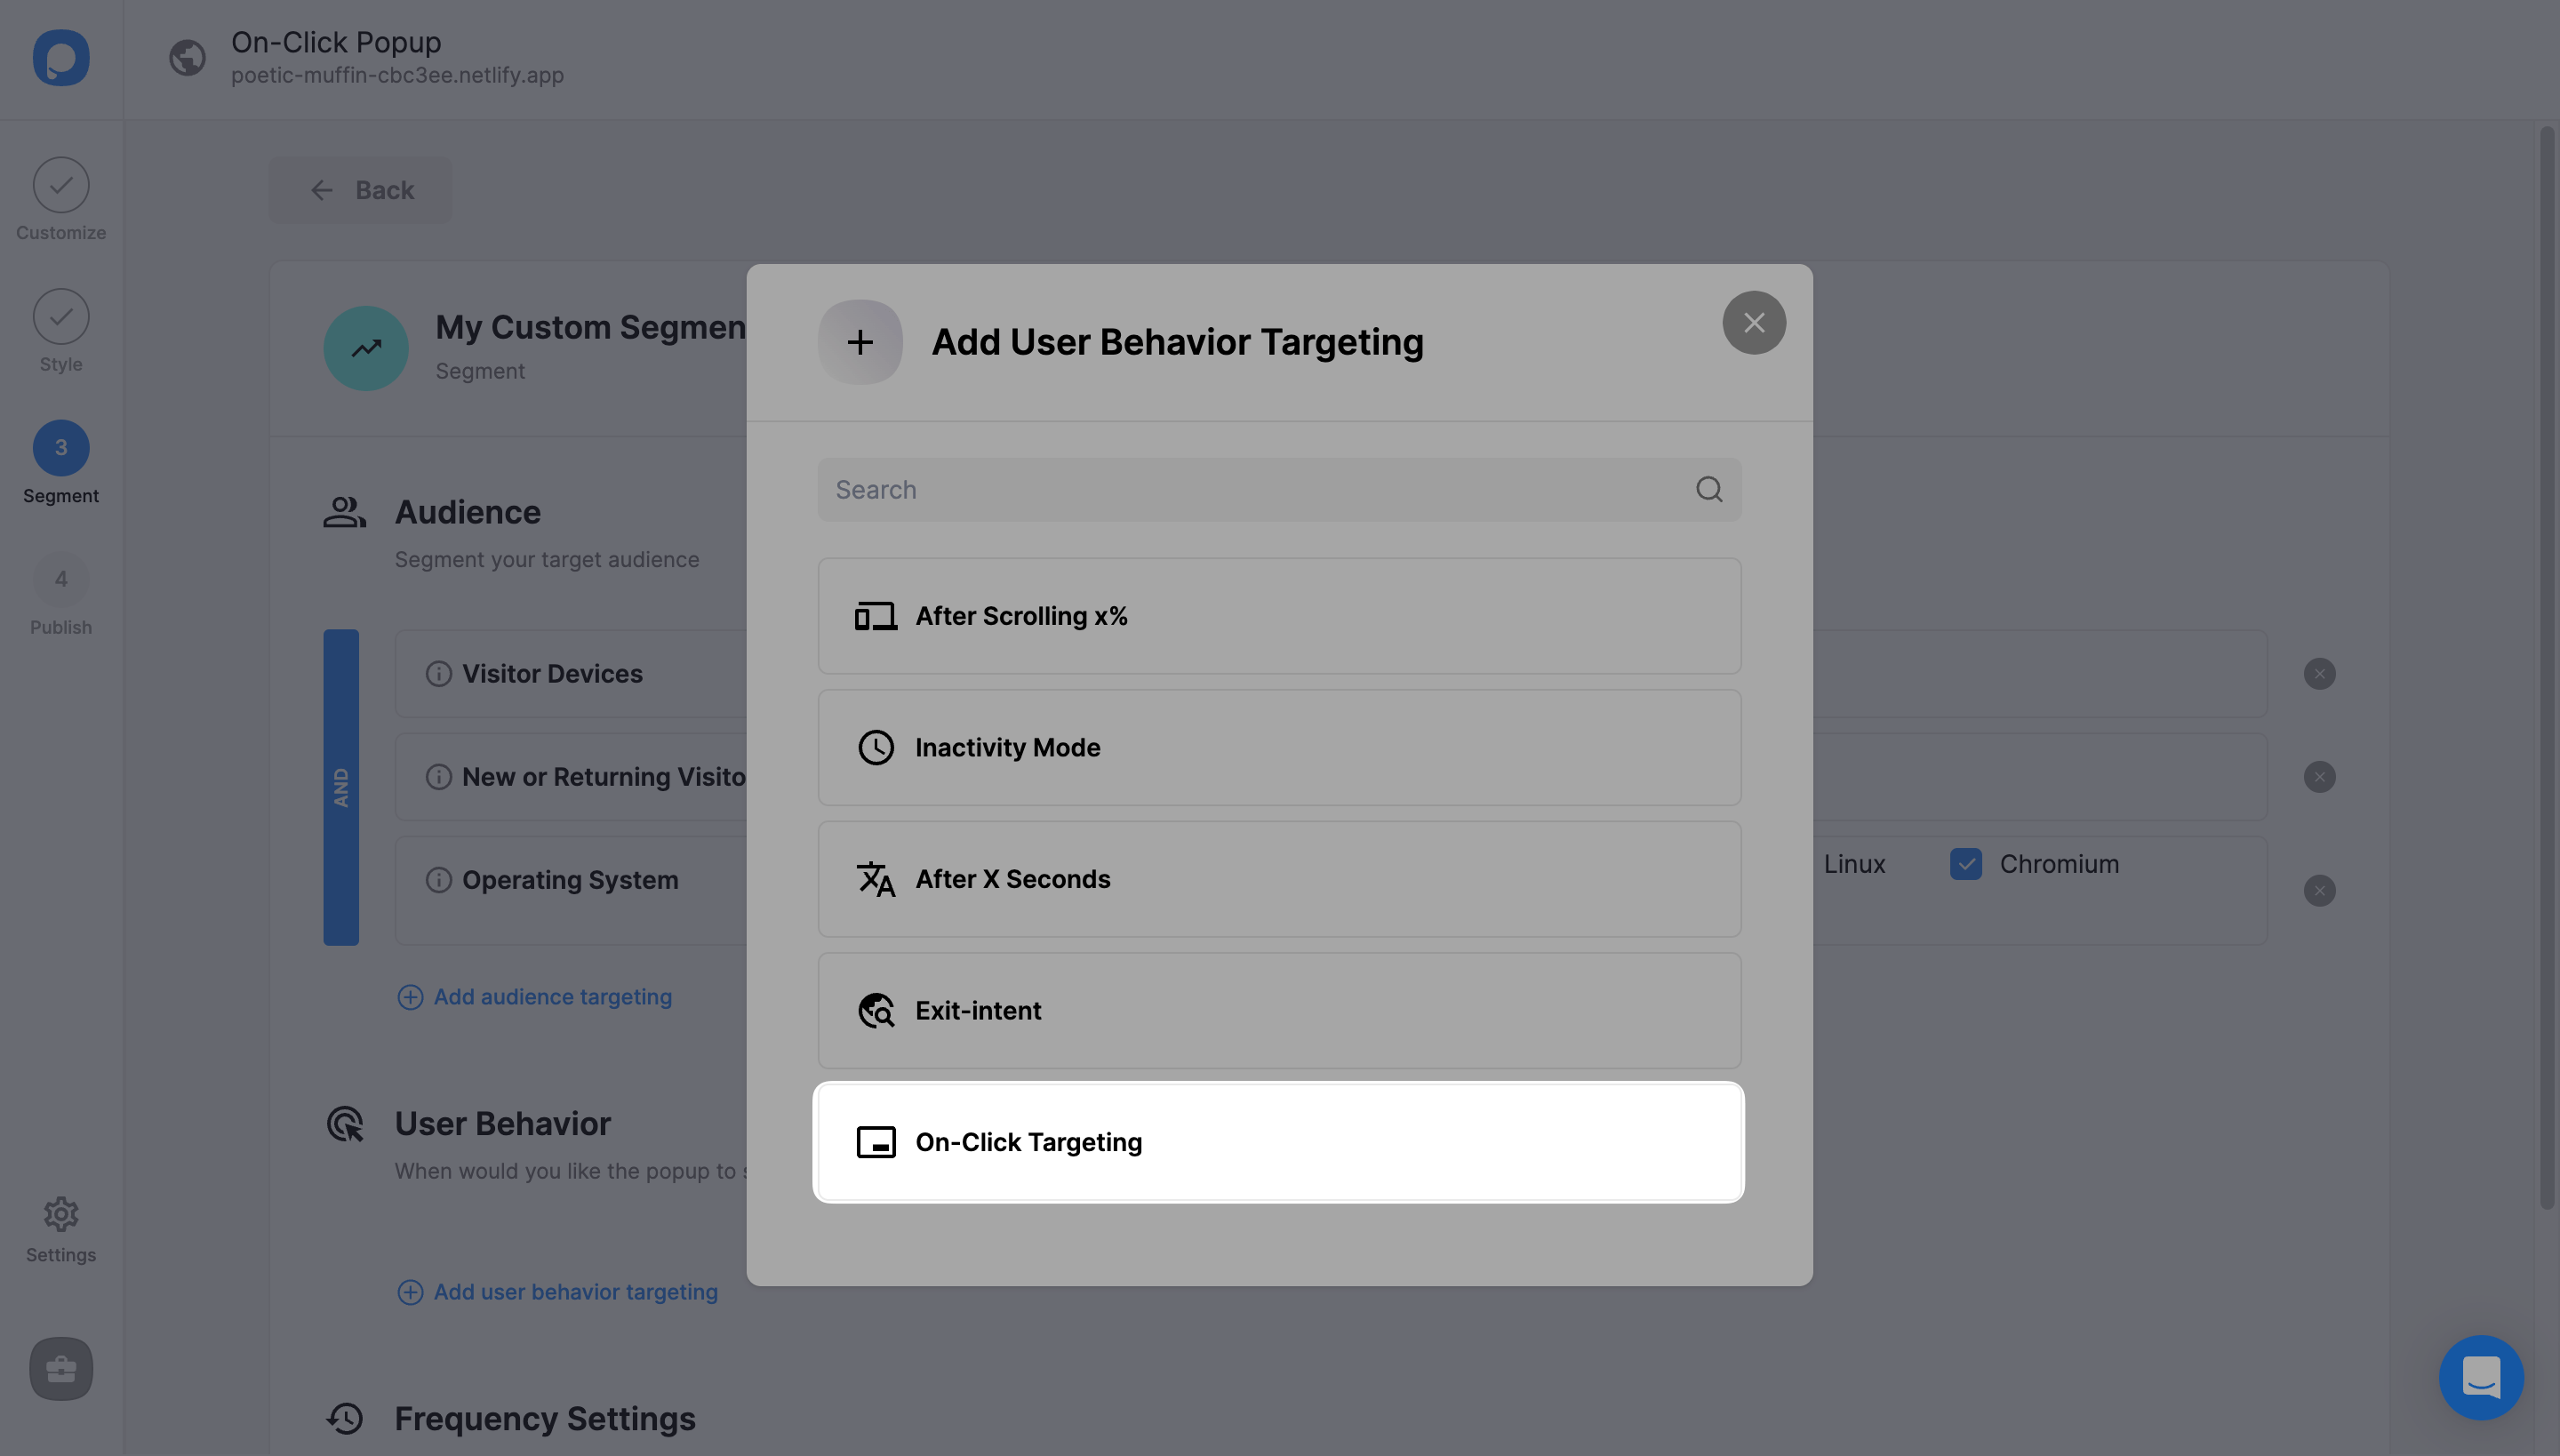
2. Click “Add user behavior targeting” under “User Behavior”. Then, click “Add” next to “On-Click Targeting”.
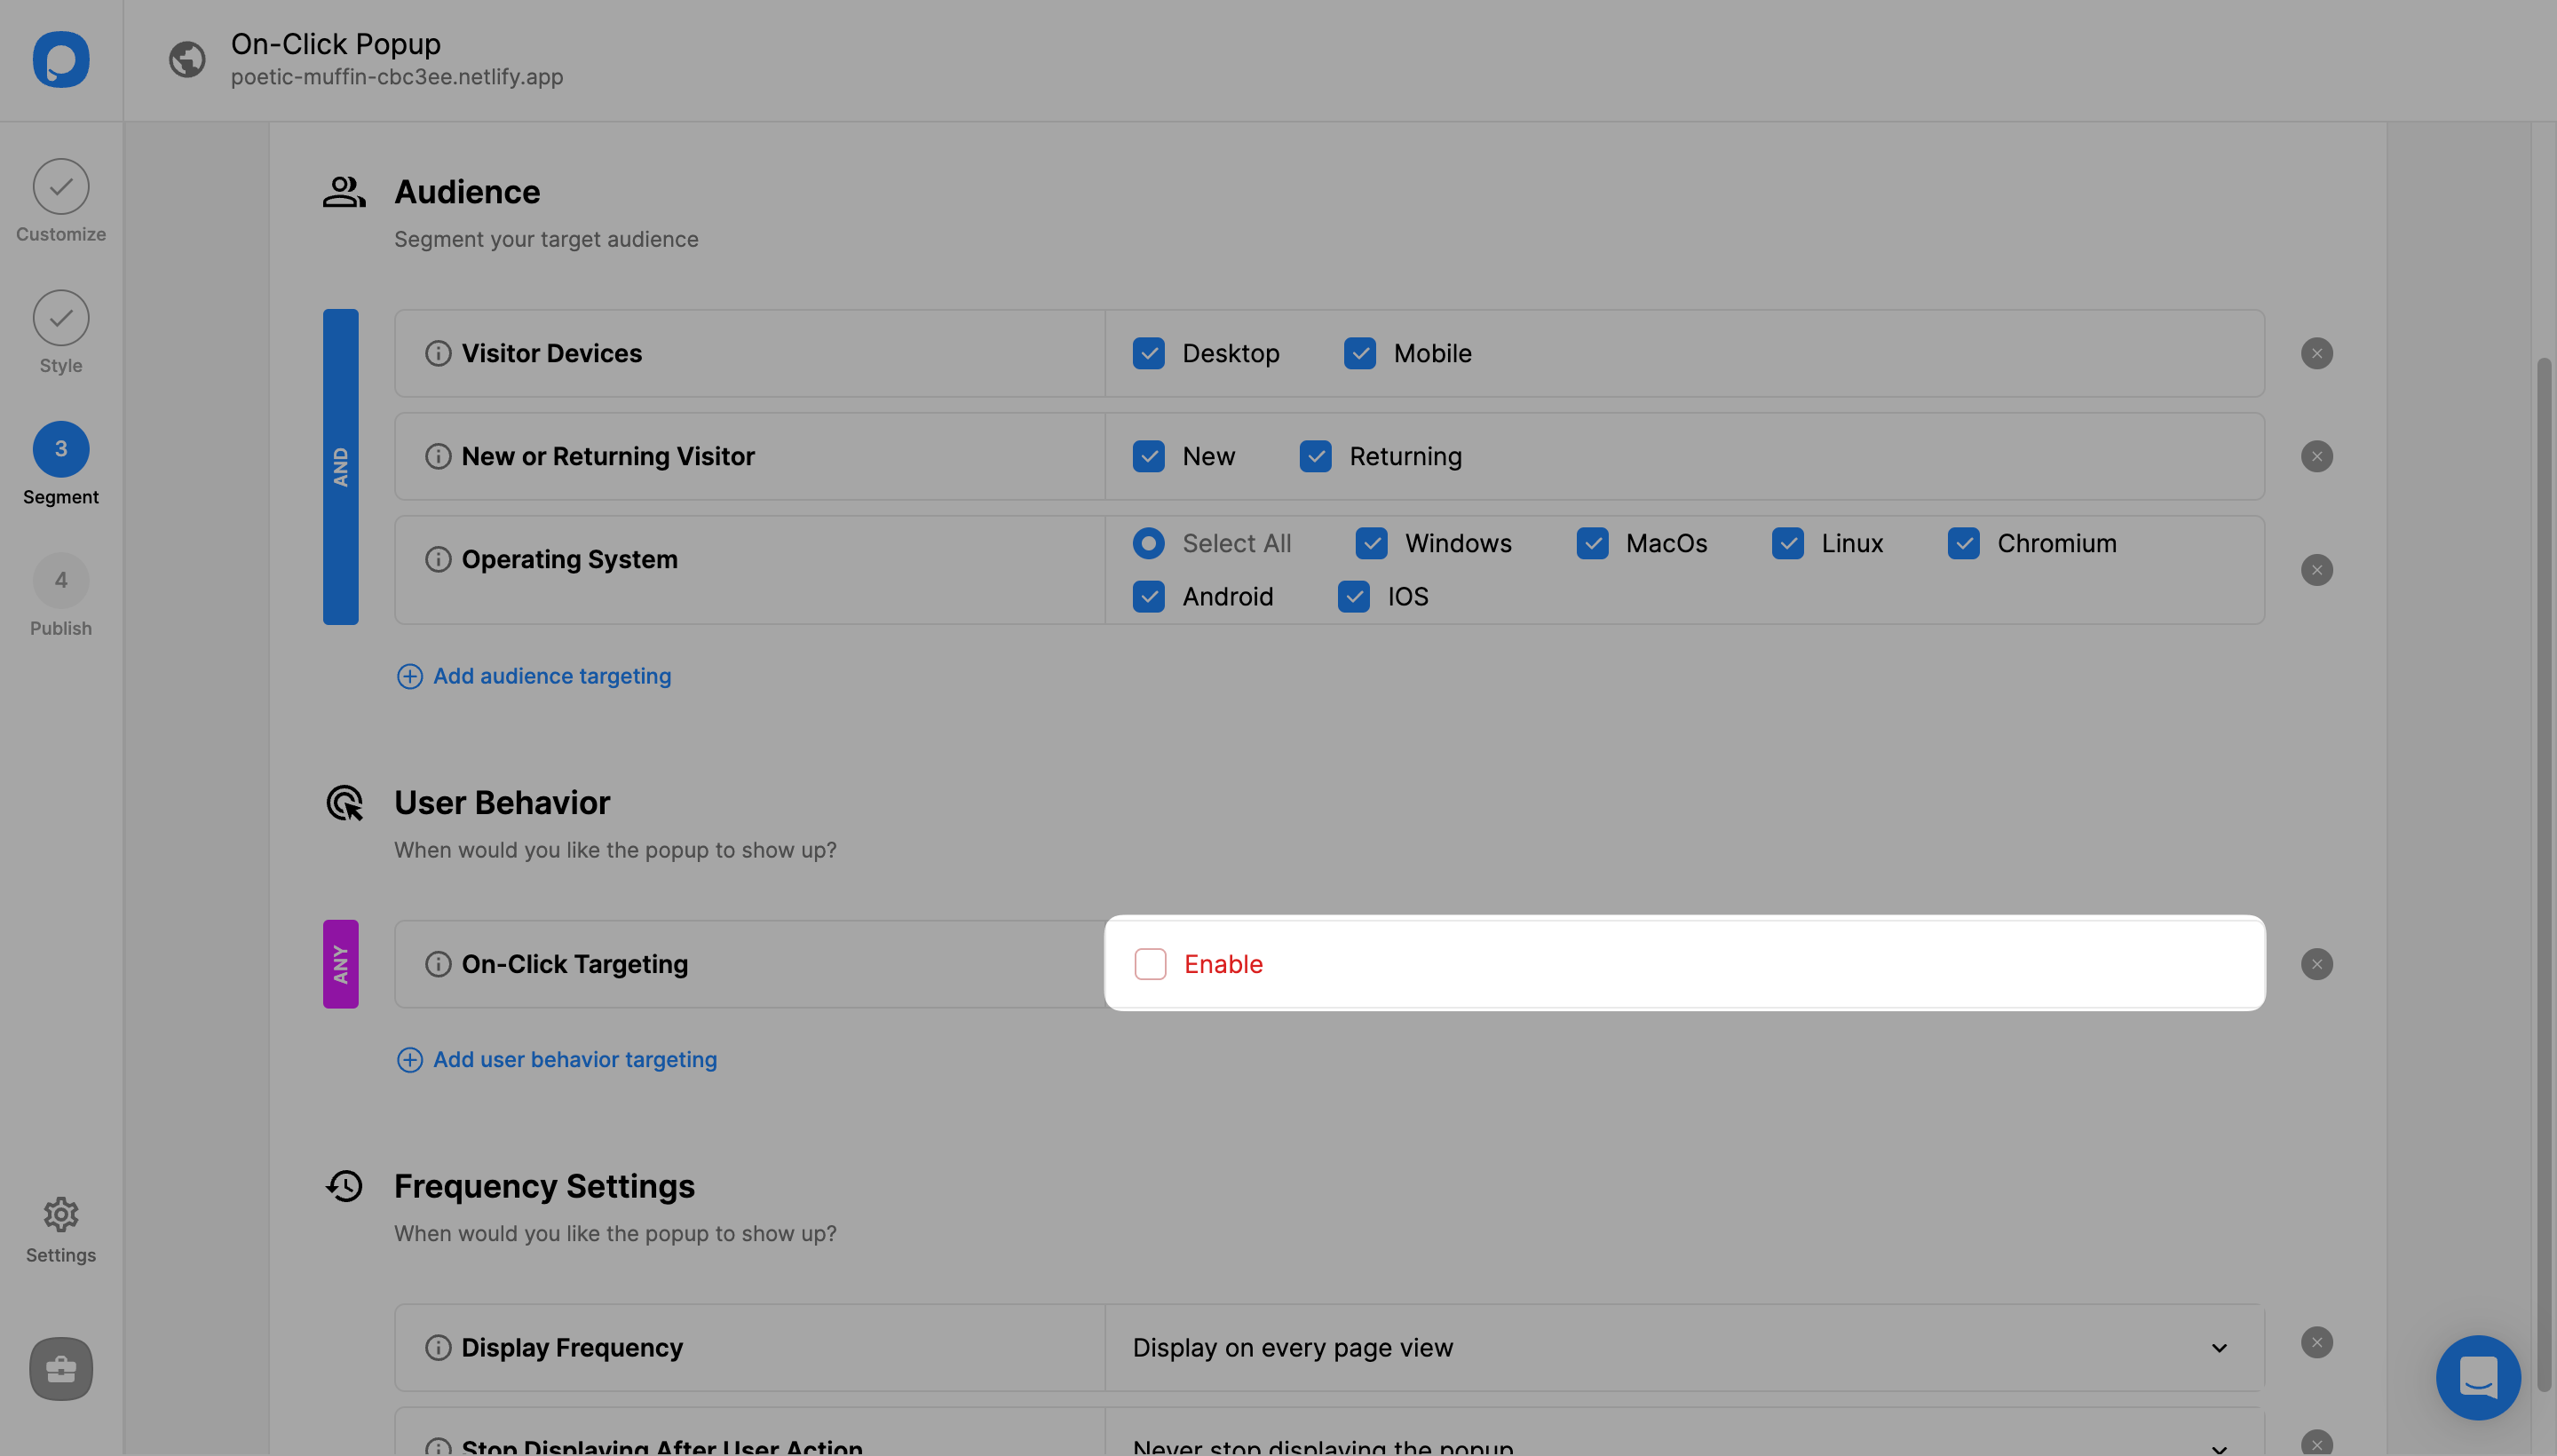
3. Check the “Enable” box to activate the targeting.
4. You can also choose to “Disable all the other targetings” by checking the following box.
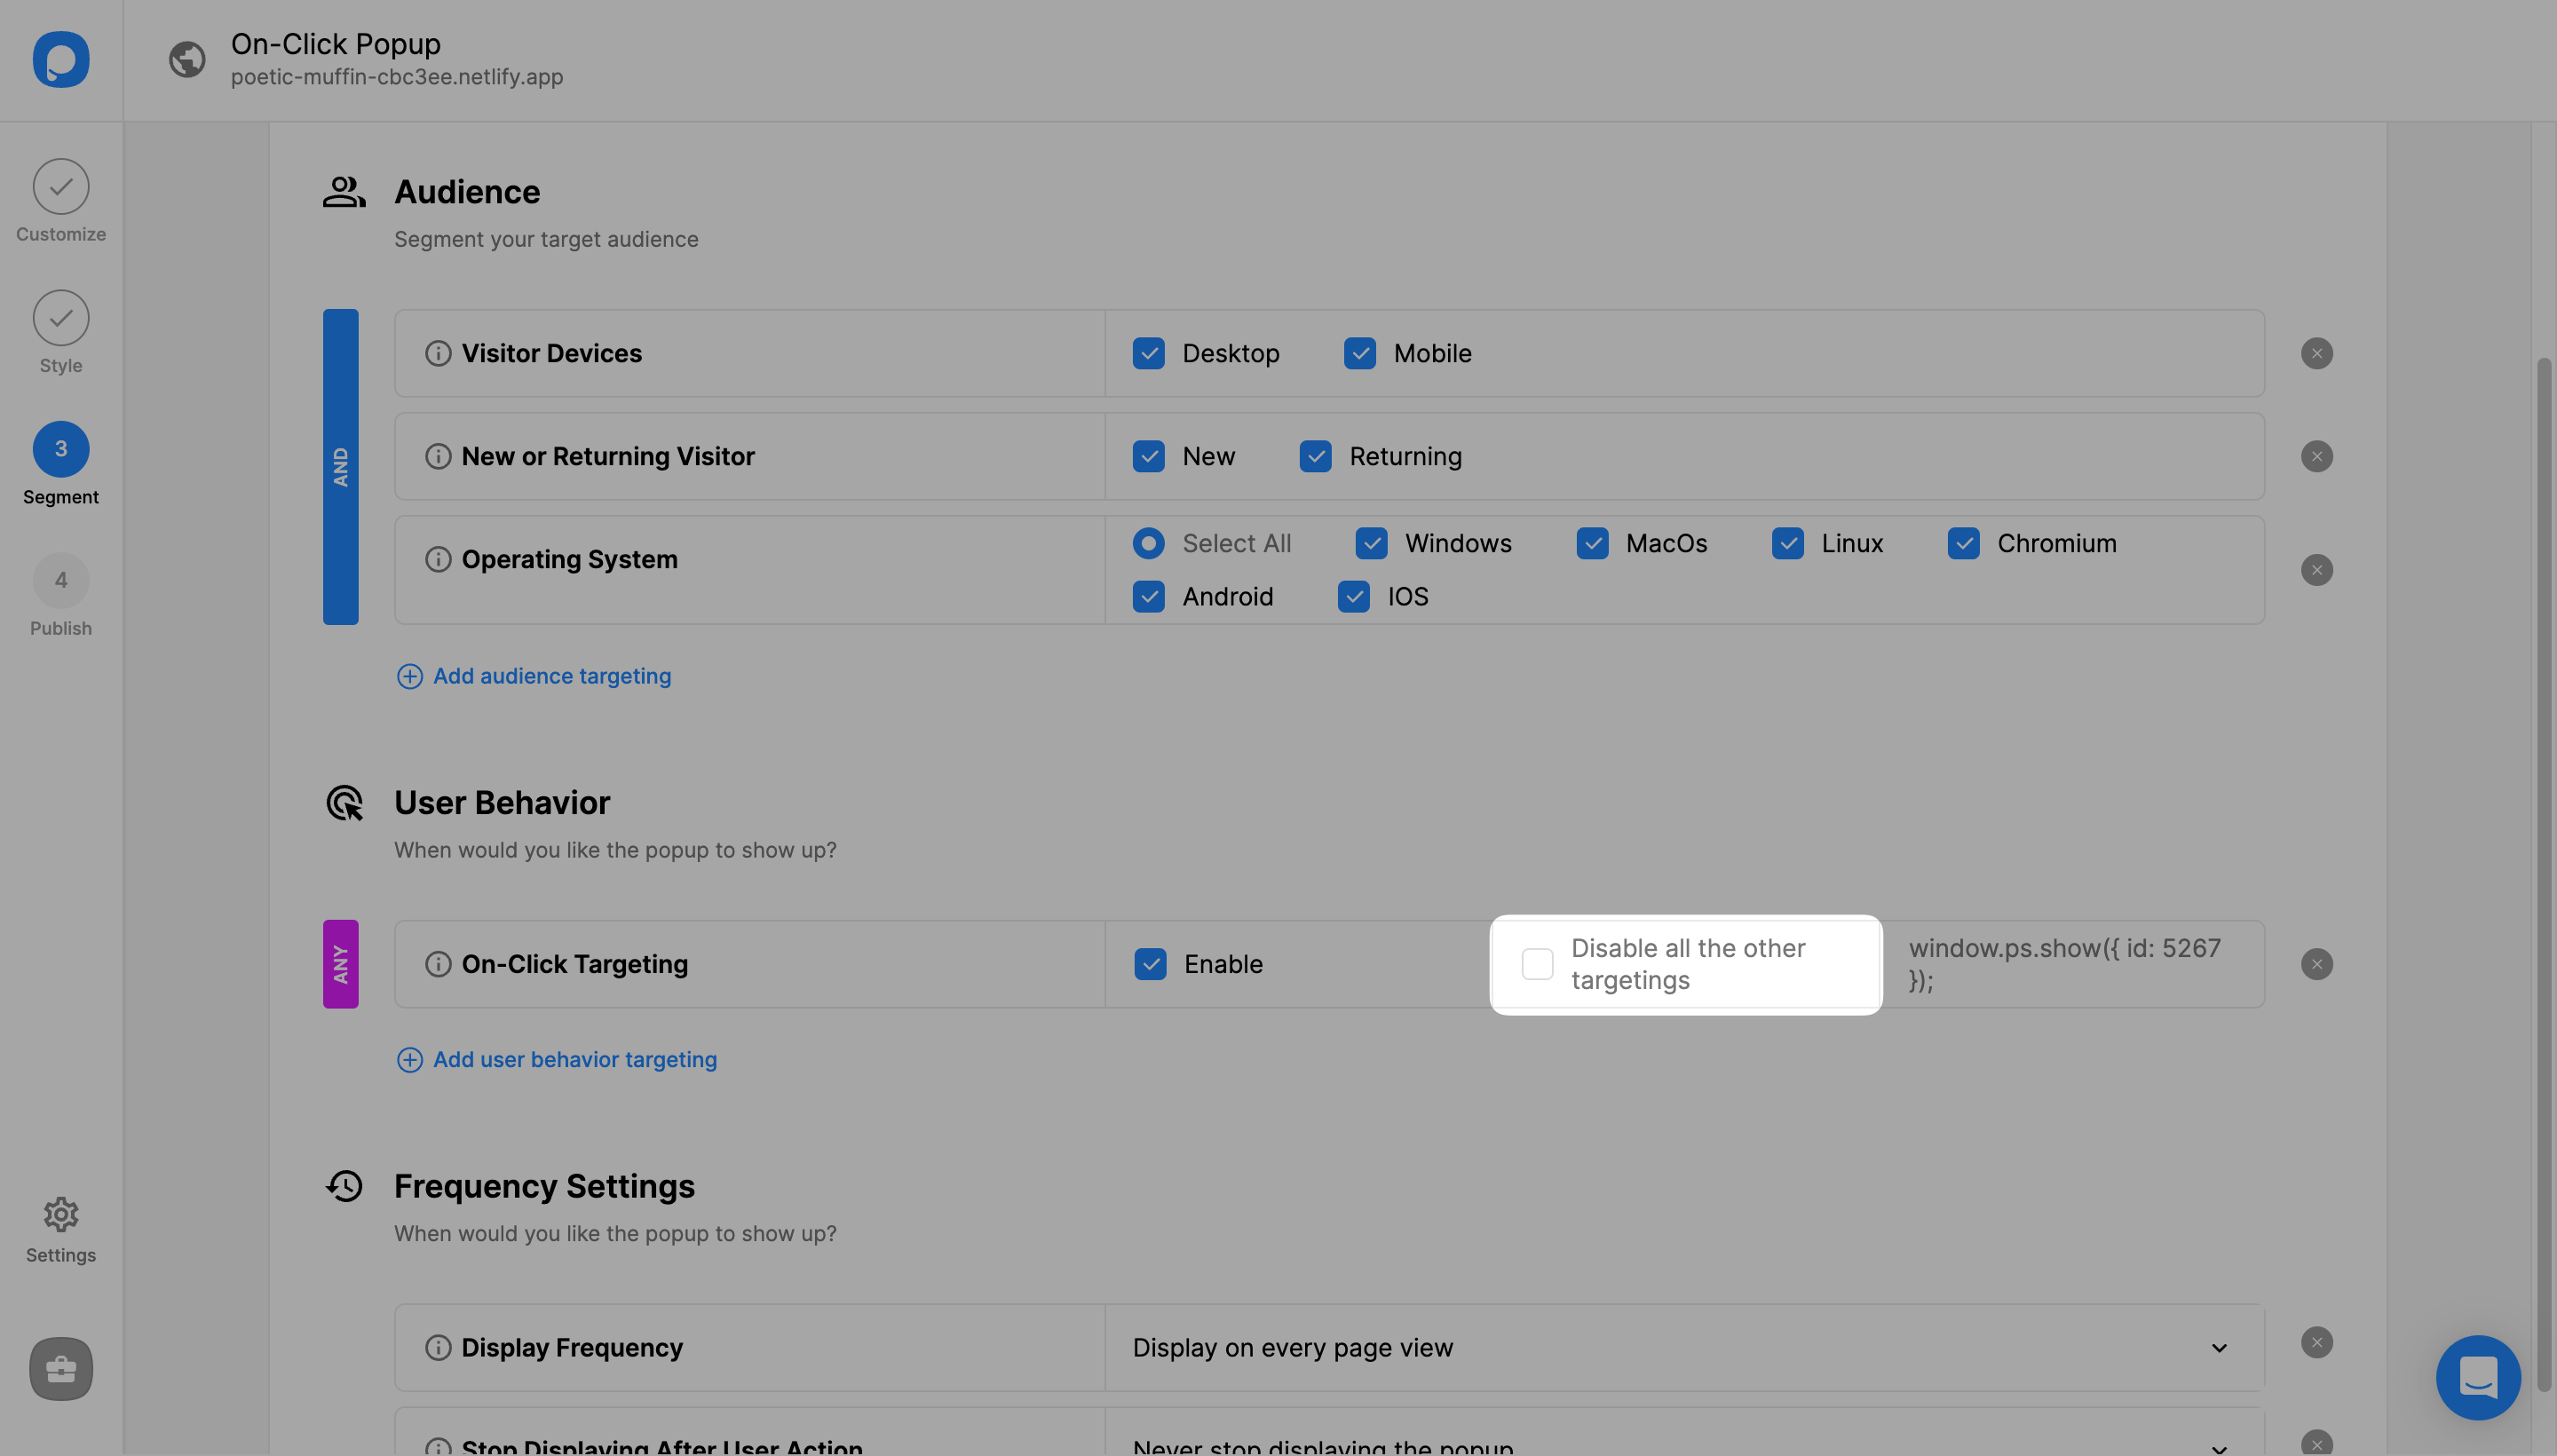
Note💡: Checking the "Disable all the other targetings" option will make all other targetings stop running except On-Click Targeting. If you just "enable" it, On-Click Targeting will be an optional targeting to all others for your popup to be triggered.
5. Paste the generated code snippet to your element’s click function.
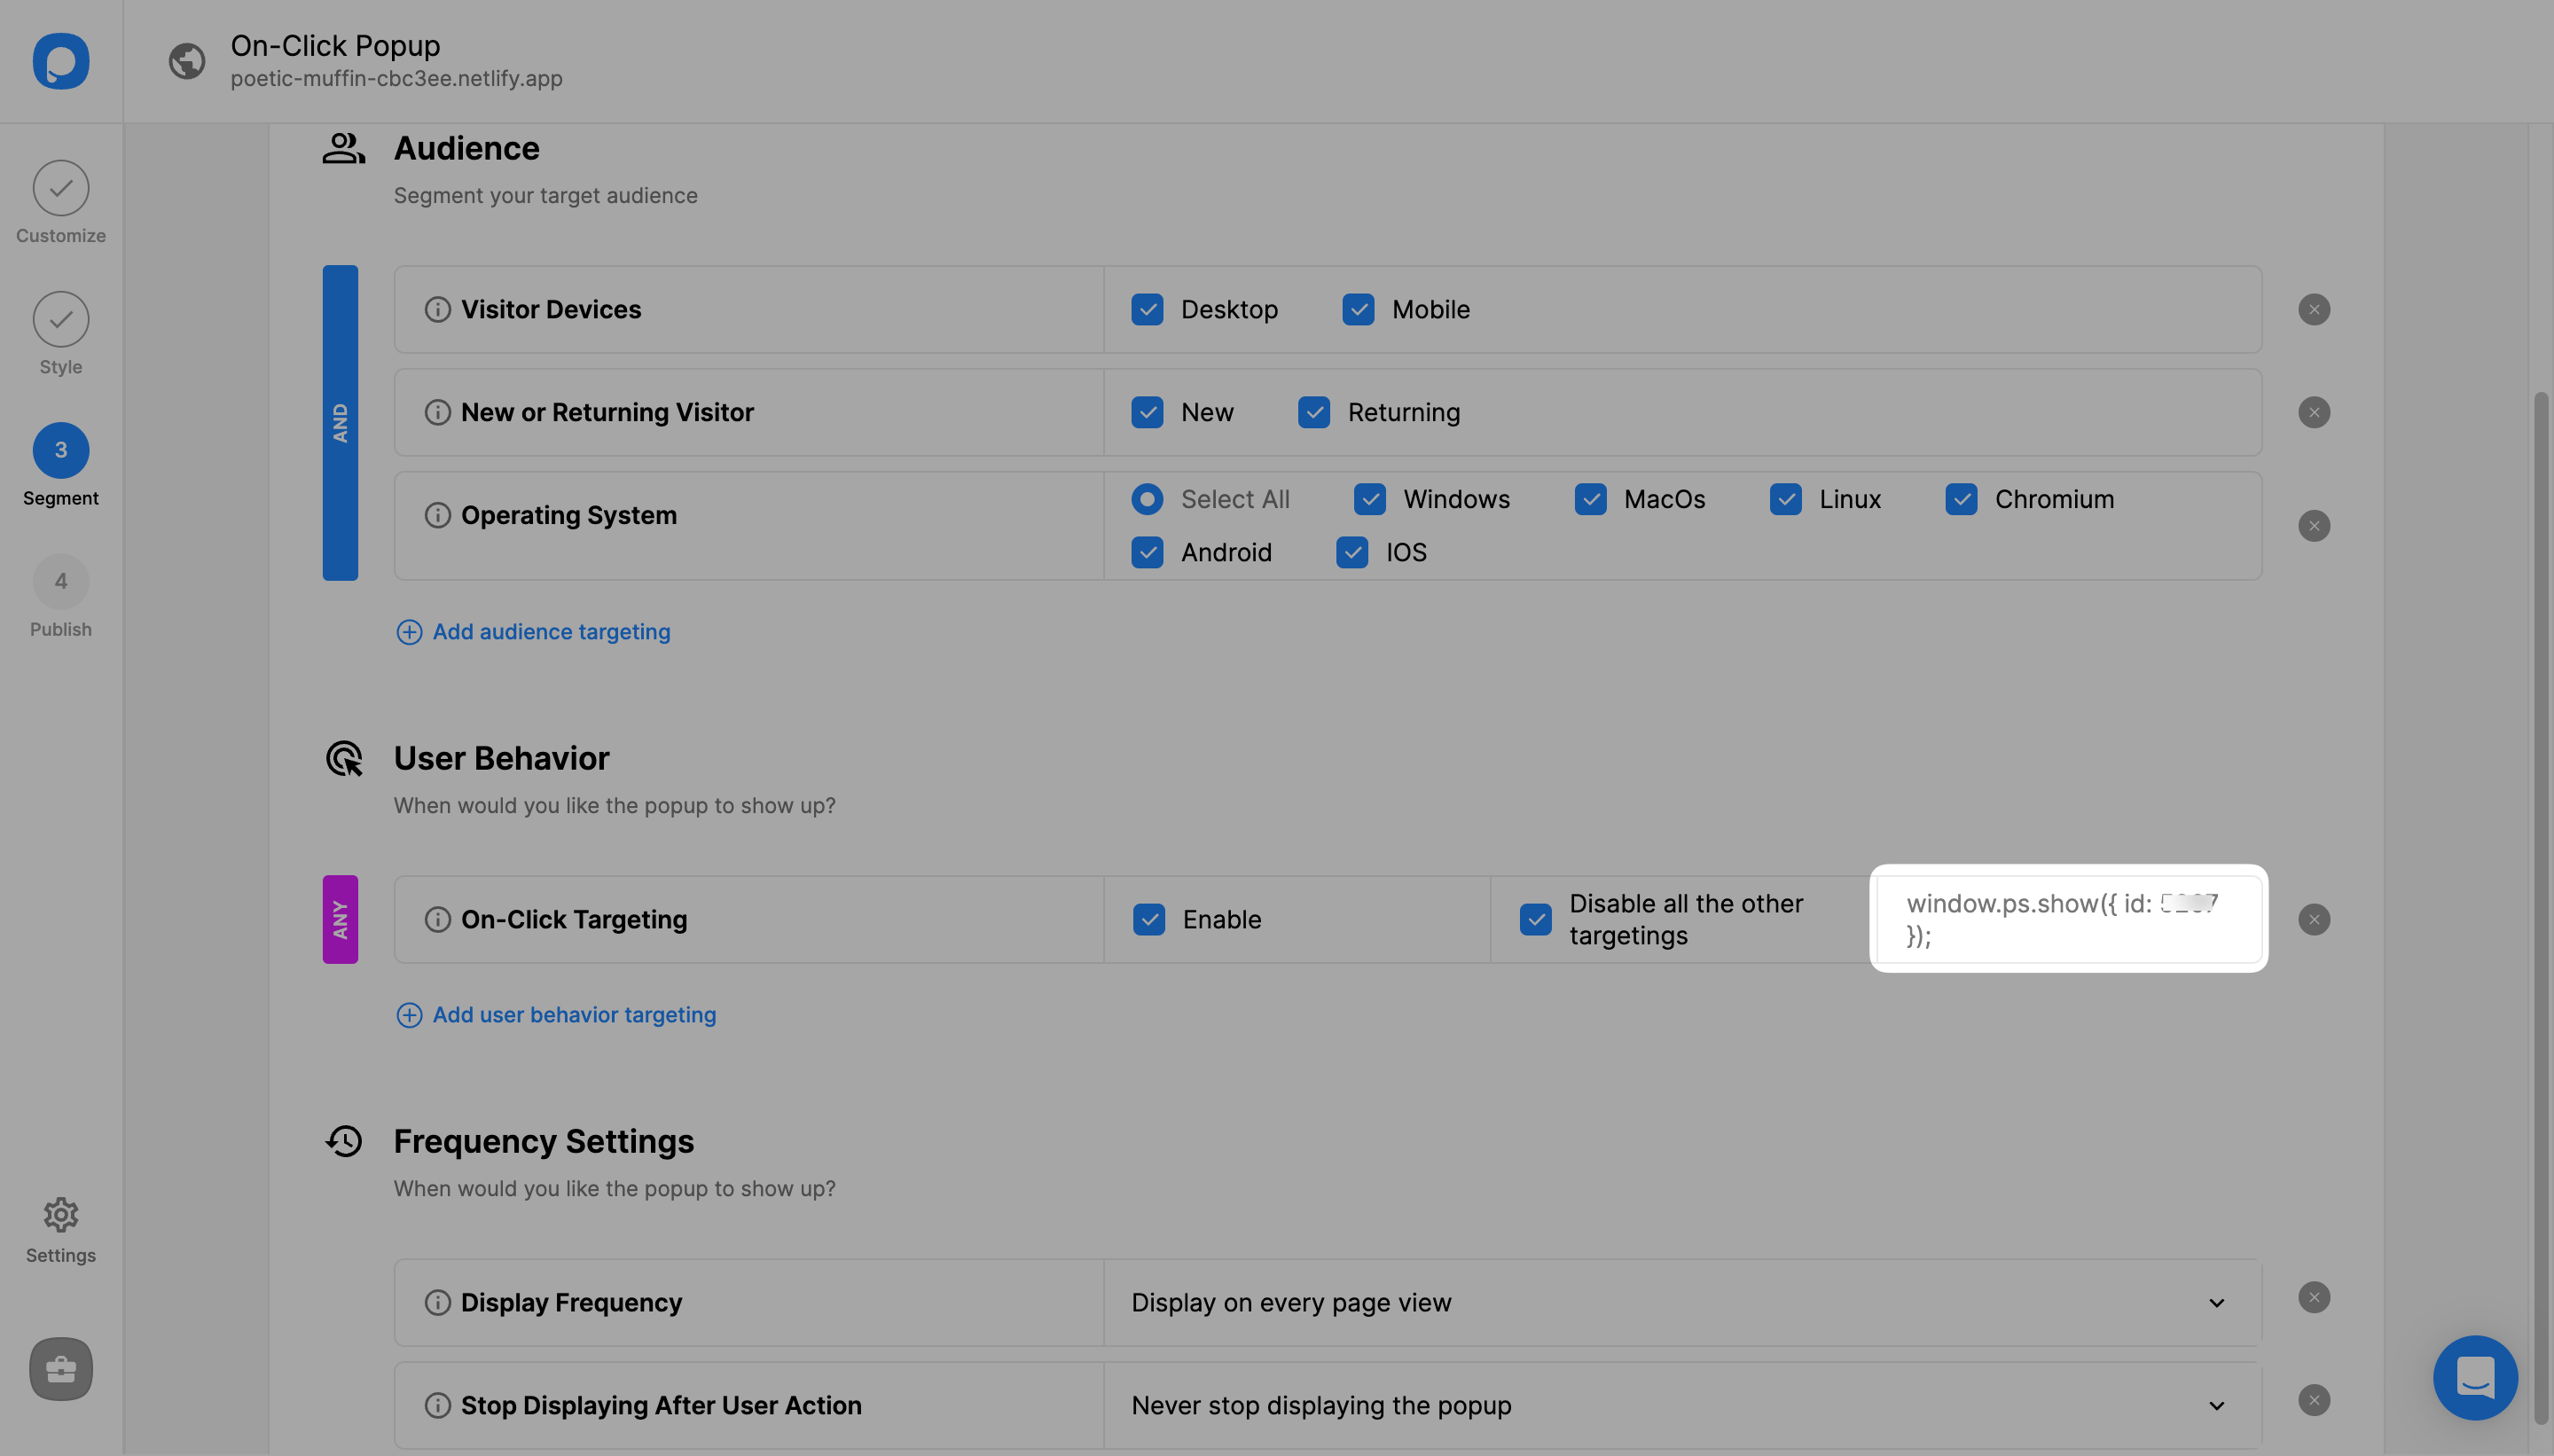
On-Click targeting, the function window.ps.show({ id: xxxxx }); should be assigned to the on-click property of the element. It is not recommended to use it on <a> tags or buttons that redirect to another page when clicked.
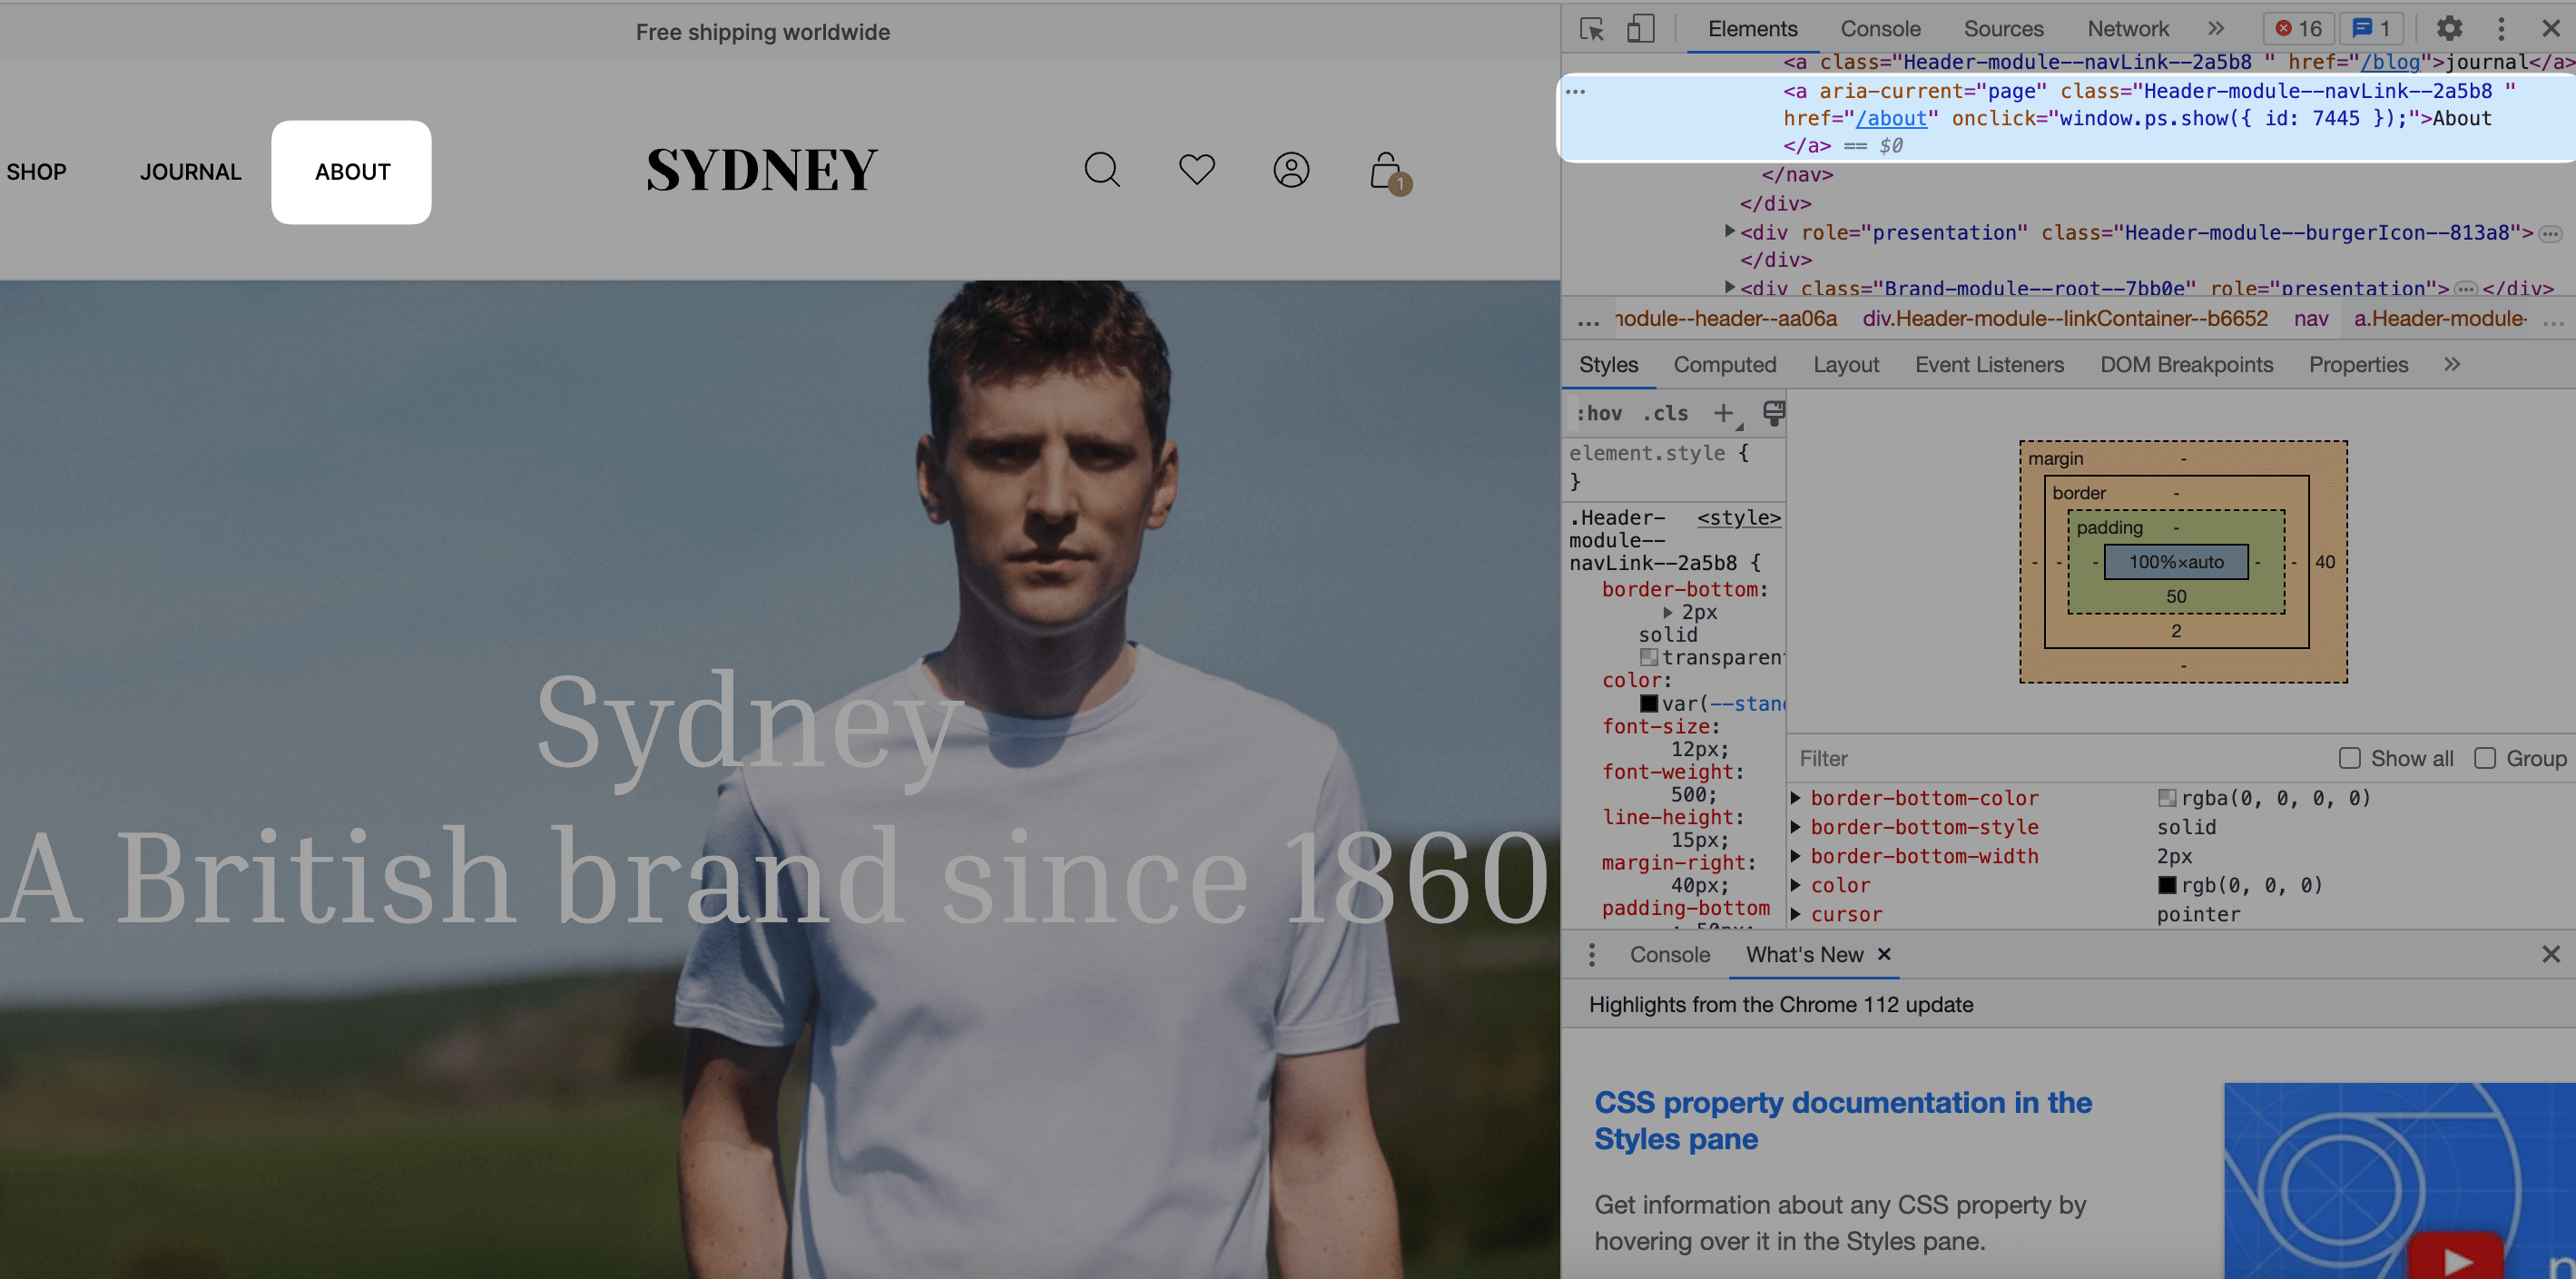
Example of correct usages:
<div onclick="window.ps.show({ id: xxxxx });">test2</div>
<button onclick="window.ps.show({ id: xxxxxx });">test2</button>
2
Incorrect usage:
<a onclick="window.ps.show({ id: xxxxxx });" href="/about">about</a>
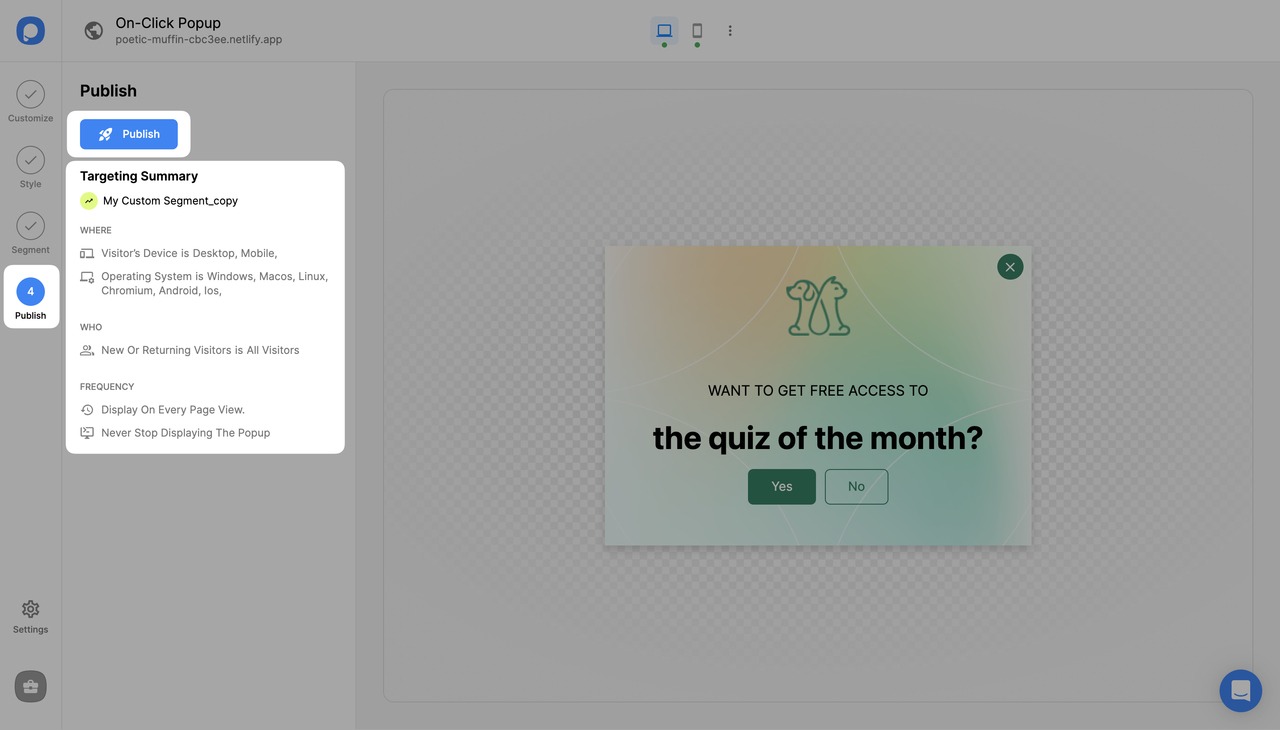
6. Click "Save" from the upper-right corner and continue with the “Publish” step from the left-hand panel to see the Targeting Summary.
Still have questions? Feel free to contact us via live chat or email!


