Increase Sales Conversion
Can’t turn your site traffic into sales?
Reduce Cart Abandonment
Your customers abandoning their carts?
Promote Products & Offers
Make potential customers notice special offers.
Collect Form Submission
Struggling to collect form submissions?
Get More Phone Calls
Let them call you directly via popups.
Grow Email List
Having trouble growing your email list?
Gamify Your Campaign
Choose your offer and let the game begin.
Make Announcement
Make sure important news unmissed.
Increase User Engagement
Keep visitors & customers on your site longer.
Collect Feedback & Surveys
Can’t draw attention to your surveys?
Facilitate Social Sharing
Grow social media followers and likes!


Add Popupsmart Embed Code via Google Tag Manager


Connecting Popupsmart with Google Tag Manager (GTM) has been one of the easiest ways of having popup campaigns on your website.
Let's explore how smooth the process is!
When we want to lead the process from GTM, there are three various ways to choose from:
All these three methods need one-time implementation, and you will not need another process to follow.
By following the steps below, you will manage to add Popupsmart Embed Code via Google Tag Manager:
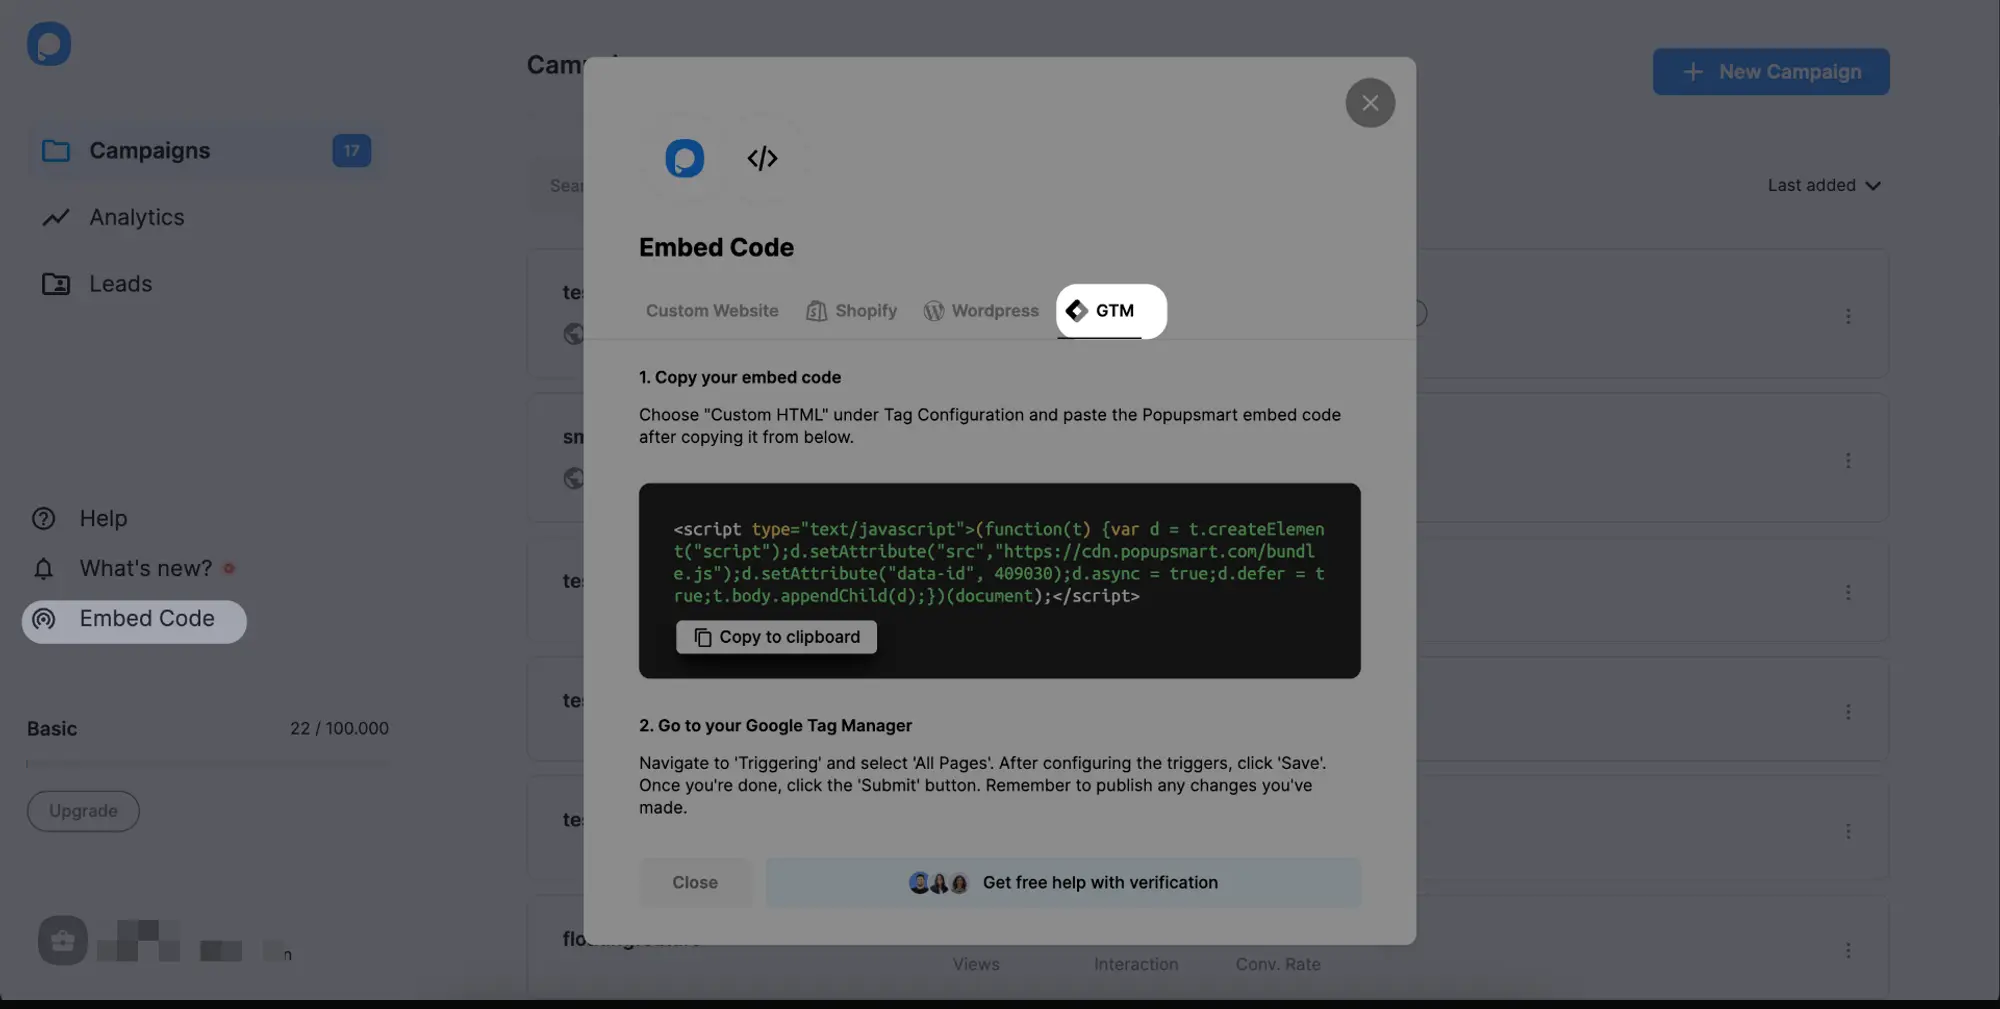
1. Log into your Popupsmart account. Click "Embed Code" on the left sidebar and choose “GTM” as the category. Copy the code from the modal with “Copy to clipboard”.
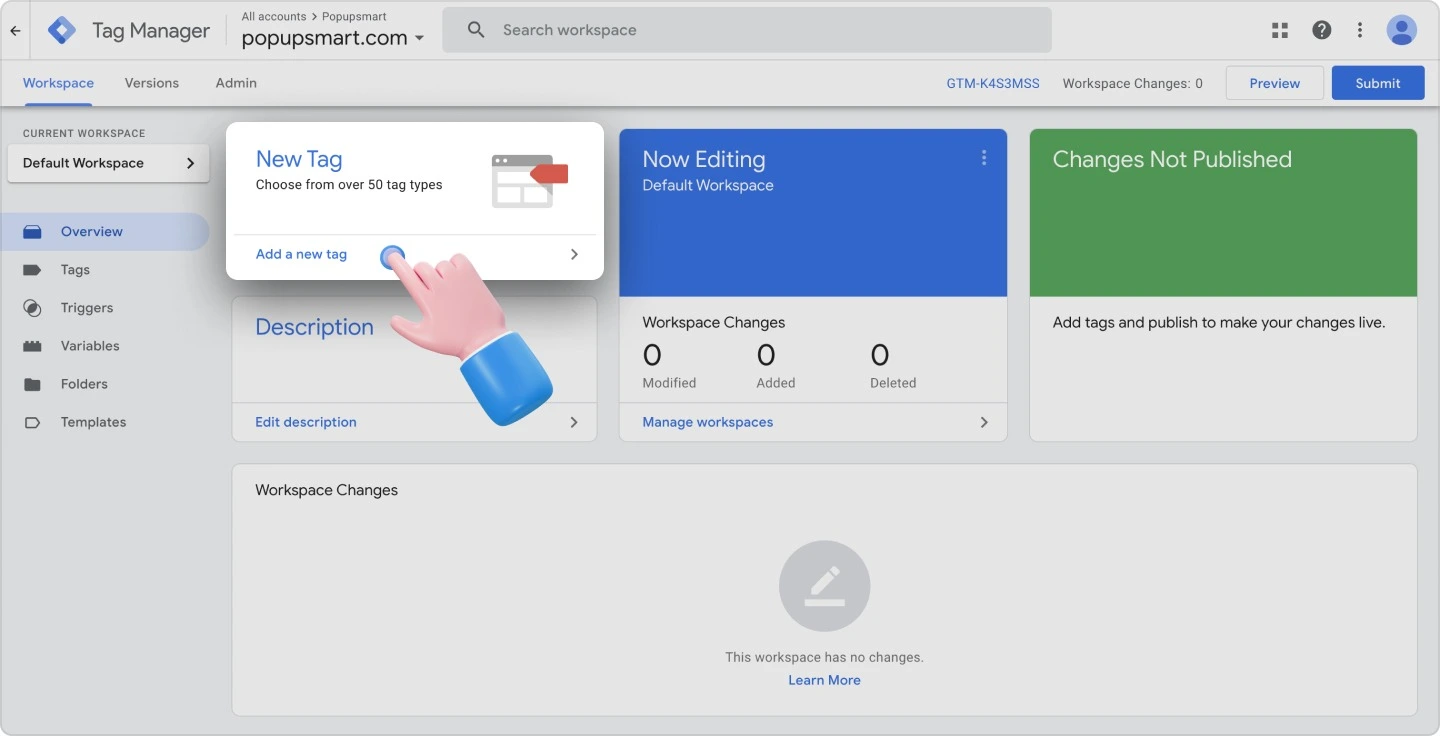
2. On another tab, go to your GTM account and choose “Add a new tag” on the dashboard.
3. Name your tag on the Untitled Tag and click “Tag Configuration.”
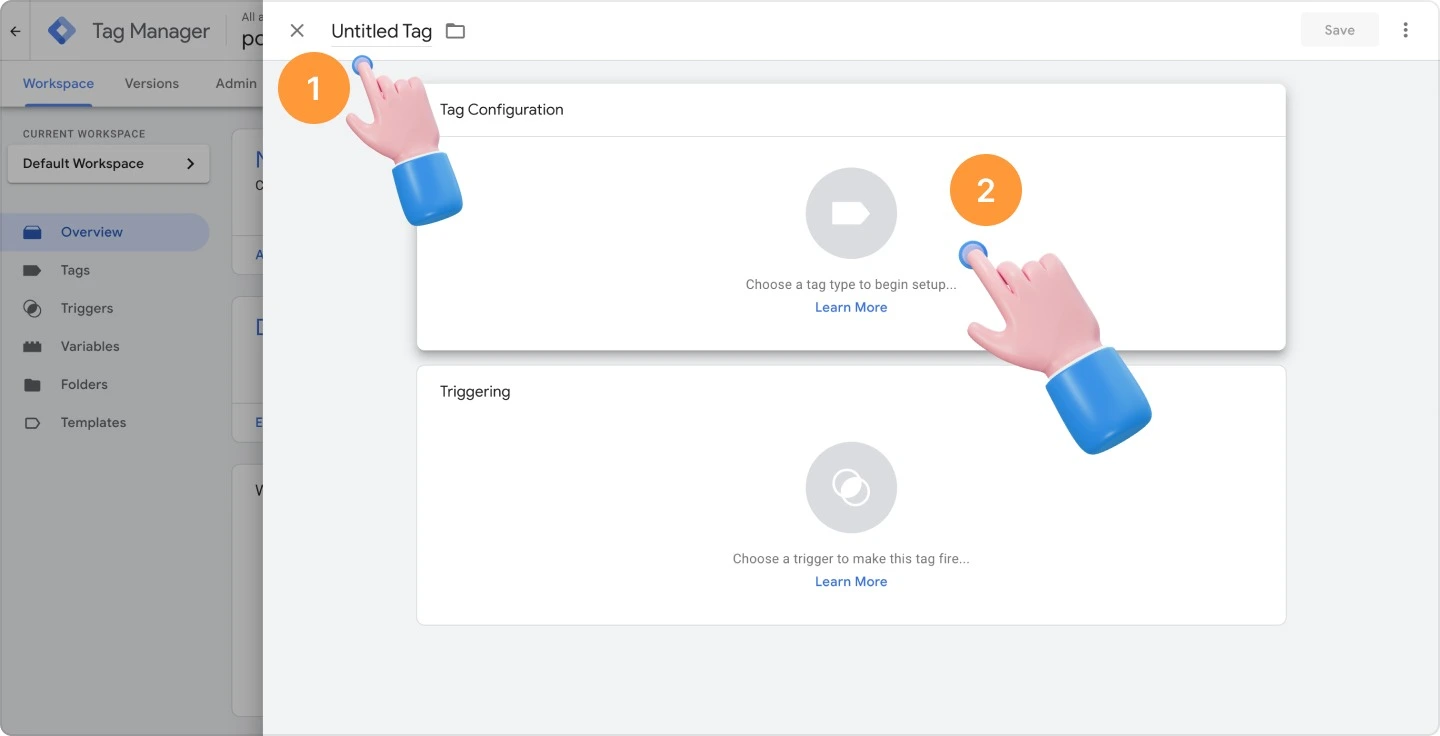
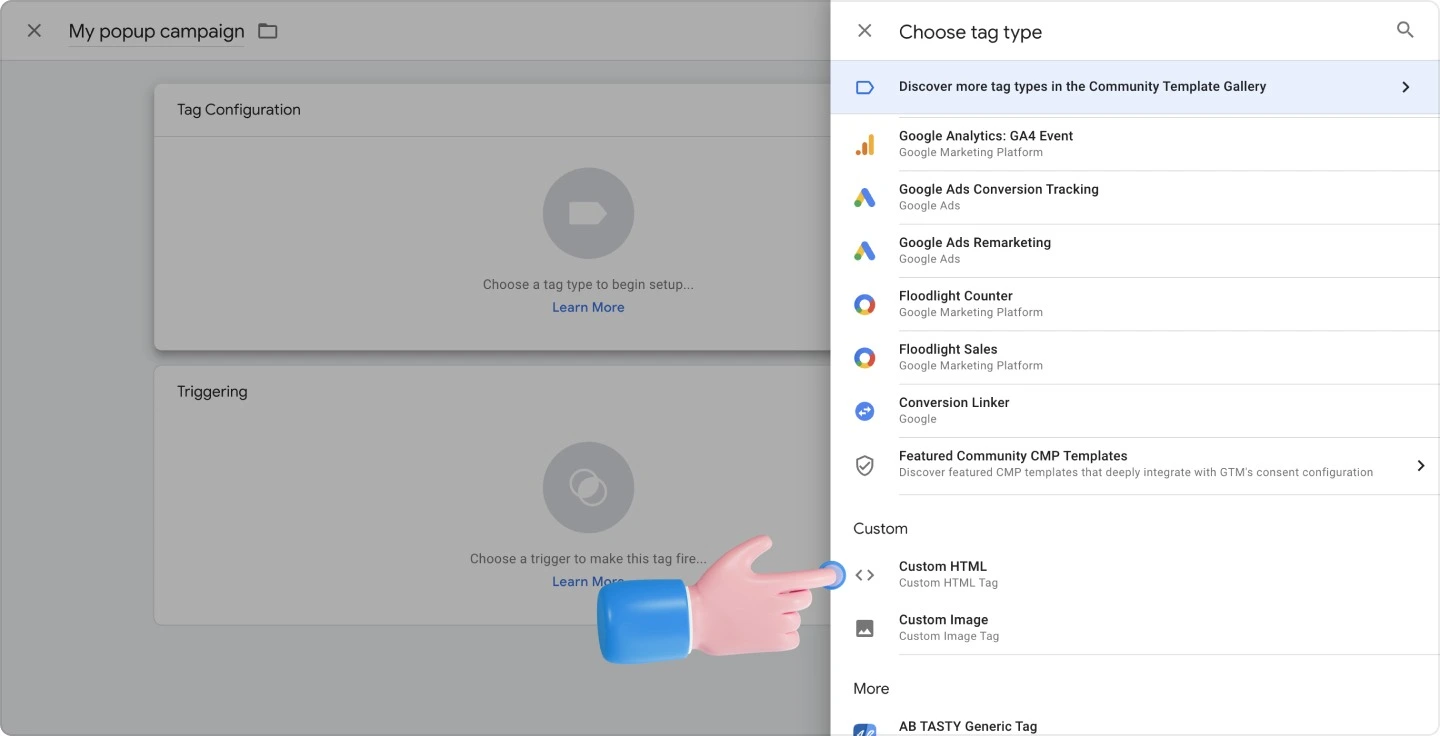
4. To enter your Popupsmart embed code, you need to choose “Custom HTML”.
5. Then, paste your embed code for the empty HTML field.
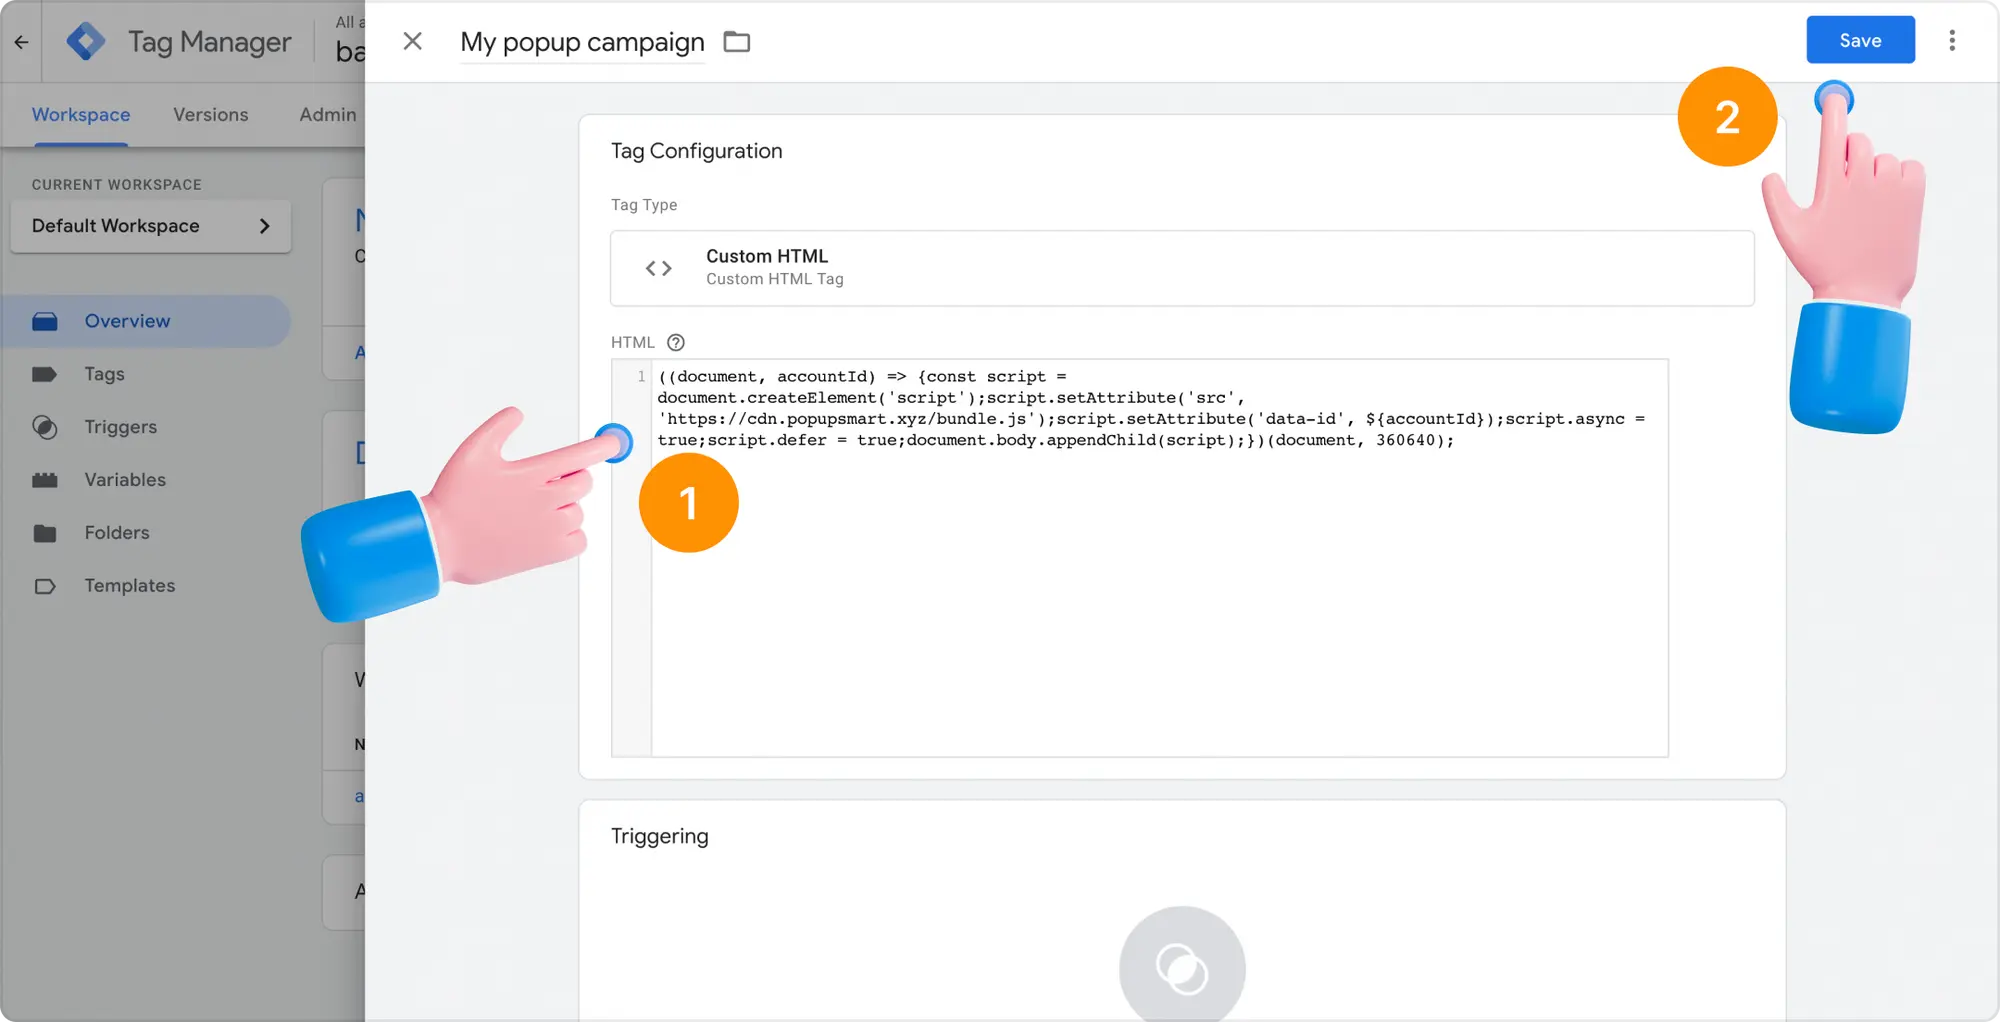
6. Scroll down to click Triggering and “All pages”. Choosing "All Pages" helps you make Popupsmart work on all your pages.
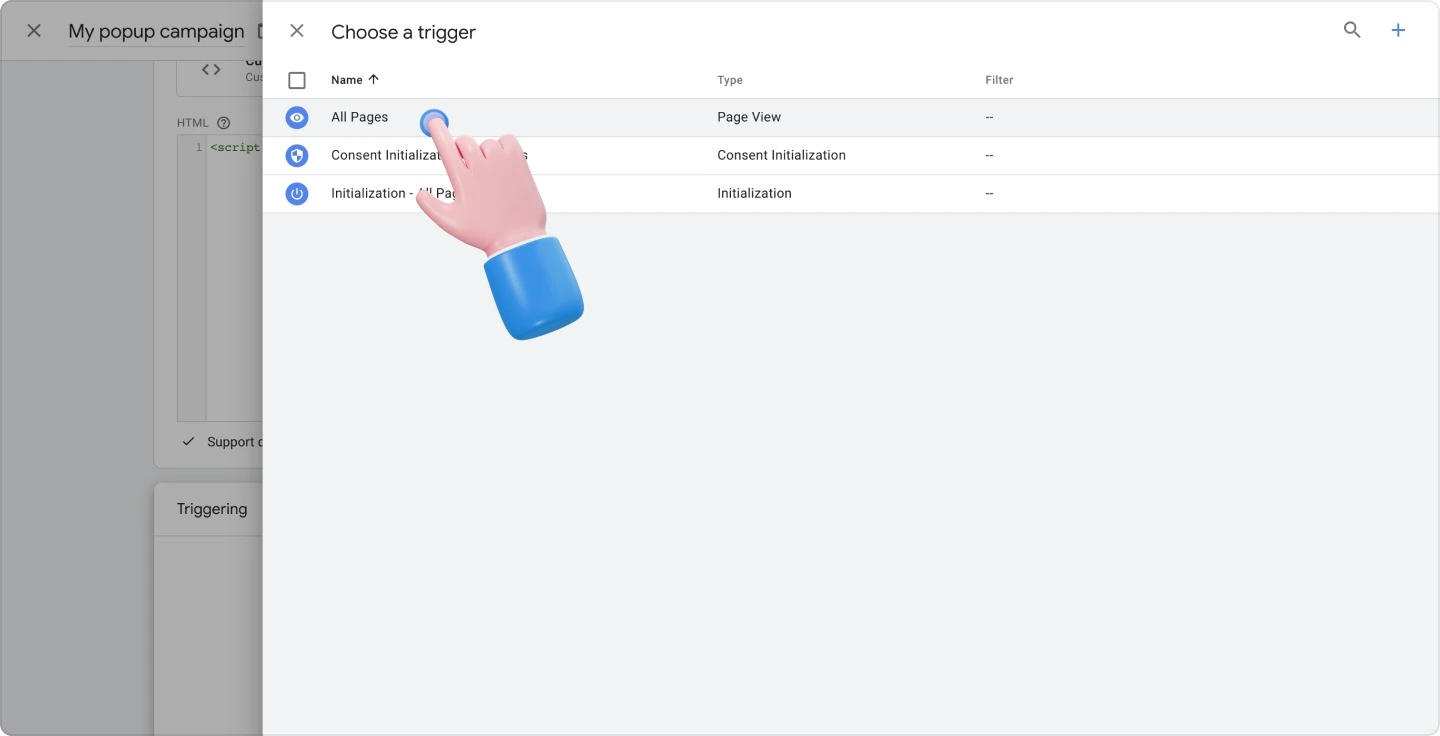
→ For Targeting Specific Pages with GTM:
➡️ After clicking Triggering, choose the “+” icon in the upper-right corner.
![]()
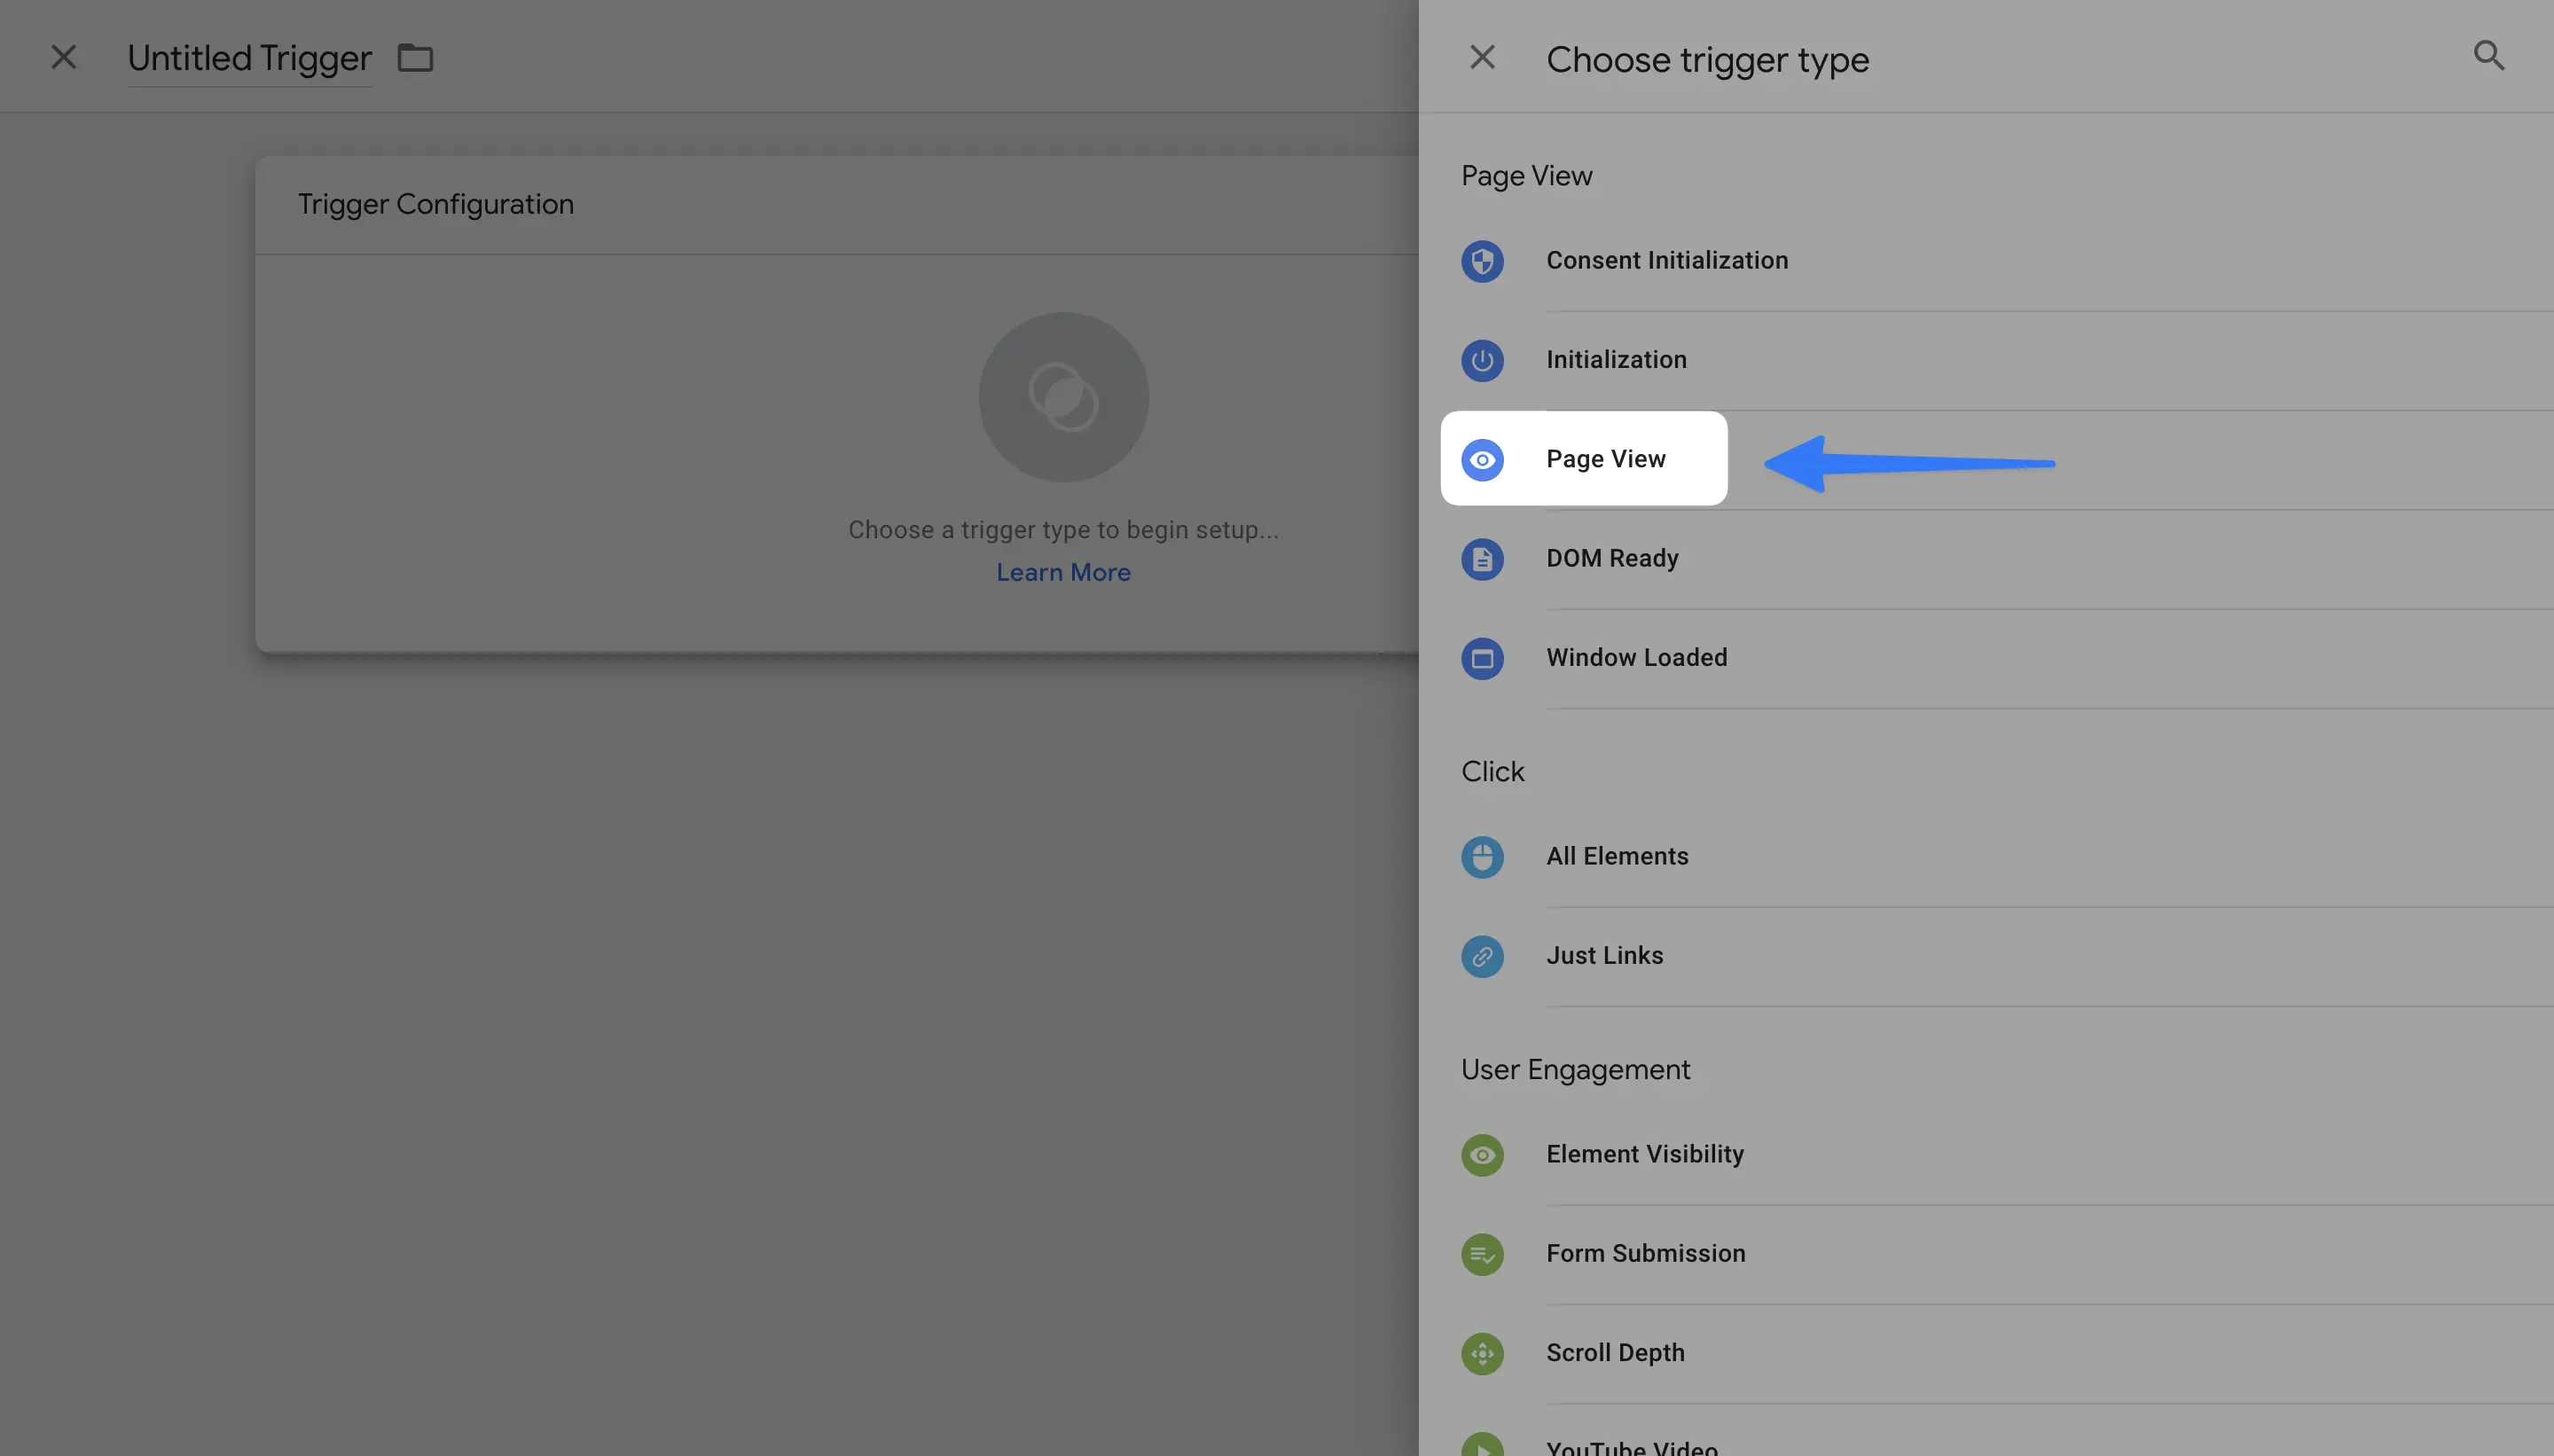
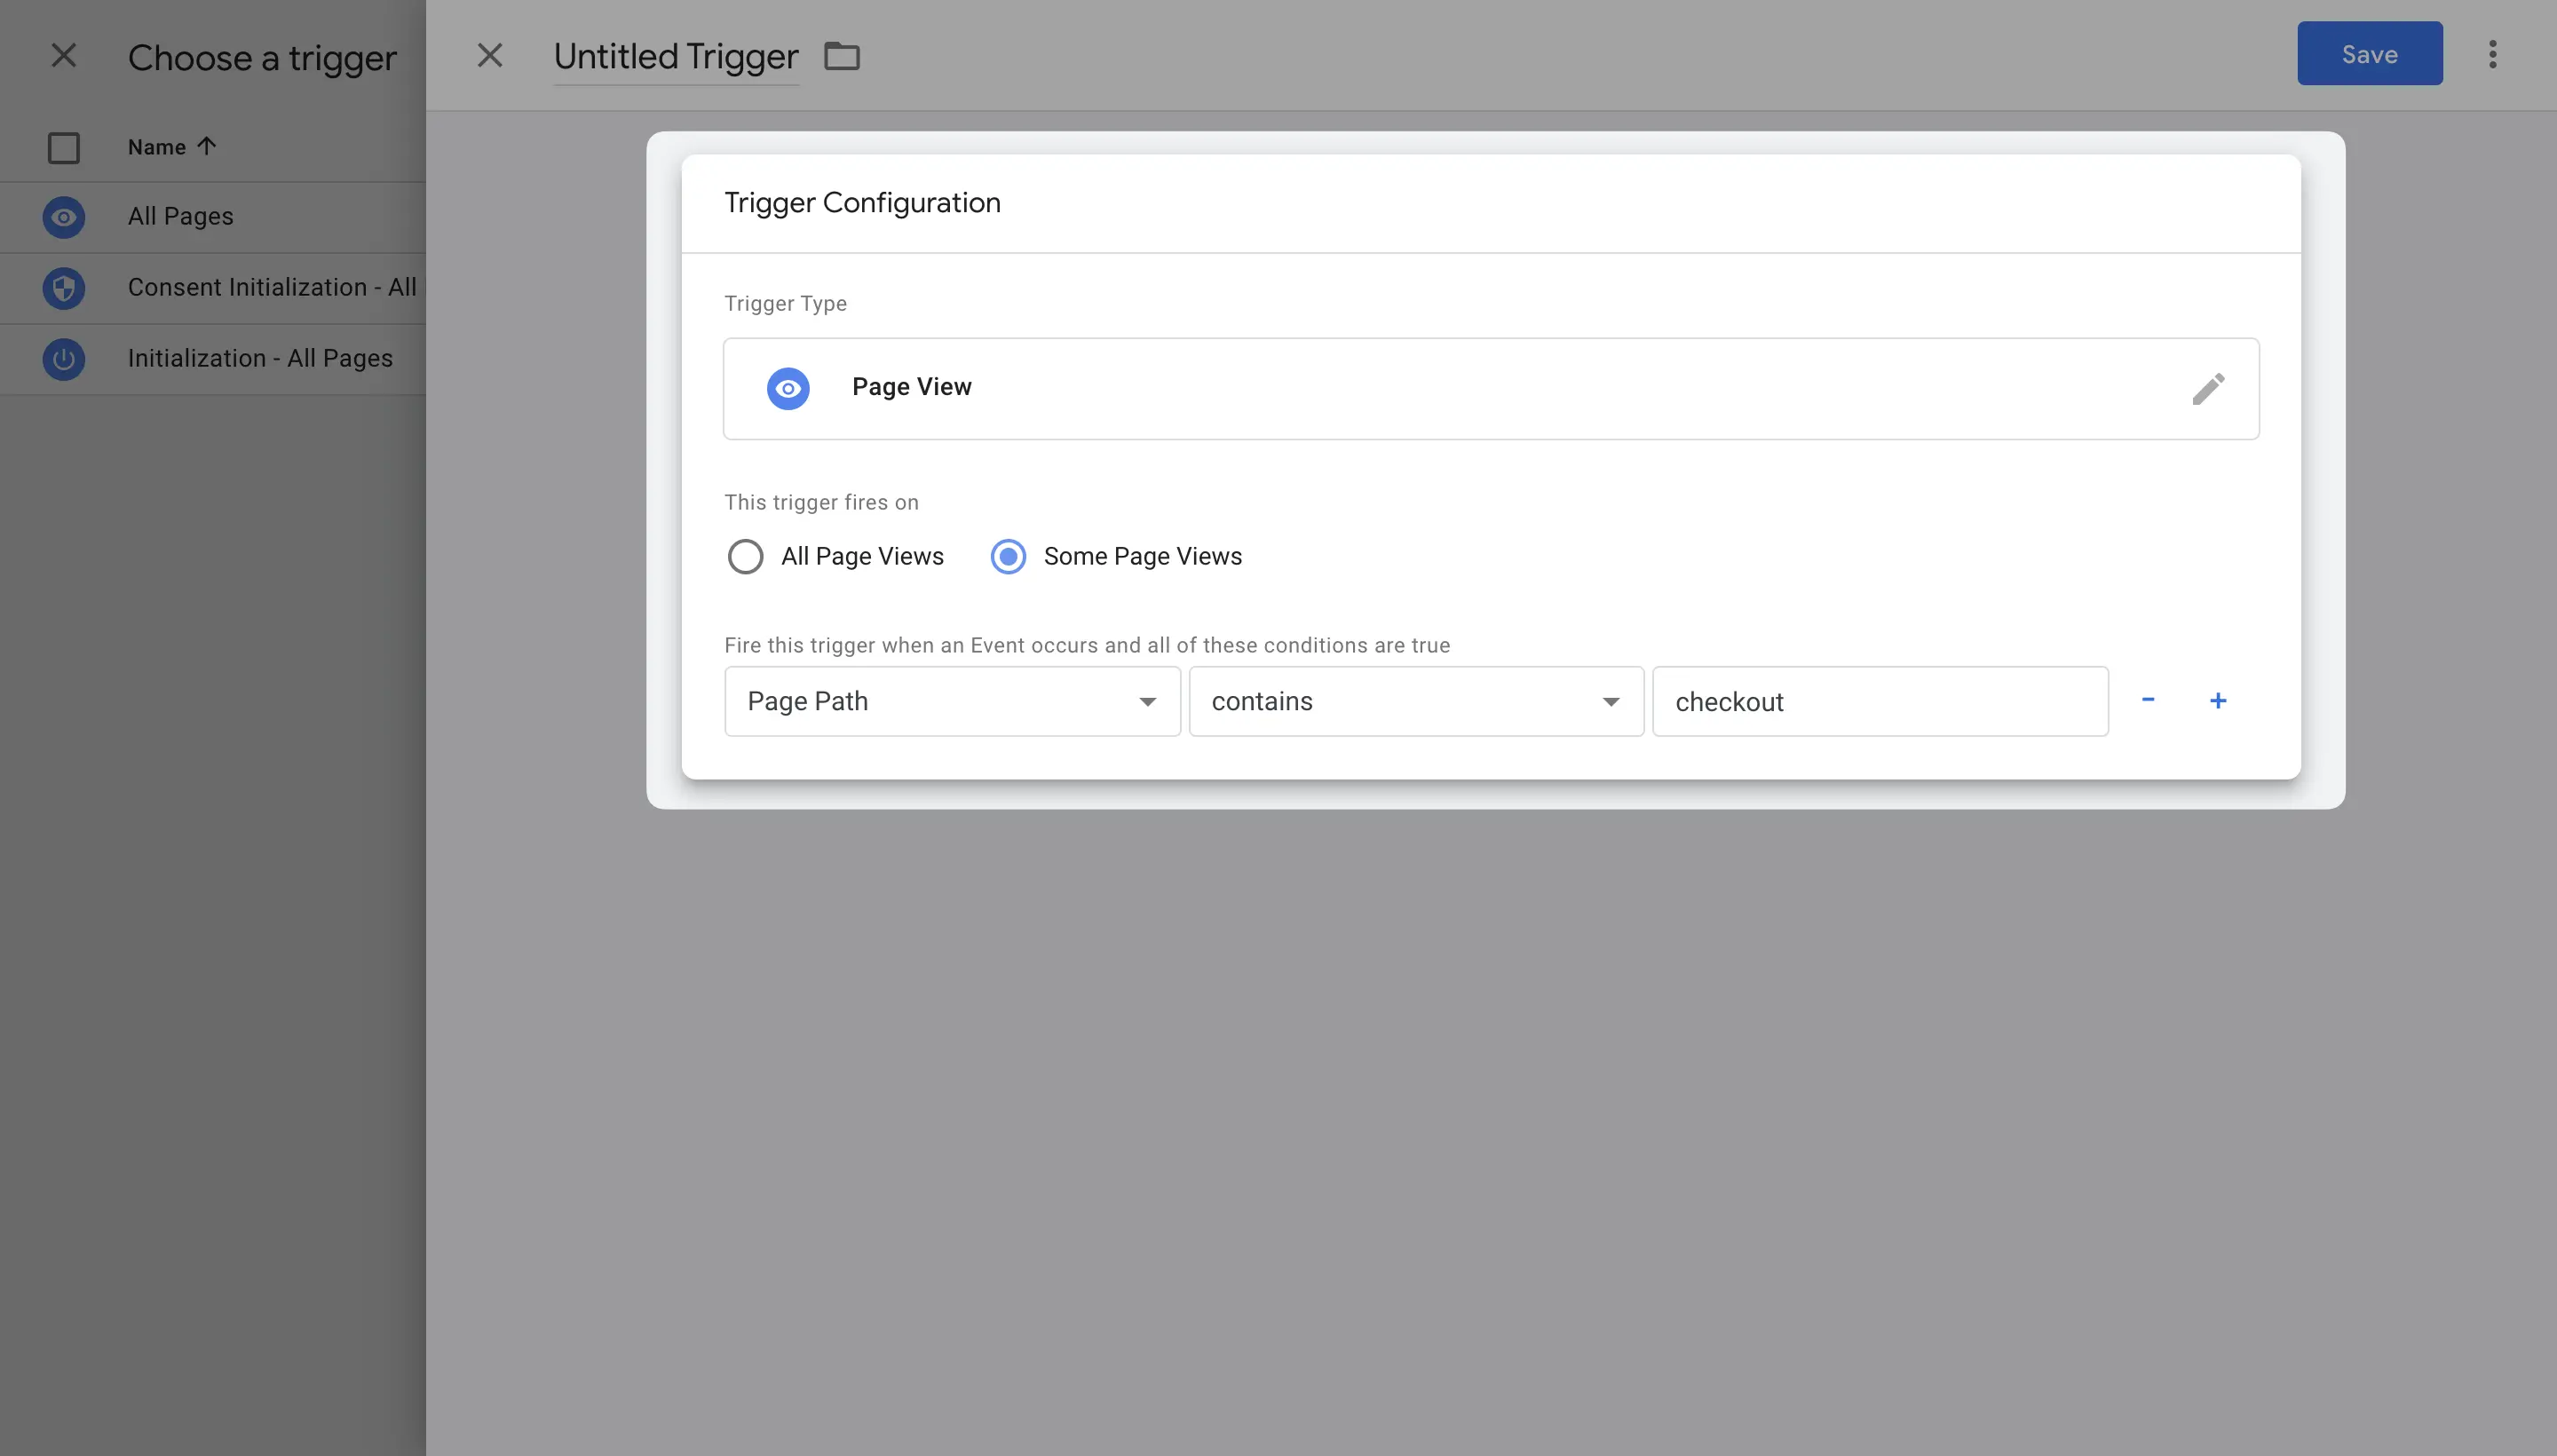
➡️ For the Trigger Configuration, choose “Page view” as the trigger type.
➡️ Choose “Some Page Views” and customize the conditions. Then, don’t forget to “Save.”
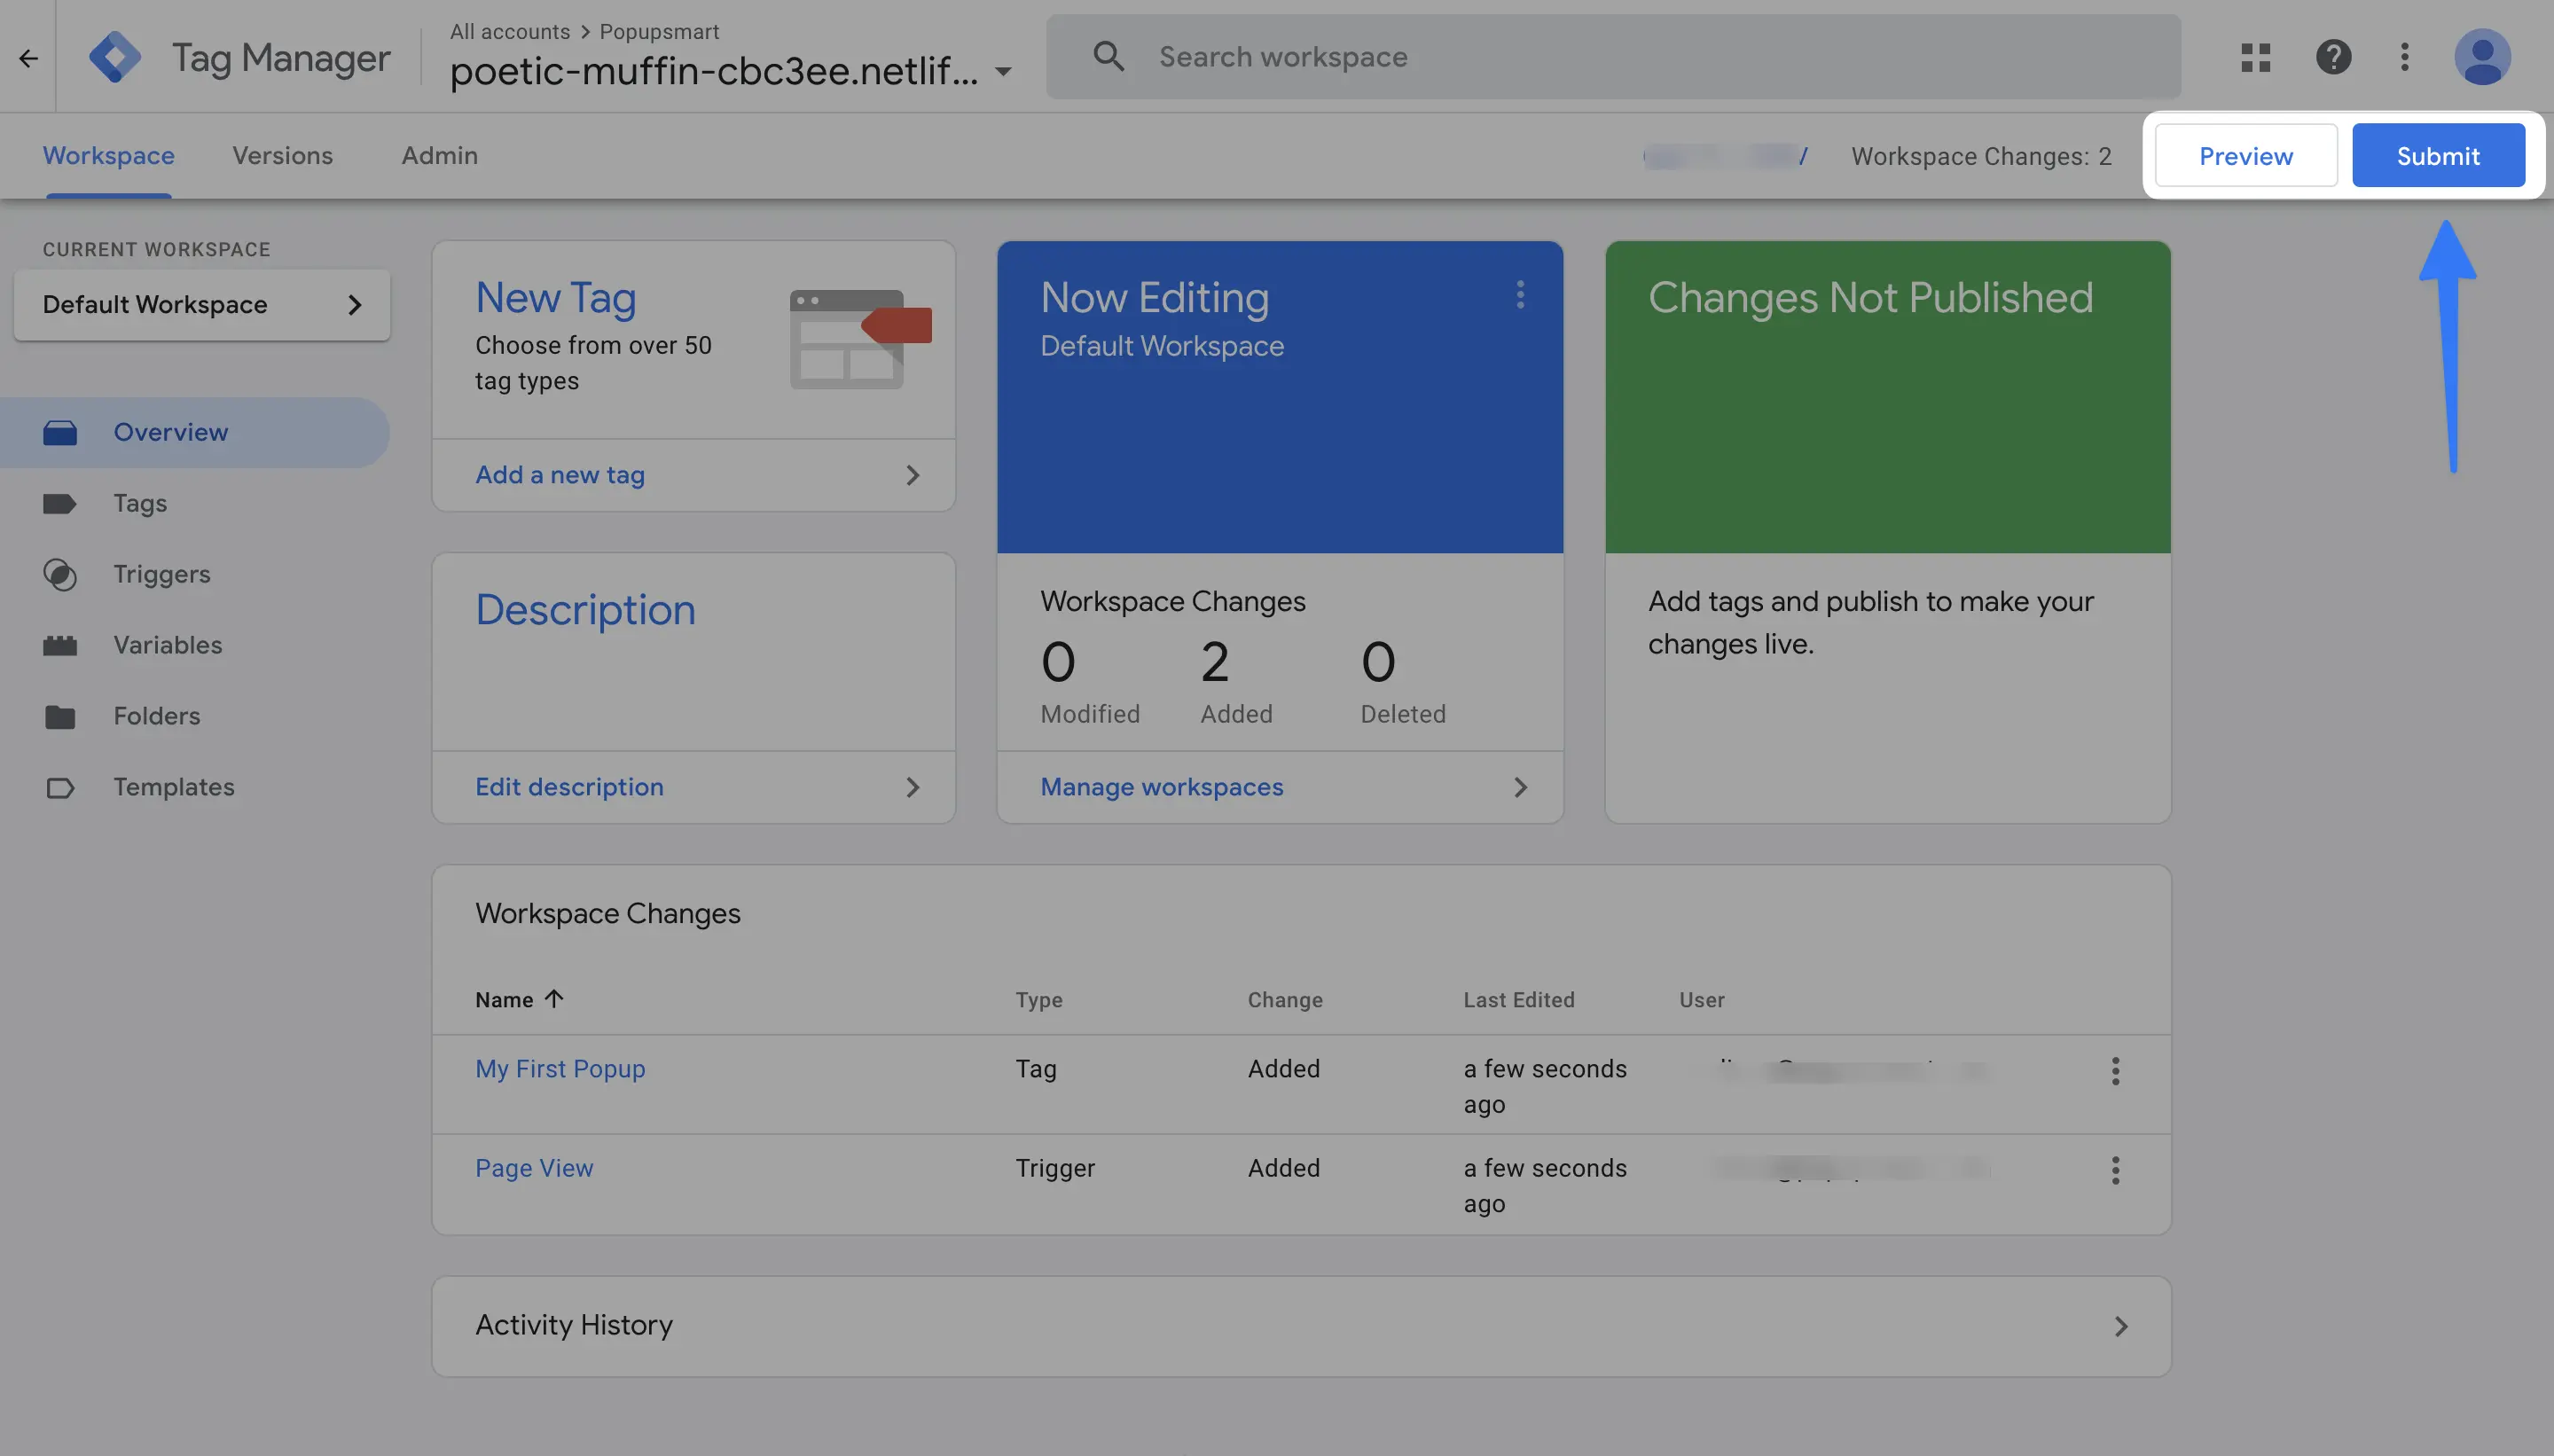
7. Once you have completed all the configurations, Submit all the changes.
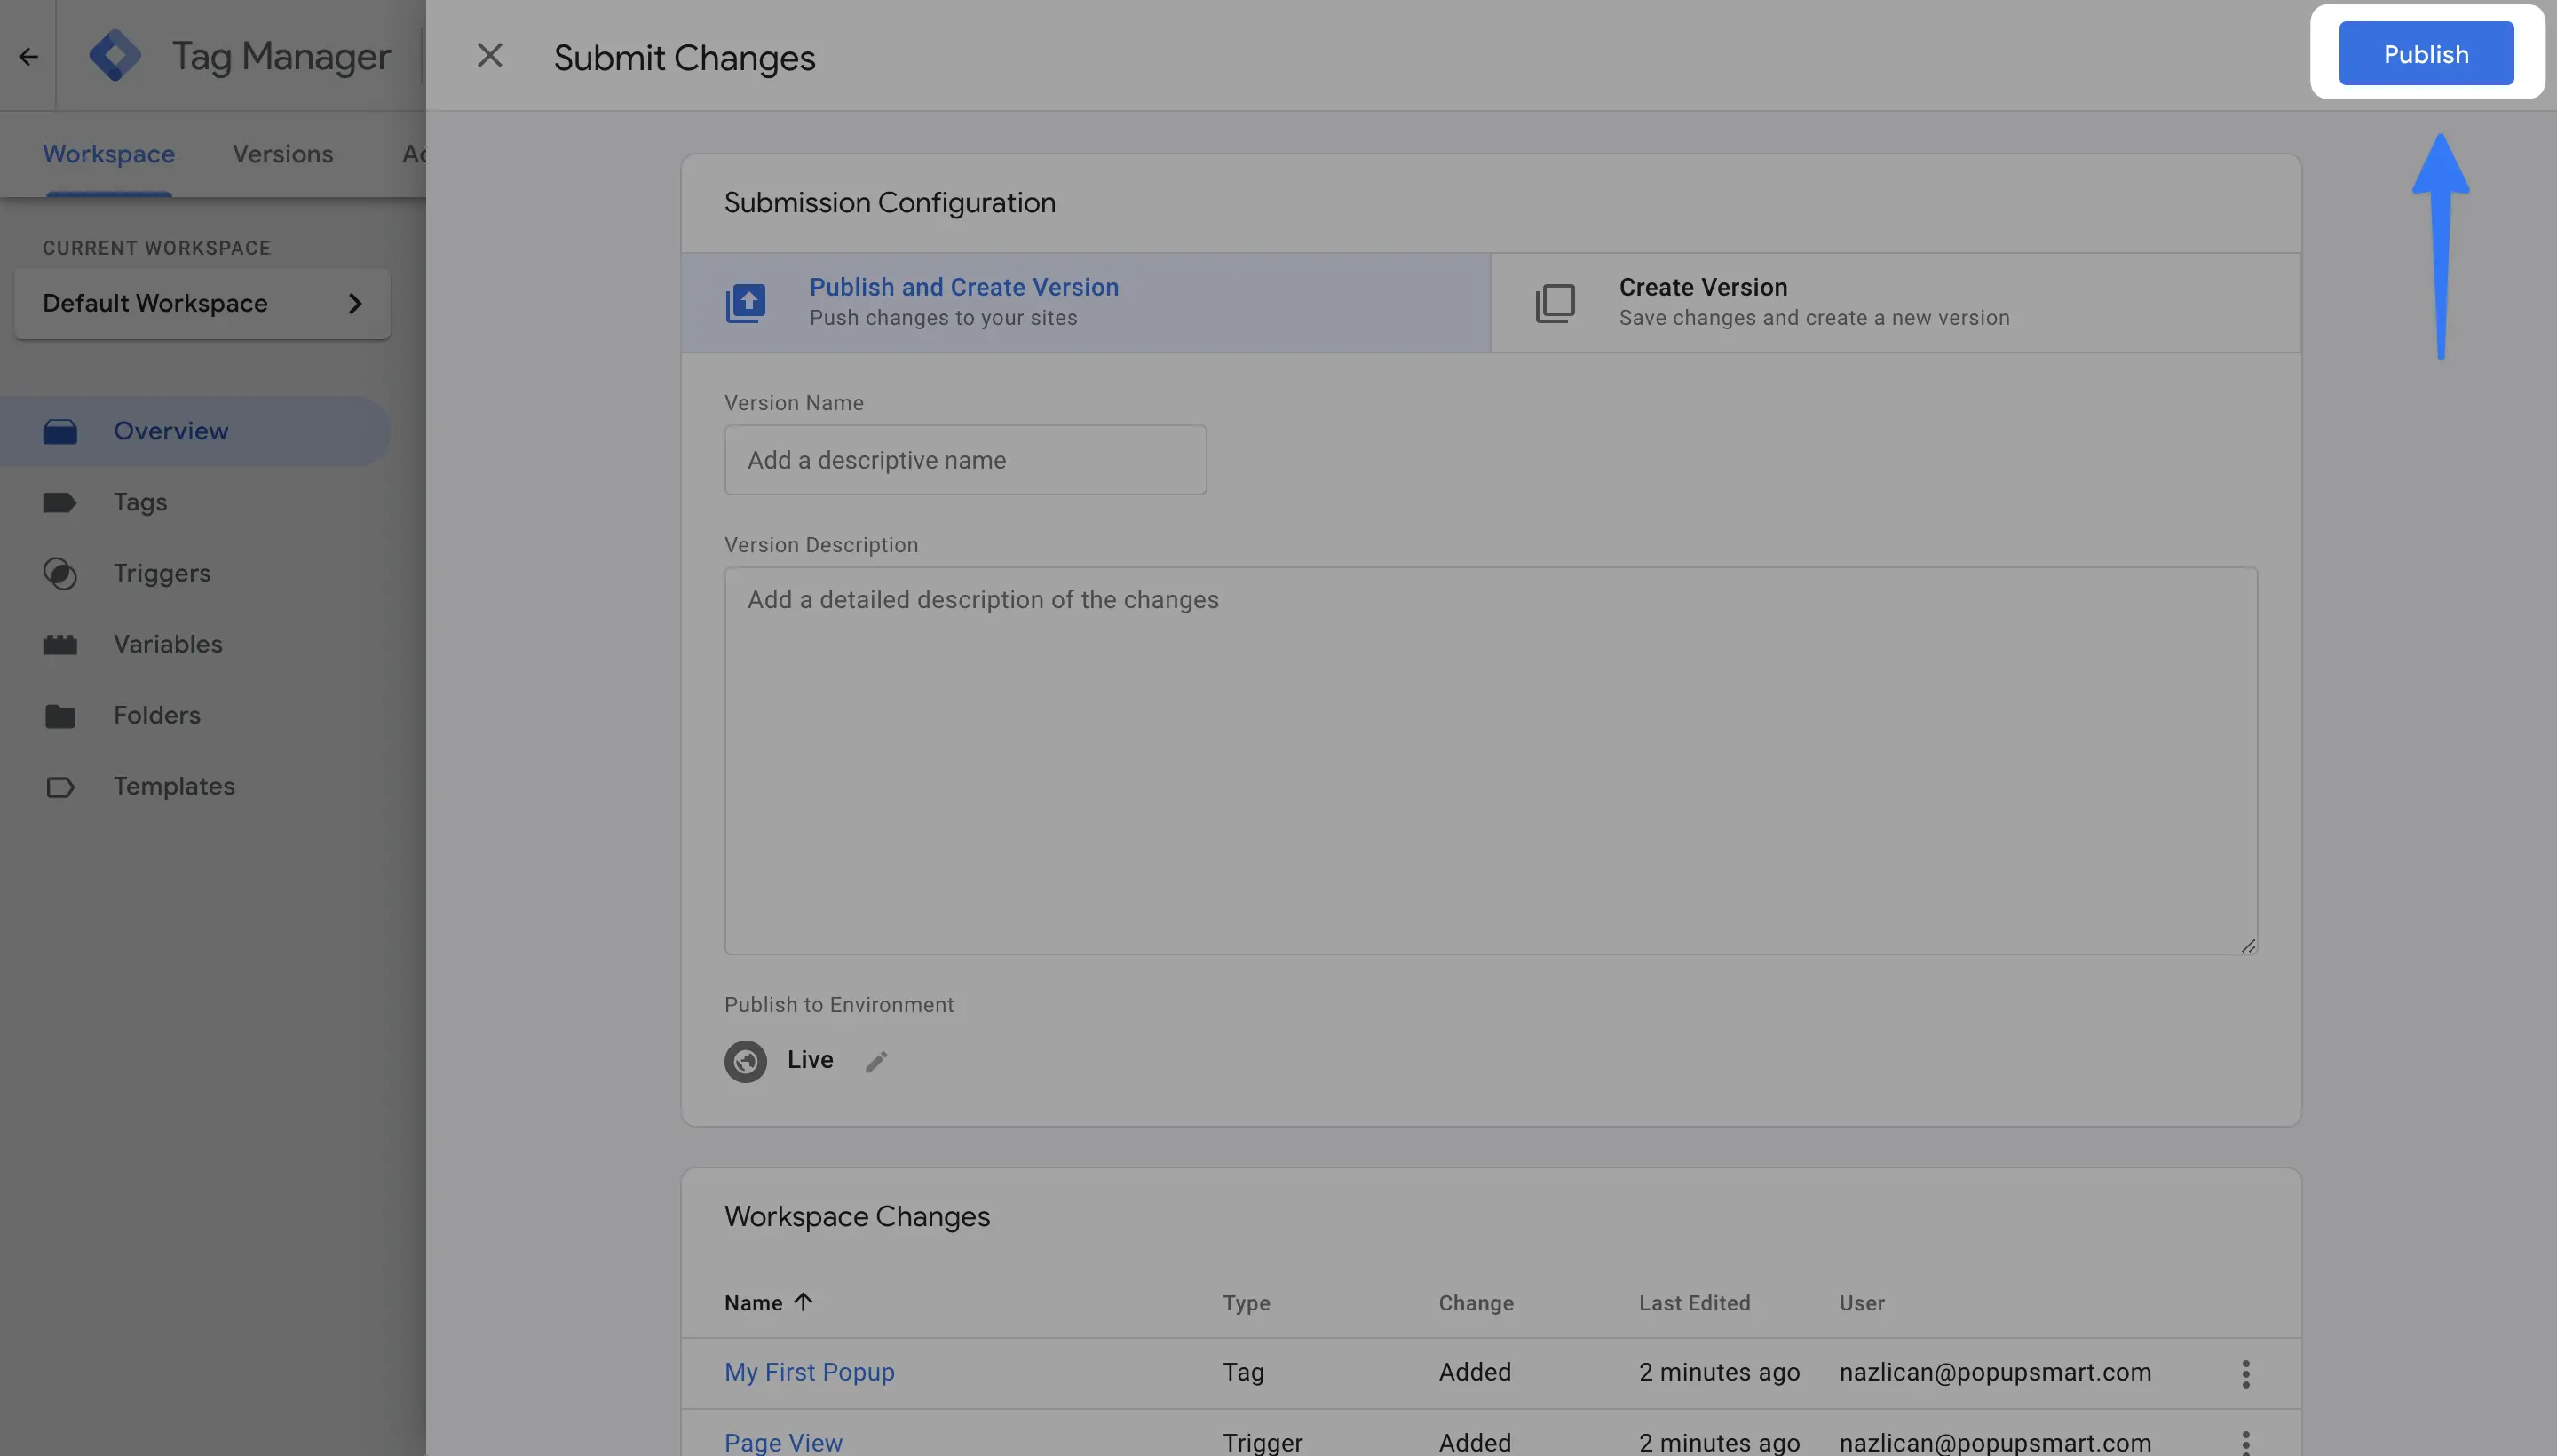
8. Finally, you need to click on “Publish”.
If you're still uncertain about integrating Popupsmart code with Google Tag Manager, please contact us through email or our live chat service for assistance!