Increase Sales Conversion
Can’t turn your site traffic into sales?
Reduce Cart Abandonment
Your customers abandoning their carts?
Promote Products & Offers
Make potential customers notice special offers.
Collect Form Submission
Struggling to collect form submissions?
Get More Phone Calls
Let them call you directly via popups.
Grow Email List
Having trouble growing your email list?
Gamify Your Campaign
Choose your offer and let the game begin.
Make Announcement
Make sure important news unmissed.
Increase User Engagement
Keep visitors & customers on your site longer.
Collect Feedback & Surveys
Can’t draw attention to your surveys?
Facilitate Social Sharing
Grow social media followers and likes!
# How Segmentation Works?
We all know that the best way to show our popup campaign is related to finding the best segmentation along with the other designs.
After you have done with your customization and adjusted the style of your popup, it’s time to manage the segment to target the most related audience for your campaign.
Popupsmart has useful and direct segmentation options to help you reach your target.
Let’s learn how the segmentation of Popupsmart works!
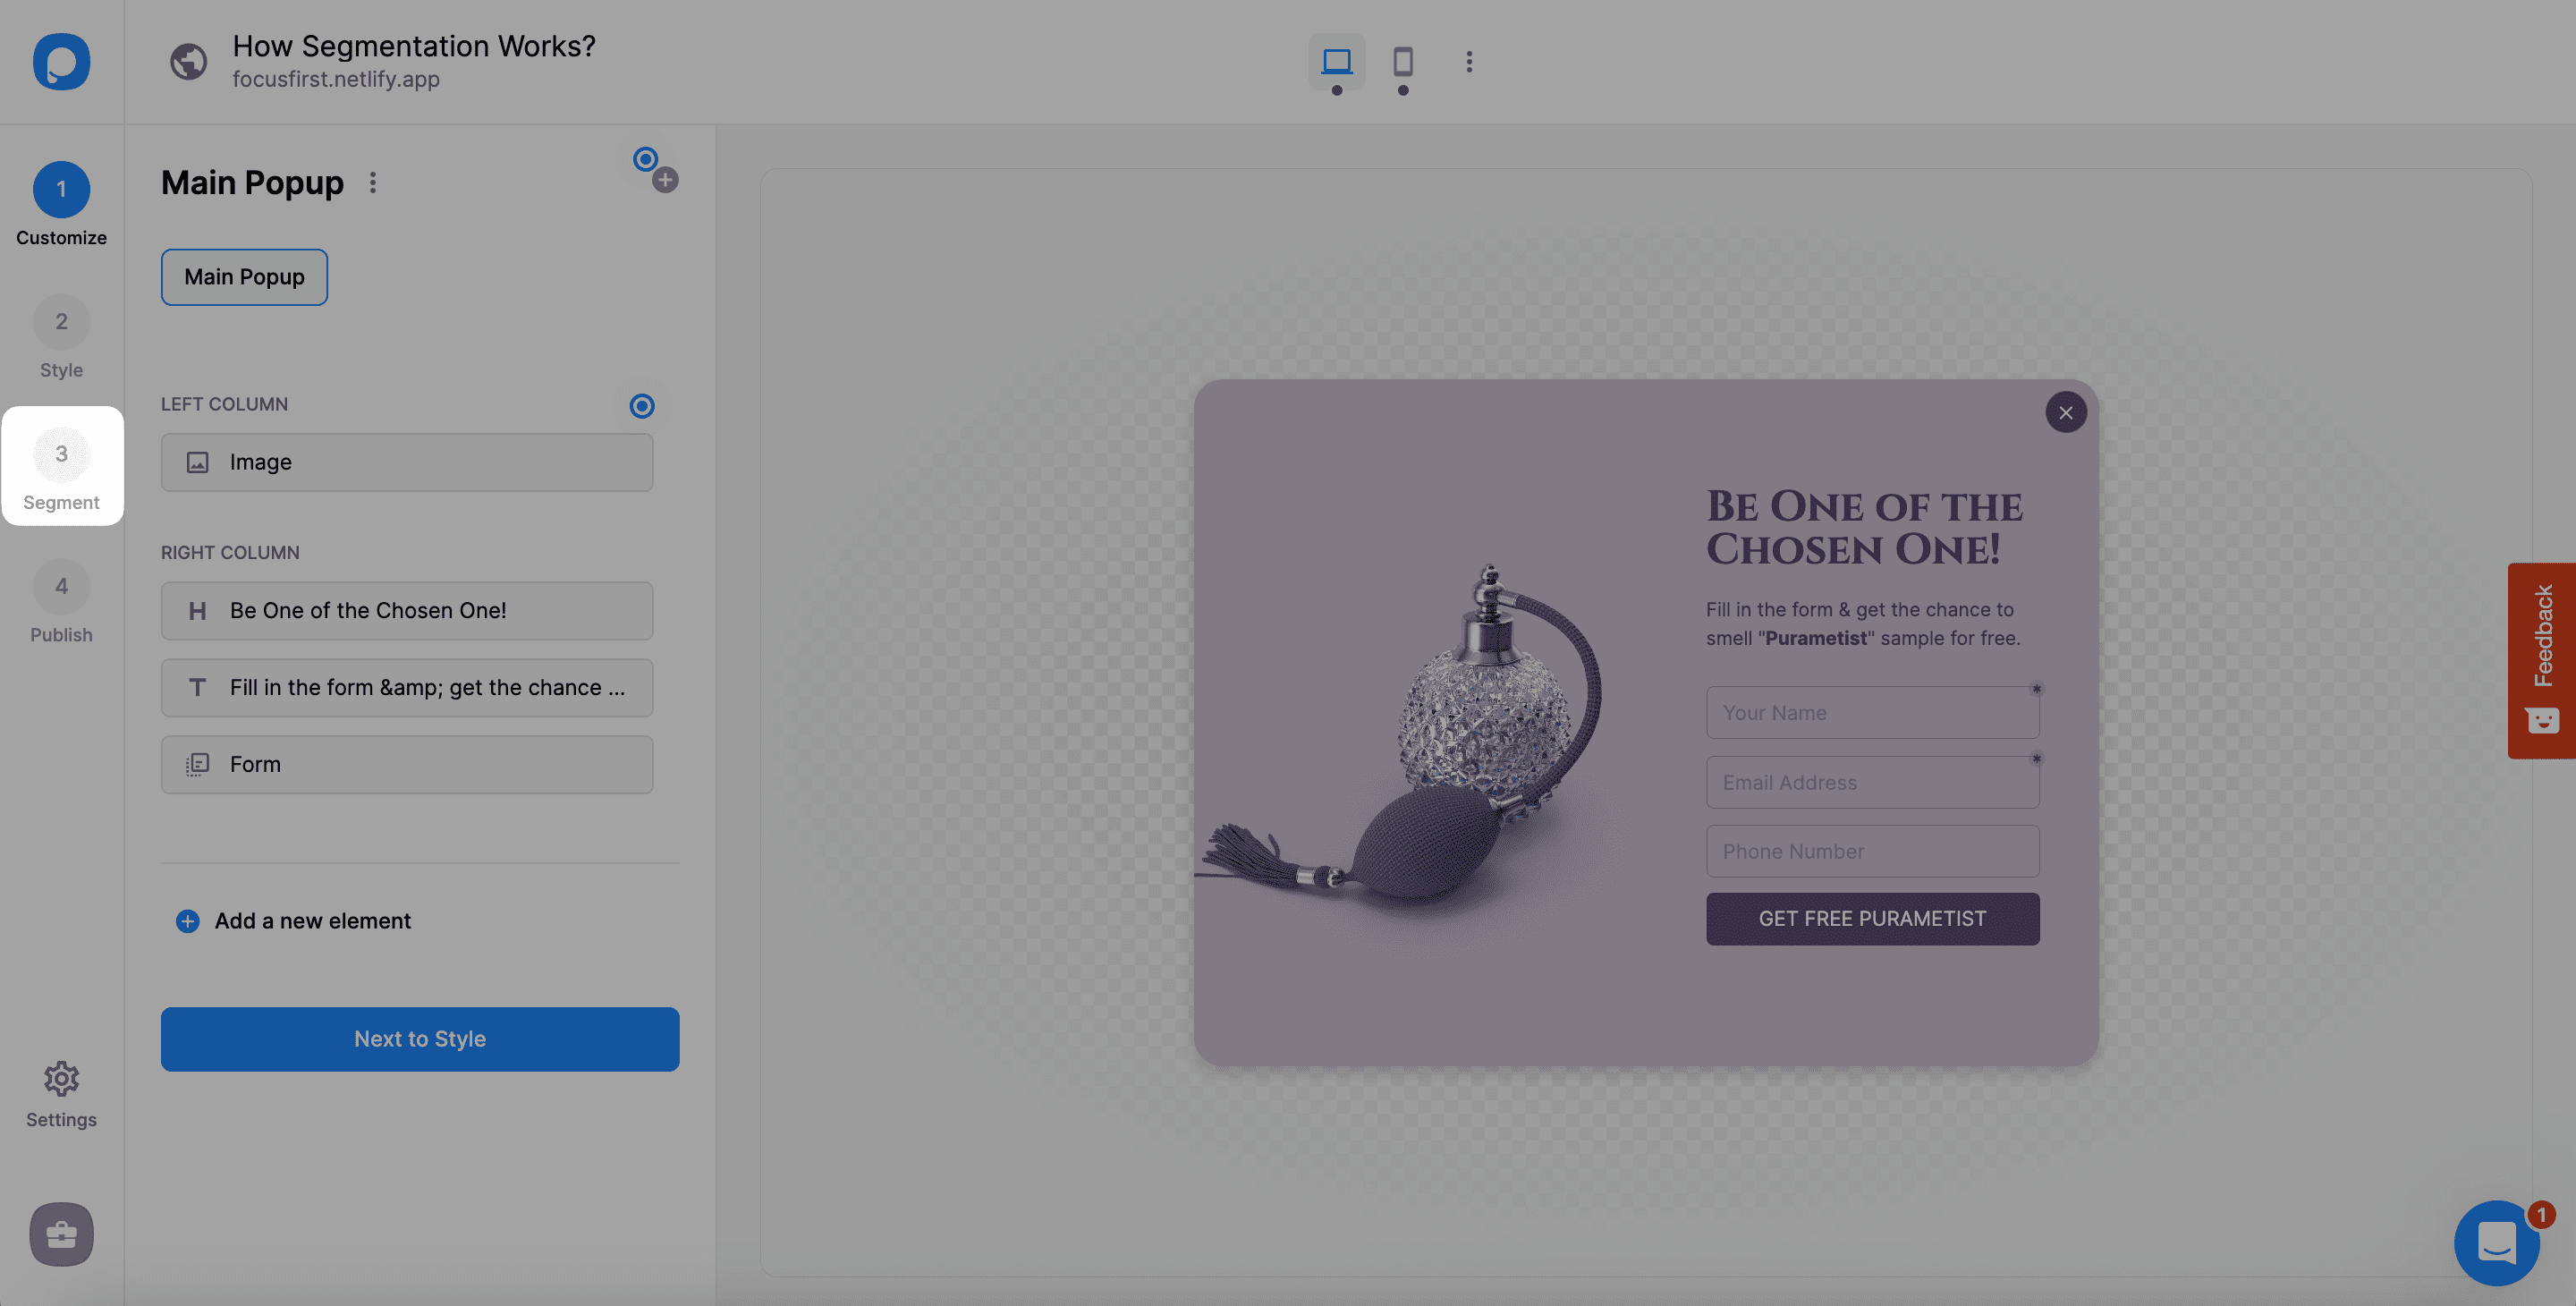
1. Since we have created our campaign and made arrangements on the Customize and Style steps, click Segment to start.
2. Since every template on Popupsmart’s template gallery, you come across a segment here. You need to click “Change” to see the other customization options.
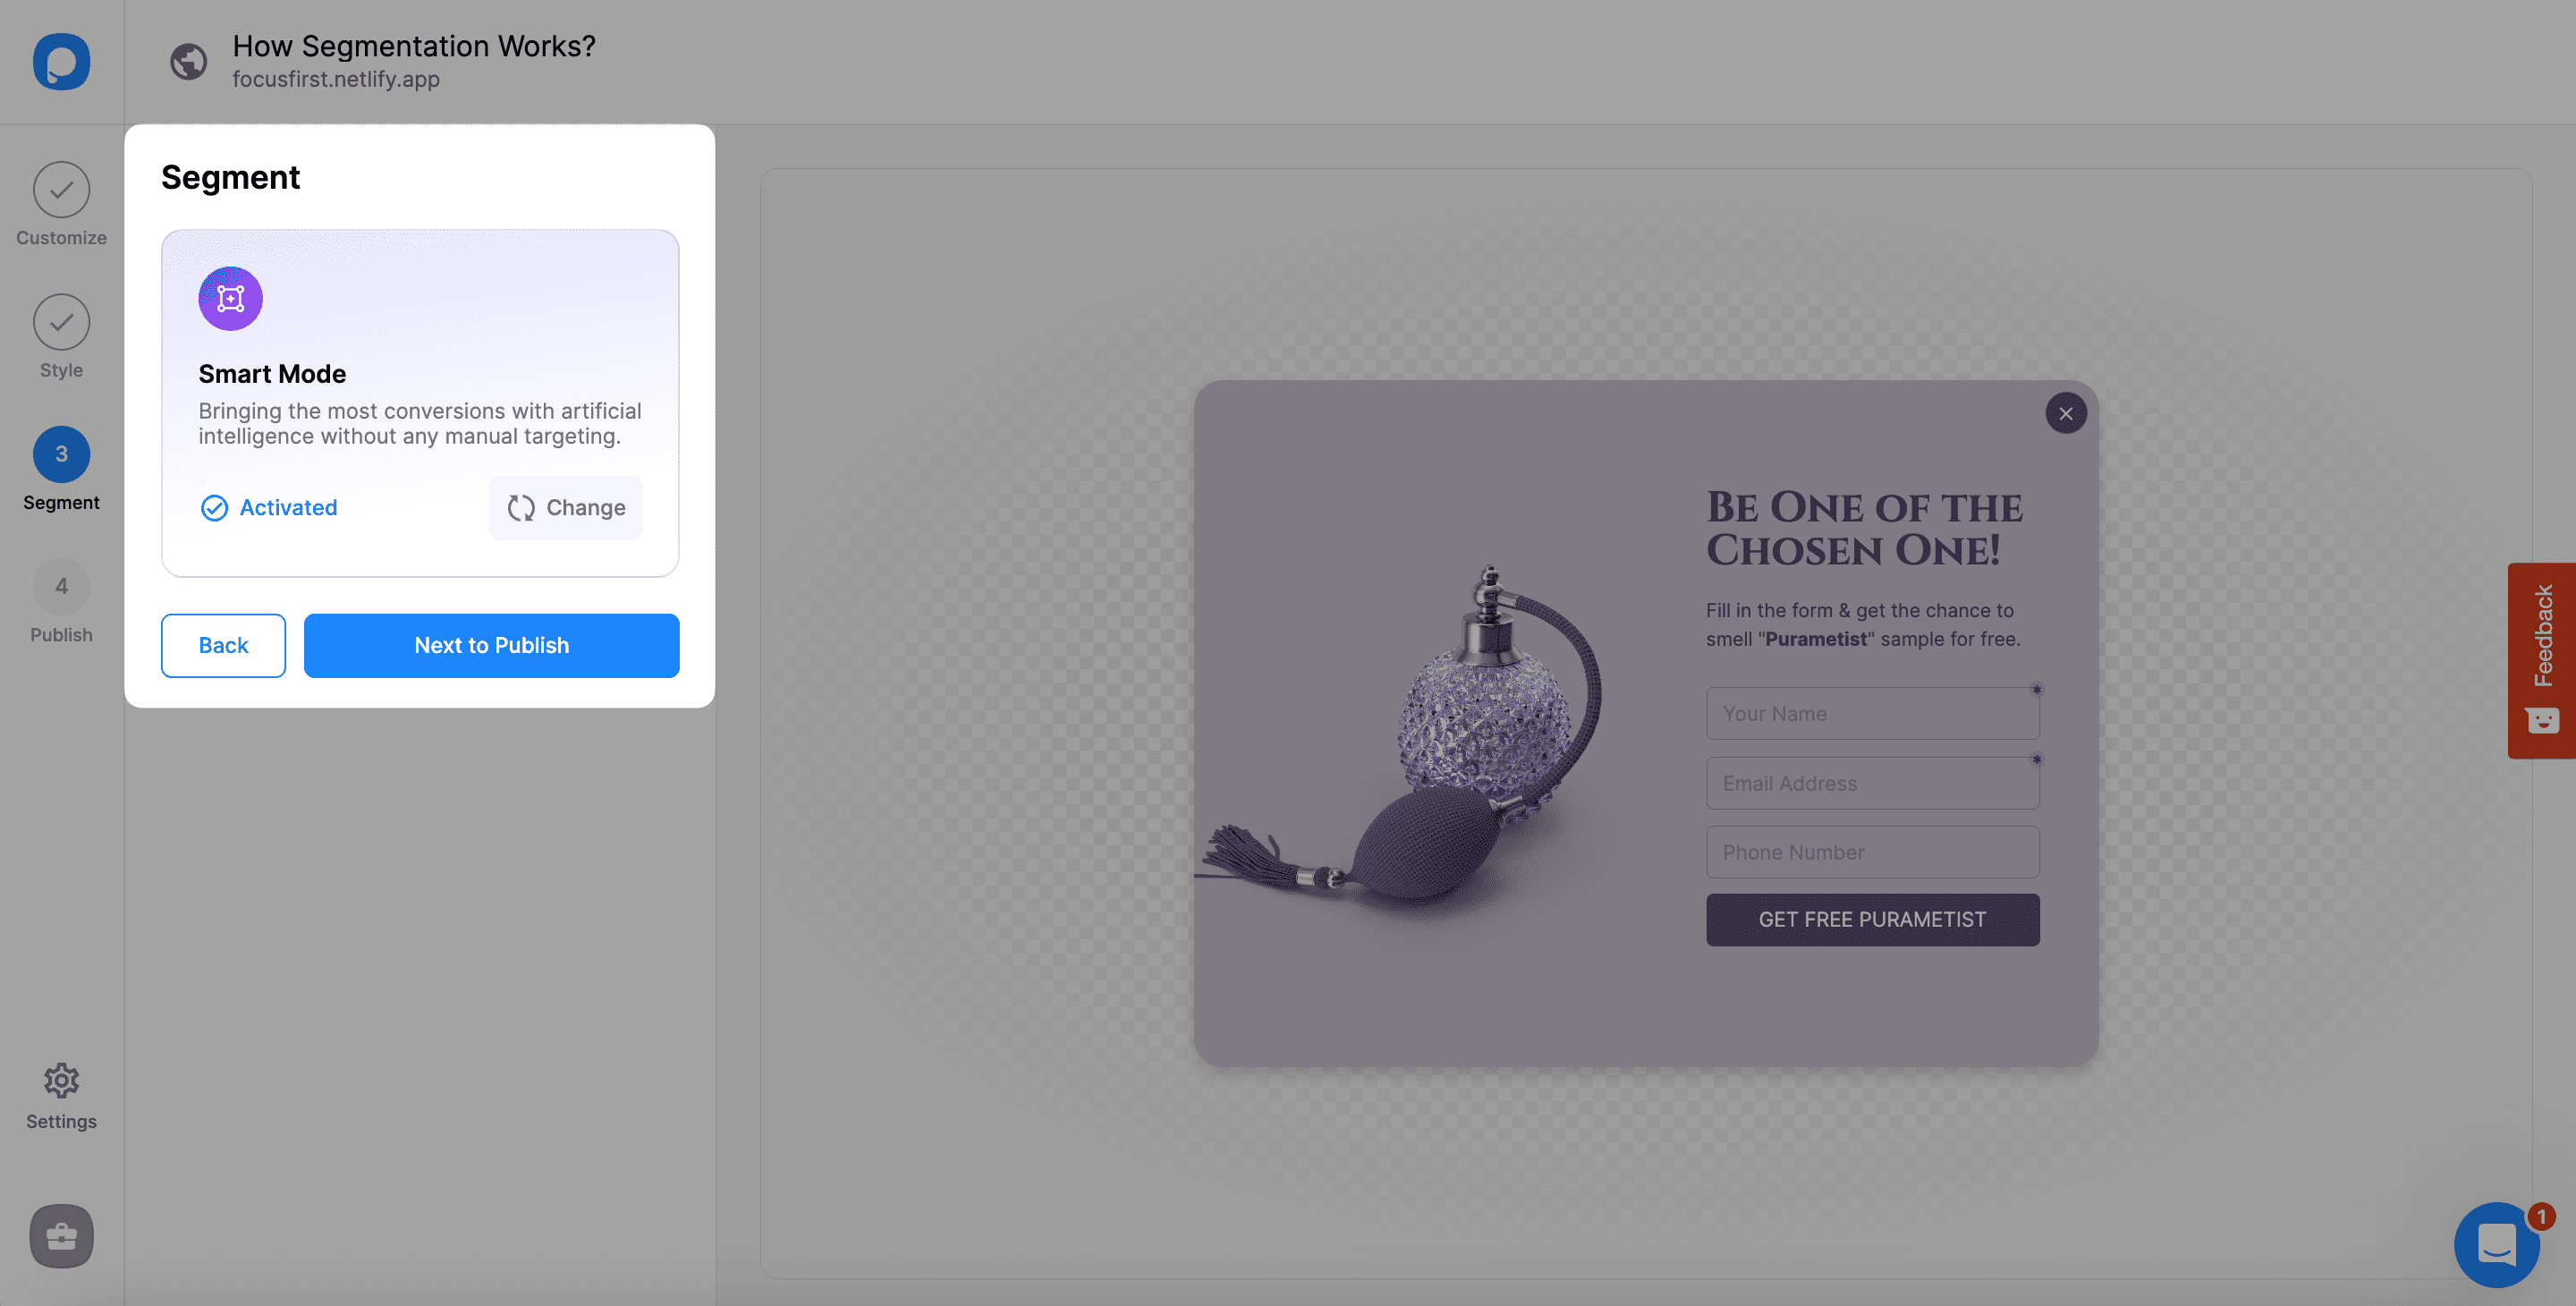
If another current segment is available on this step, you can arrange it by clicking “Edit.”
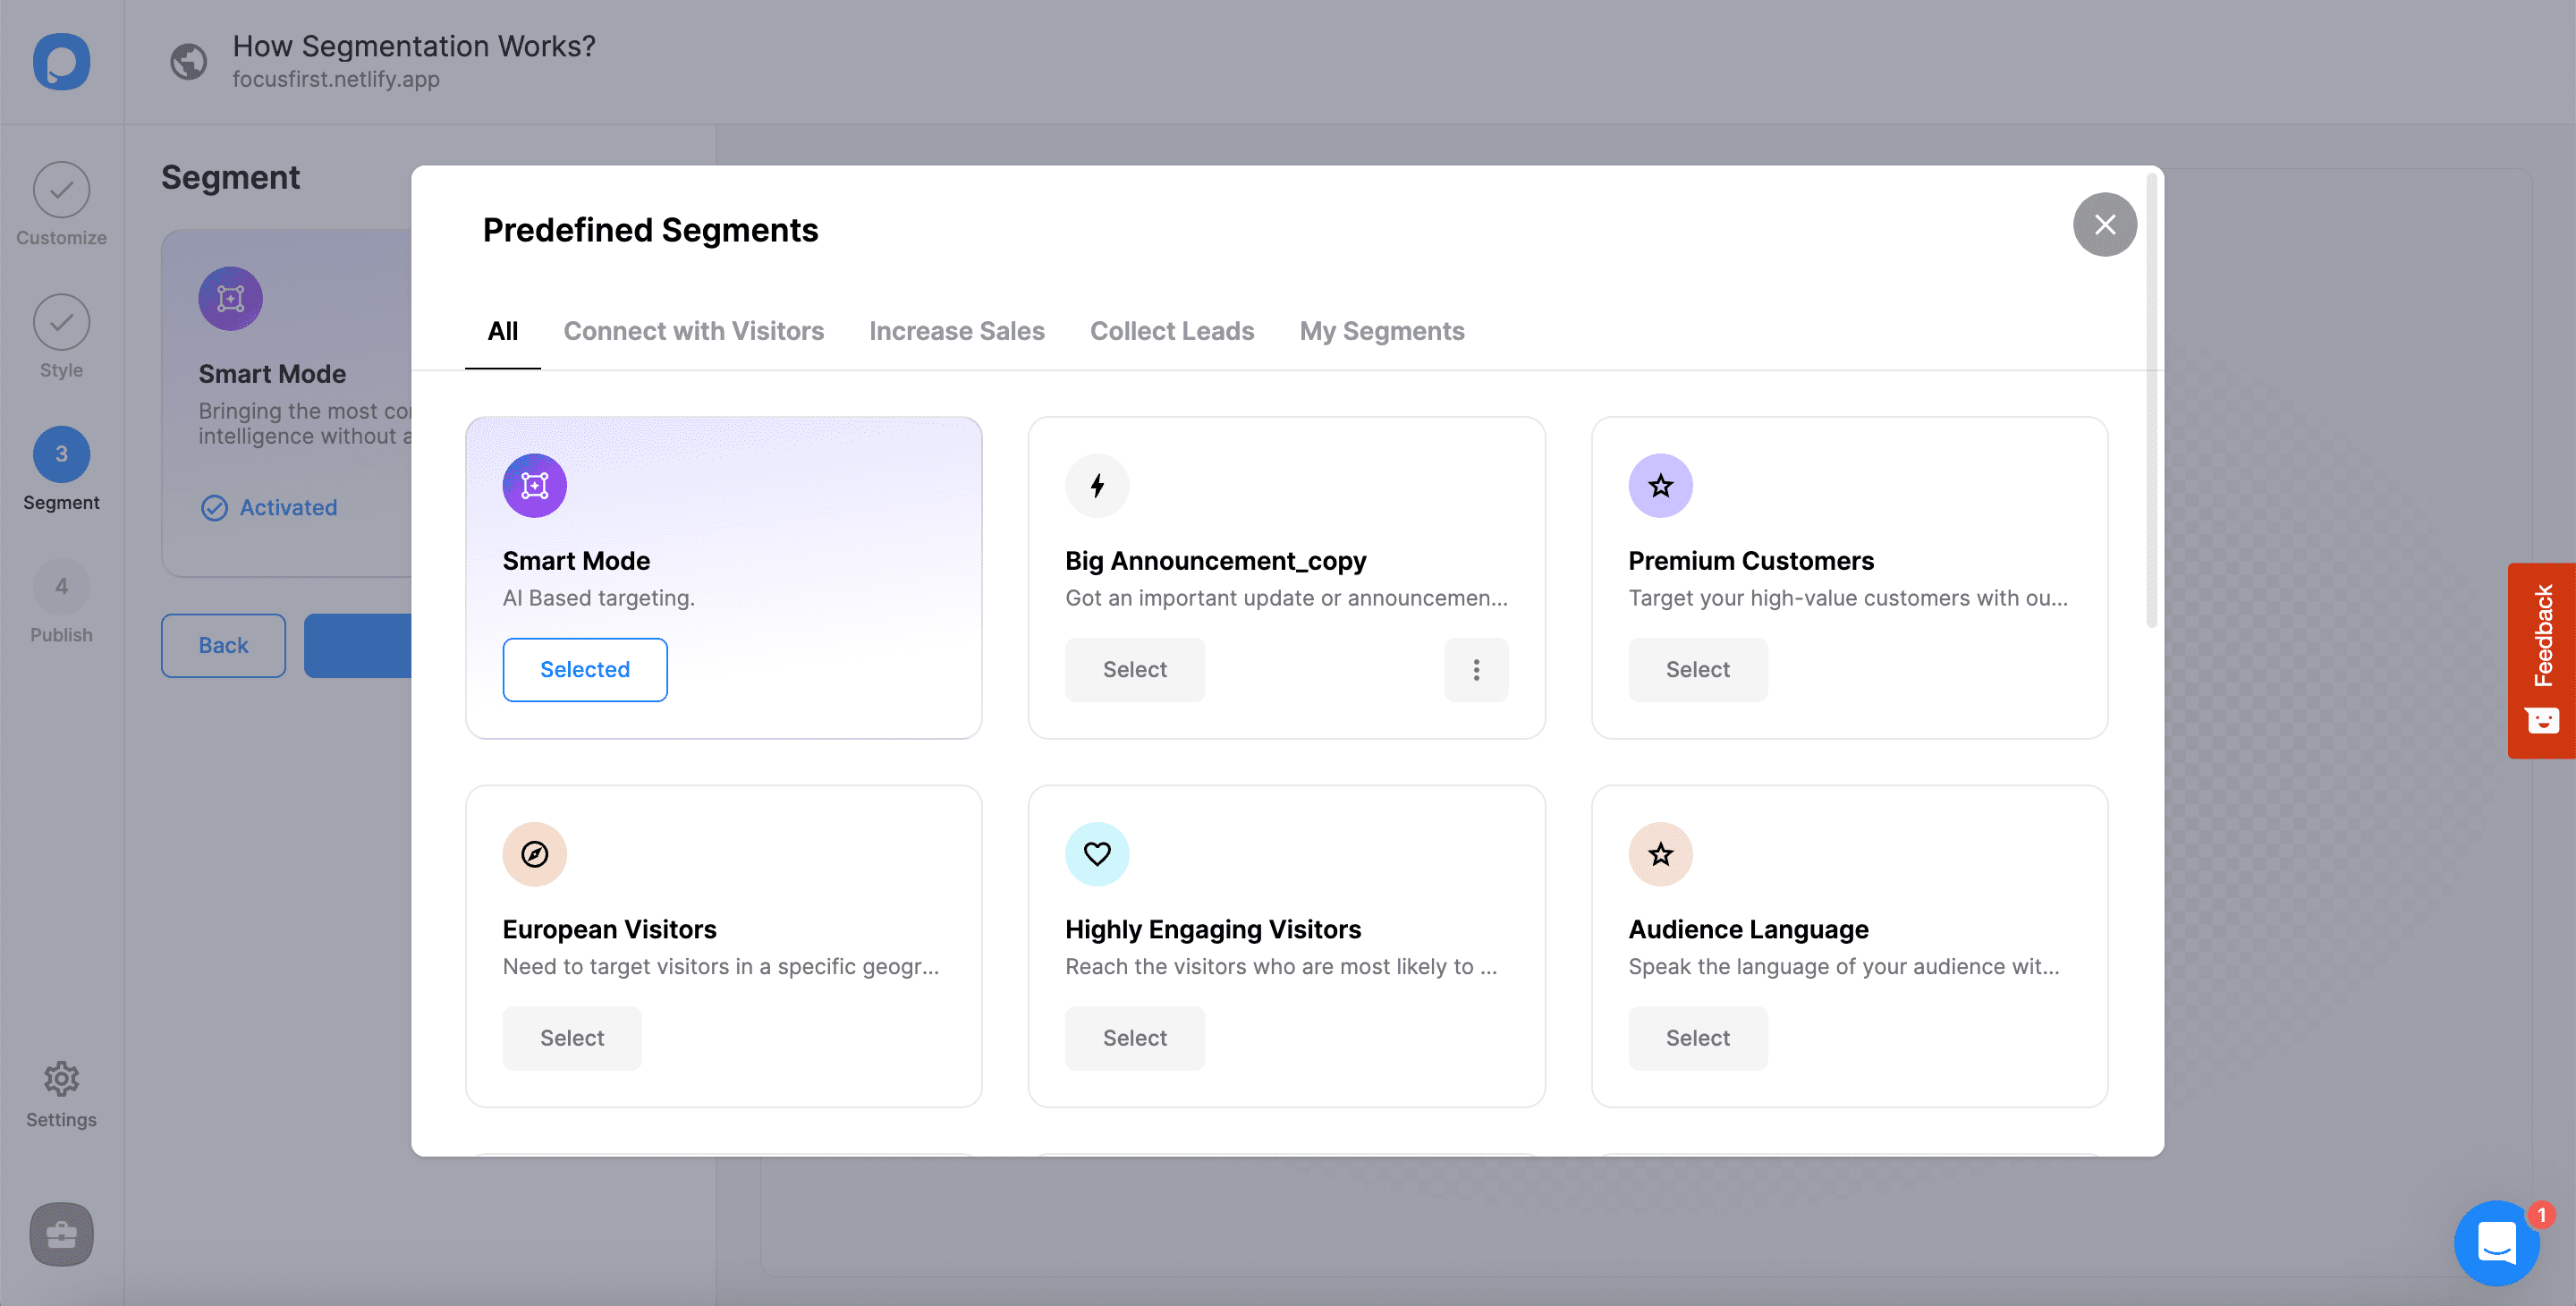
3. A modal of Predefined Segments will show up, and you have options there. You can choose among the specific titles or create your own segment on “My Segments.”
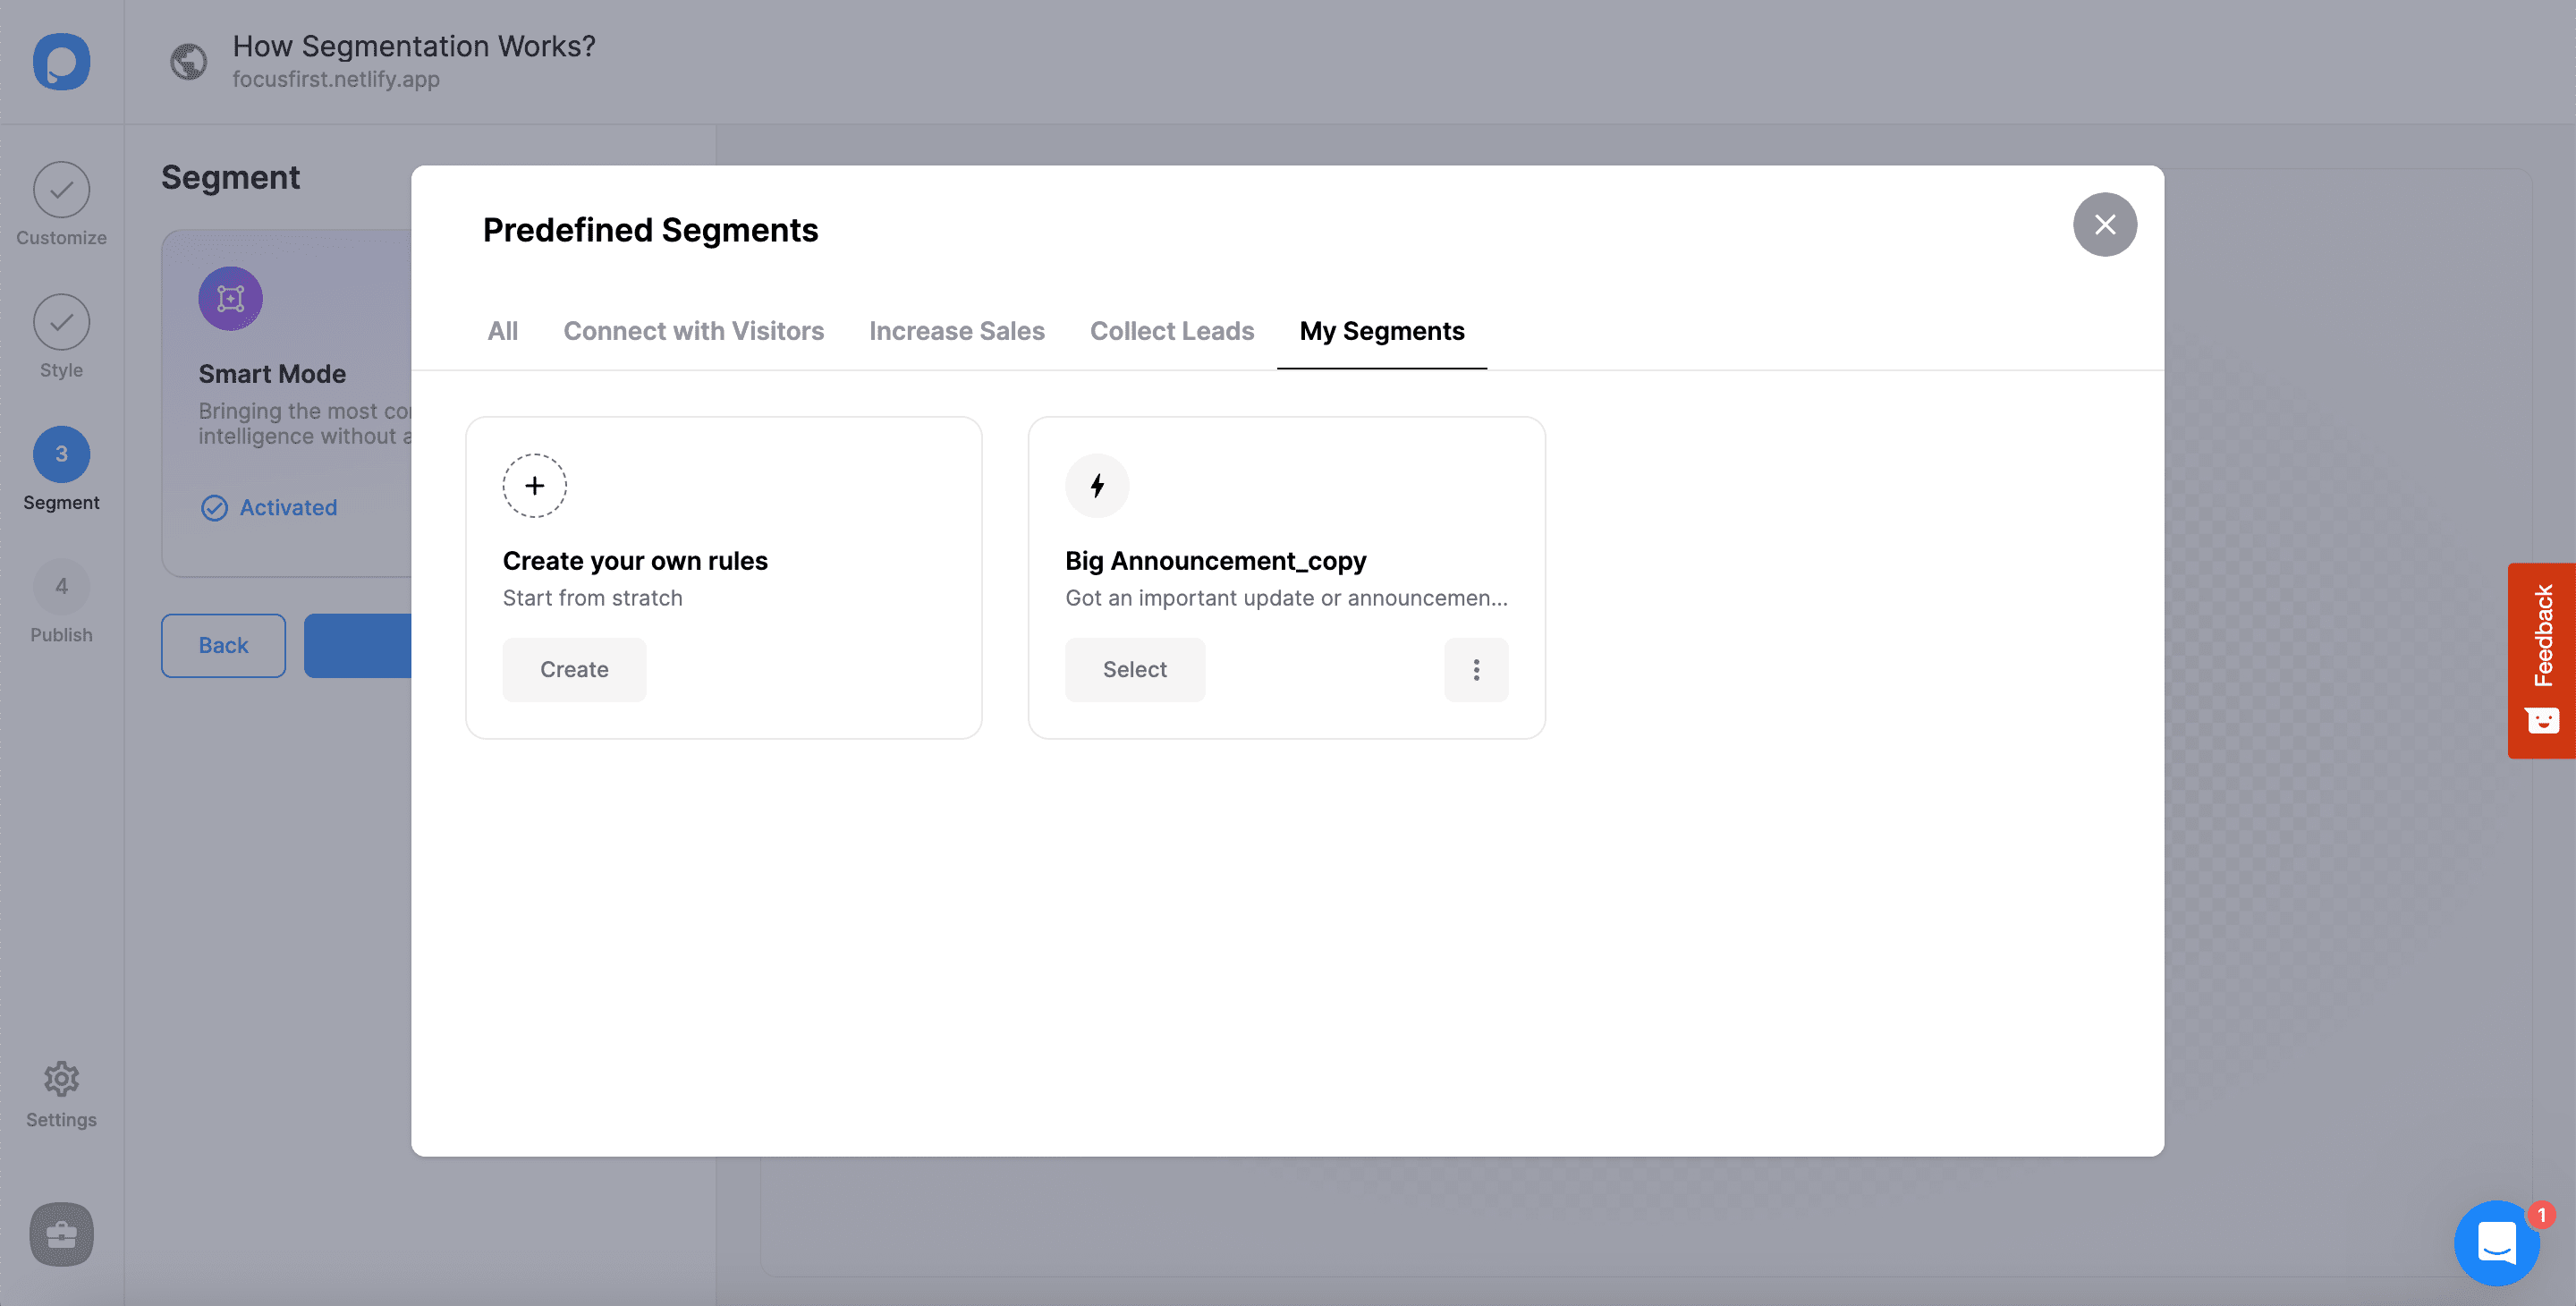
4. When choosing “My Segments”, you need to click “Create.”
5. The first part of the Segment is “Audience,” where you can target your audience. Click “Add audience targeting” to reach the options.
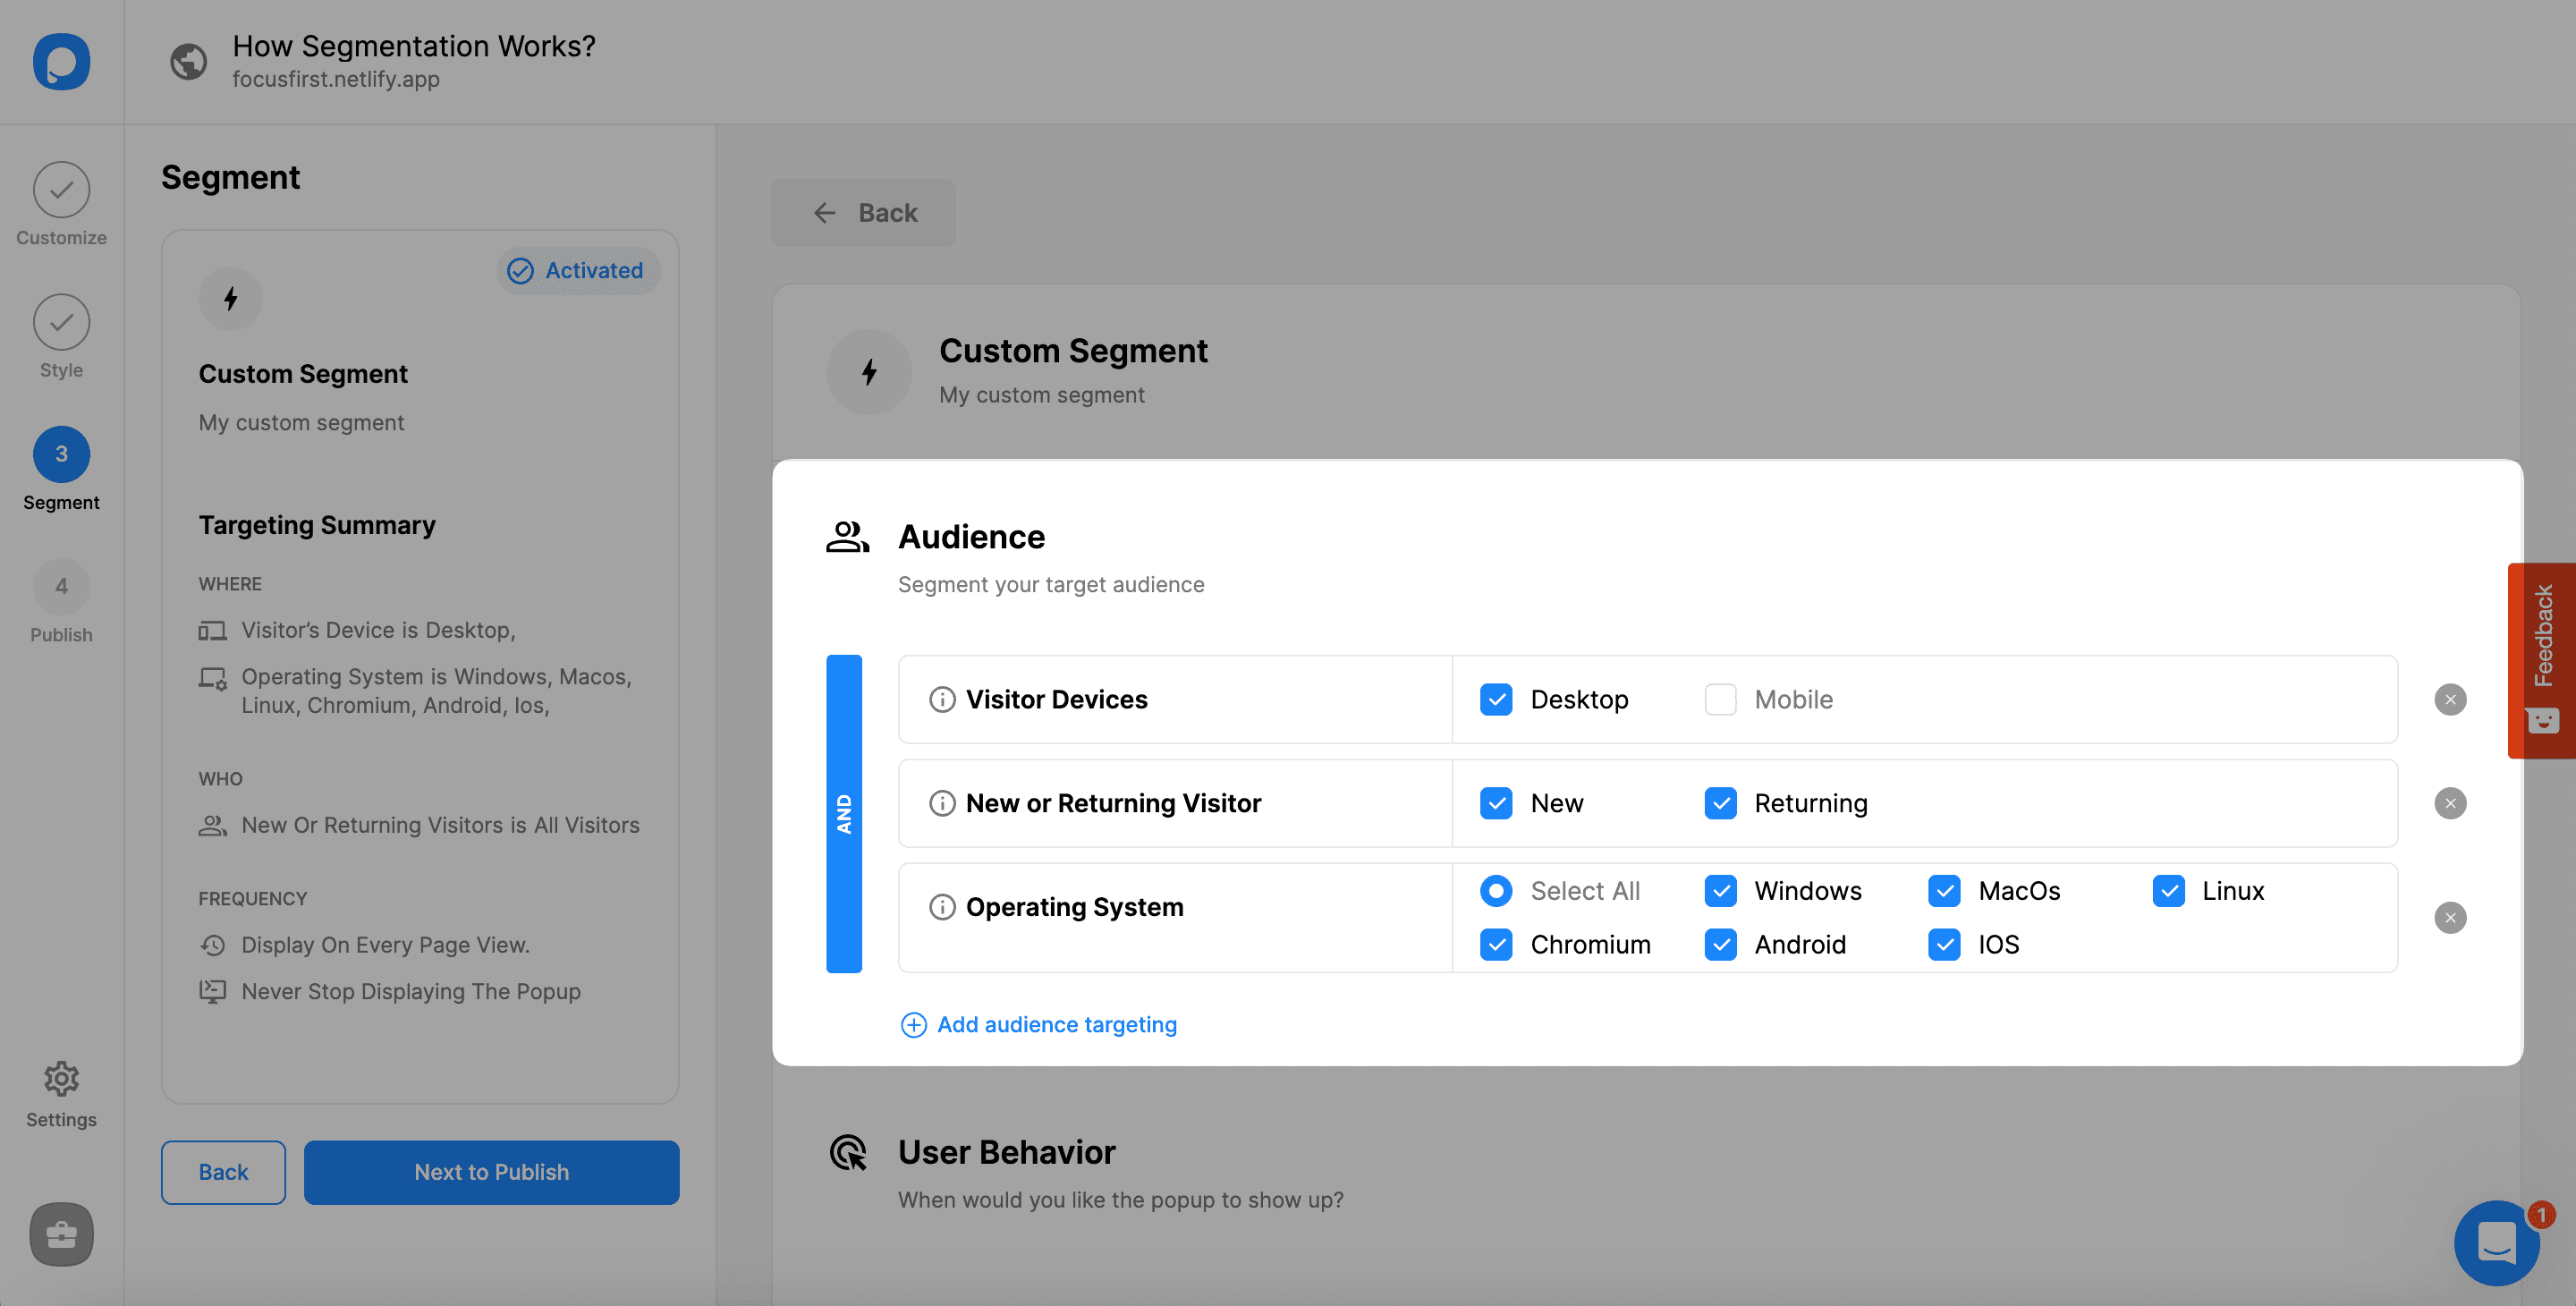
6. The options for Audience targeting include different segmentation related to the device, location, website, language, and source of your audience.
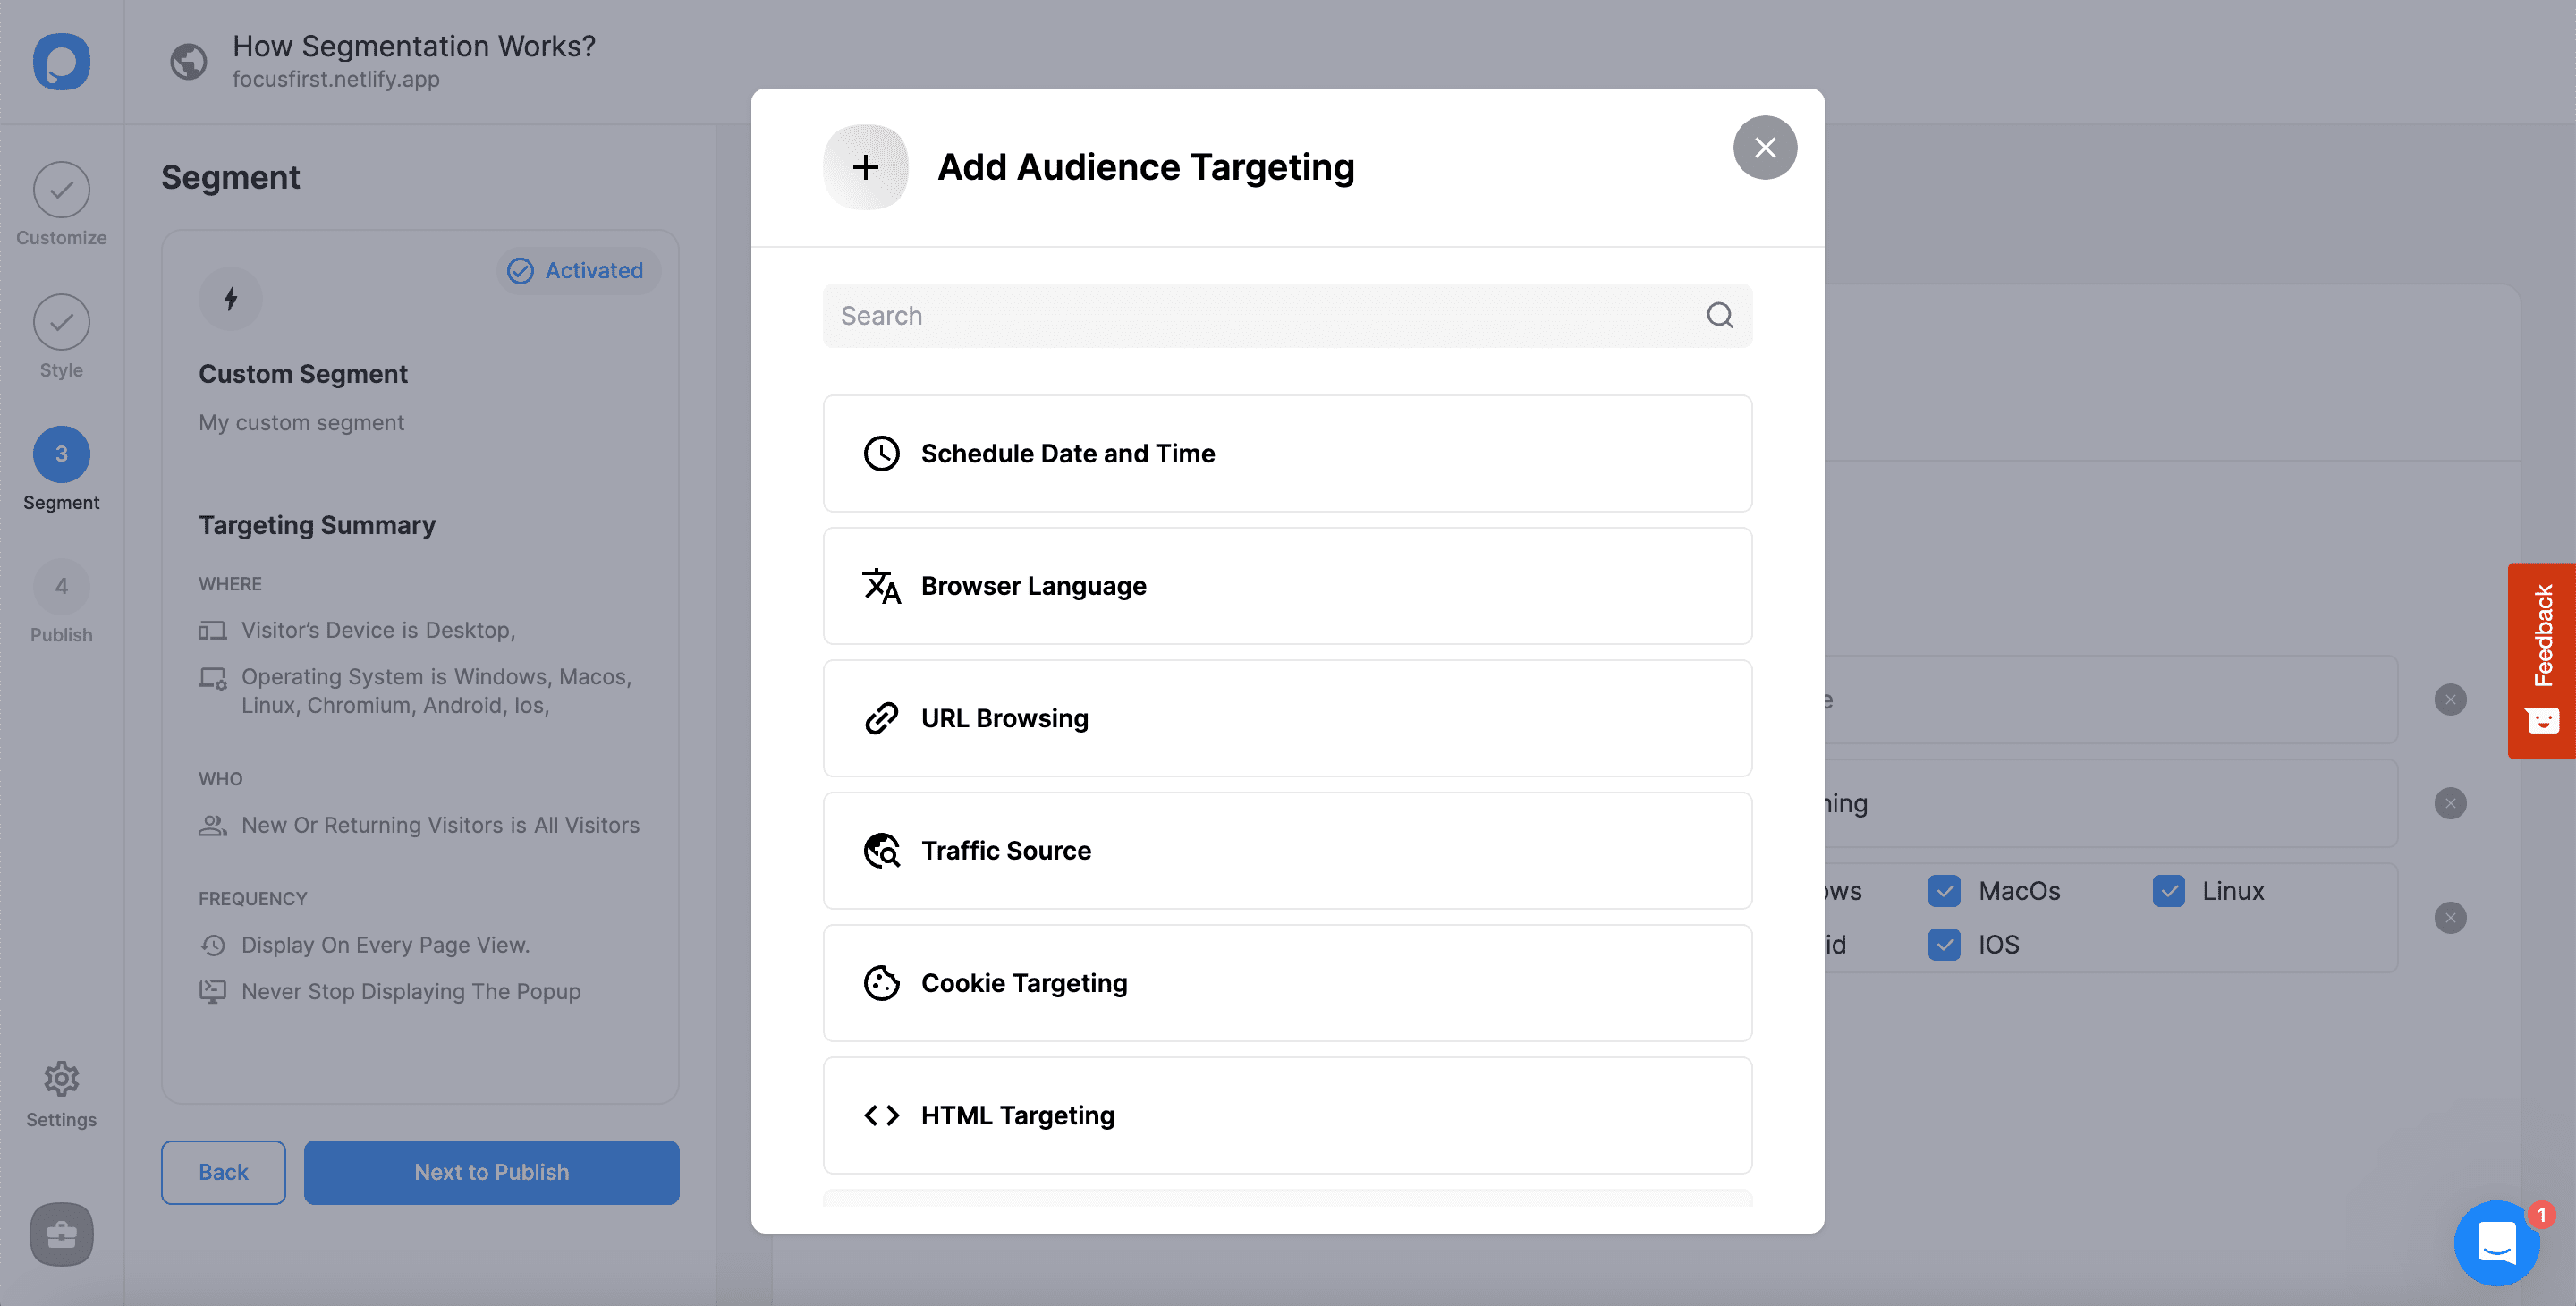
You can add more than one of them based on your needs.
7. The second part is “User Behavior,” where you can decide when to show your popup based on their behavior.
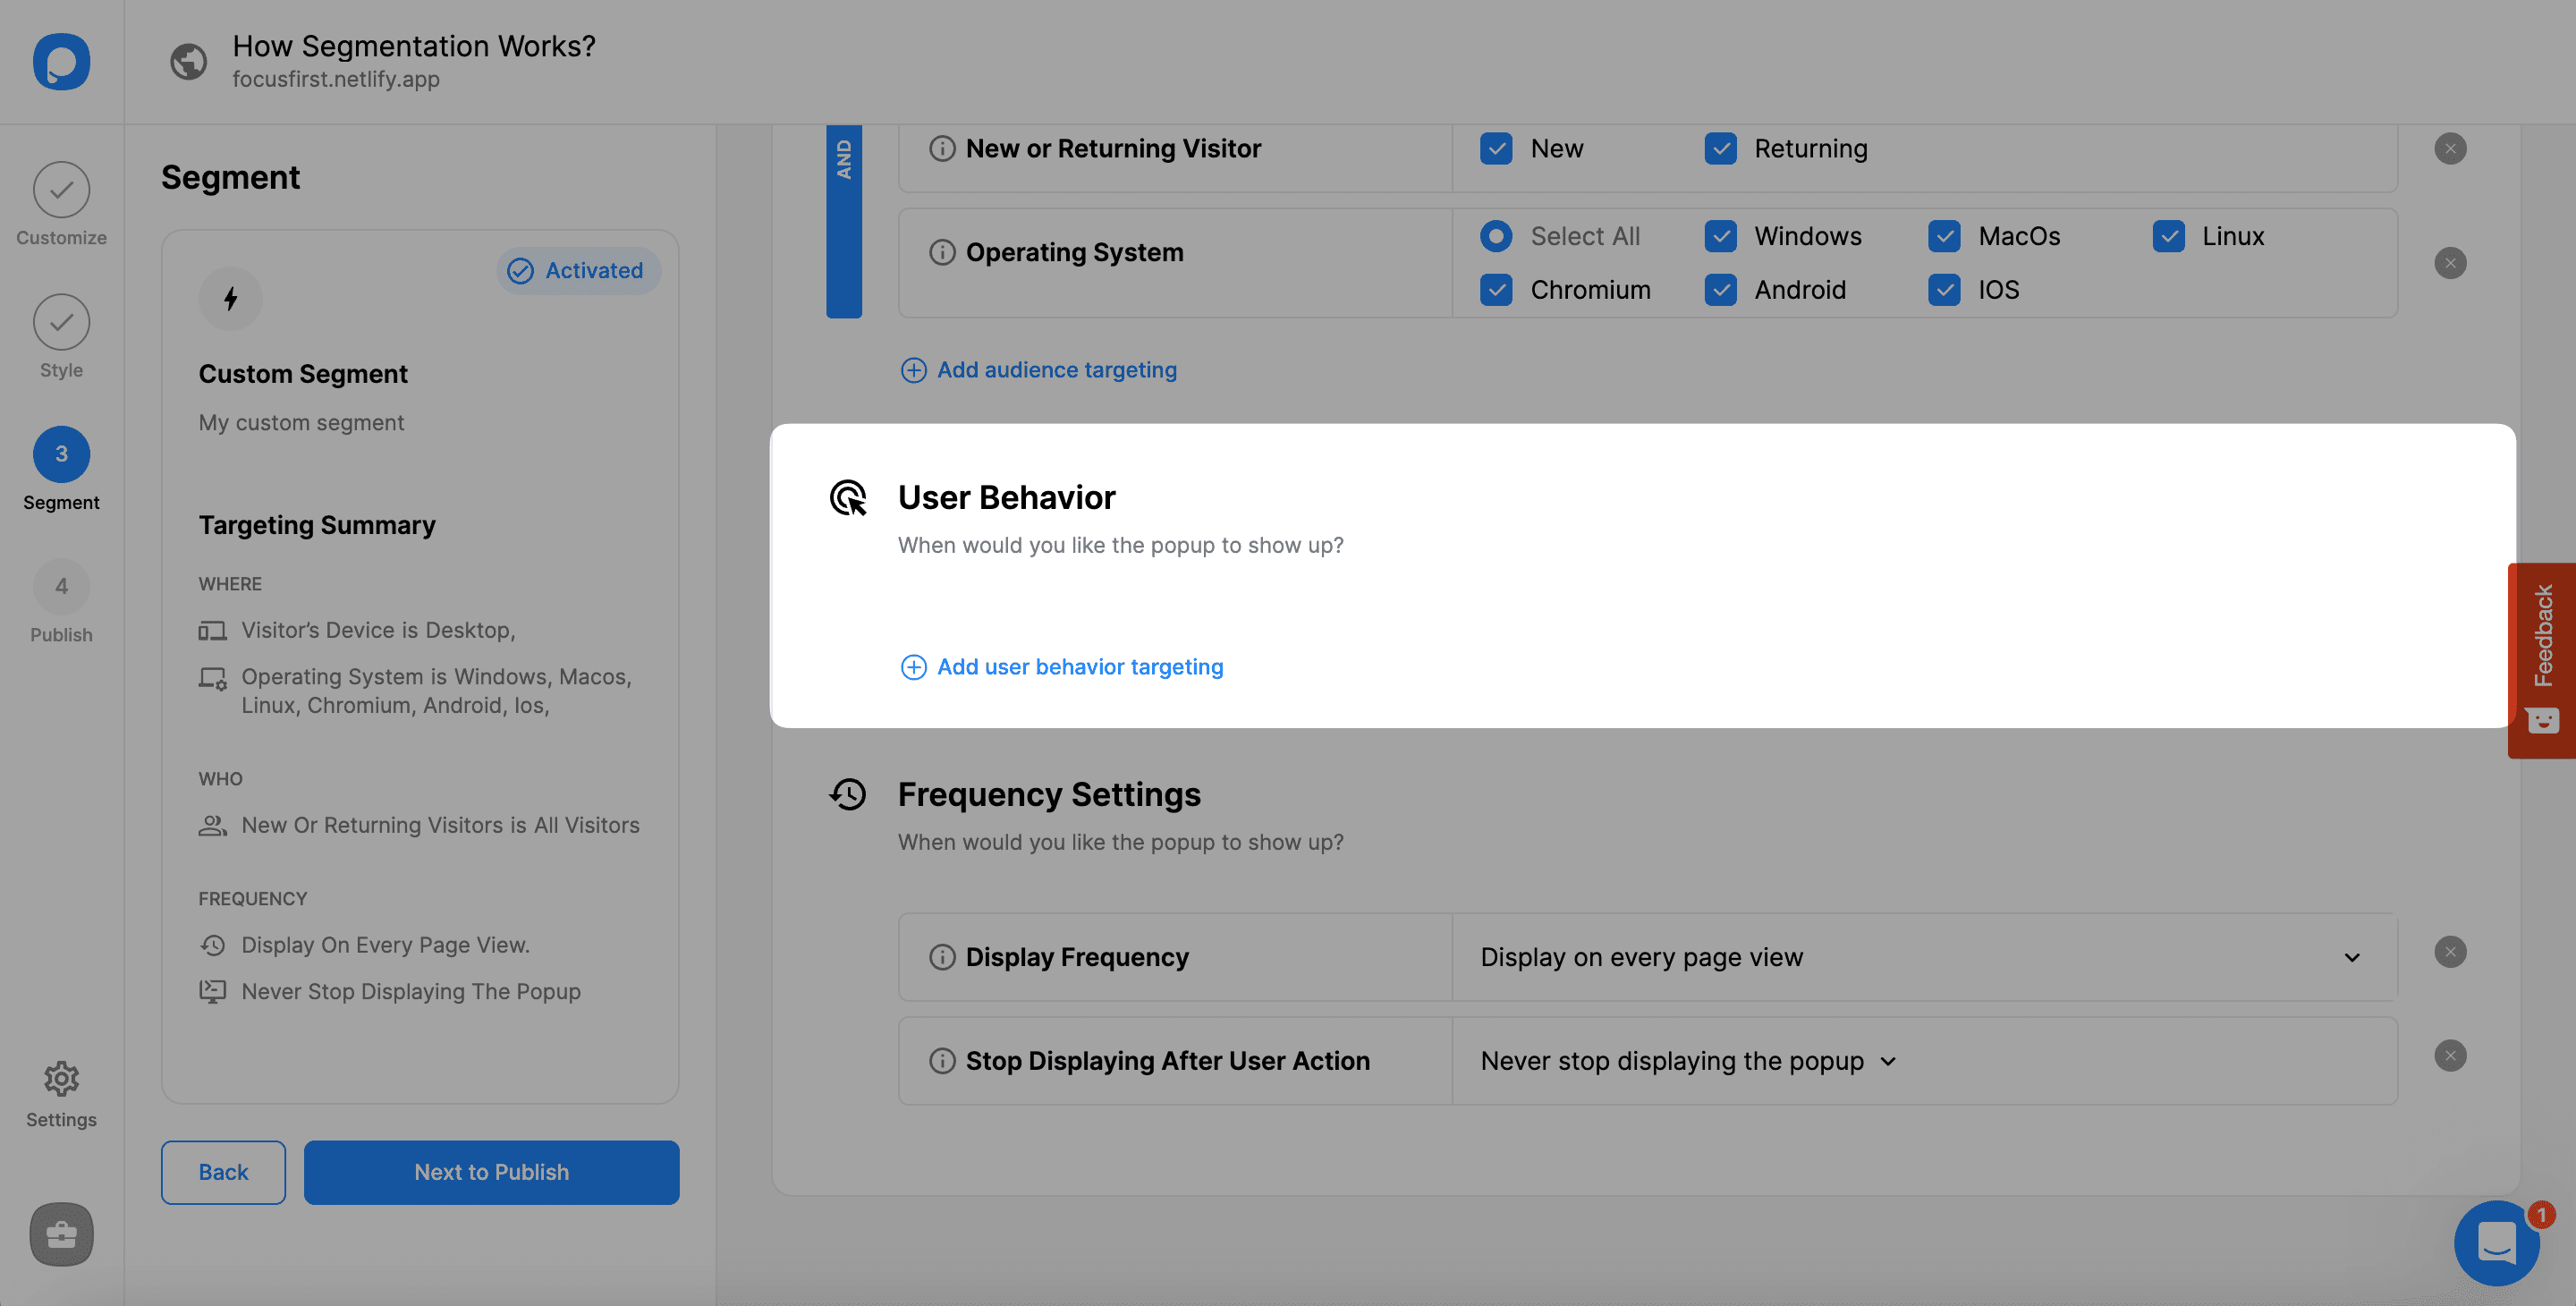
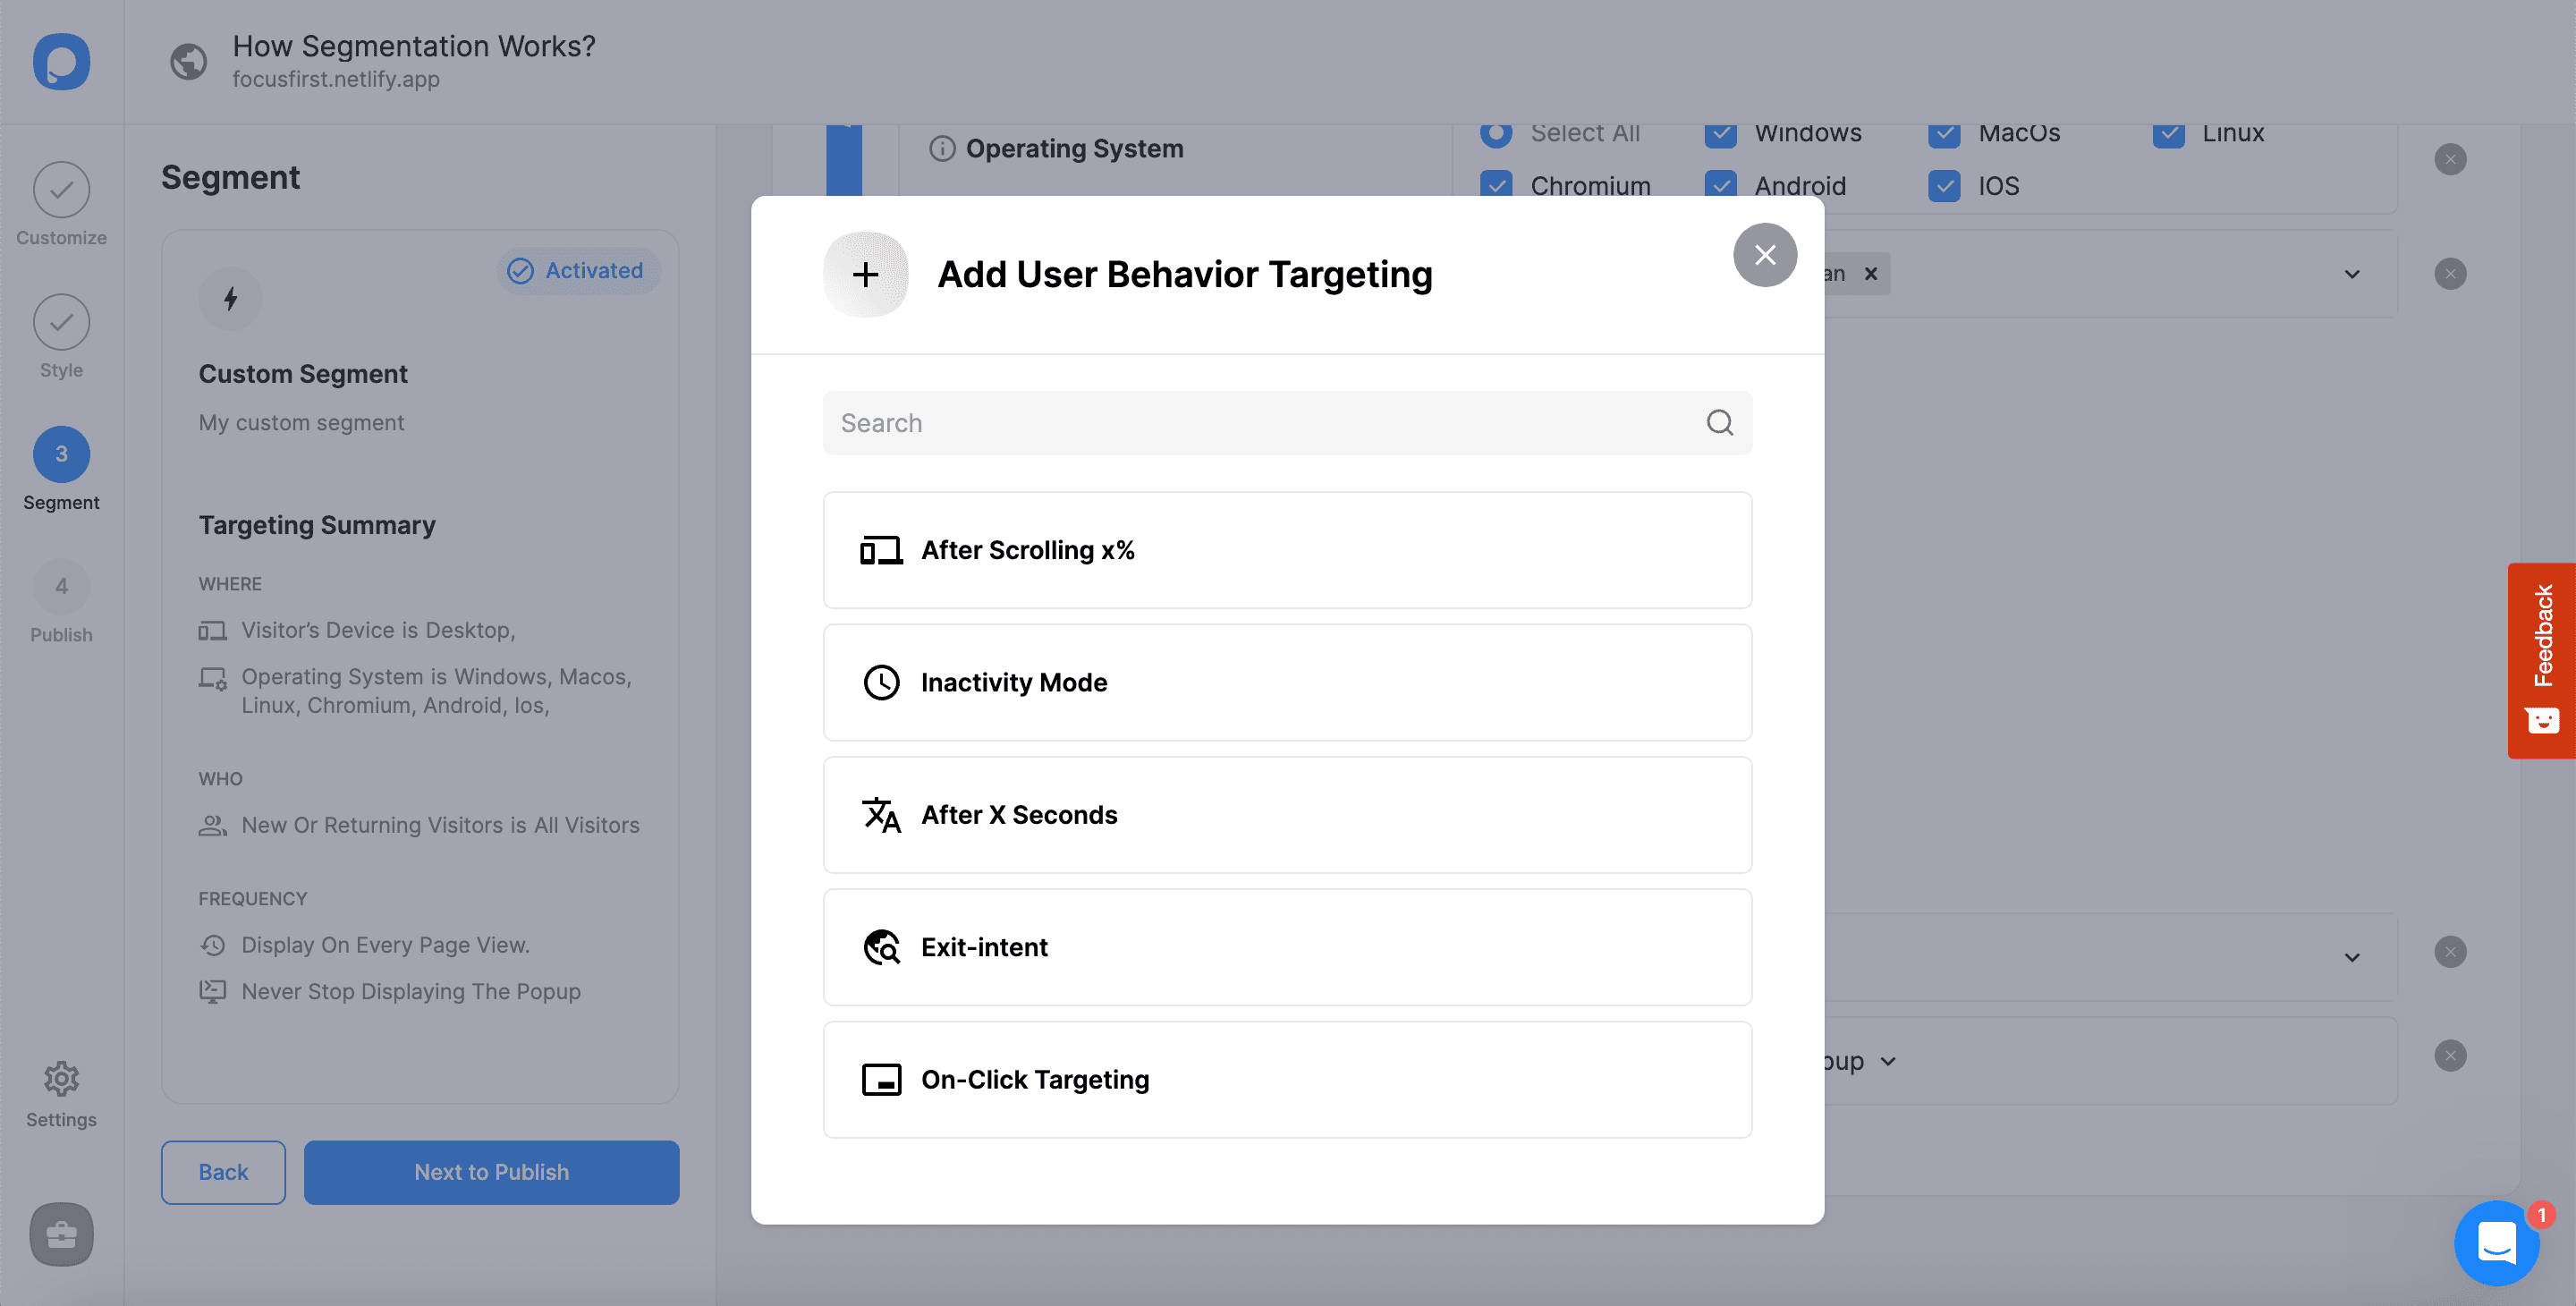
8. You can see the User Behavior Targeting modal after clicking “Add user behavior targeting.”
9. The last part is “Frequency Settings,” where the frequency of popup appearance is determined.
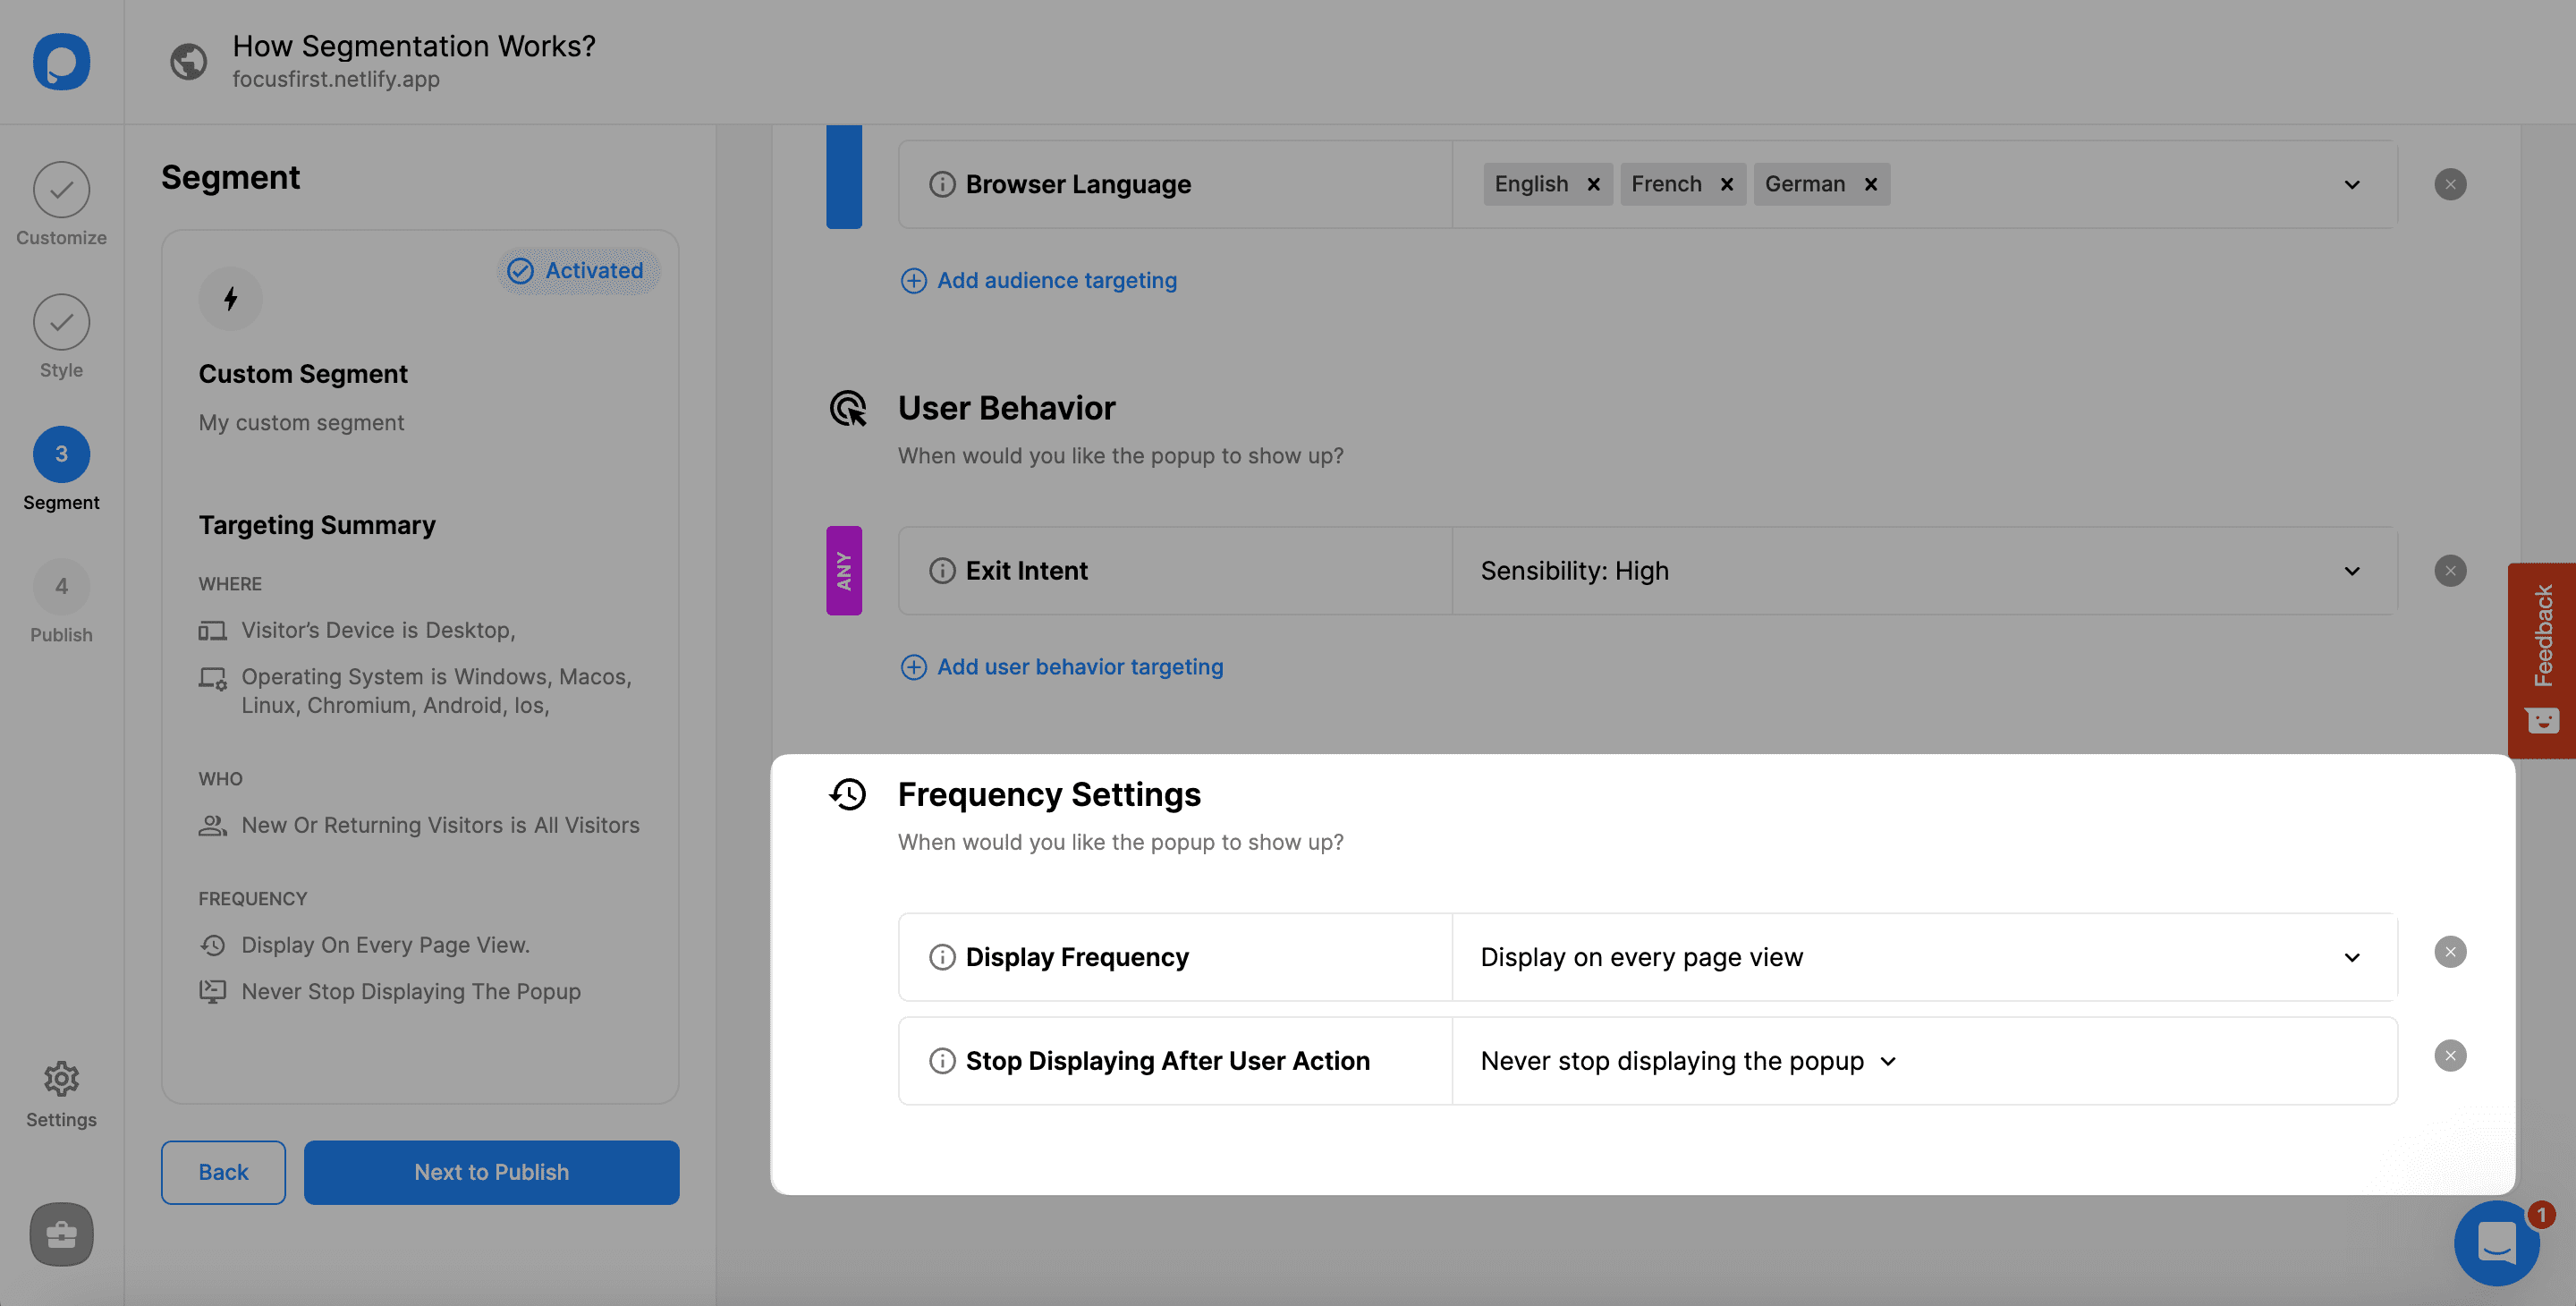
You can configure them on the related dropdowns. For more information about the frequency settings, please take a look at Popup Display Frequency Settings.
10. When you complete all the segments, you need to scroll up and click “Save” to save all the arrangements.
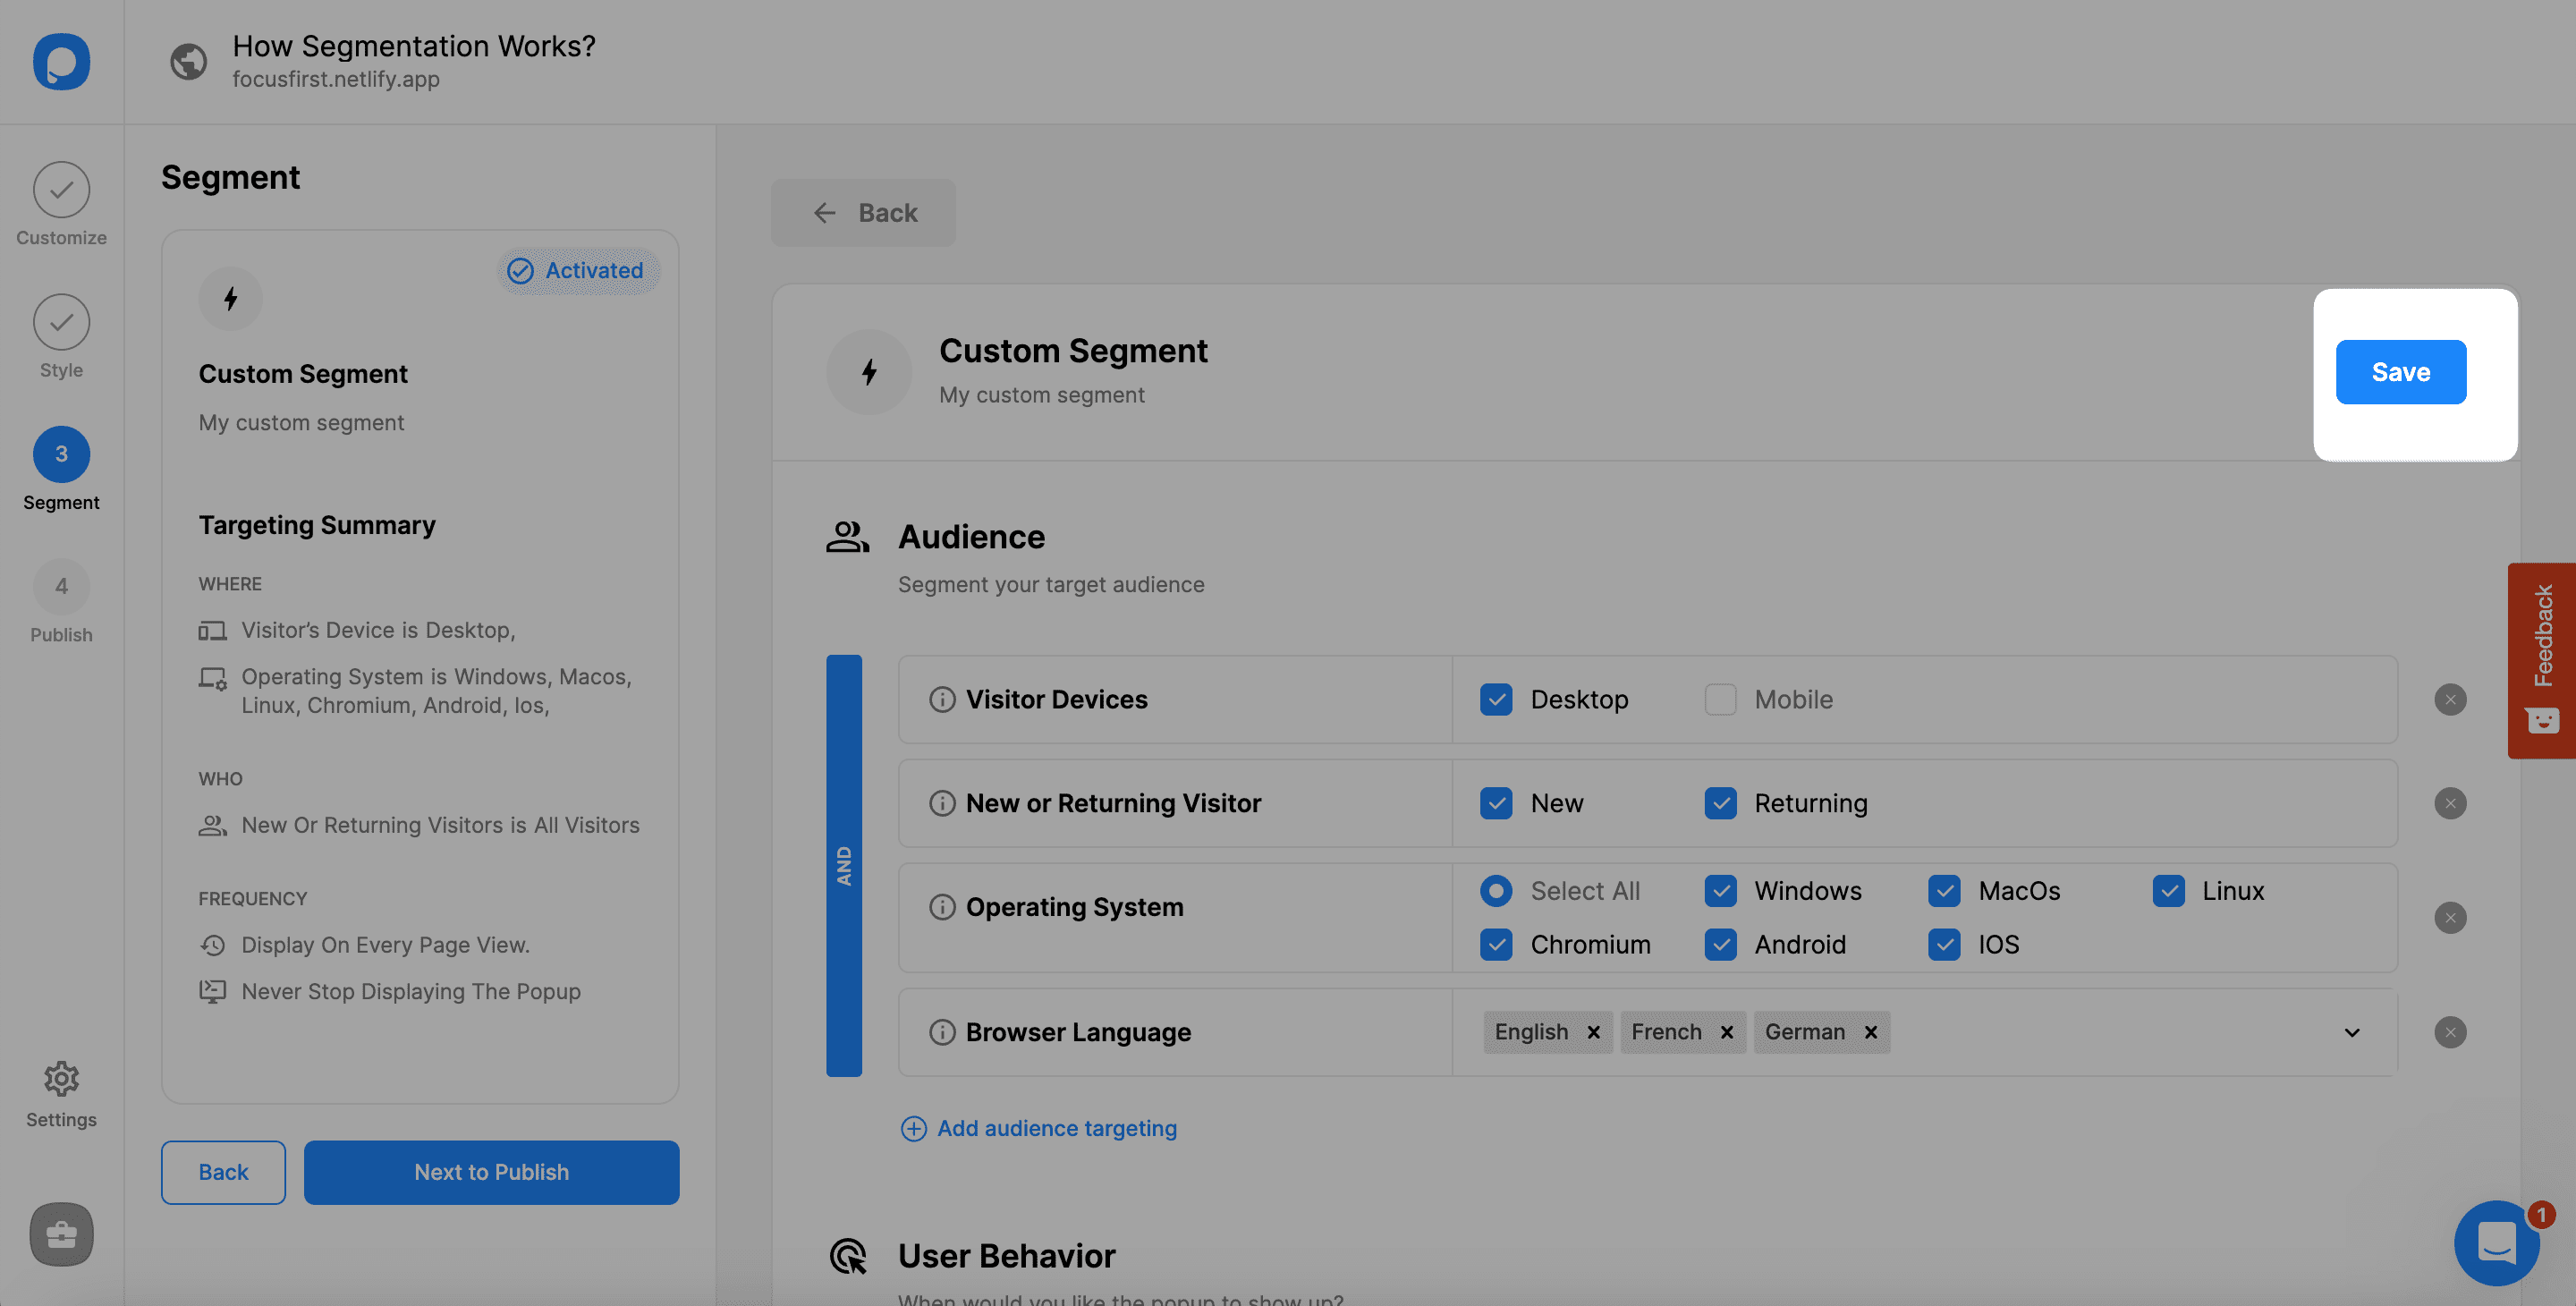
You can also see the Targeting Summary of your Custom Segment on the left side easily after you save the changes.
You’re ready to publish your popup with custom segmentation options.
Don’t forget that you need to decide your segmentation based on the behavior and timing of your audience to make the most of your campaigns.
Find your target audience and then segment for your campaigns.
While doing so, feel free to contact us if you have any questions in your mind.


