Increase Sales Conversion
Can’t turn your site traffic into sales?
Reduce Cart Abandonment
Your customers abandoning their carts?
Promote Products & Offers
Make potential customers notice special offers.
Collect Form Submission
Struggling to collect form submissions?
Get More Phone Calls
Let them call you directly via popups.
Grow Email List
Having trouble growing your email list?
Gamify Your Campaign
Choose your offer and let the game begin.
Make Announcement
Make sure important news unmissed.
Increase User Engagement
Keep visitors & customers on your site longer.
Collect Feedback & Surveys
Can’t draw attention to your surveys?
Facilitate Social Sharing
Grow social media followers and likes!
# Geo-Located Targeting
Geo-targeting allows your popup campaigns to appear only to visitors from specific location/s. It’s one of the best practices if you have campaigns that target based on locations like a country or a city.
Your Popupsmart campaigns are set to display on all locations by default.
To customize geo-targeting, follow the steps below after opening your Popupsmart dashboard and clicking “Edit” a campaign or creating a new campaign.
But remember, you can always use Popupsmart’s ready-to-use popup templates equipped with precise segmentation options.
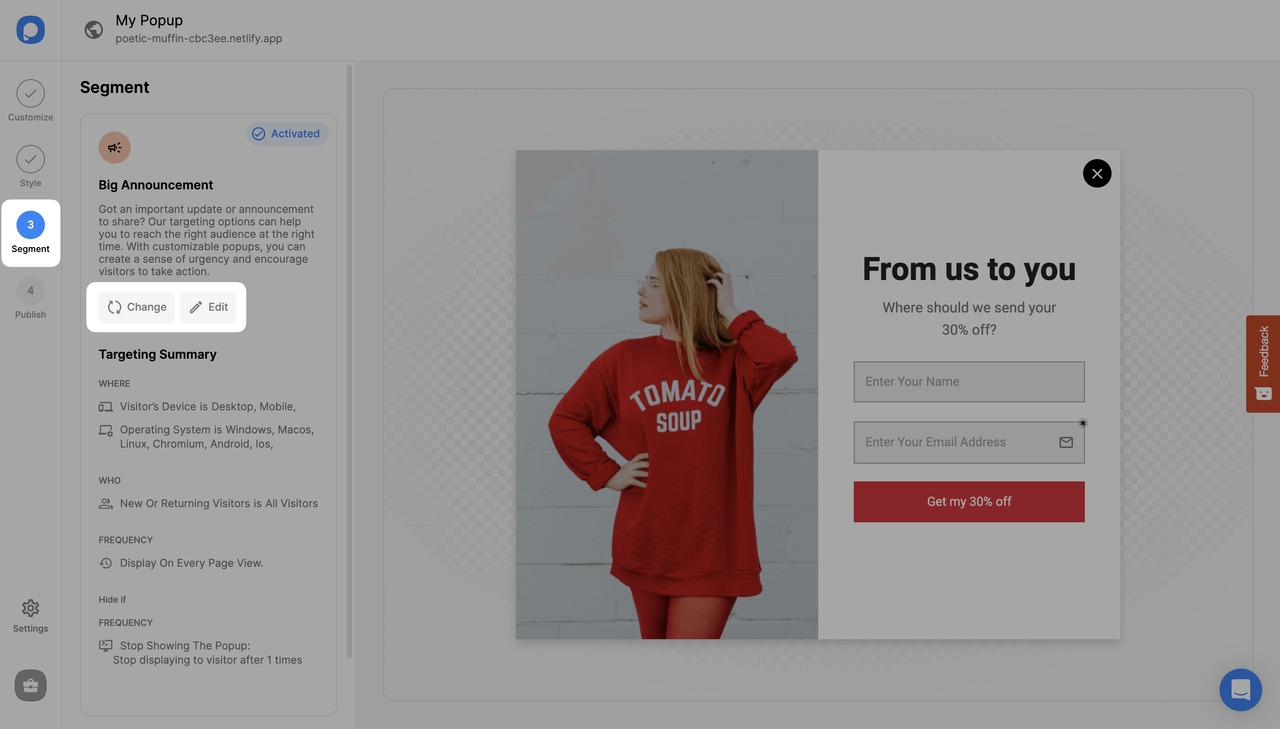
1. On the popup builder screen, navigate to the “Segment” section and click “Edit Segment.” (If it’s a new campaign, click the two circular arrows to choose a predefined segment or create one from scratch in “My Segment.”)
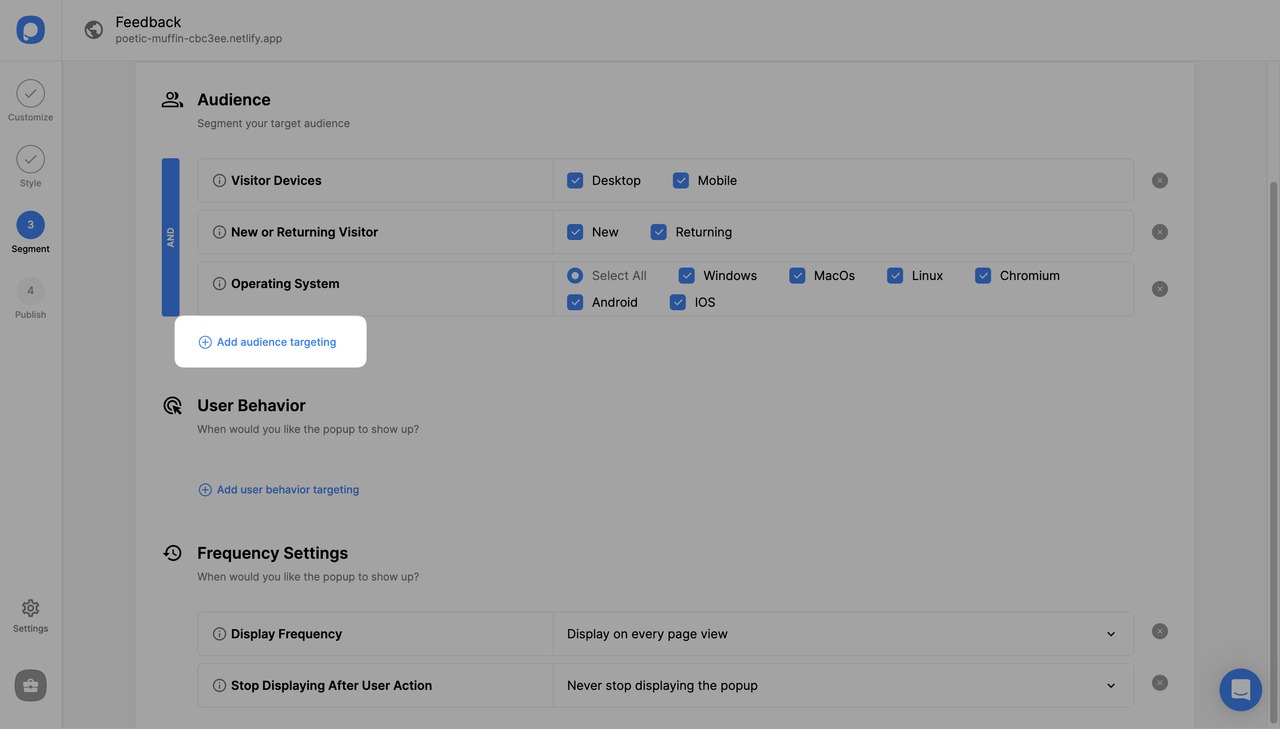
2. Then, click “Add audience targeting” under "Audience".
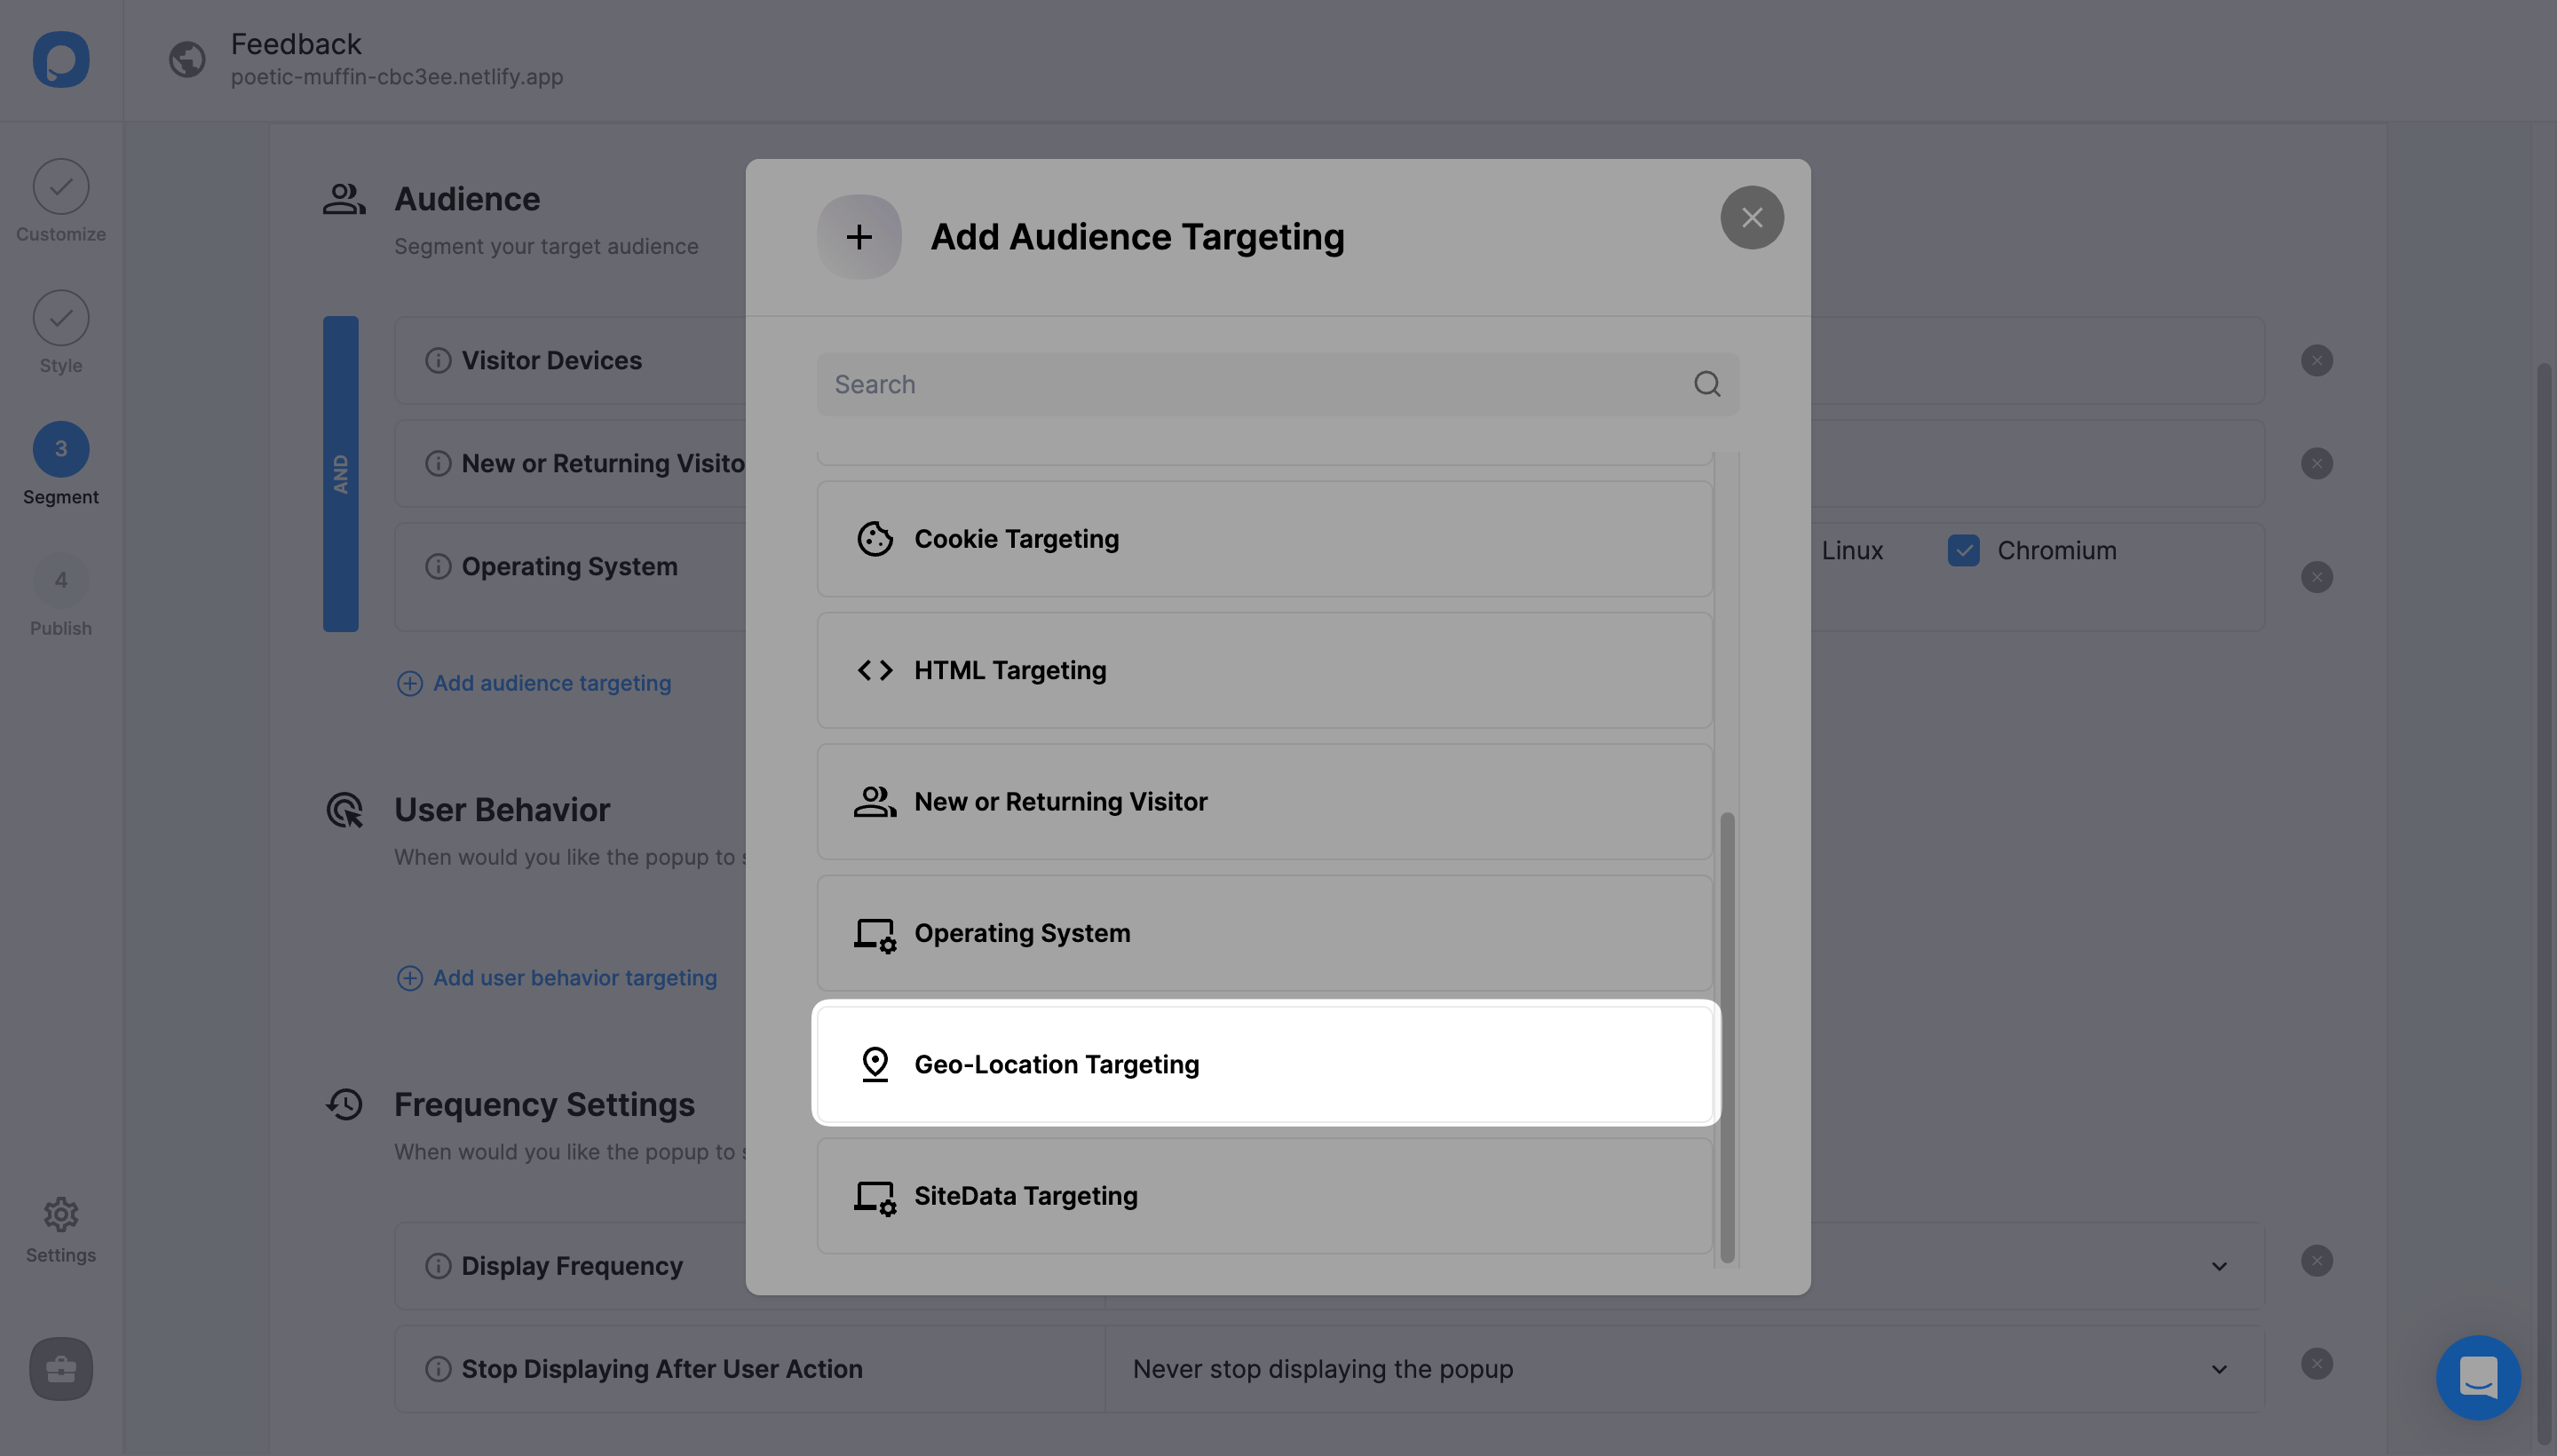
3. Click on “Add” next to “Geo-Location Targeting”.
4. There are three options to choose from.
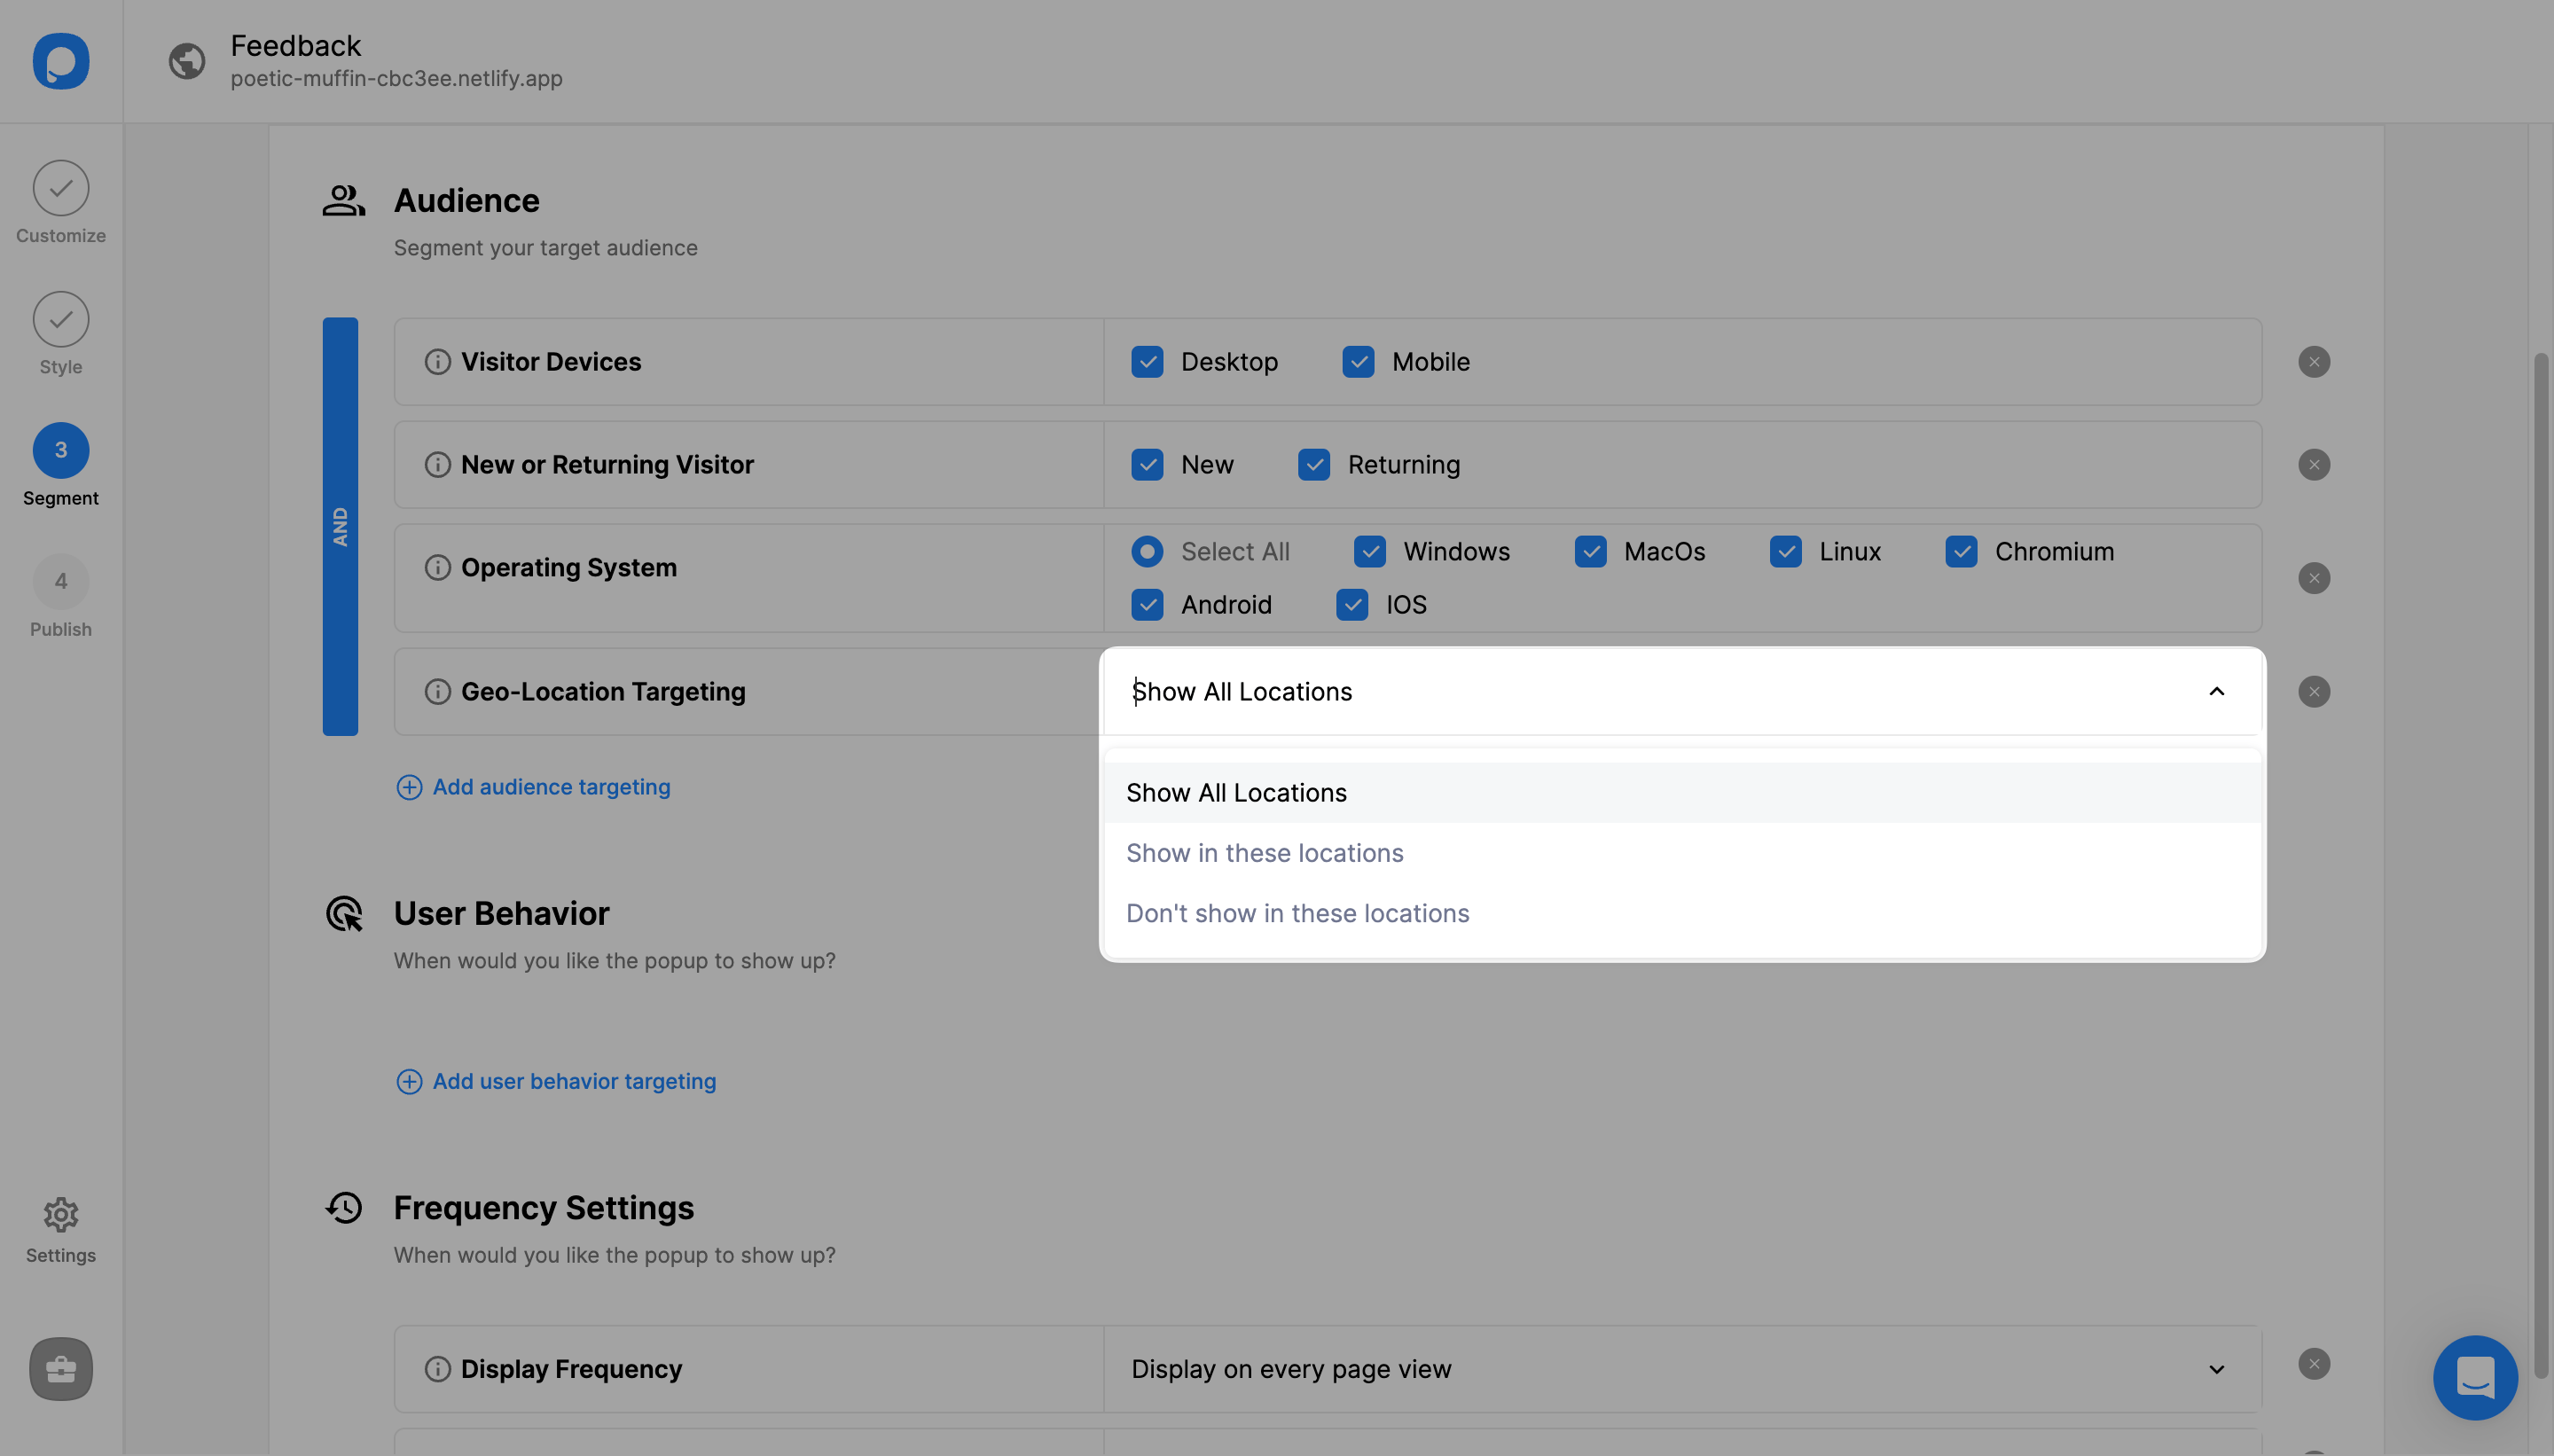
5. If you select one of the last two options, click on the drop-down to choose a “Country”, “Region” and “City” or you can simply type in a location name.
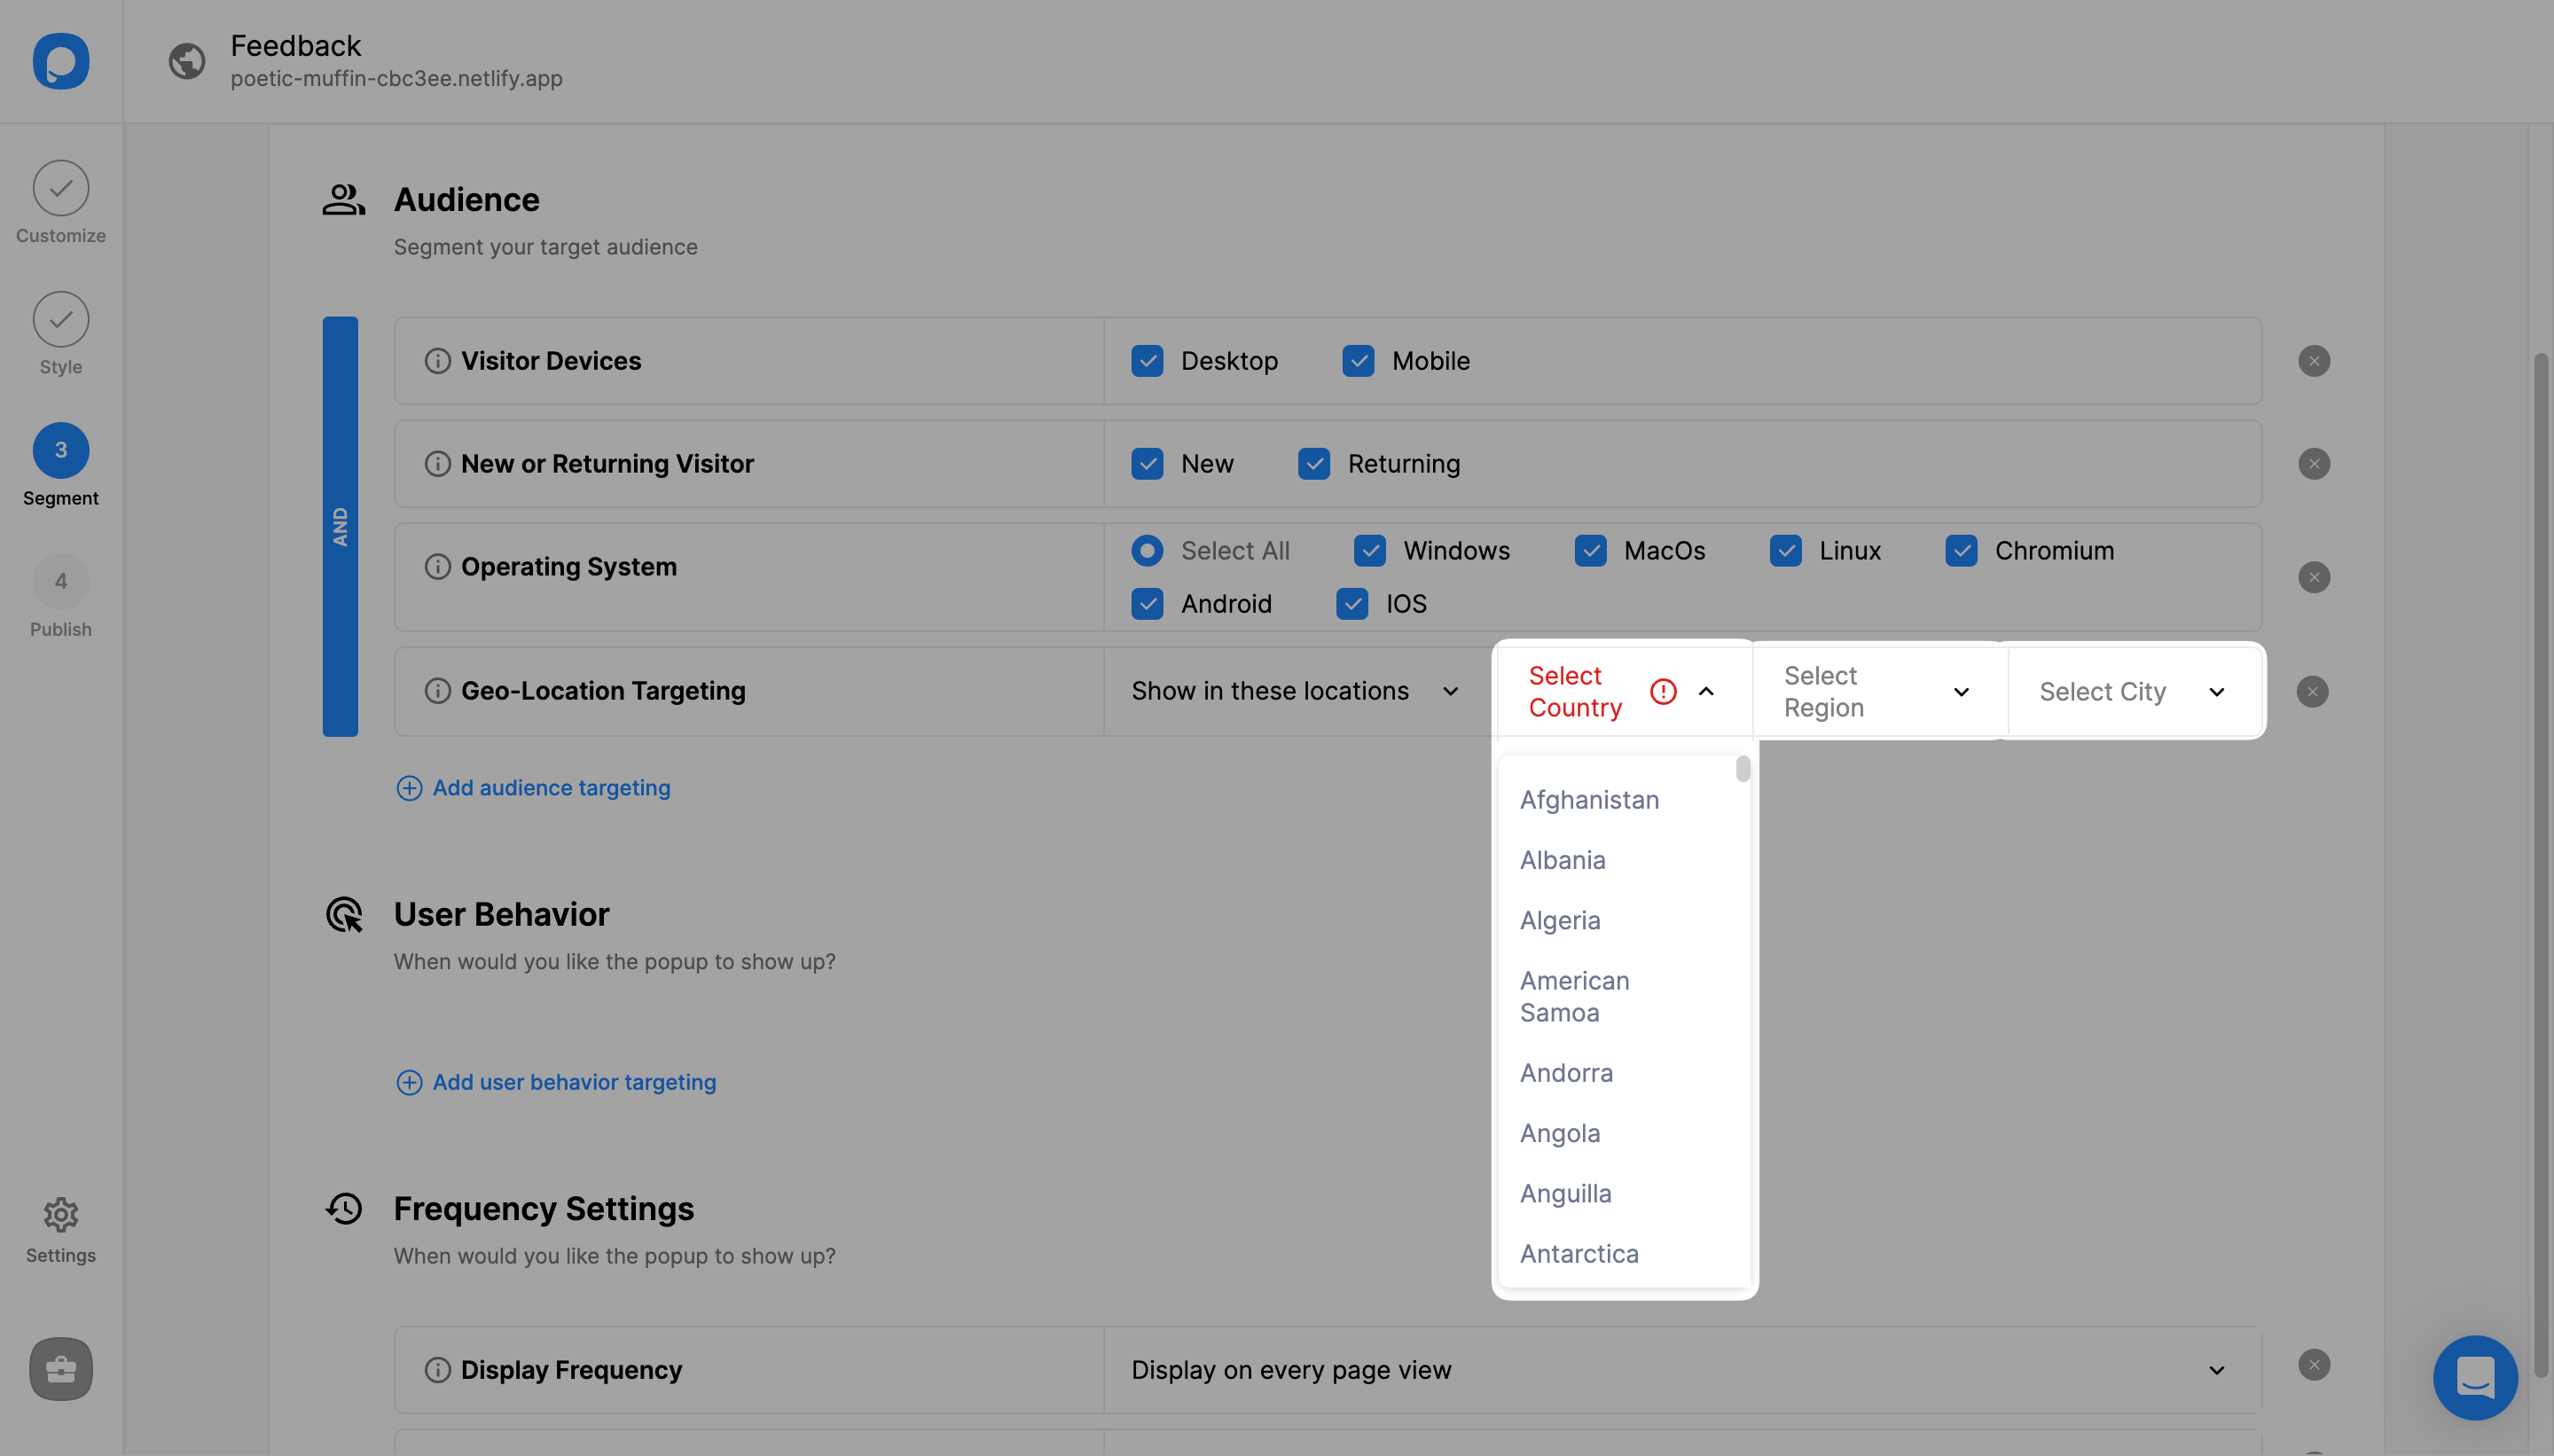
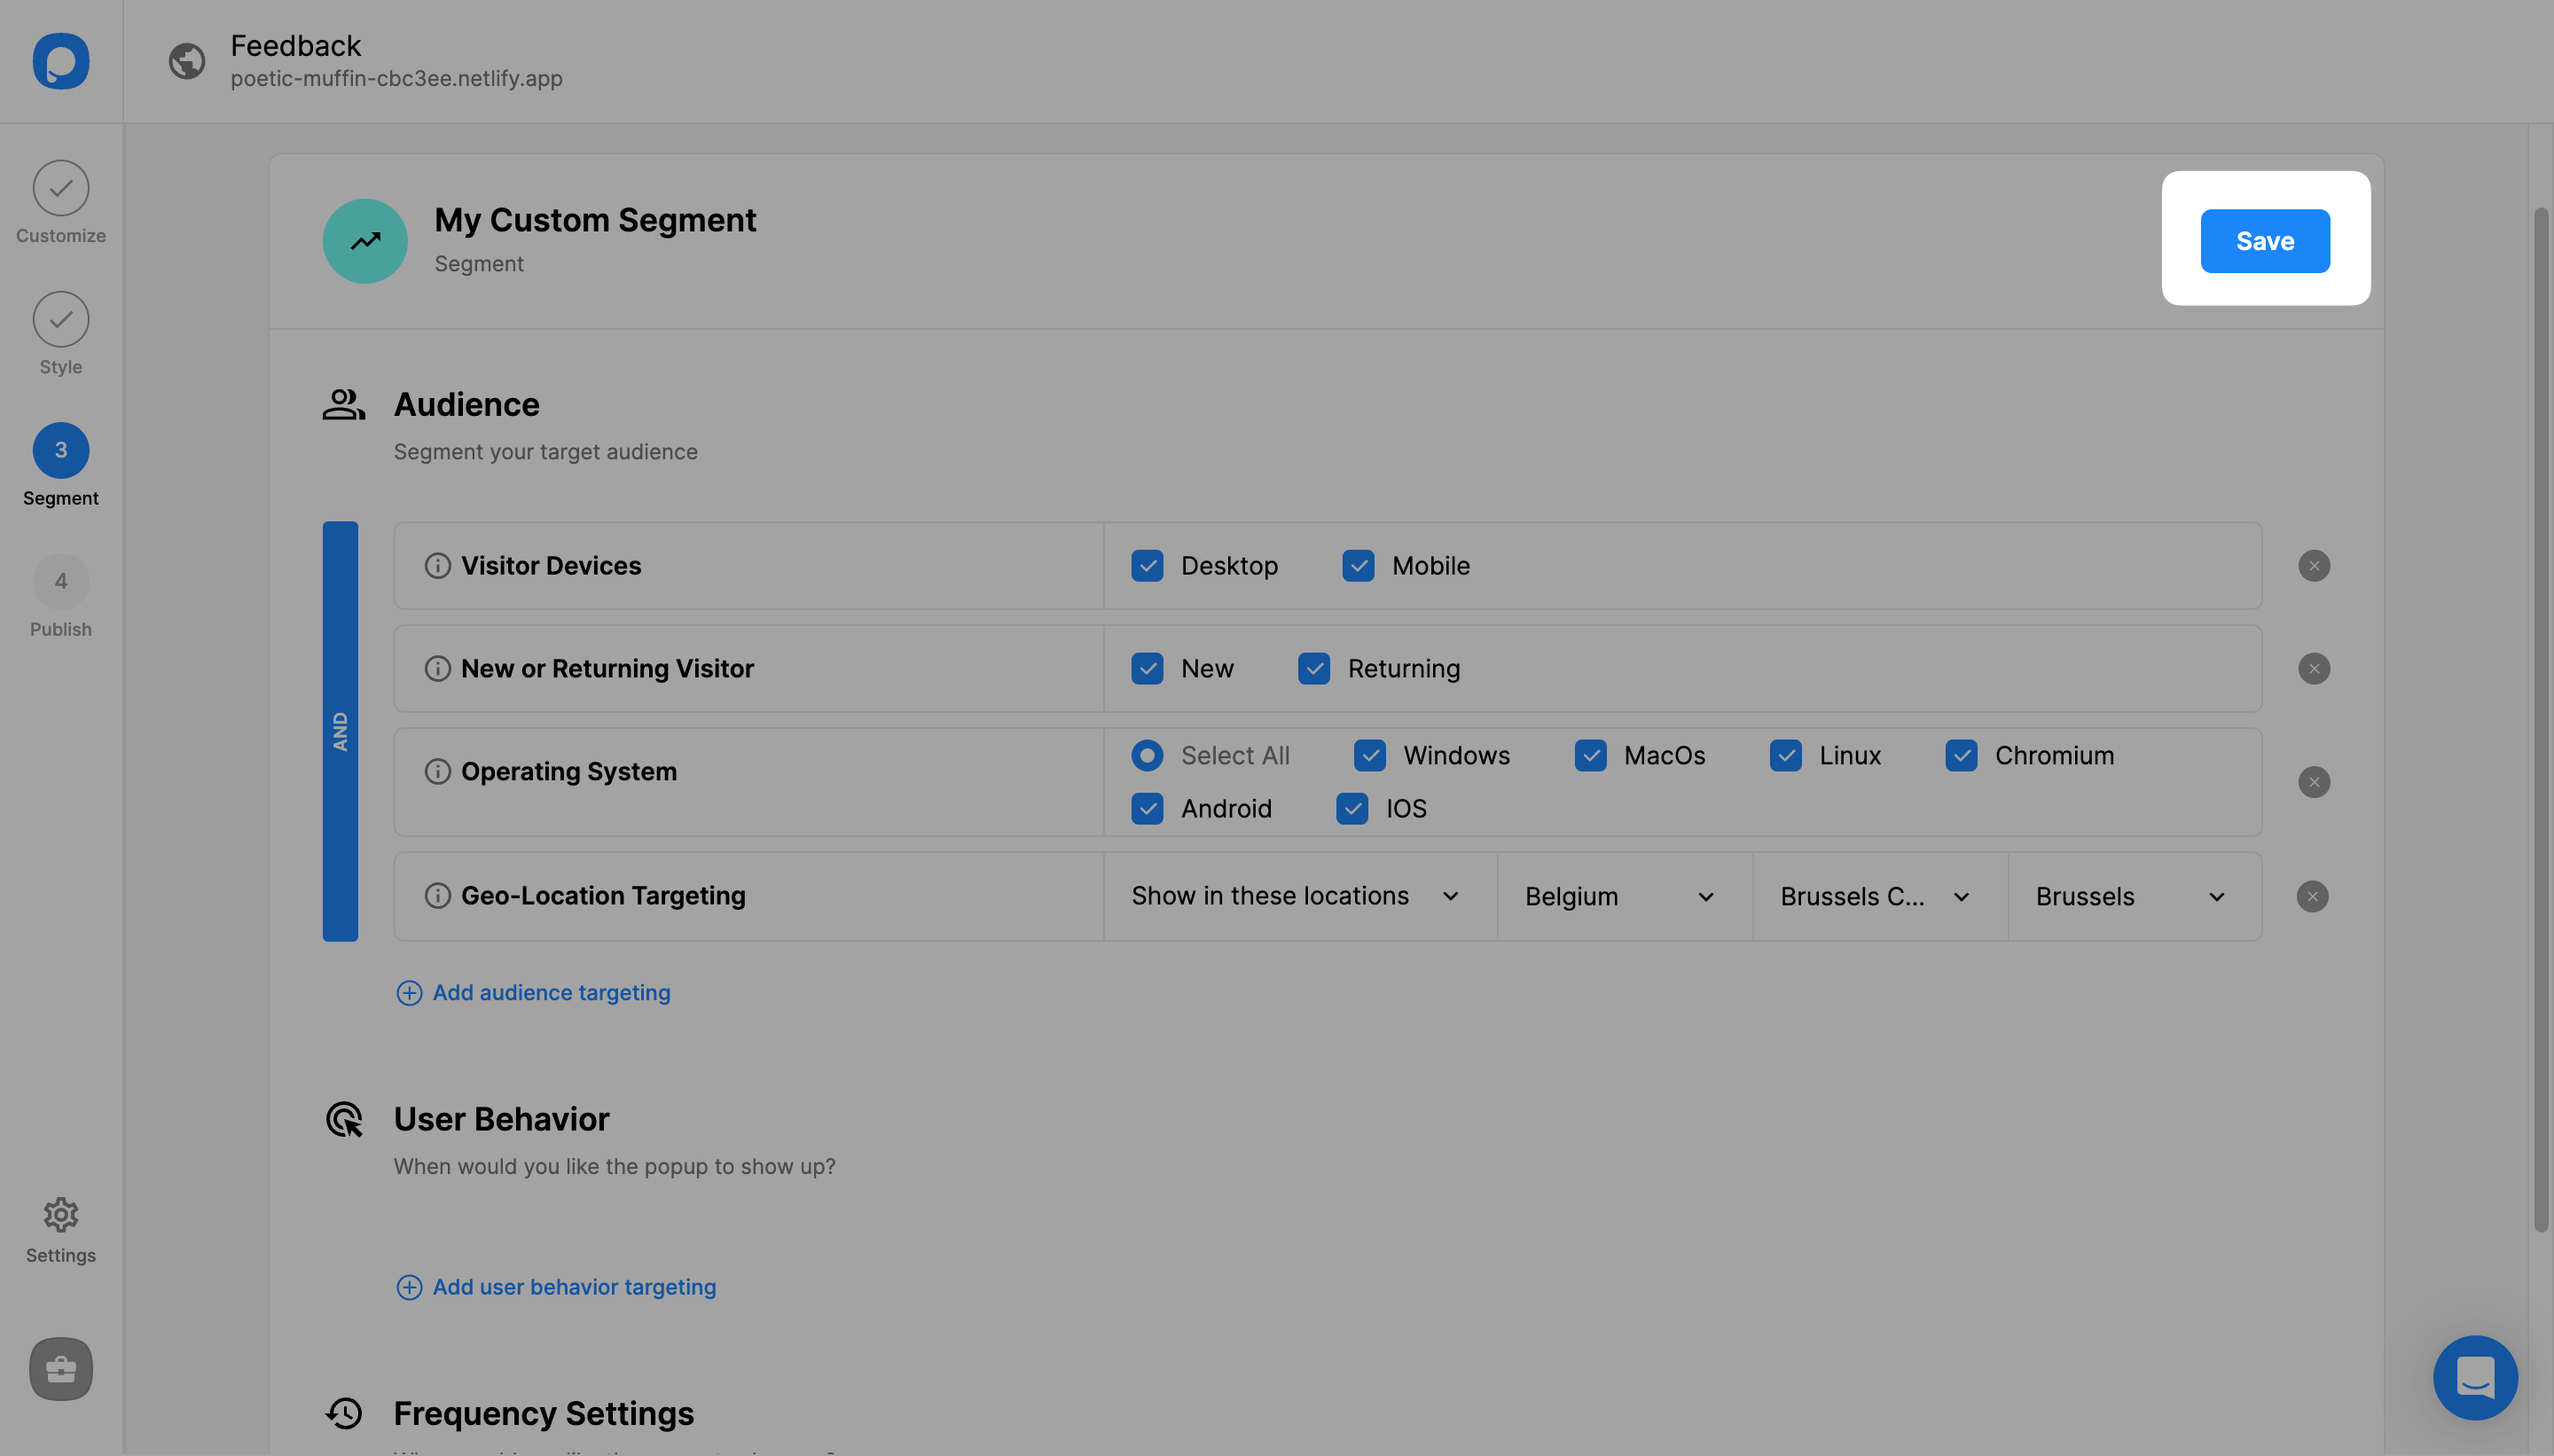
6. Once you have configured location-specific settings, click "Save" from the upper-right corner.
Note that you can add more than one location by repeating Step 3.
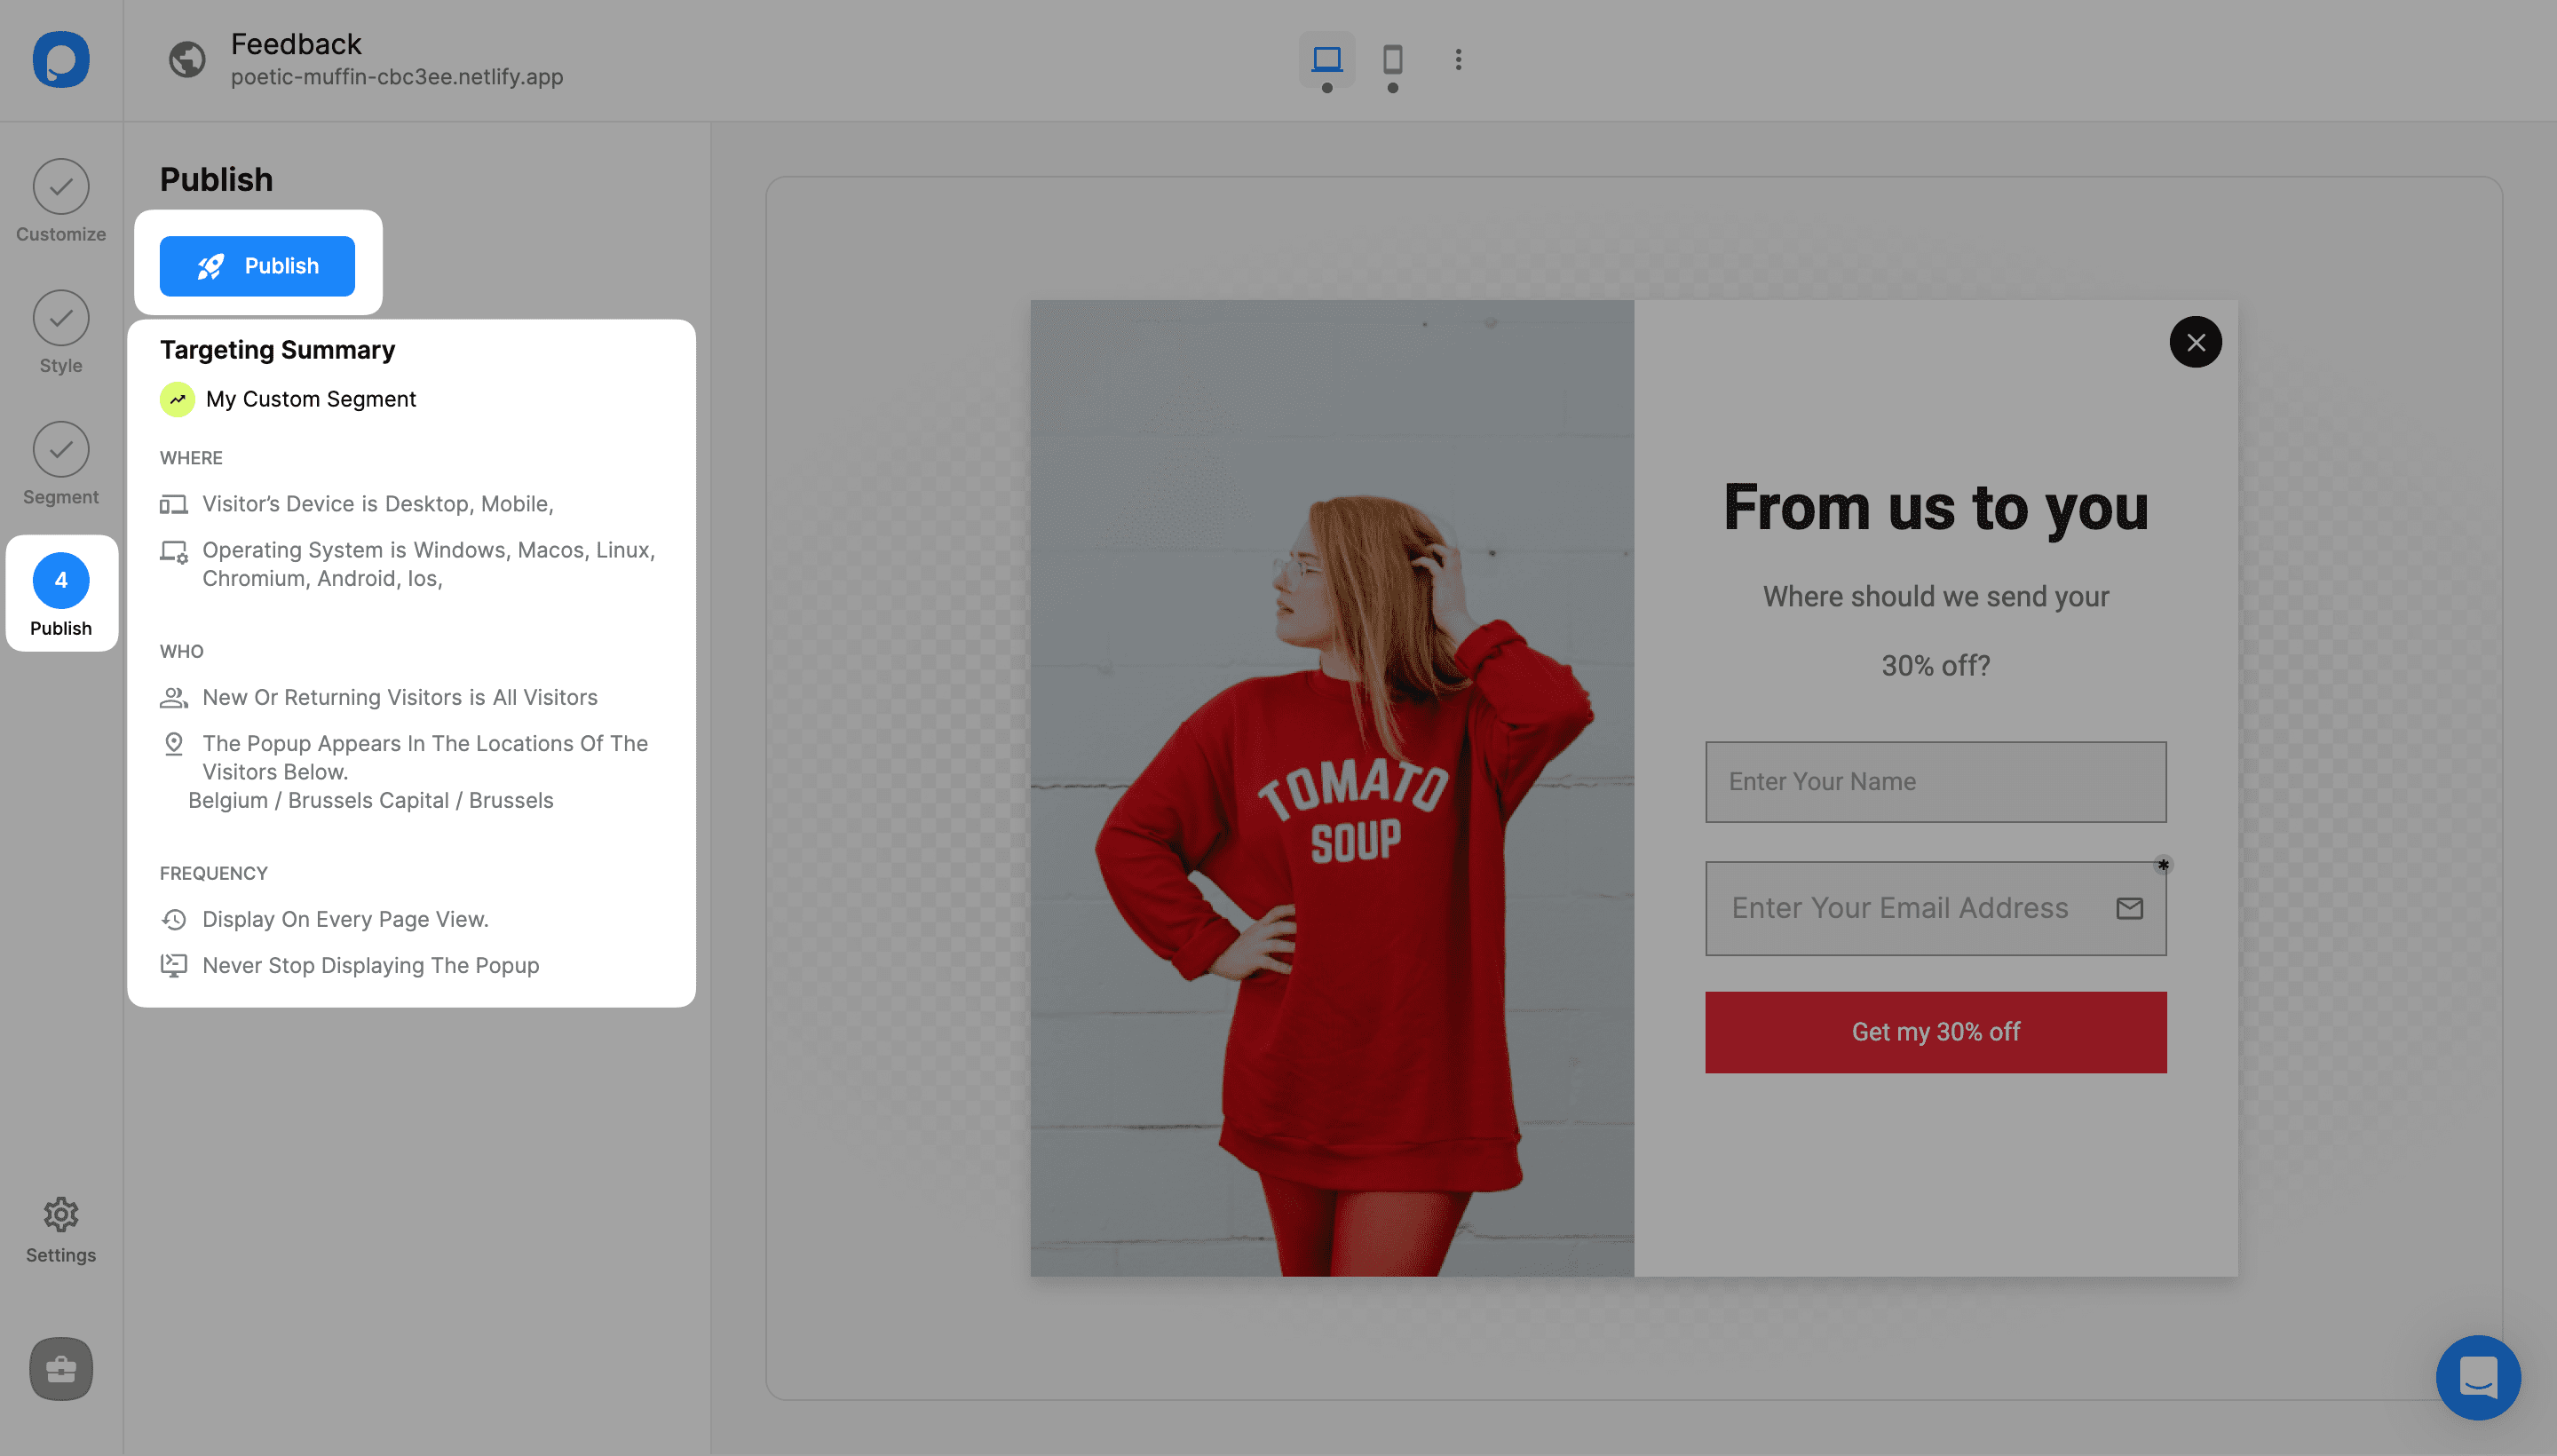
7. You can also continue with “Publish” from the left-hand panel to see all your current display settings, including the geo-location targeting you’ve just set up under “Targeting Summary”.
That’s it! Need a hand? Contact Popupsmart!


