Increase Sales Conversion
Can’t turn your site traffic into sales?
Reduce Cart Abandonment
Your customers abandoning their carts?
Promote Products & Offers
Make potential customers notice special offers.
Collect Form Submission
Struggling to collect form submissions?
Get More Phone Calls
Let them call you directly via popups.
Grow Email List
Having trouble growing your email list?
Gamify Your Campaign
Choose your offer and let the game begin.
Make Announcement
Make sure important news unmissed.
Increase User Engagement
Keep visitors & customers on your site longer.
Collect Feedback & Surveys
Can’t draw attention to your surveys?
Facilitate Social Sharing
Grow social media followers and likes!
# How to Integrate Klaviyo with Popupsmart?
Popupsmart supports Klaviyo integration so that you can effortlessly create Klaviyo popups in an easier and more advanced way.
Creating email popups and adding them to your website to gain new subscribers is possible with Popupsmart in a few minutes.
Follow this step-by-step guide to connect your Popupsmart account with your Klaviyo account.
To start the integration process, you need to have some default features
• You need to have a Klaviyo account.
• You need to have a list on your Klaviyo account by choosing ‘Lists and Segments’ under the Home tab.
• You need to verify your website on your Popupsmart account.
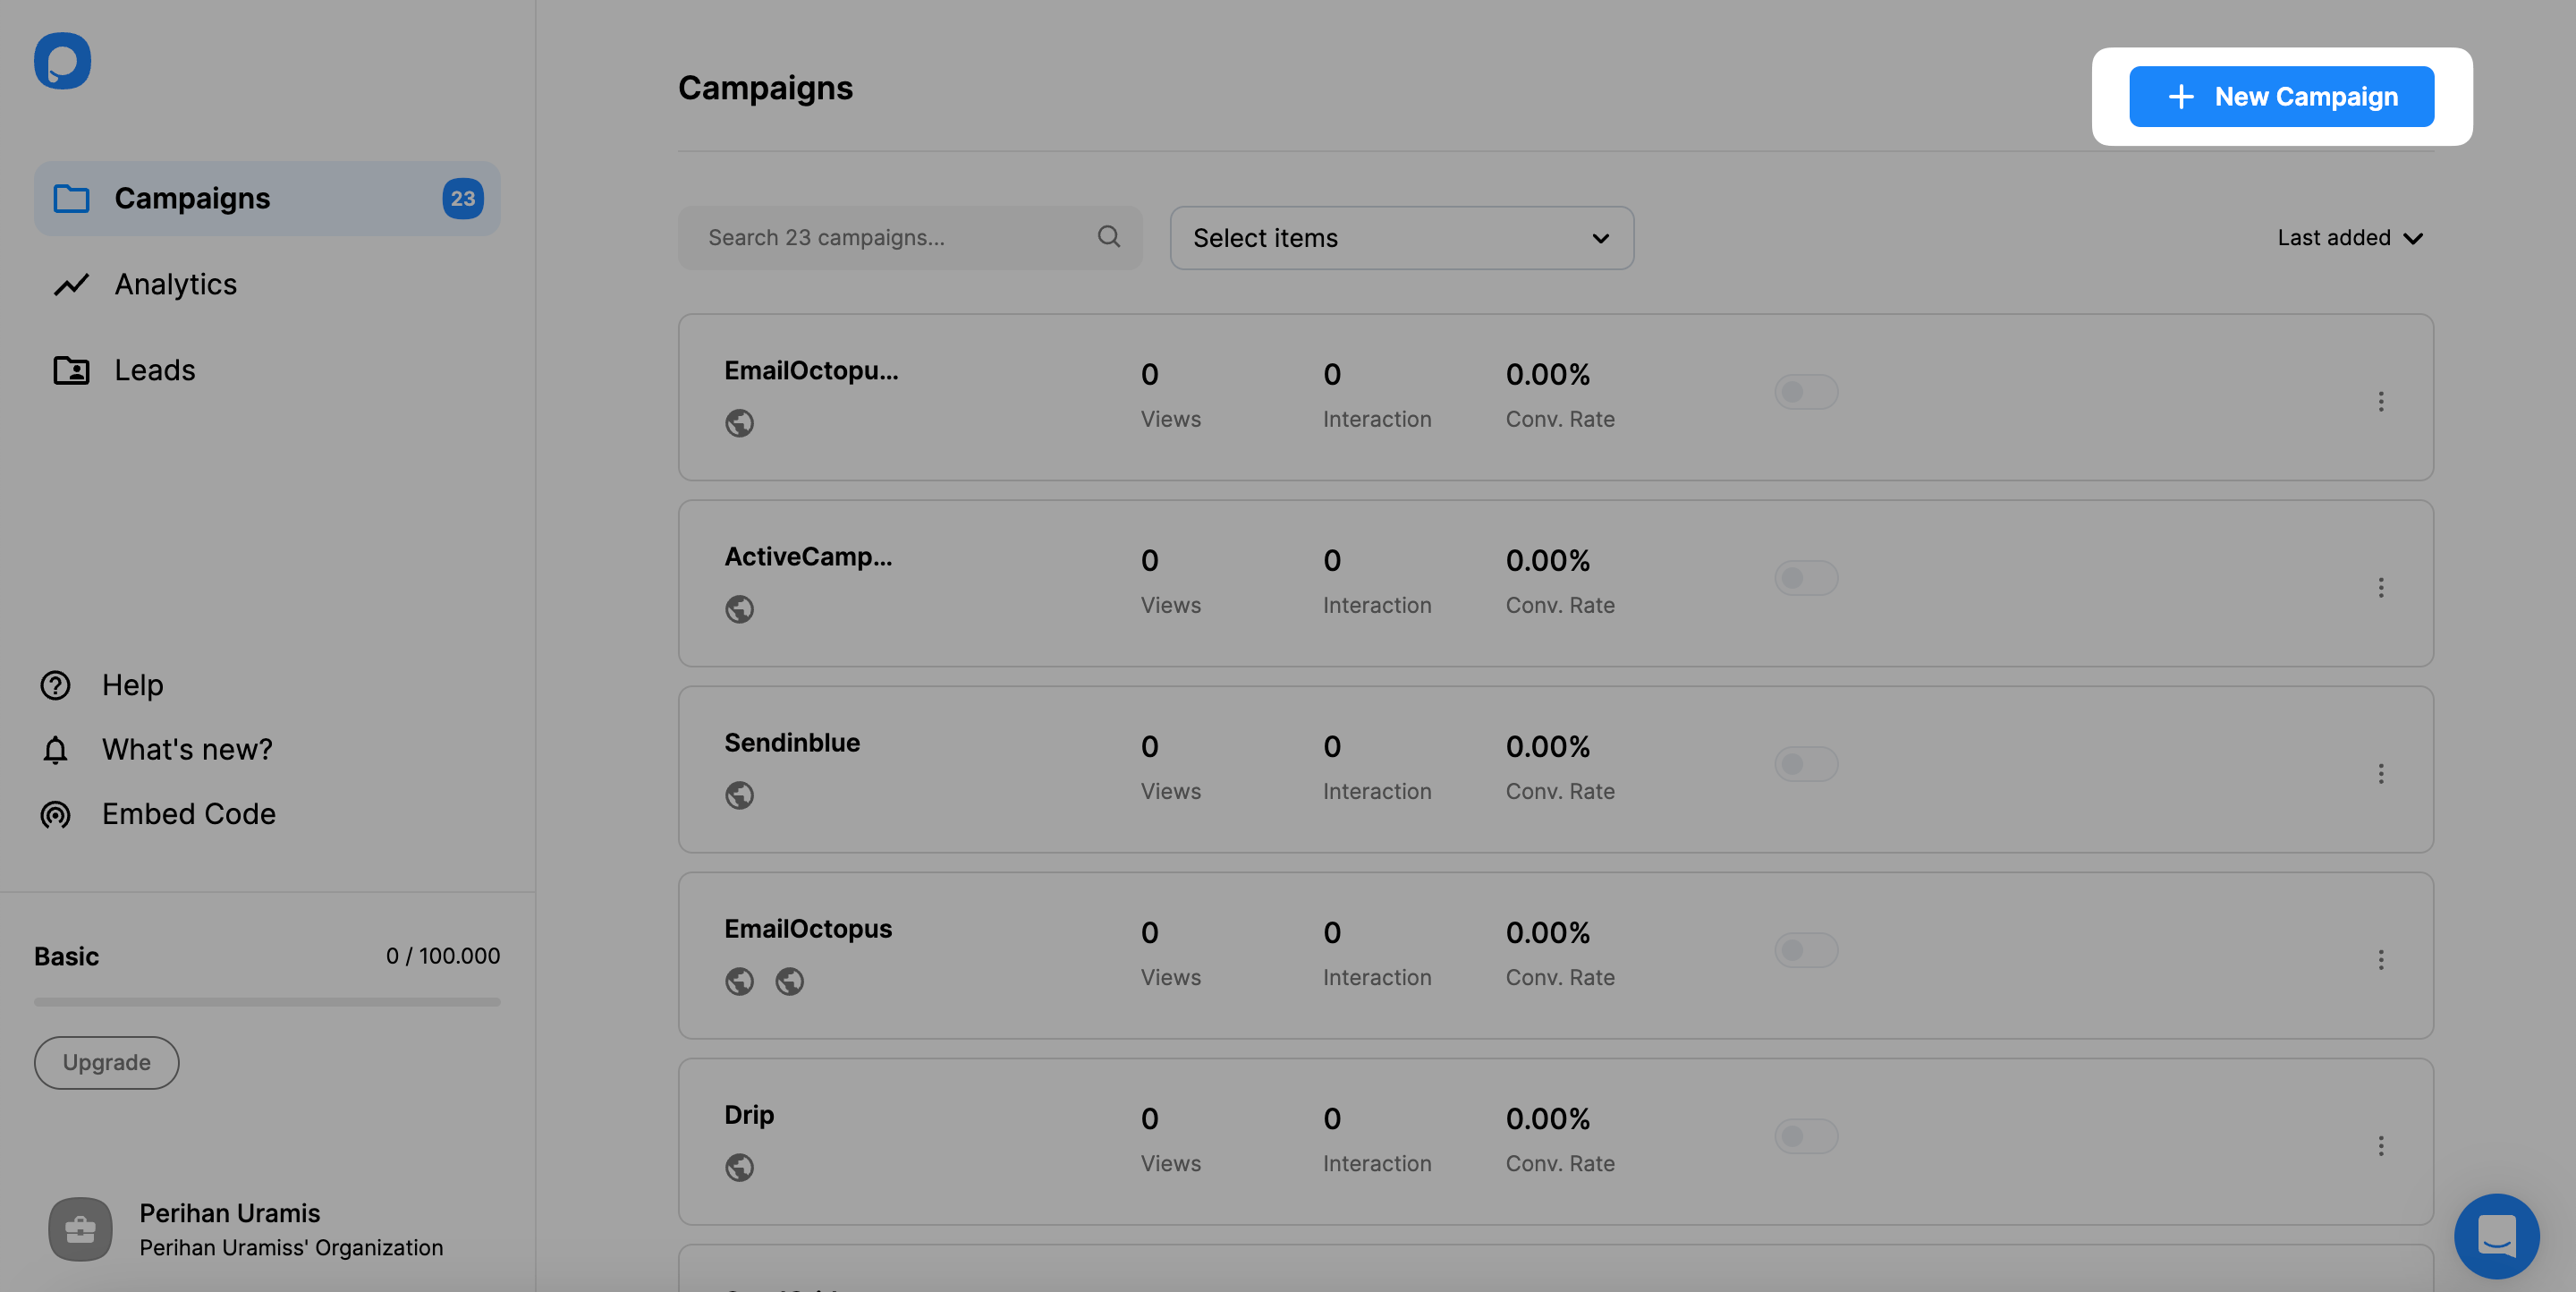
1. Firstly, sign in to your Popupsmart account and create a new campaign. You need to create a popup with a form element to integrate. Either choose a ready-made template or a blank popup.
2. Then, you need to click the form input element on the Customize step to start the integration.
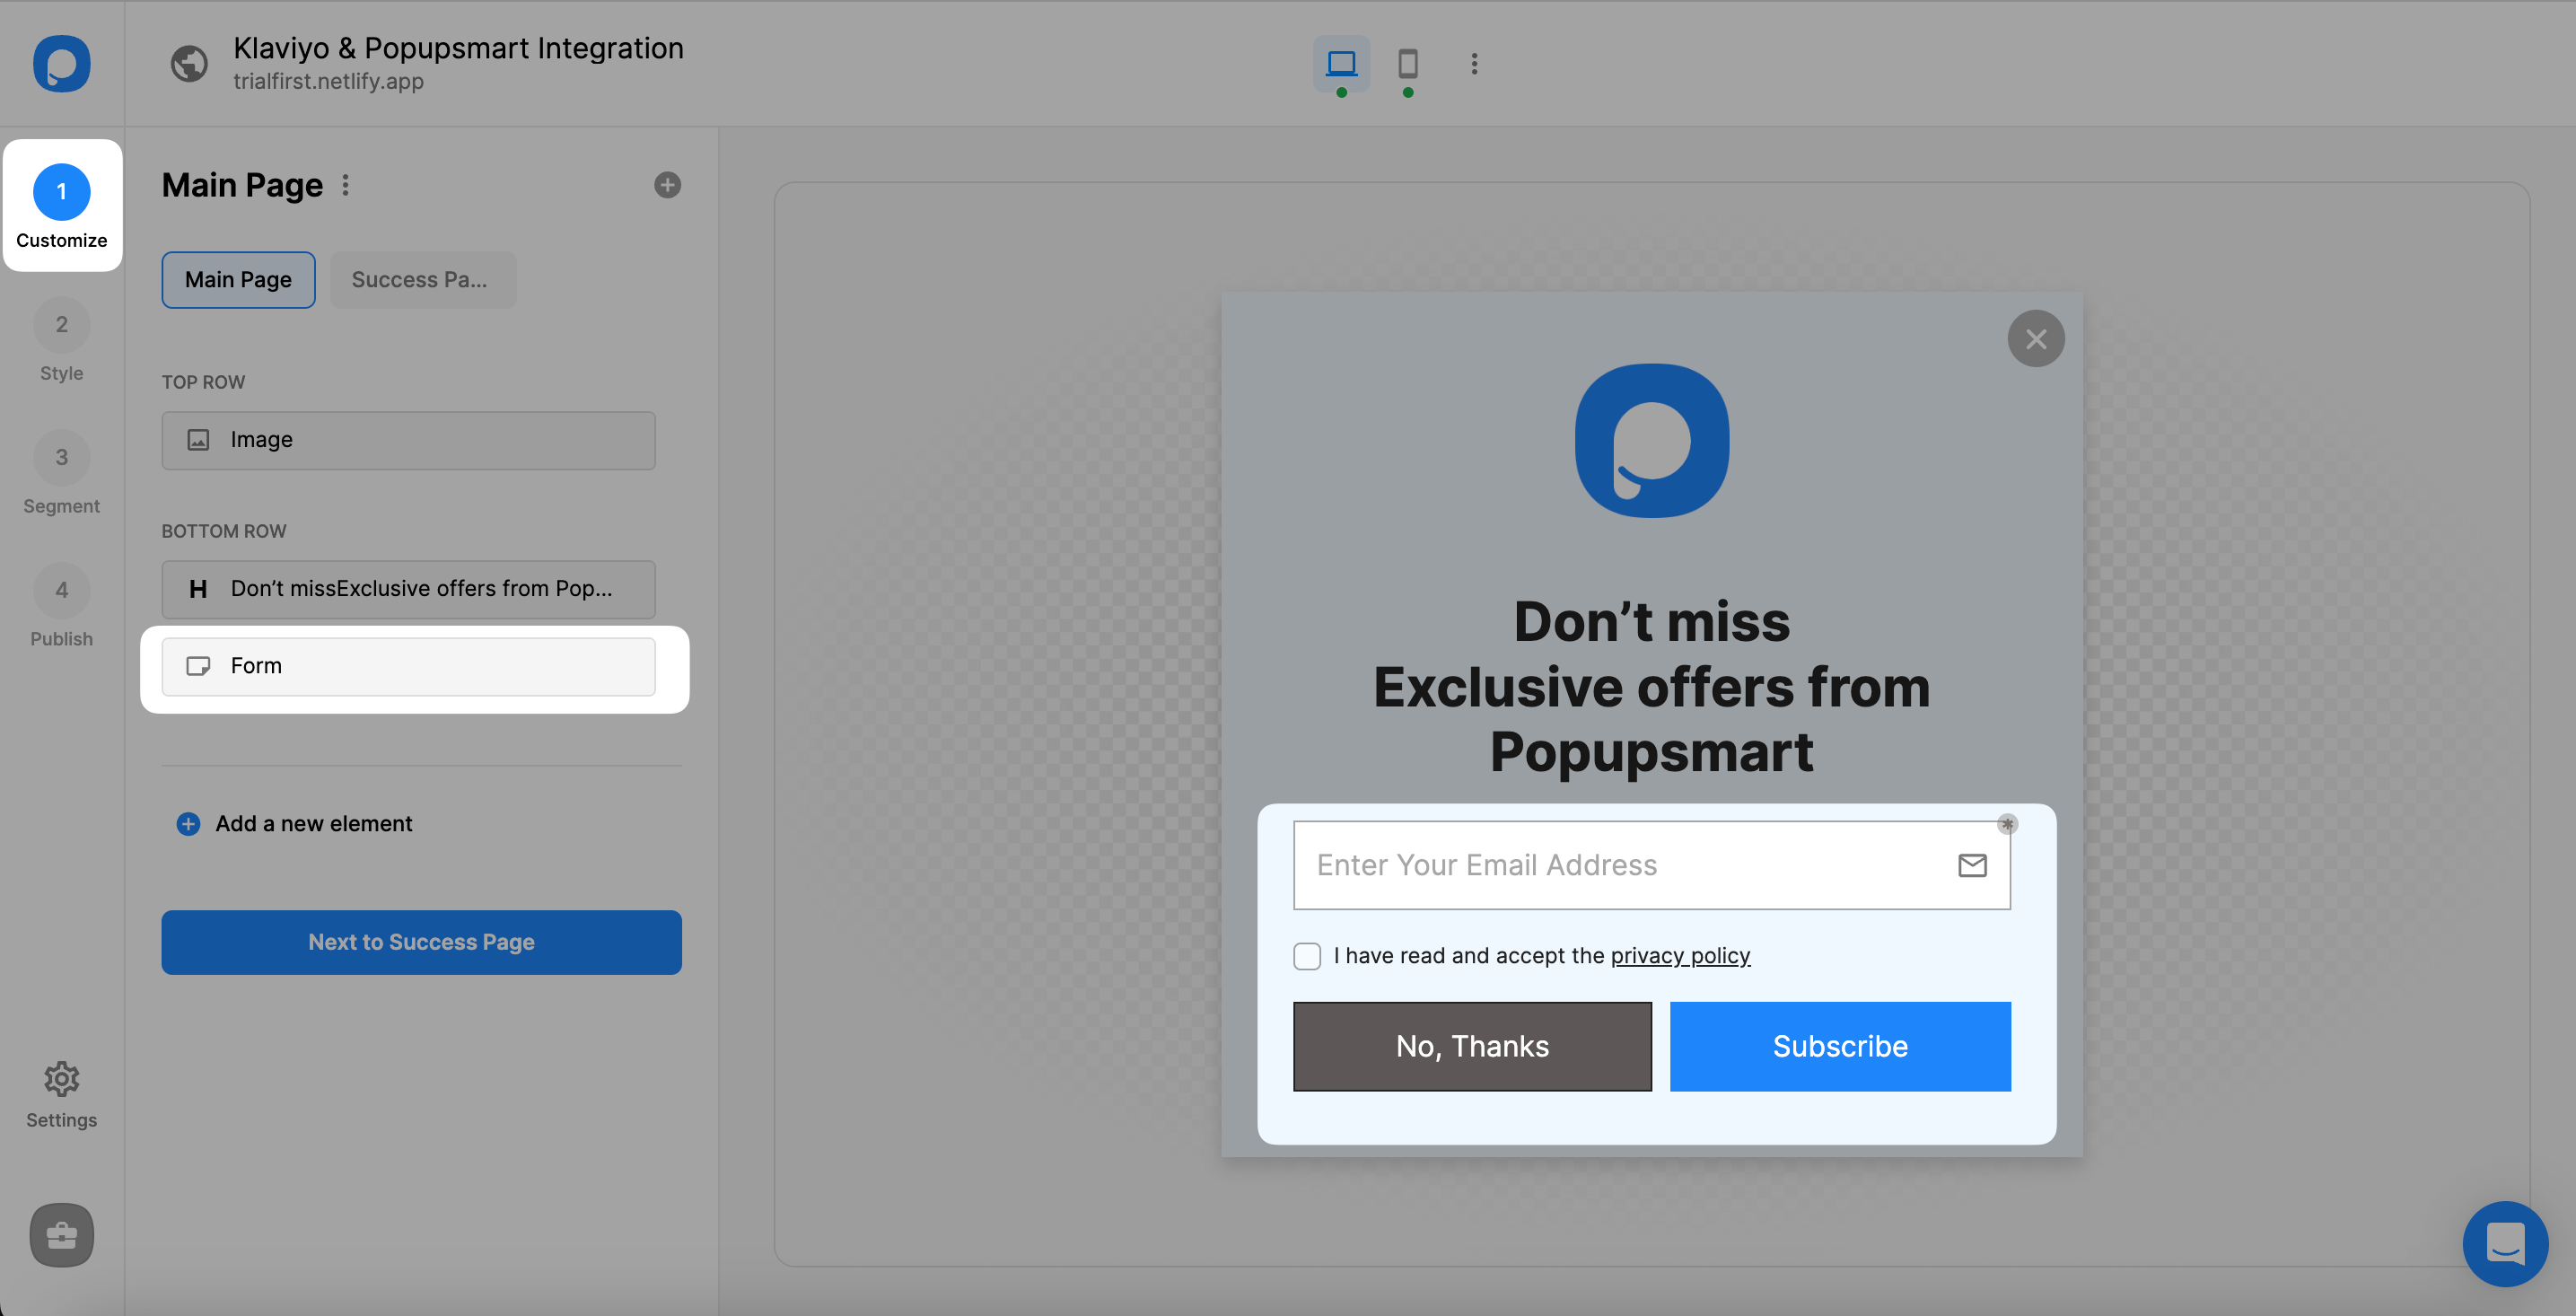
The integration can only be effective if there is a form input element to collect your data on your Klaviyo account. Also, you should know that you can only collect the data that is shared with you.
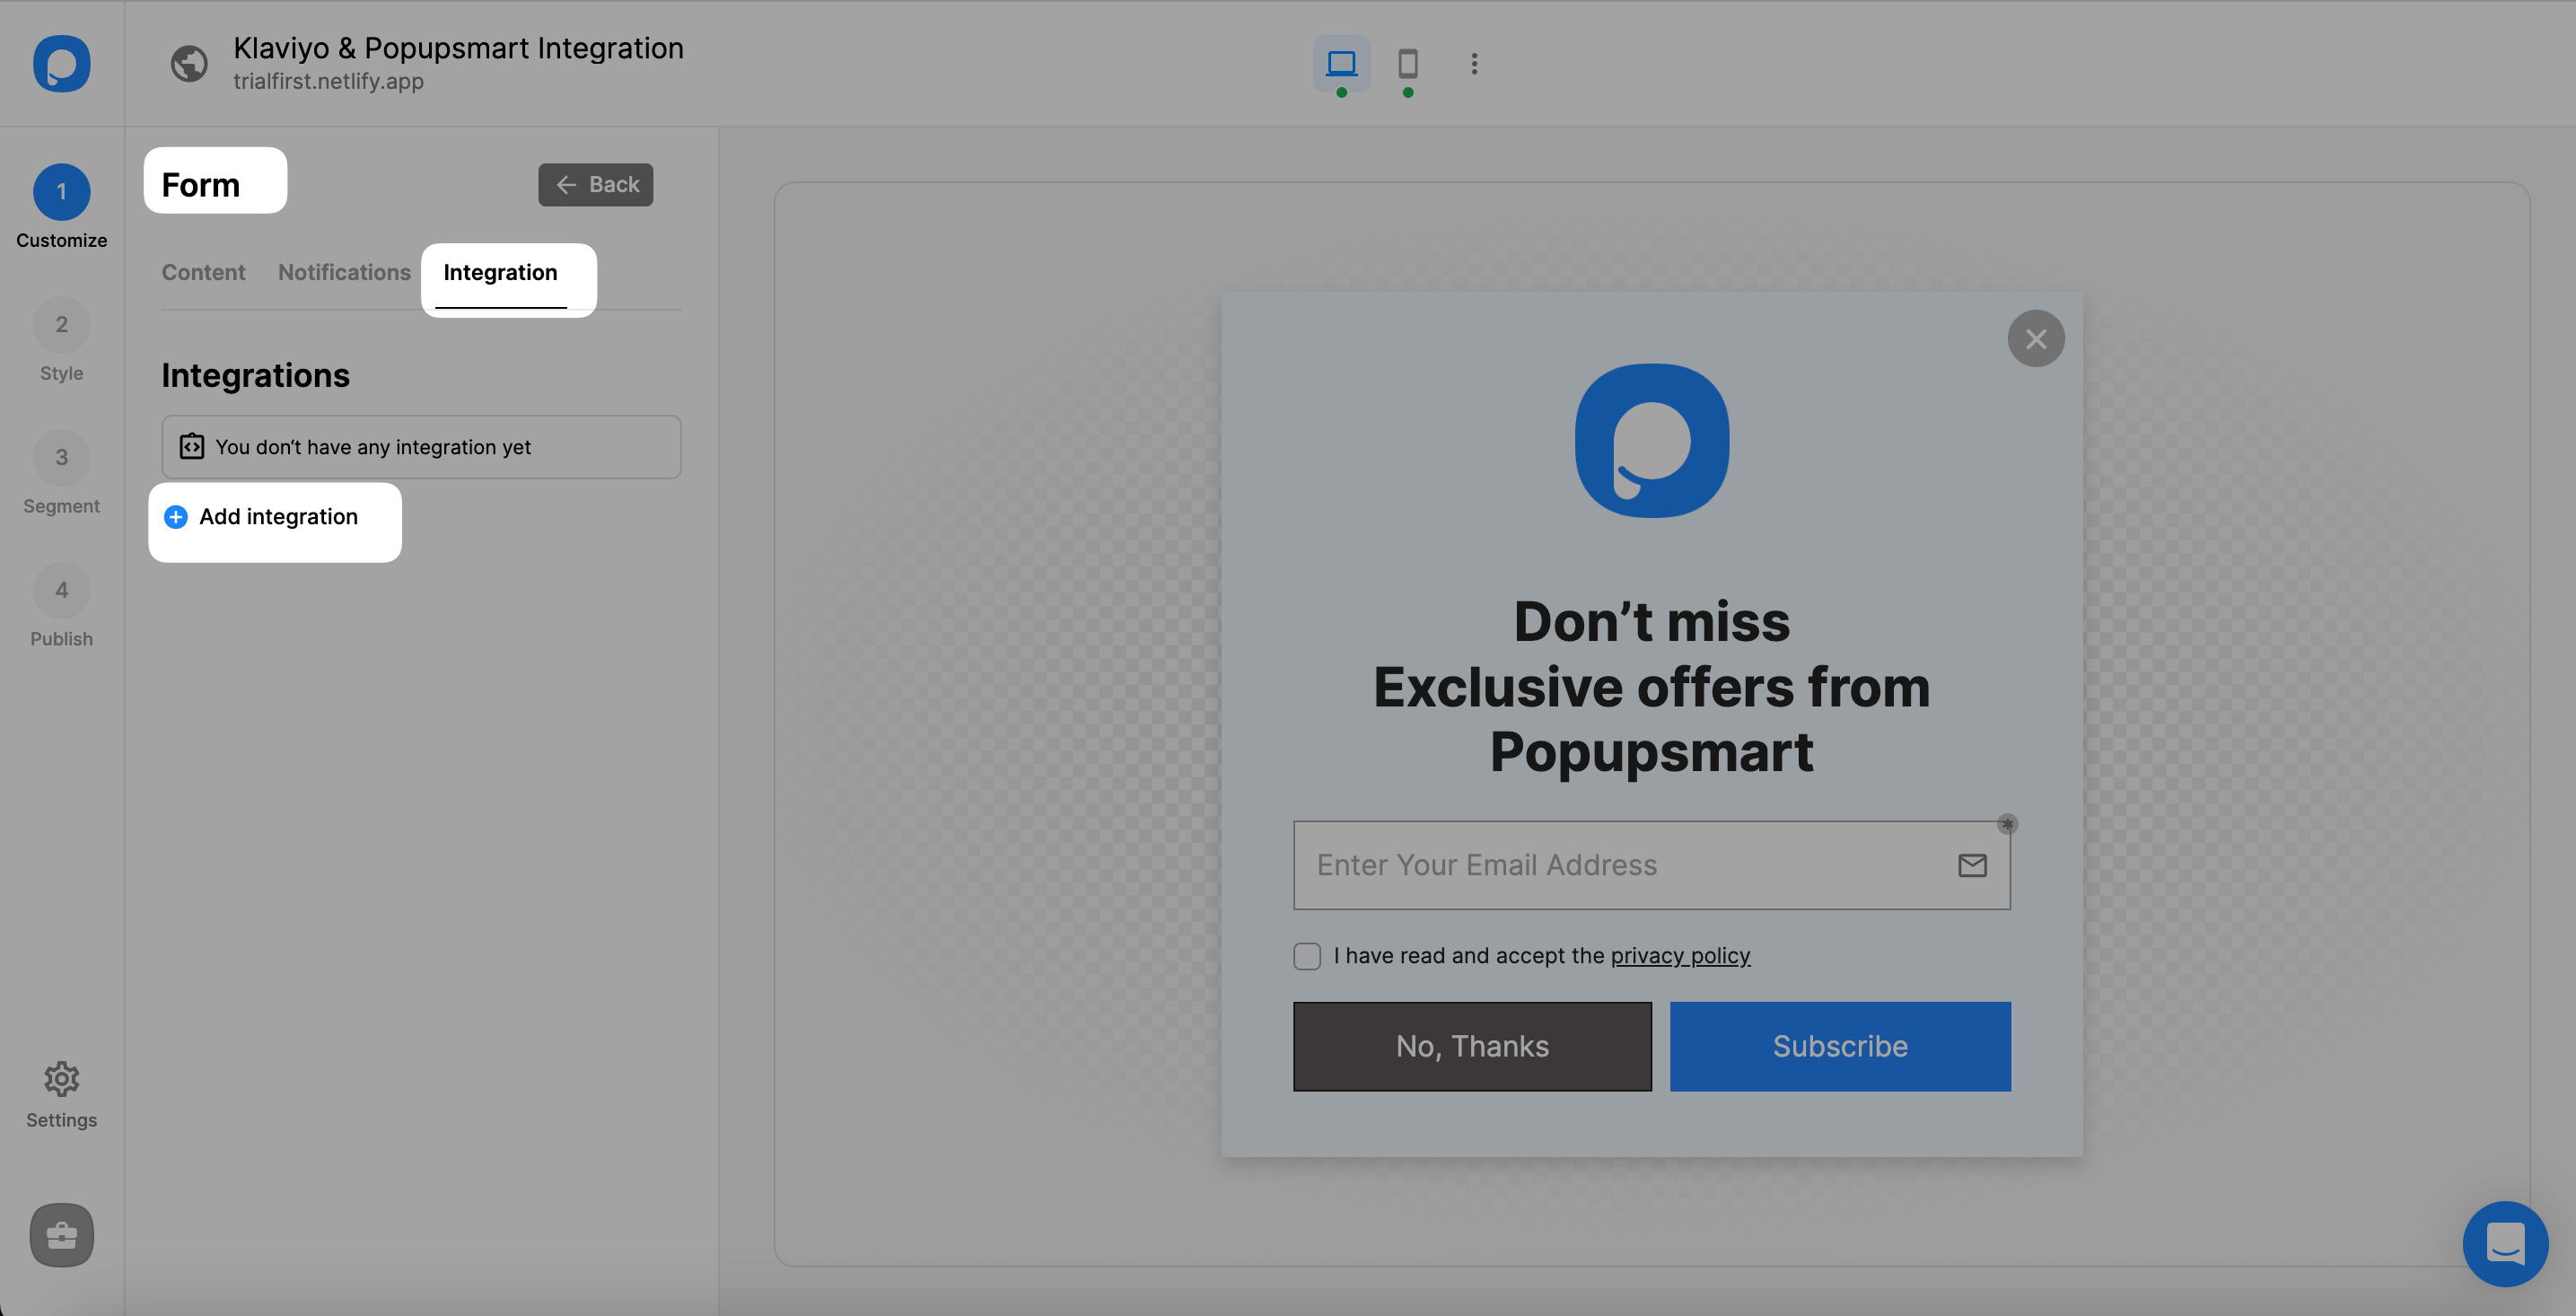
3. Next, click “Add integration” under the Integration on the Customize step.
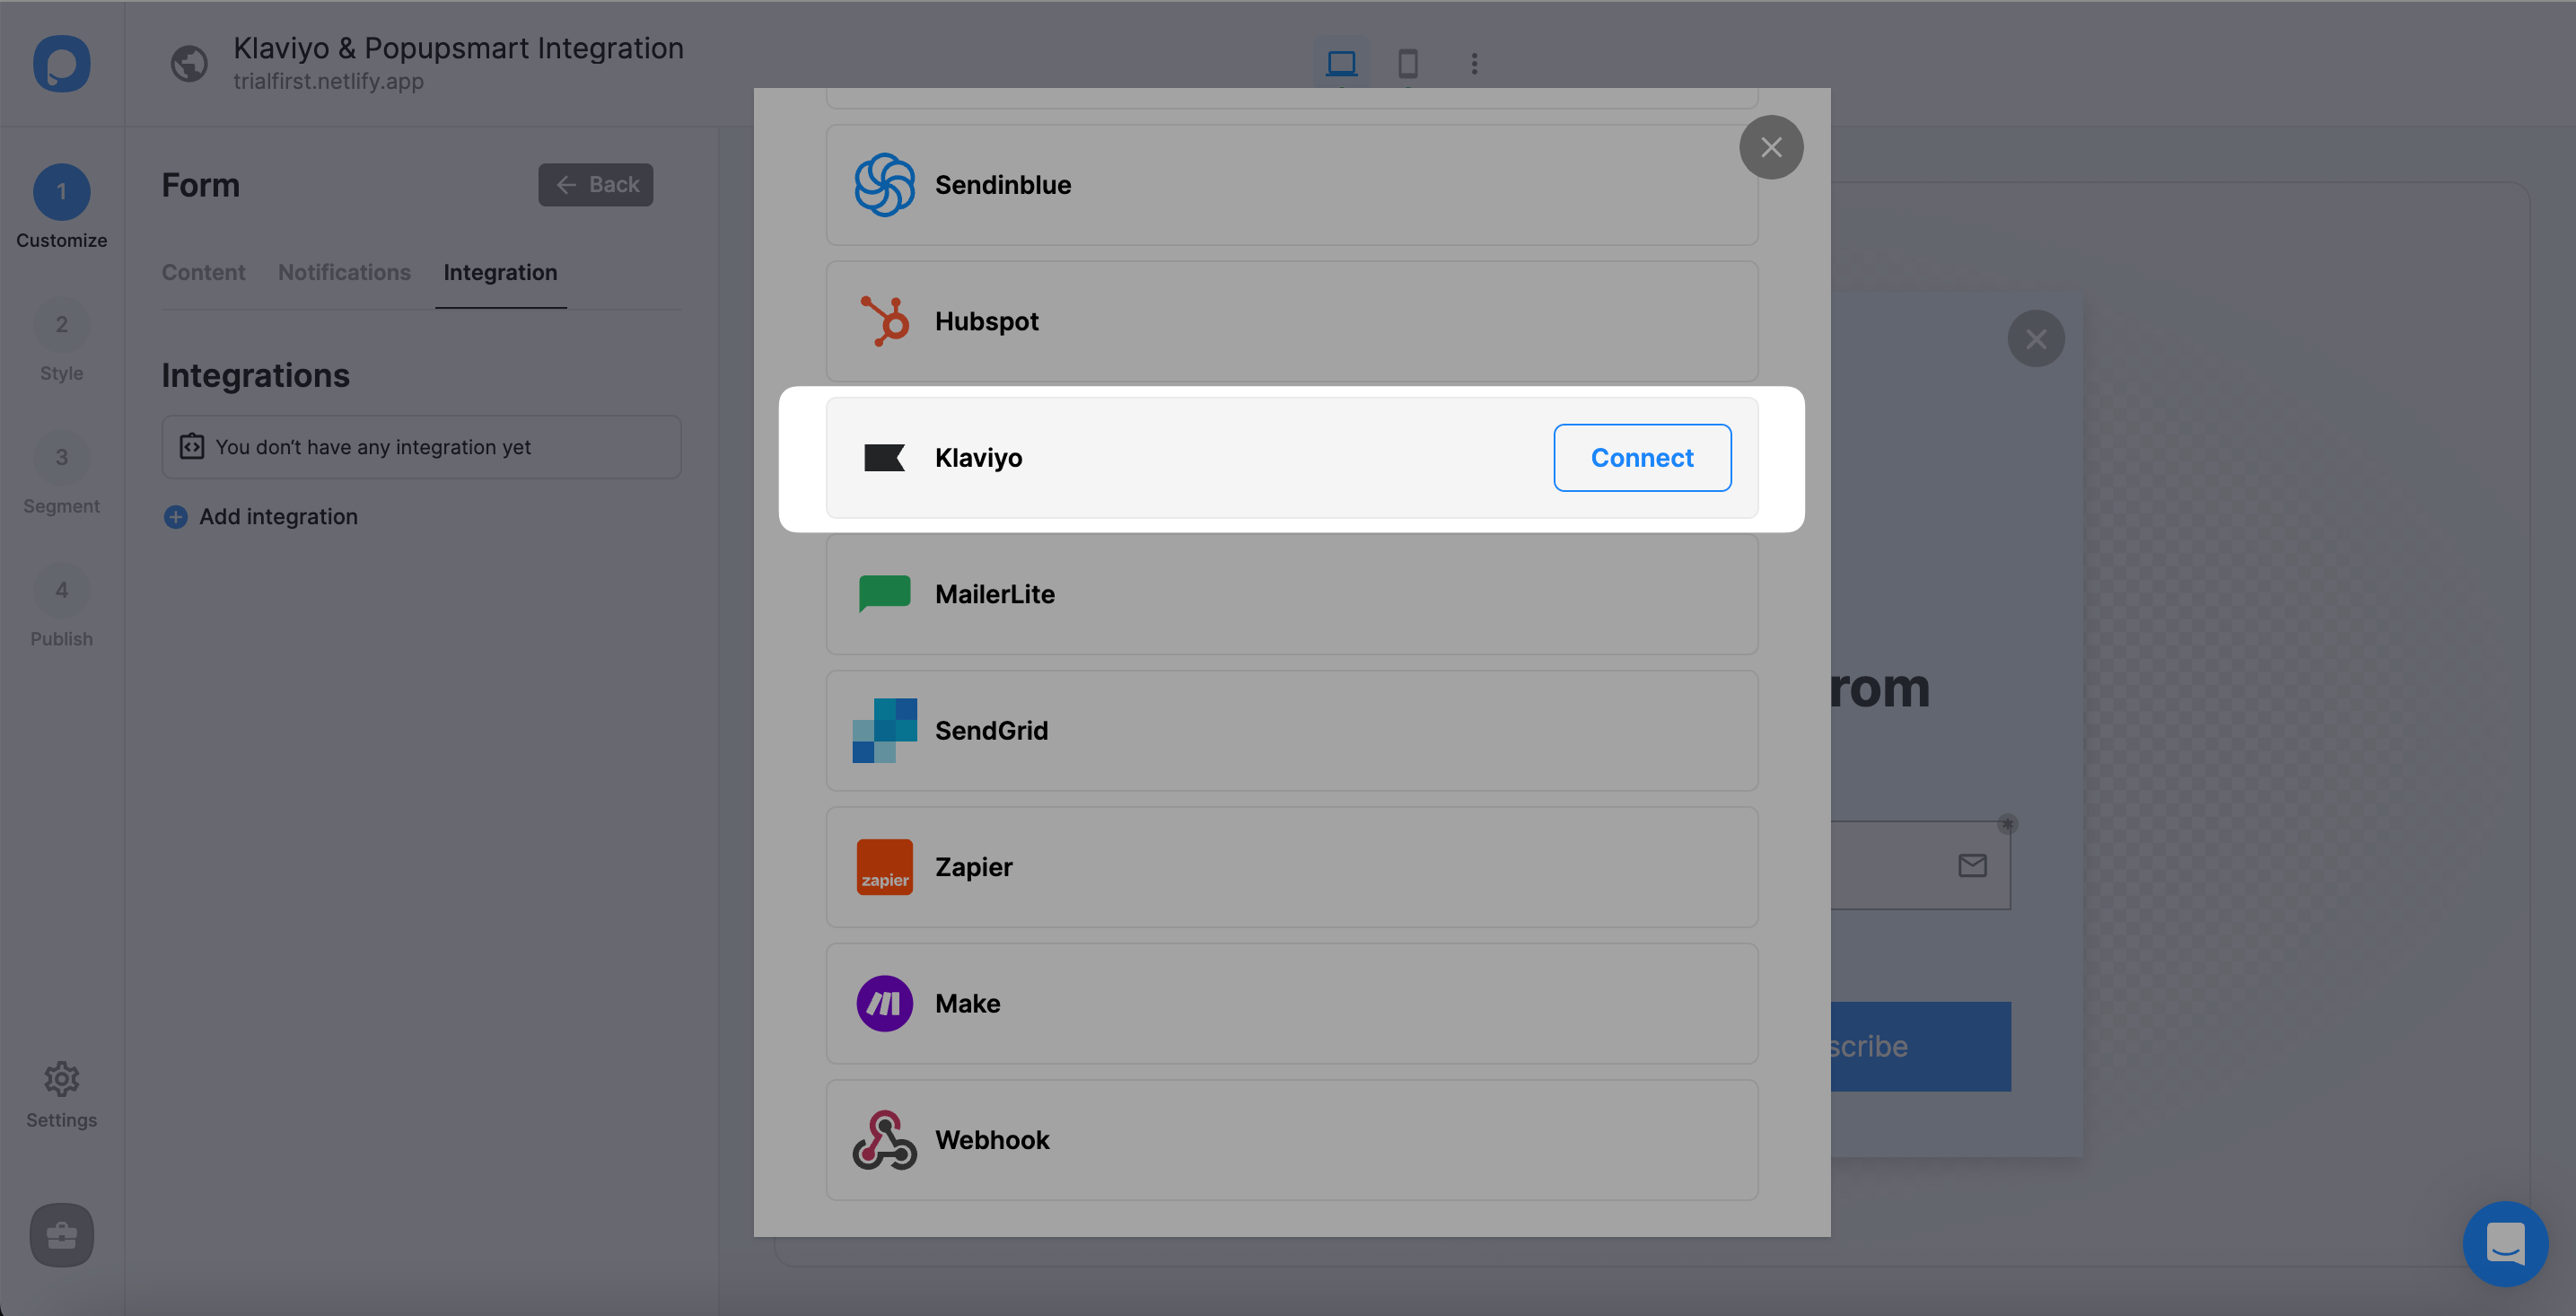
4. Click the "Connect" button on the Klaviyo option.
5. To "Add new Klaviyo API" is your first way to go if you have never added your Klaviyo API. If you have done it before, you can select from the dropdown.
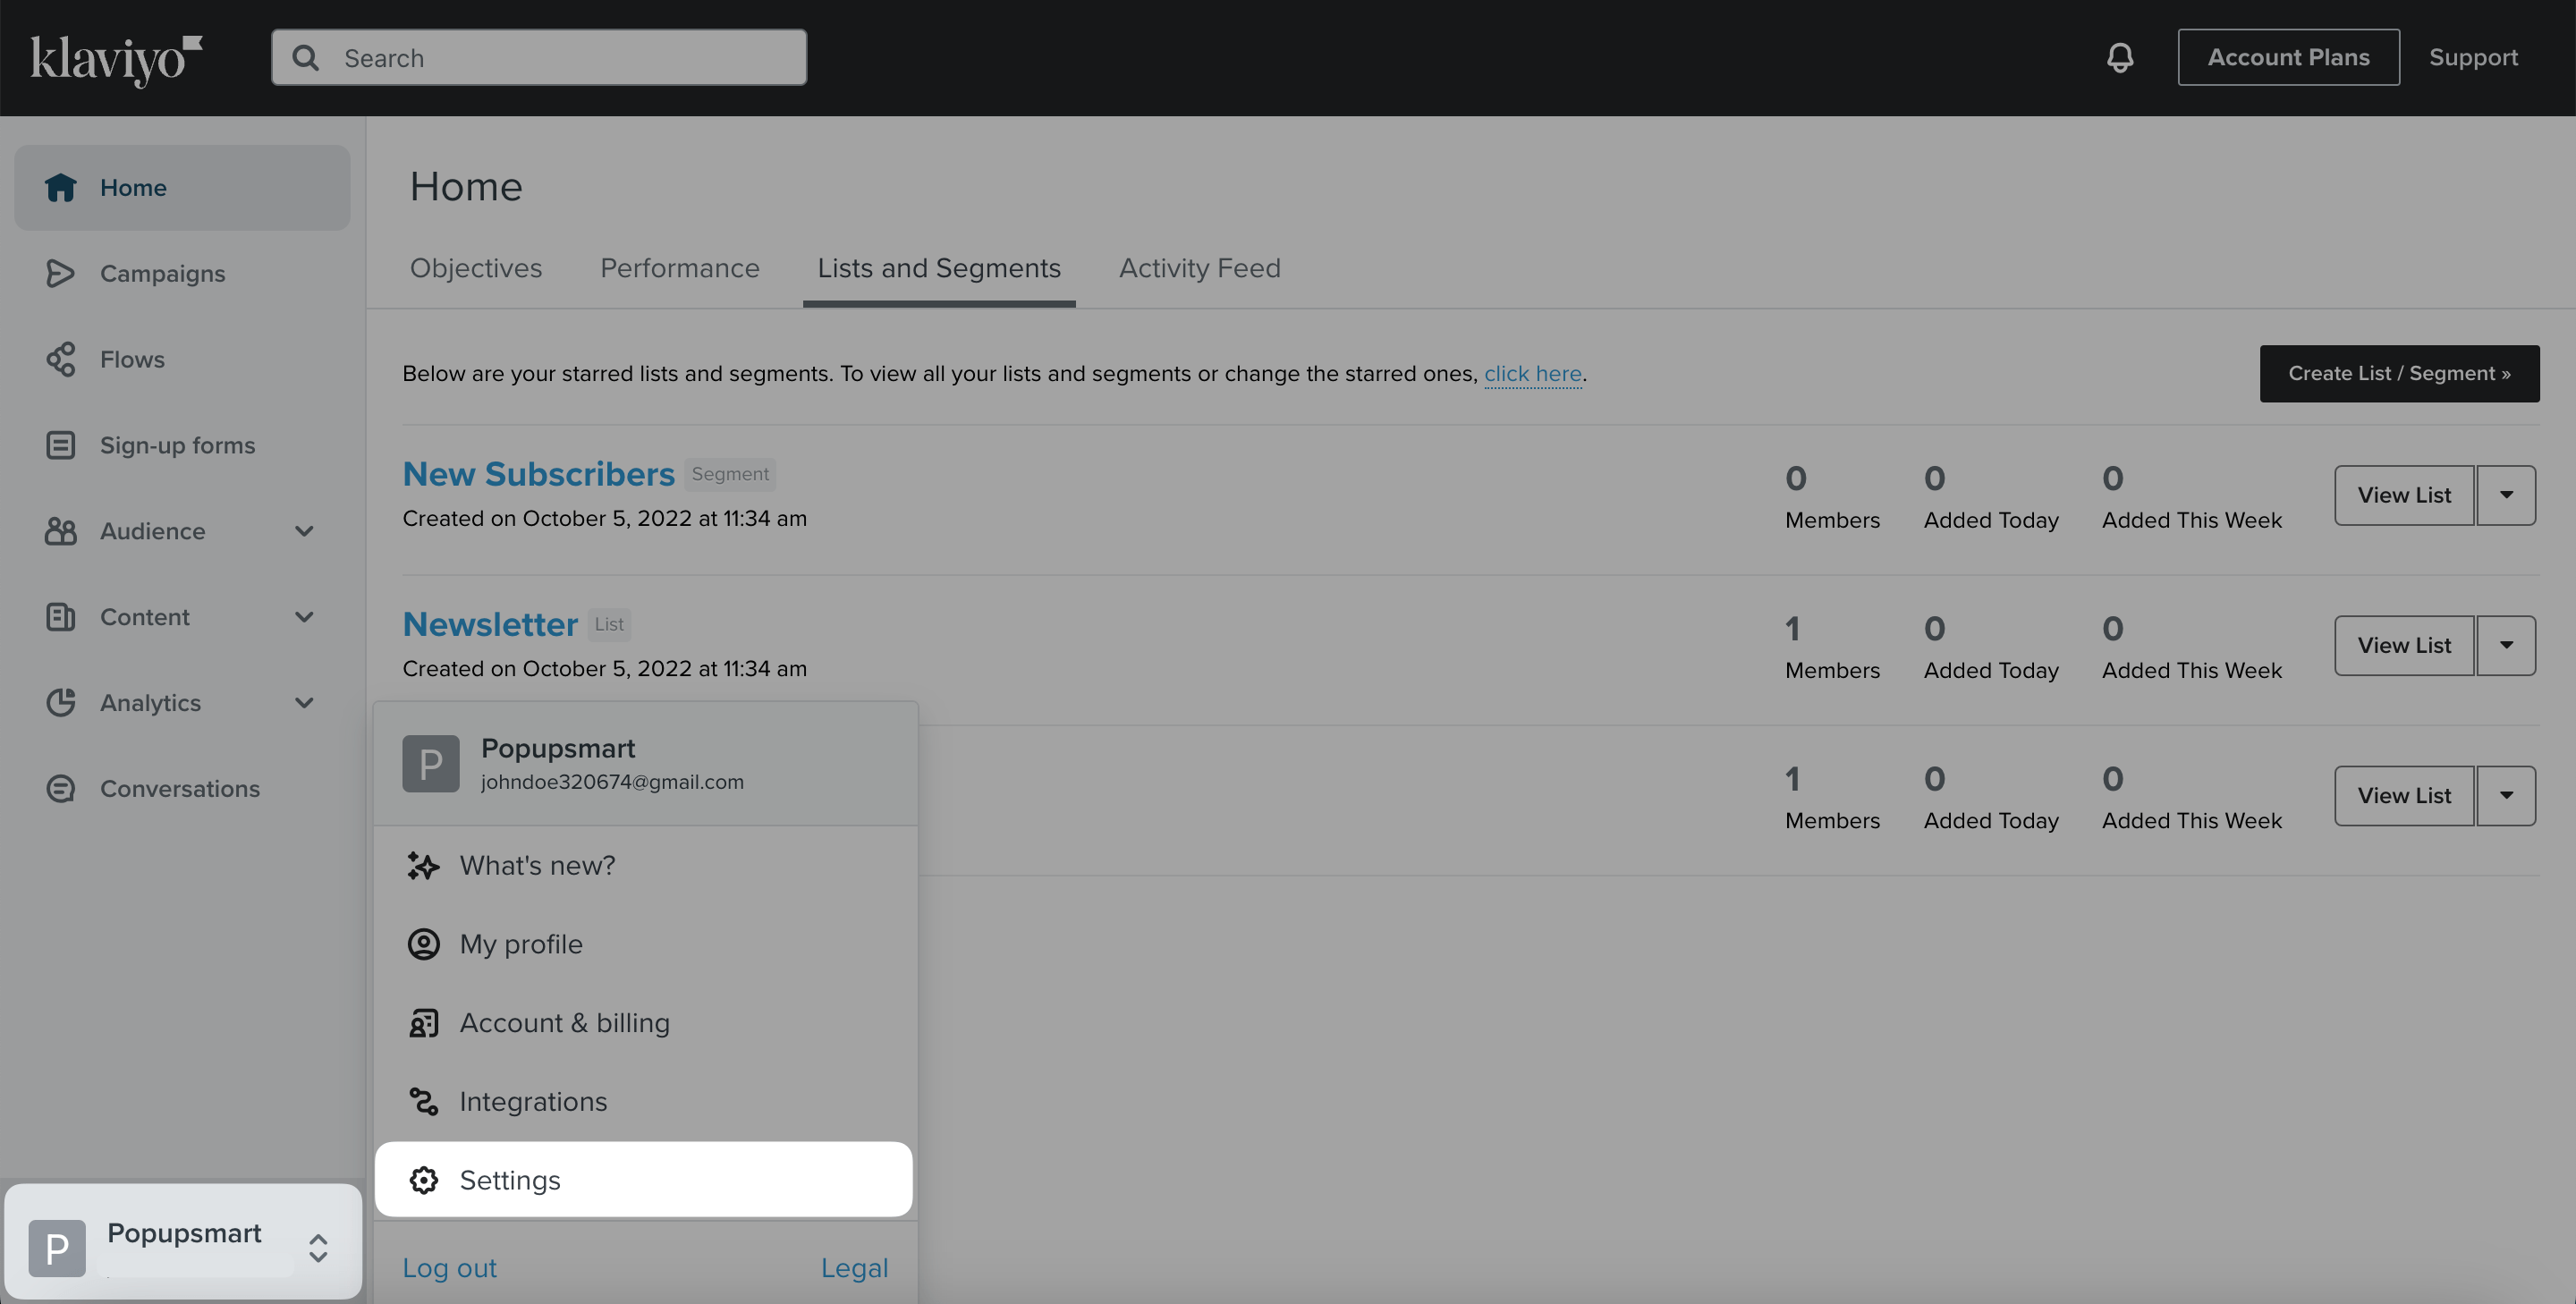
6. For the API, log in to your Klaviyo account and click on the left-bottom side of the page, your account, to find the "Settings" option.
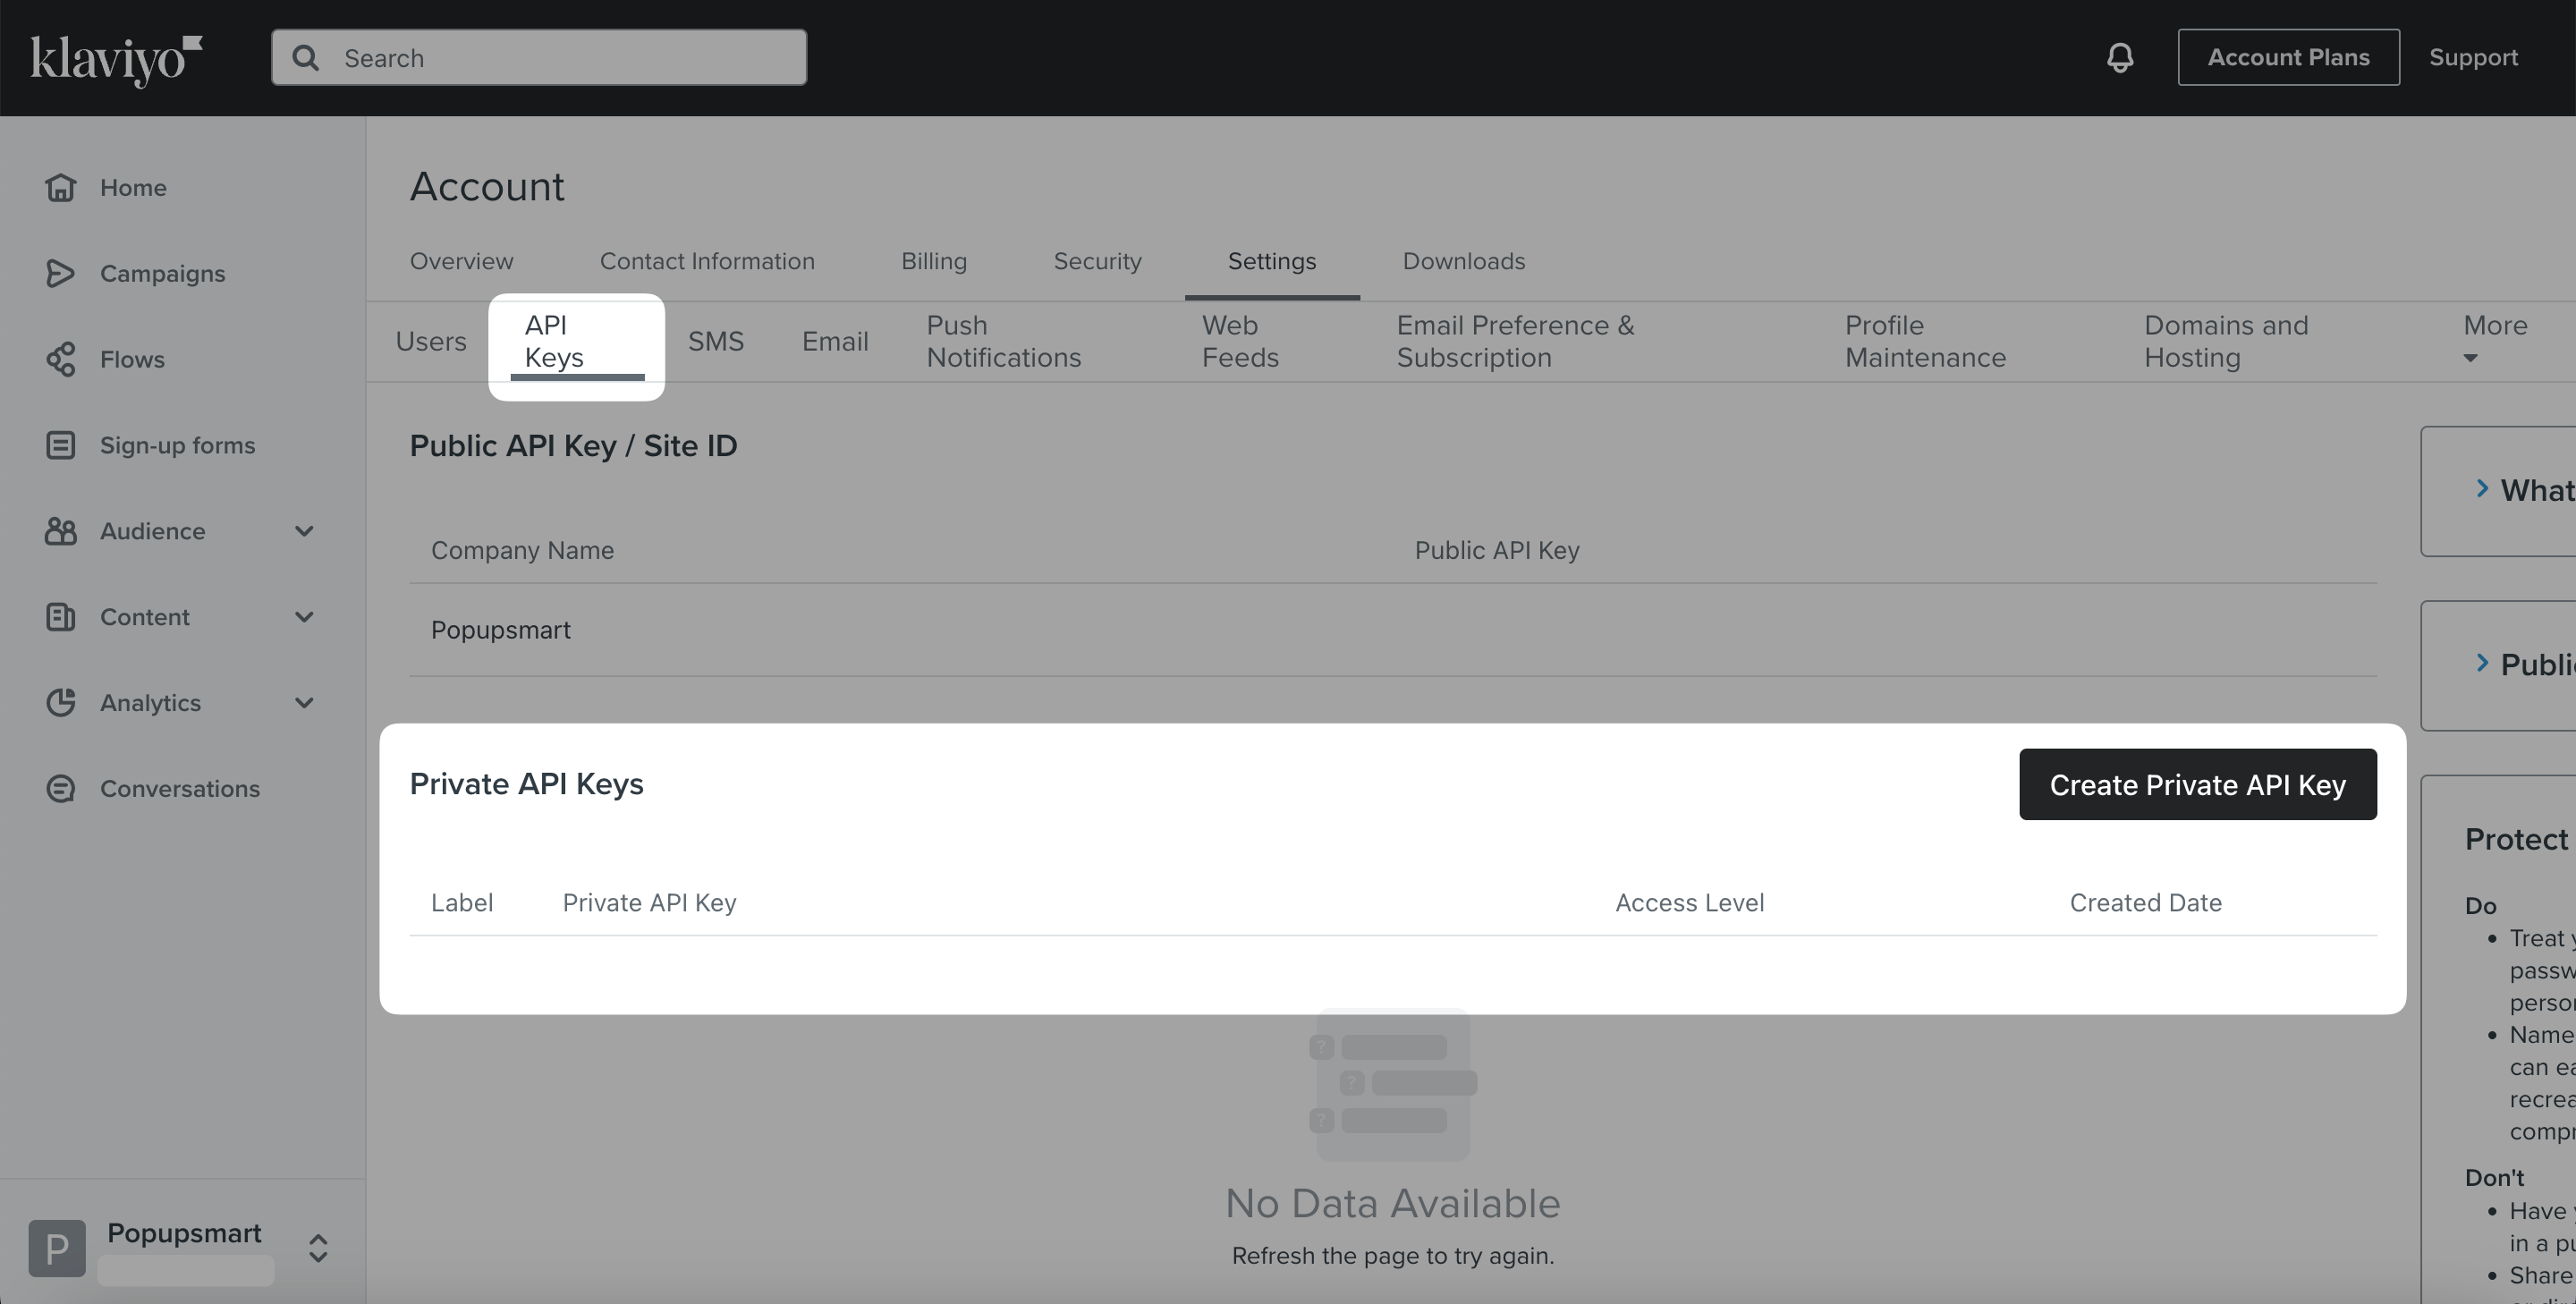
7. There, you will find the "API Keys" tab and click it. Next, you need to "Create Private API Key" in the Private API Key section.
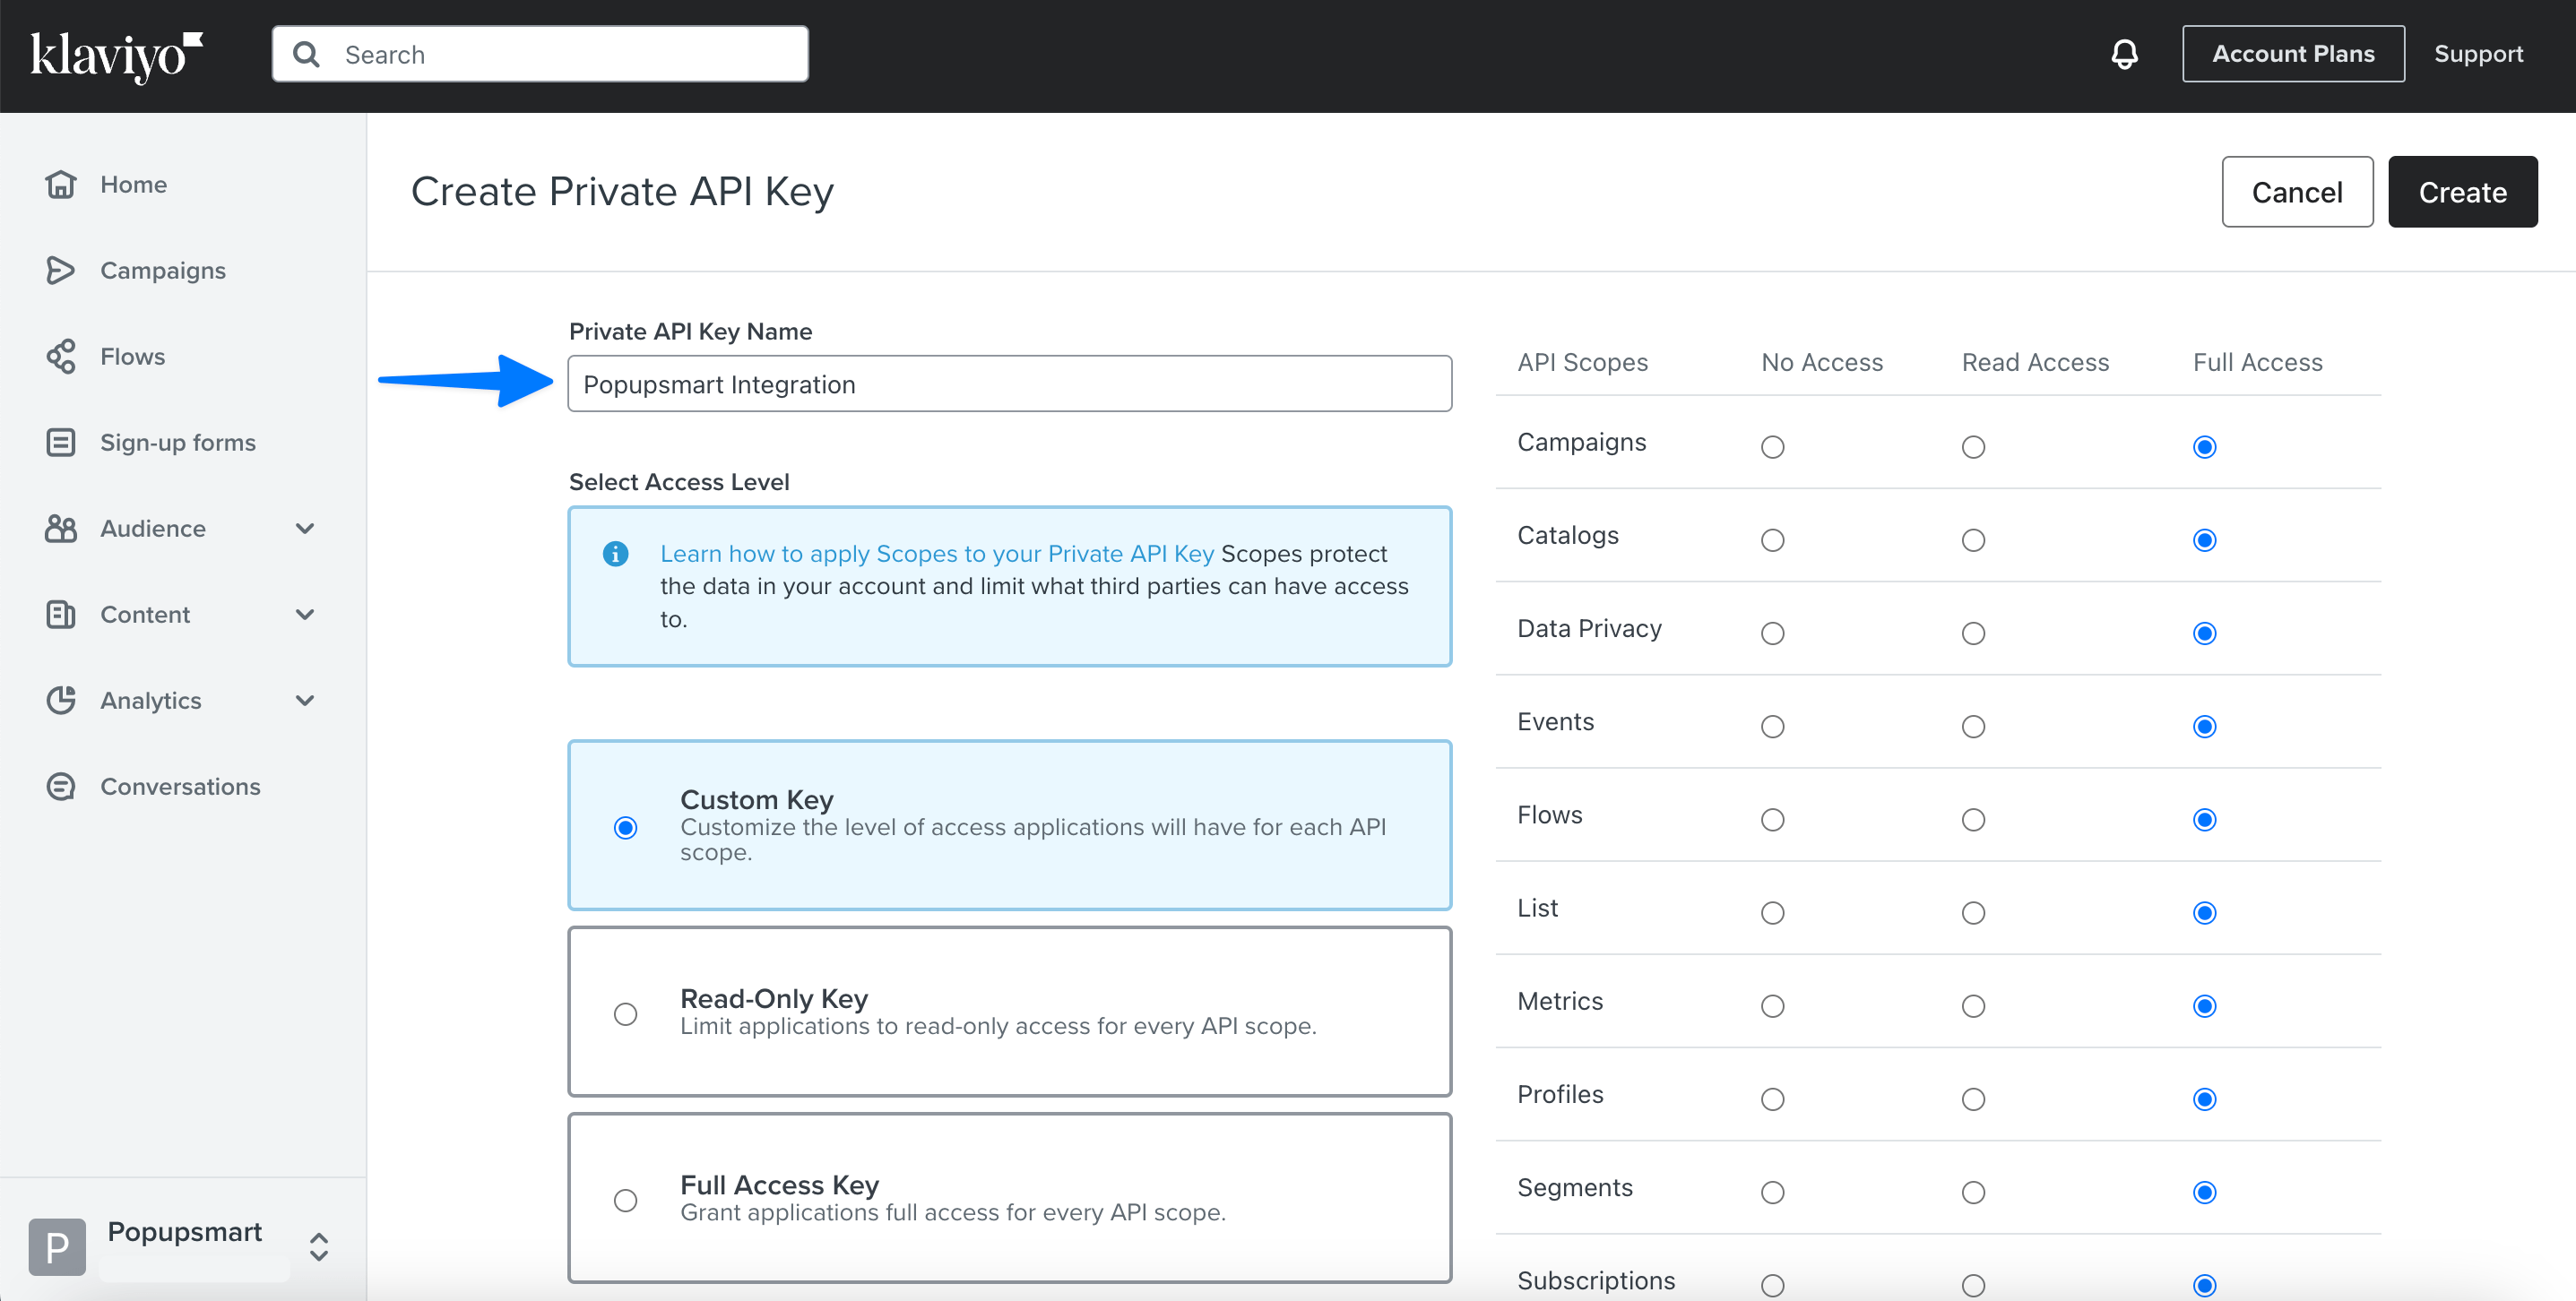
8. To create a private API key, you should give it a name, select the access level and decide which scopes to have access to.
Then, click "Create."
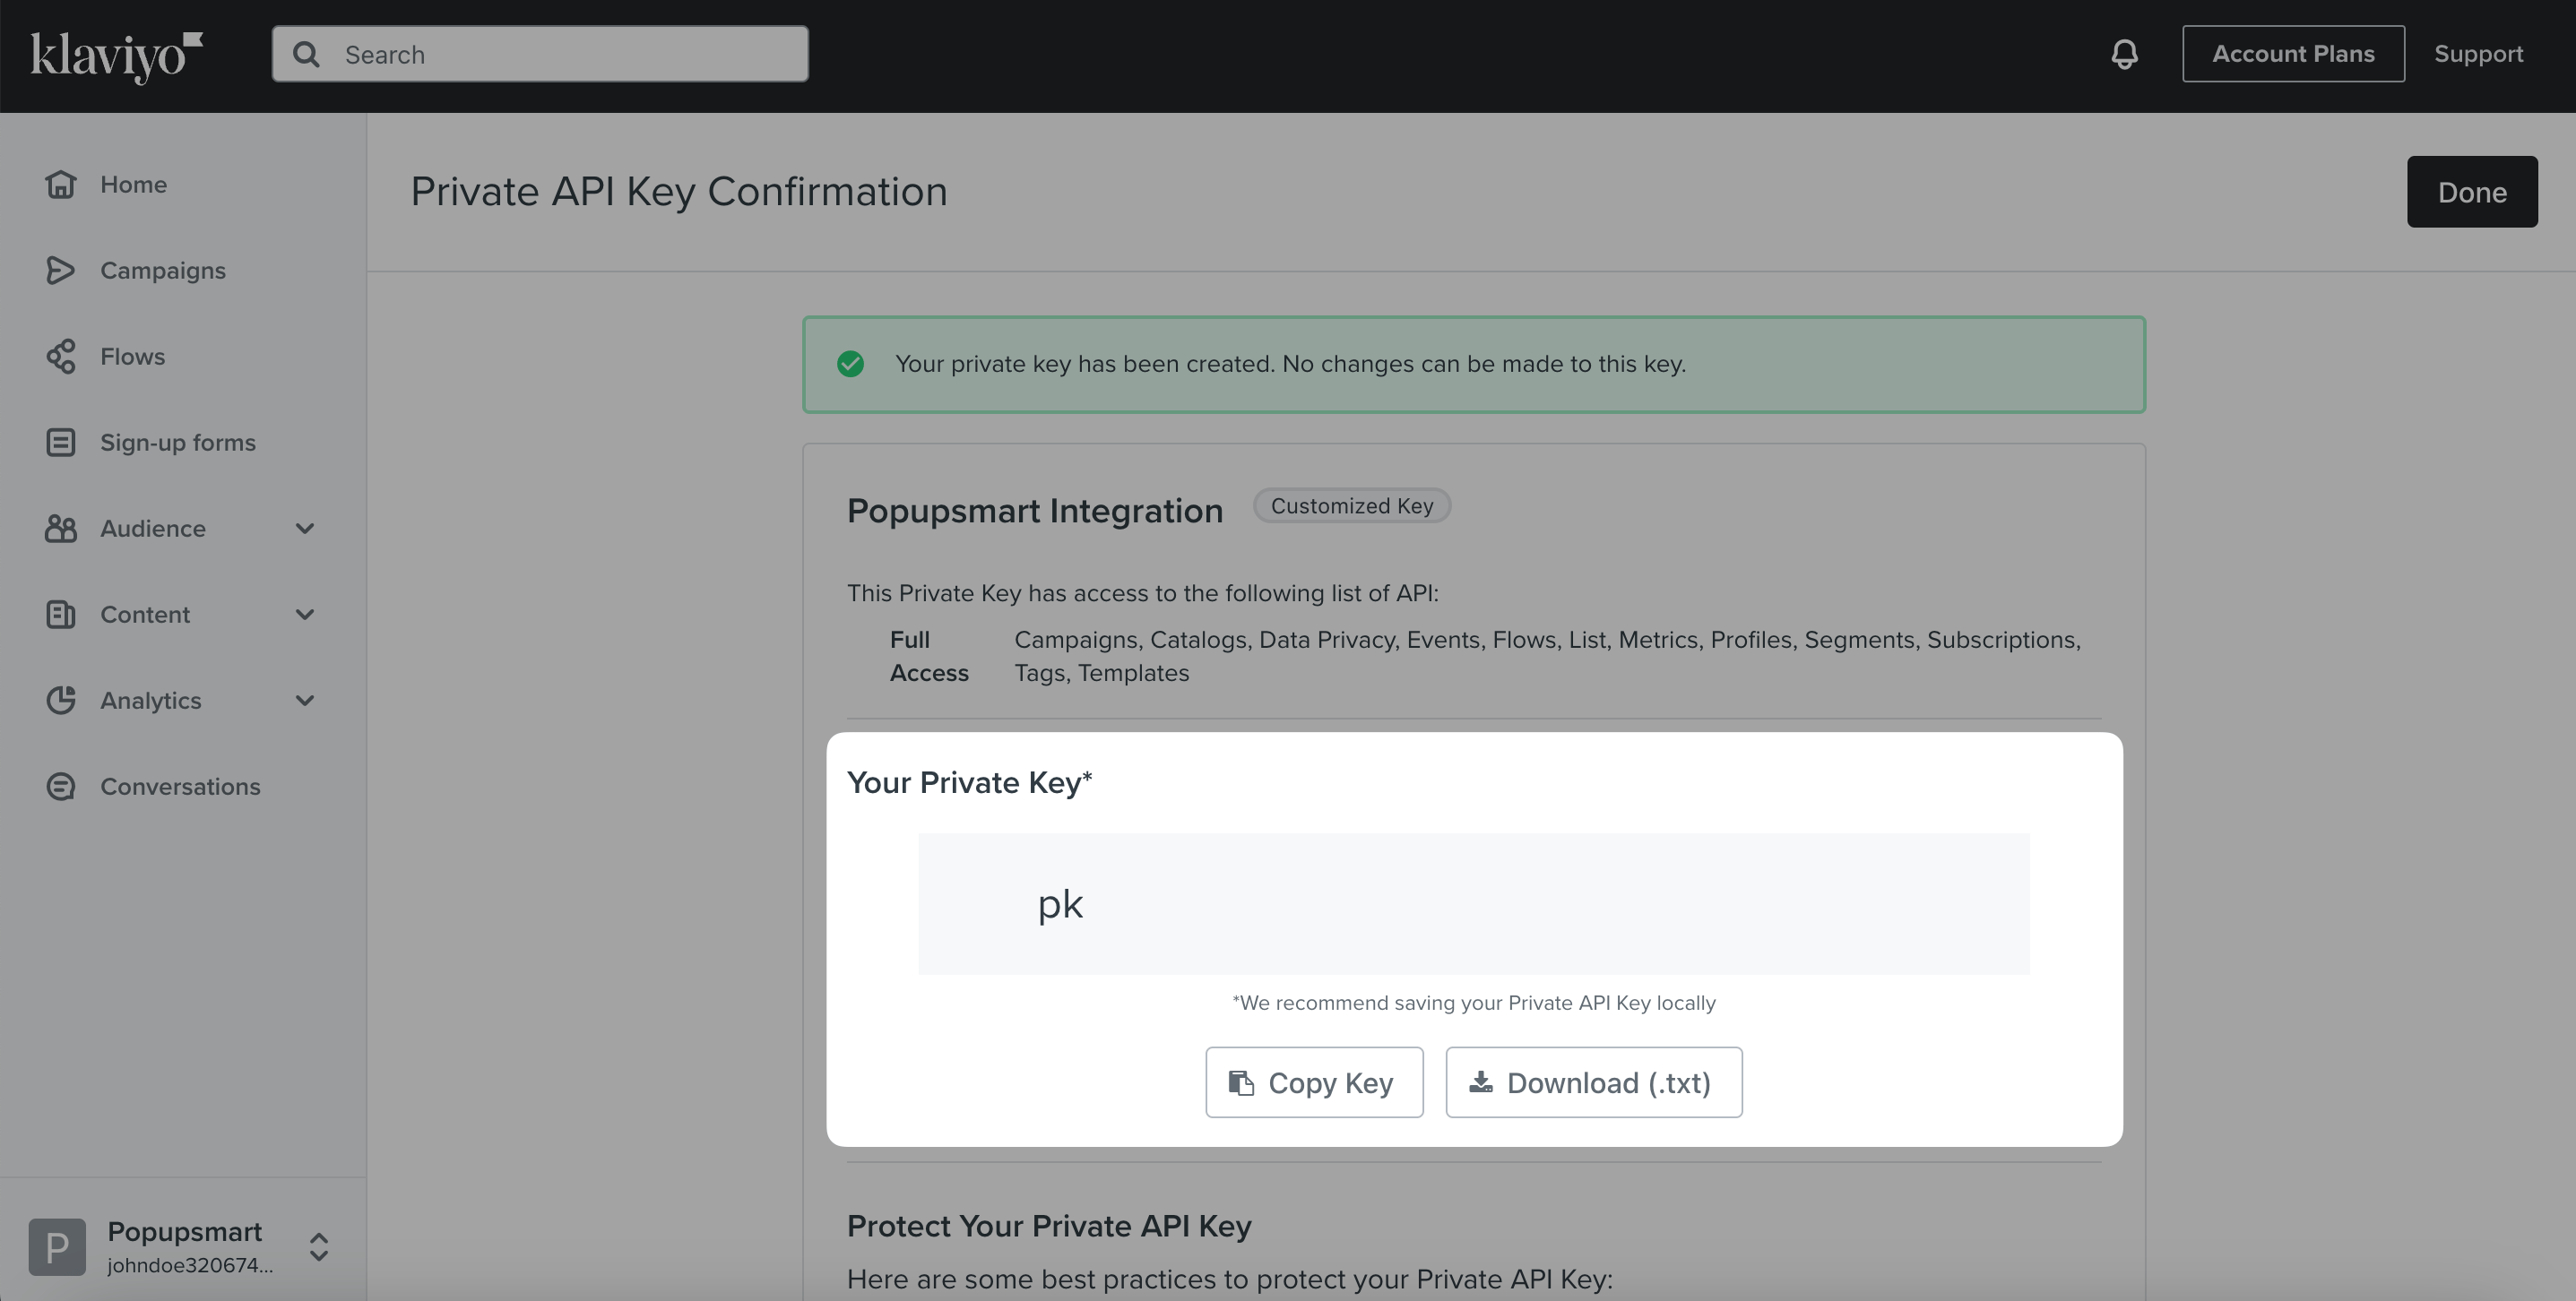
9. Now, click the "Copy Key" button to copy and use it later.
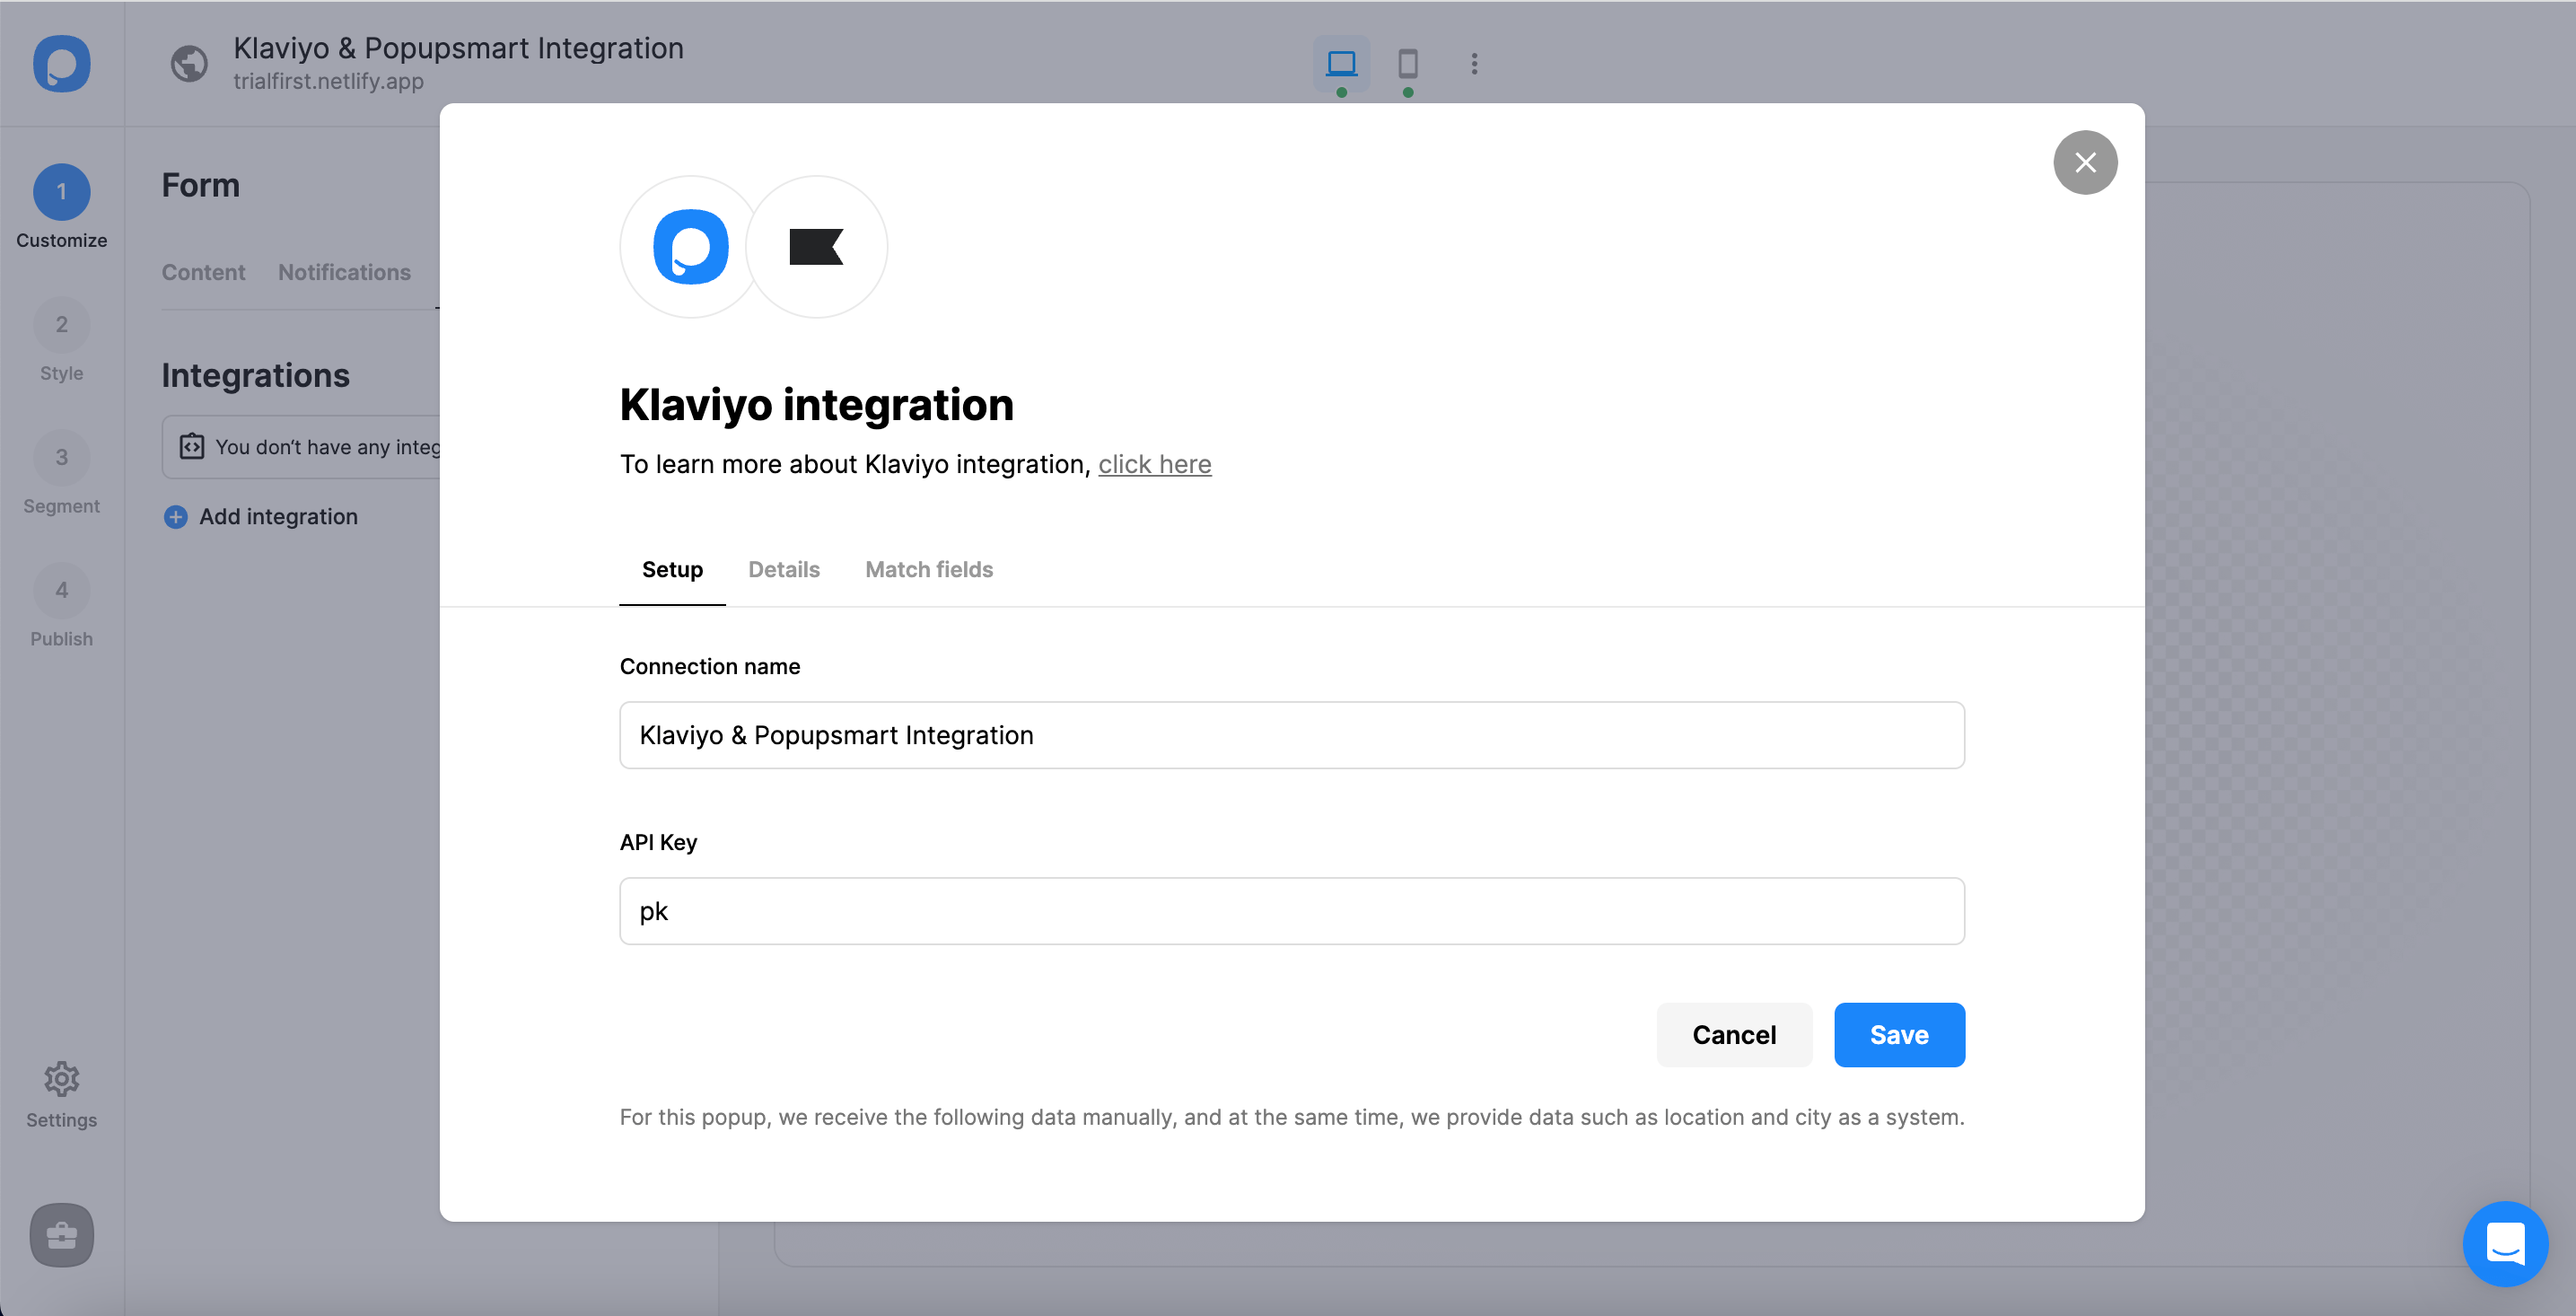
10. "Save" it after filling in the connection name and the API Key blanks on the Setup.
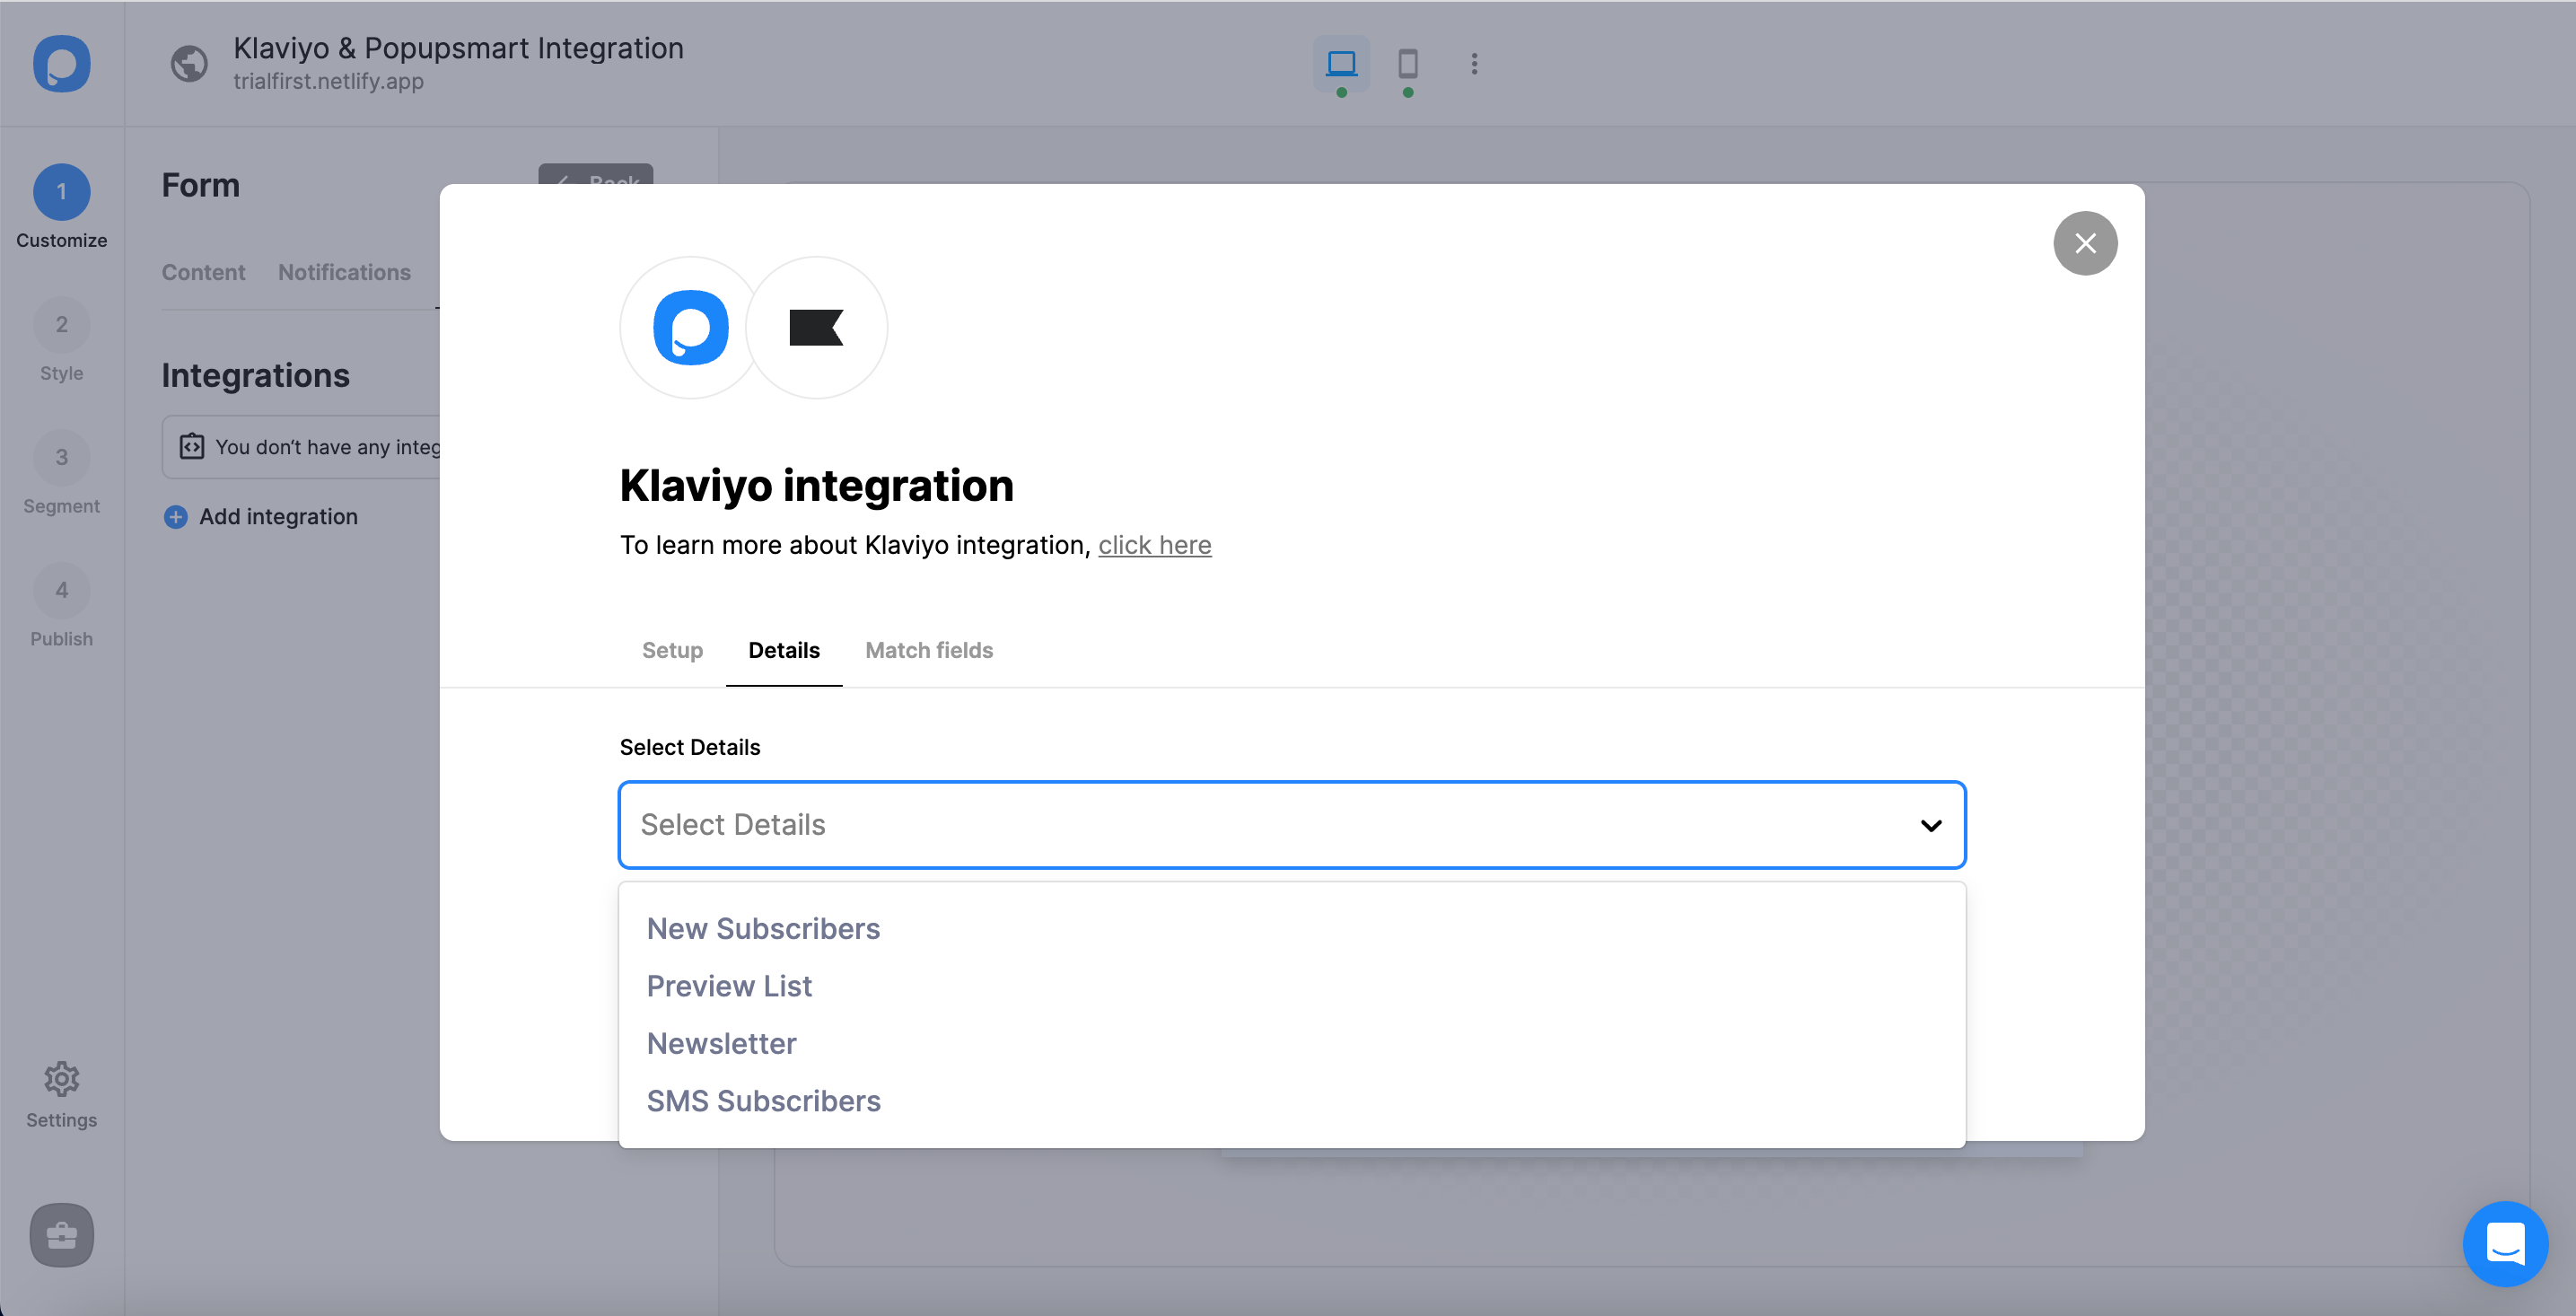
11. In the Details section, you can choose the related list that you have created on Klaviyo among the options.
12. For Match Fields, you can fill in the blanks according to your wishes.
These fields may change according to the elements you include.
Form Field: It is used if you put form elements in your popup. If you don't use any form element, you will see 'No options' on the dropdown.
System Field: You need to choose your option based on what you demand to get as data. For example, you can get the Browsers or Devices of the people who filled the popup.
API Field: You can transfer the data you sent to Popupsmart JS API with the integration again. You can get your data from your Klaviyo account.
Static Field: You need to determine the specific data you want. For example, you may want to have sales or downgrades so that you can put them as 'sales' or 'downgrade.'
Your Klaviyo integration is fully ready.
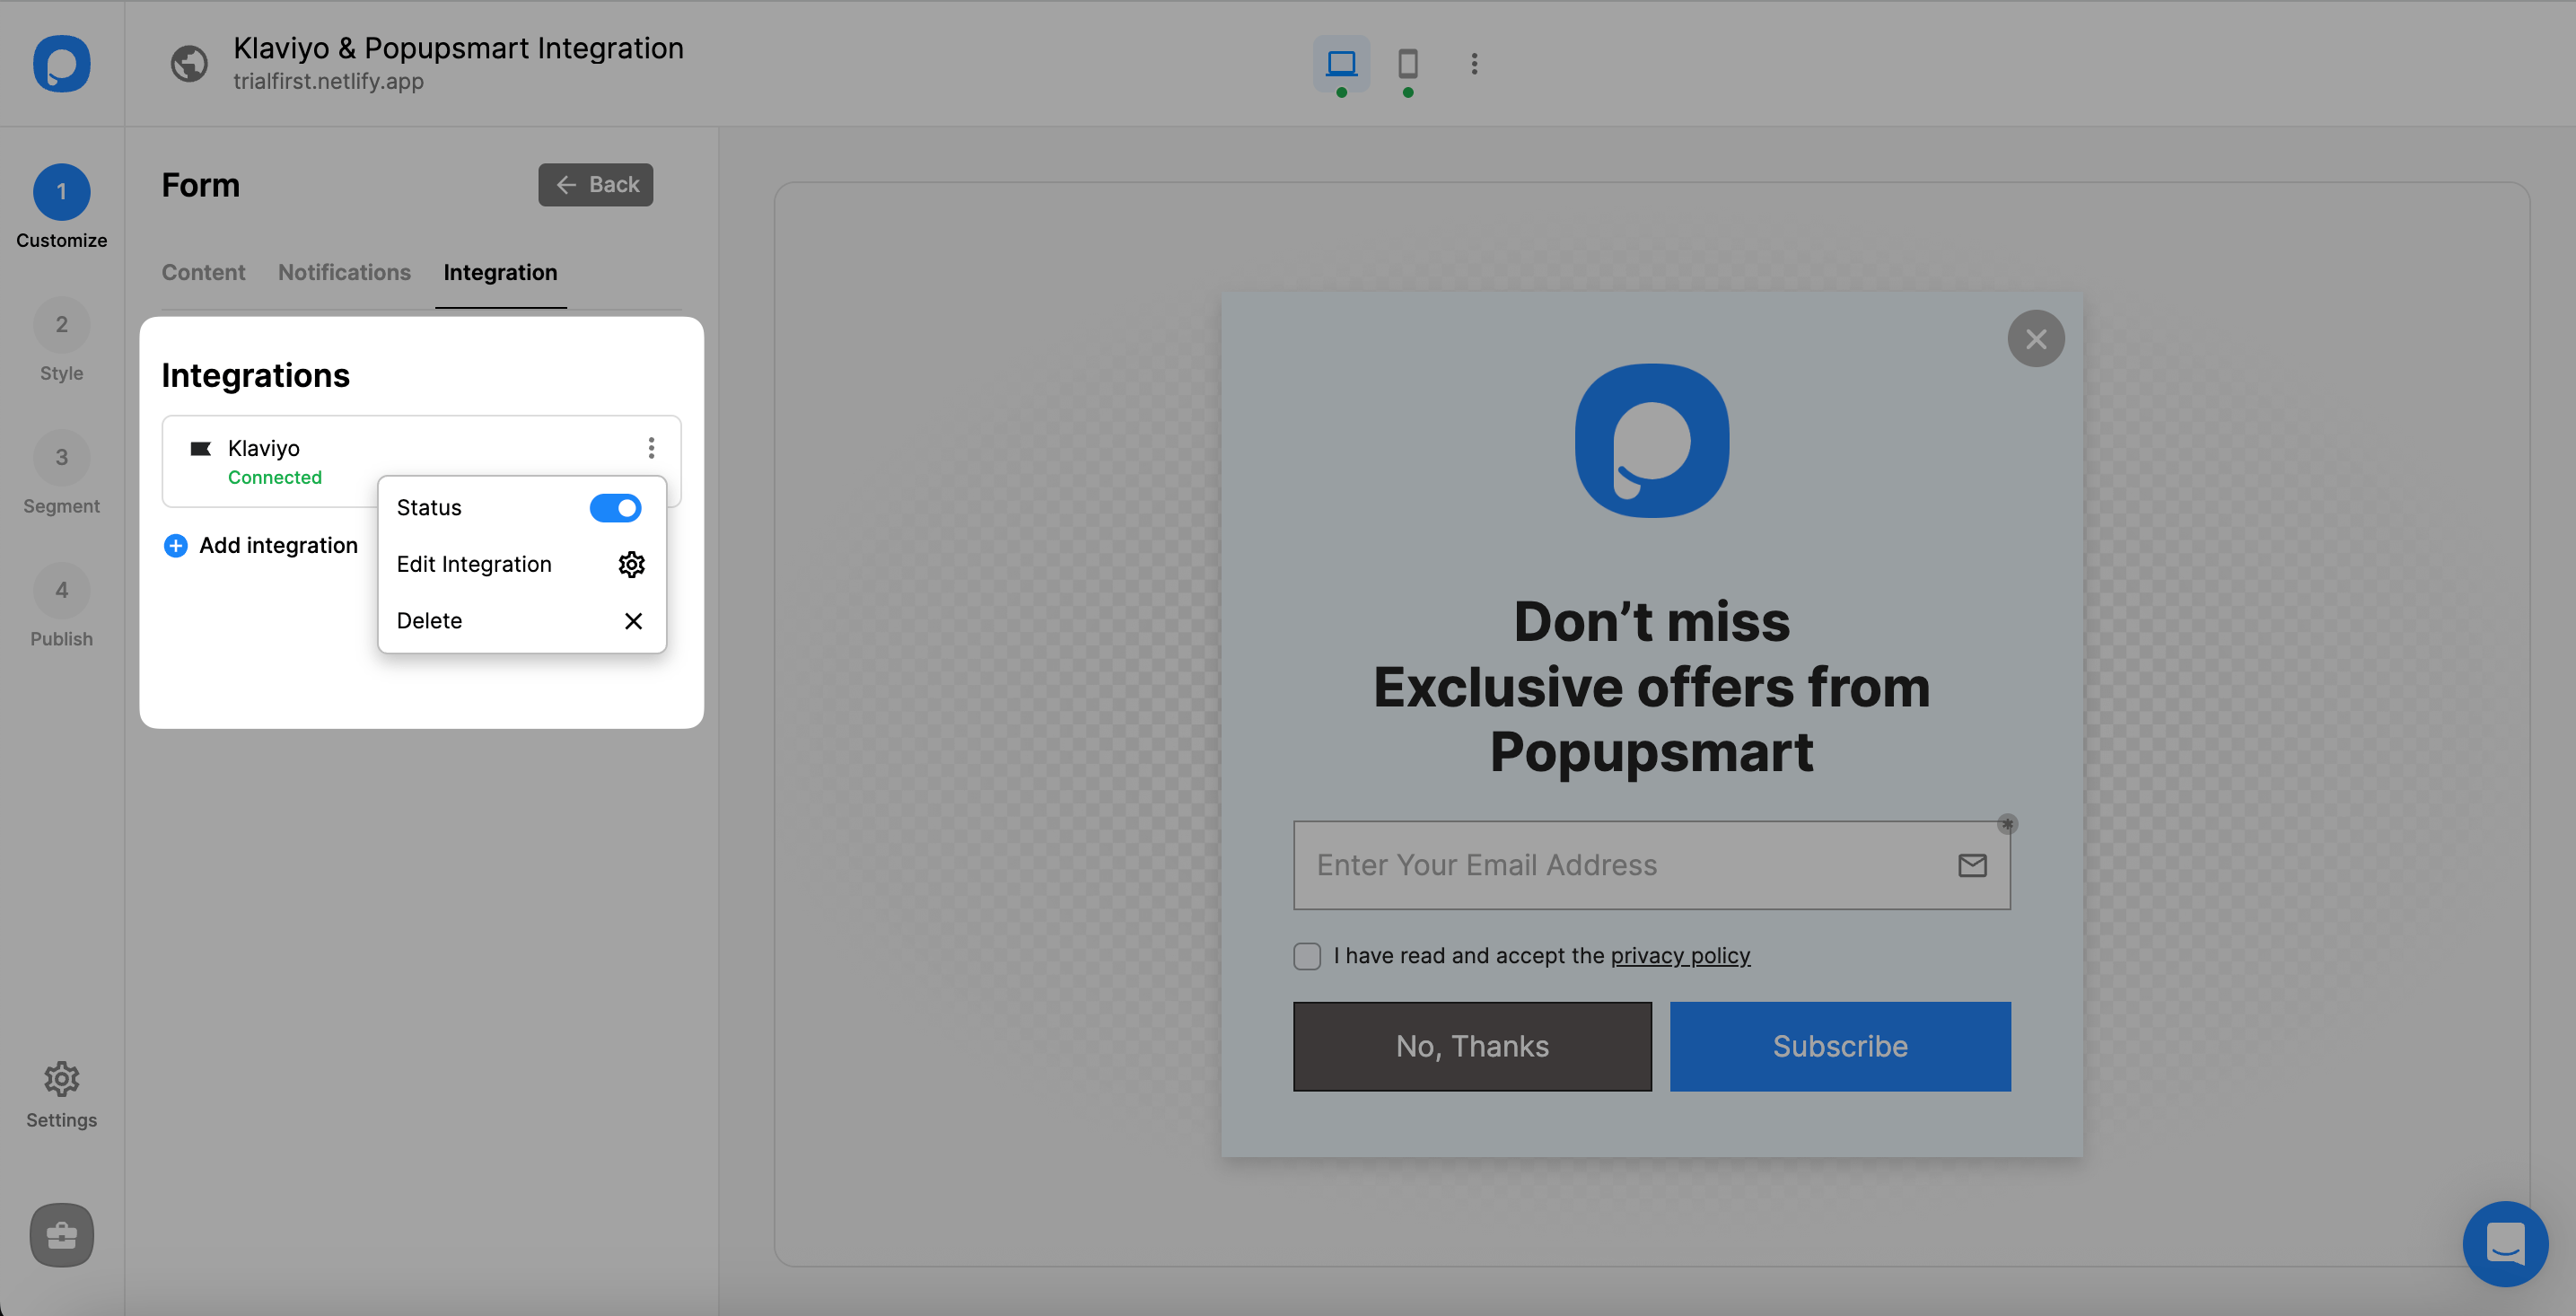
❗️Note: you can configure your settings and integrations in the Settings section of the dashboard.
If you have any other questions about Klaviyo integration, feel free to mail us!


