Increase Sales Conversion
Can’t turn your site traffic into sales?
Reduce Cart Abandonment
Your customers abandoning their carts?
Promote Products & Offers
Make potential customers notice special offers.
Collect Form Submission
Struggling to collect form submissions?
Get More Phone Calls
Let them call you directly via popups.
Grow Email List
Having trouble growing your email list?
Gamify Your Campaign
Choose your offer and let the game begin.
Make Announcement
Make sure important news unmissed.
Increase User Engagement
Keep visitors & customers on your site longer.
Collect Feedback & Surveys
Can’t draw attention to your surveys?
Facilitate Social Sharing
Grow social media followers and likes!
# How to Integrate Zapier with Popupsmart
You can effortlessly transfer the gathered data from your popup campaigns to other applications via Zapier.
Follow this guide to connect your Popupsmart account with your Zapier account.
To start the integration process, you need to have some default features
• You need to have a Zapier account.
• You need to fill in the data after you publish your popup campaign first. You should do it before you start the Zap on Zapier.
• You need to verify your website on your Popupsmart account.
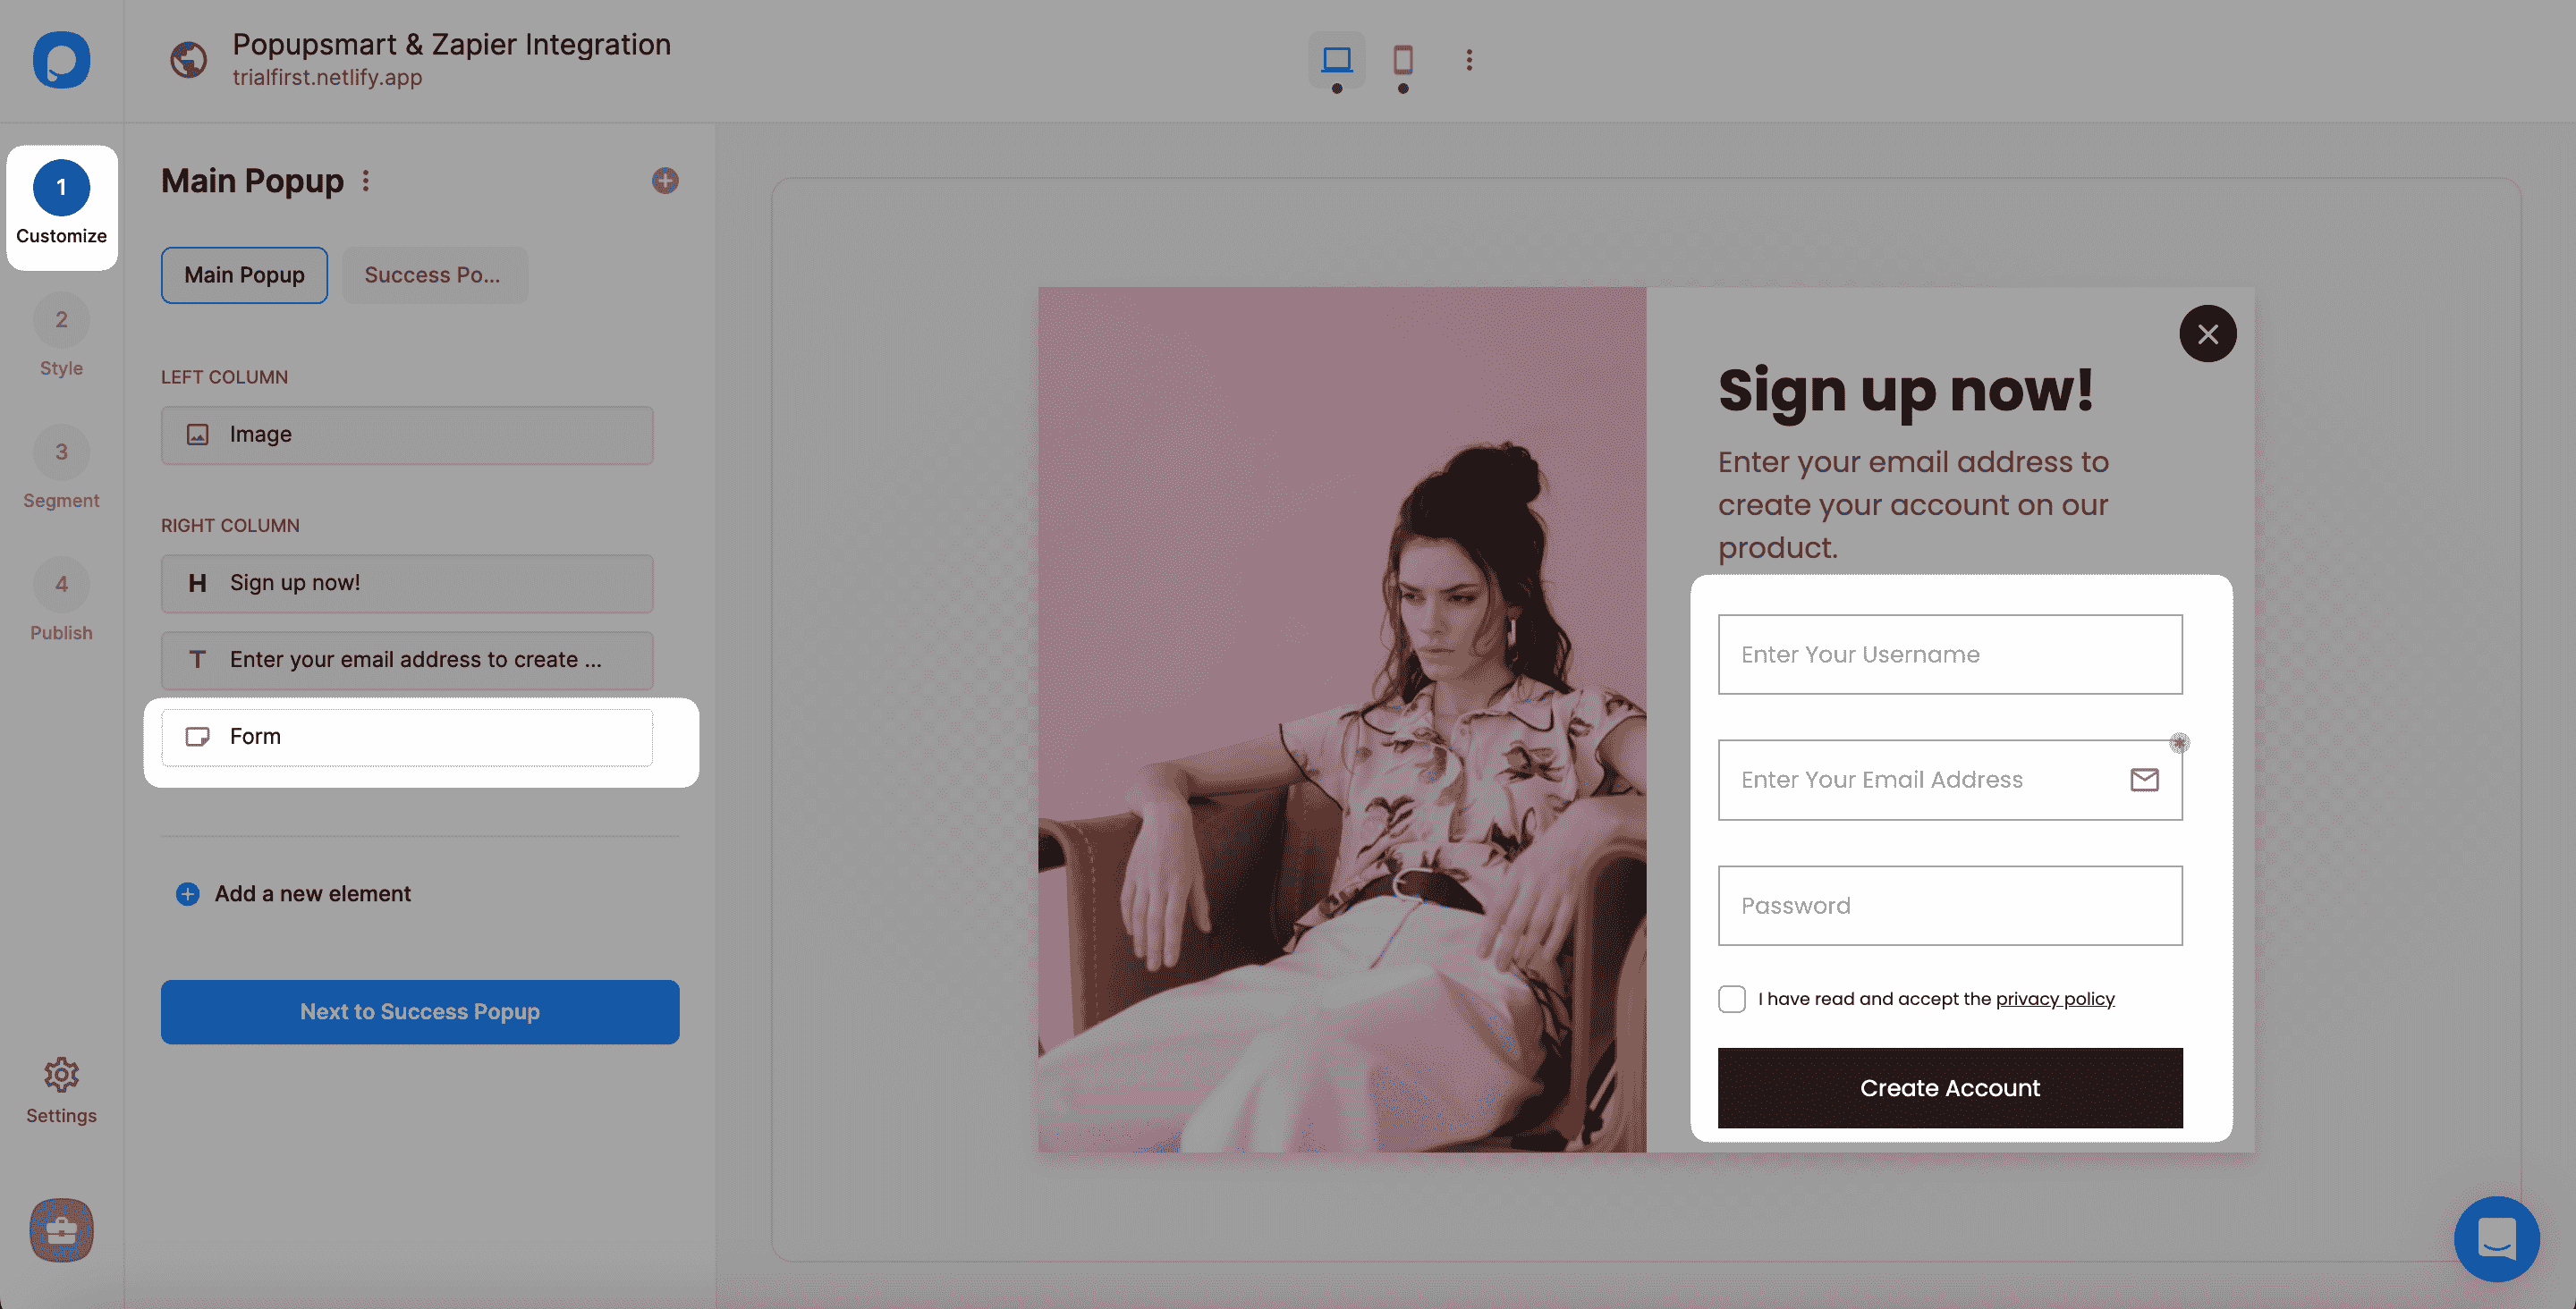
1. Sign in to your Popupsmart account and create a new campaign with a popup that includes a form input element. Then, click on the form input element to add integration.
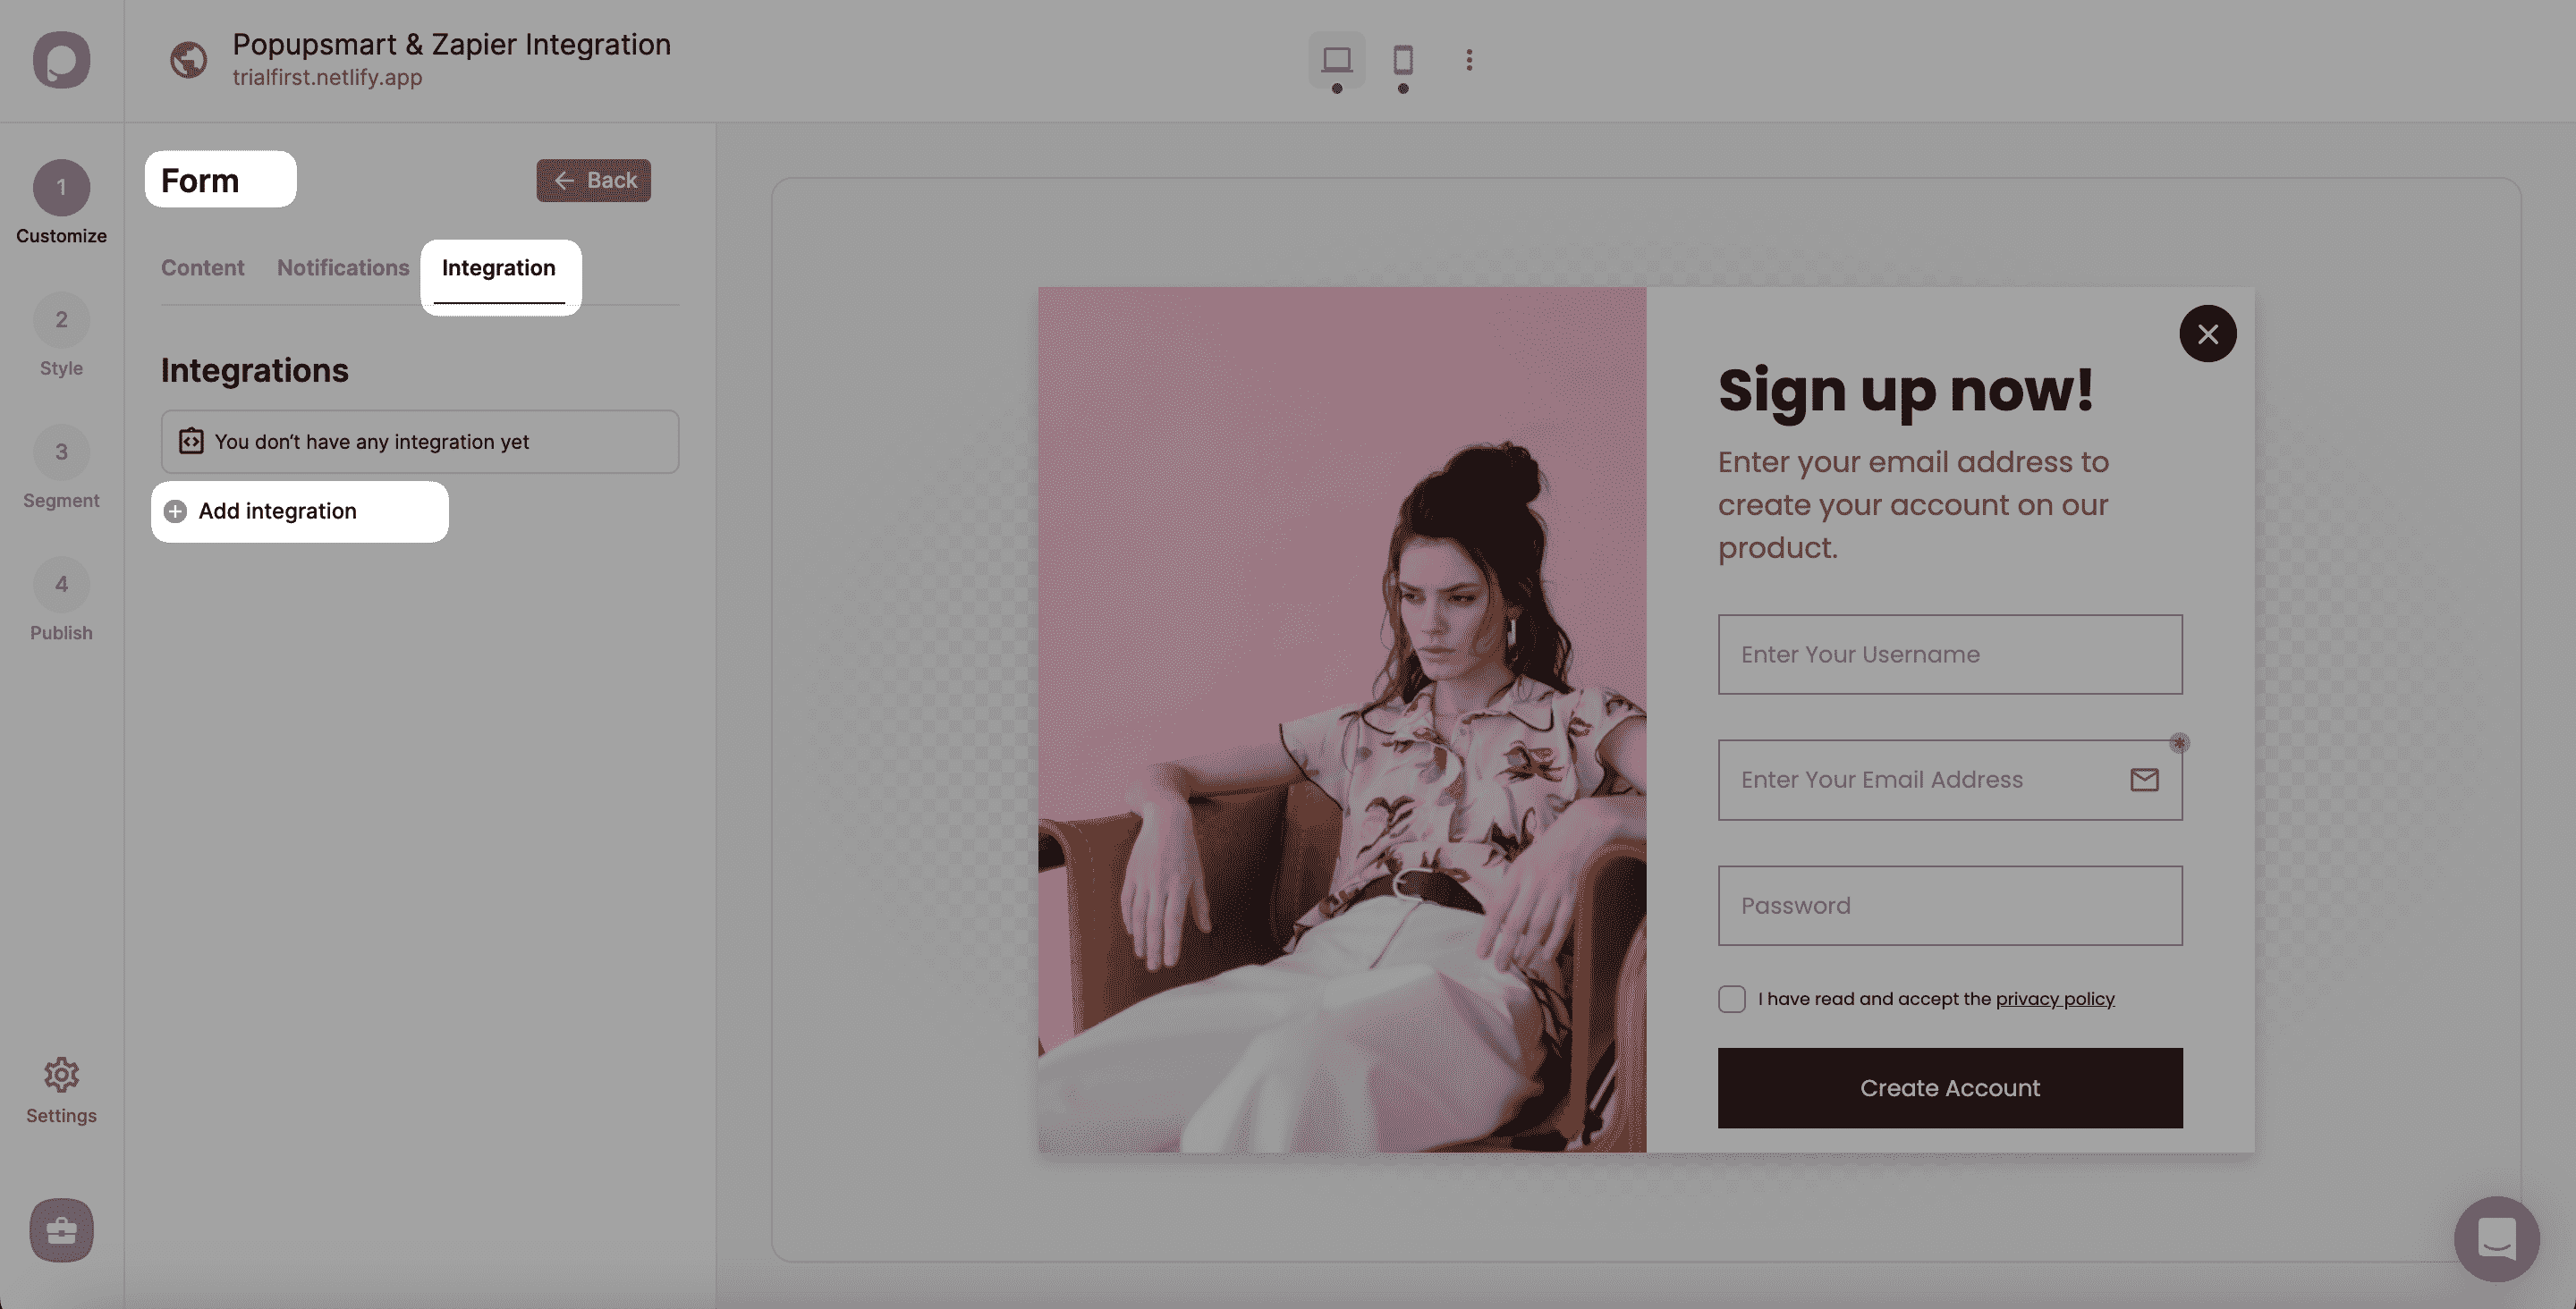
2. You need to choose Integration and add integration for Zapier.
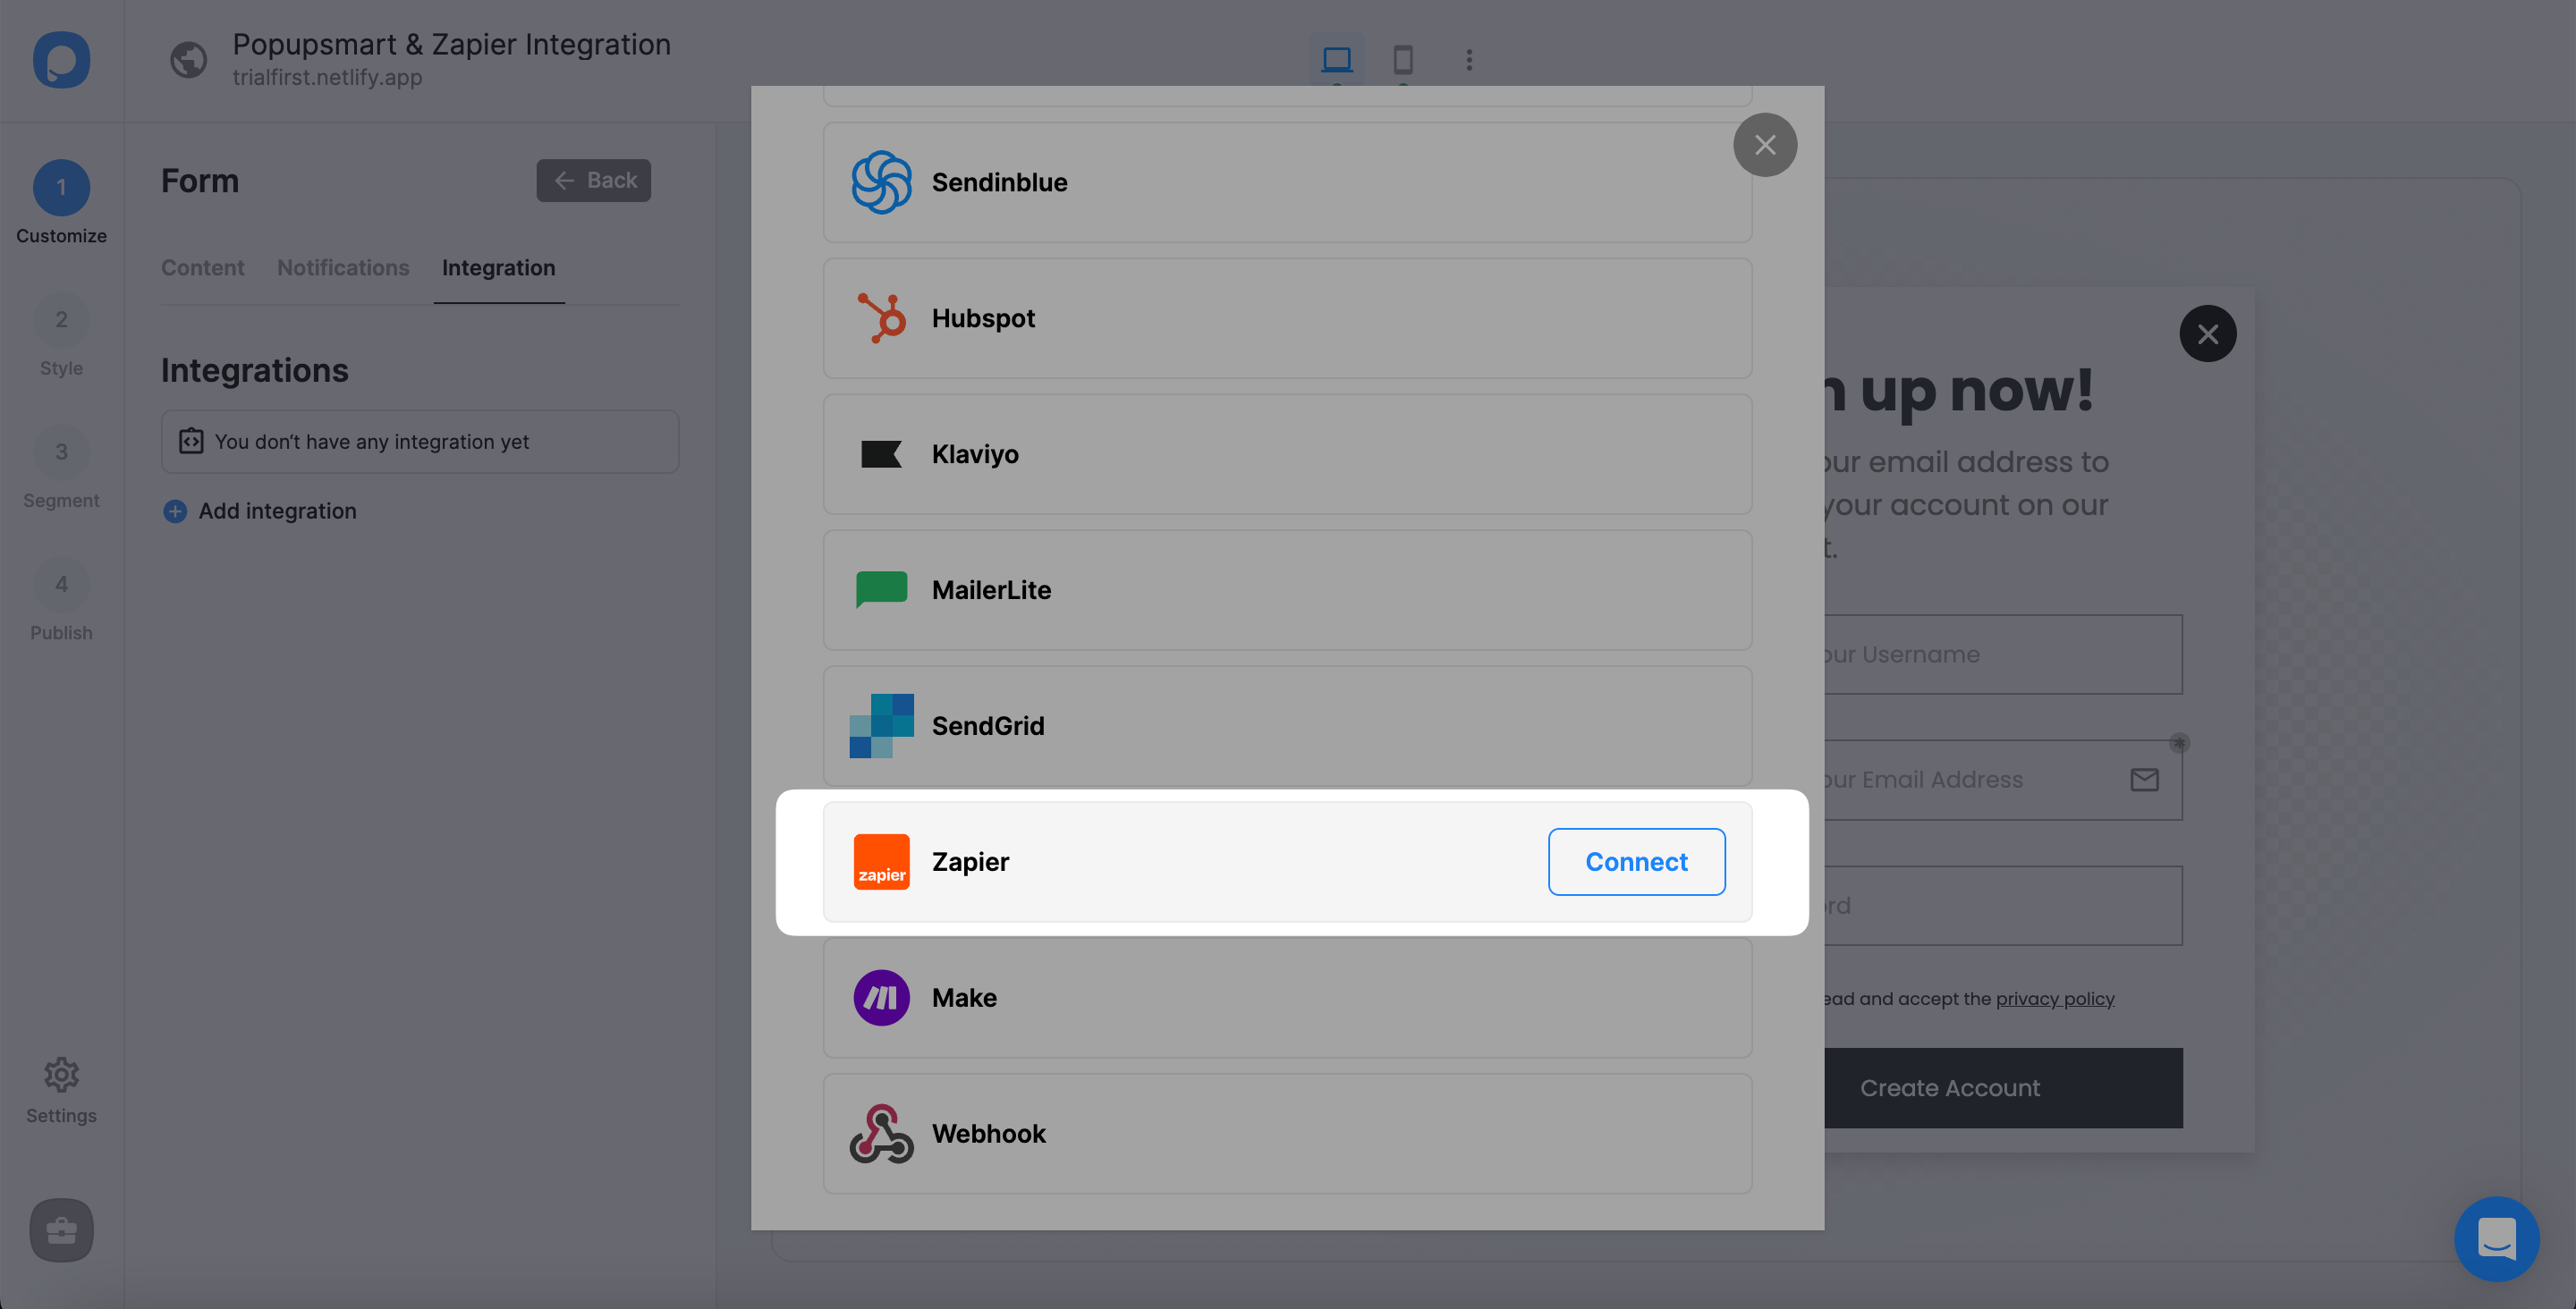
3. Choose Zapier to connect among various options.
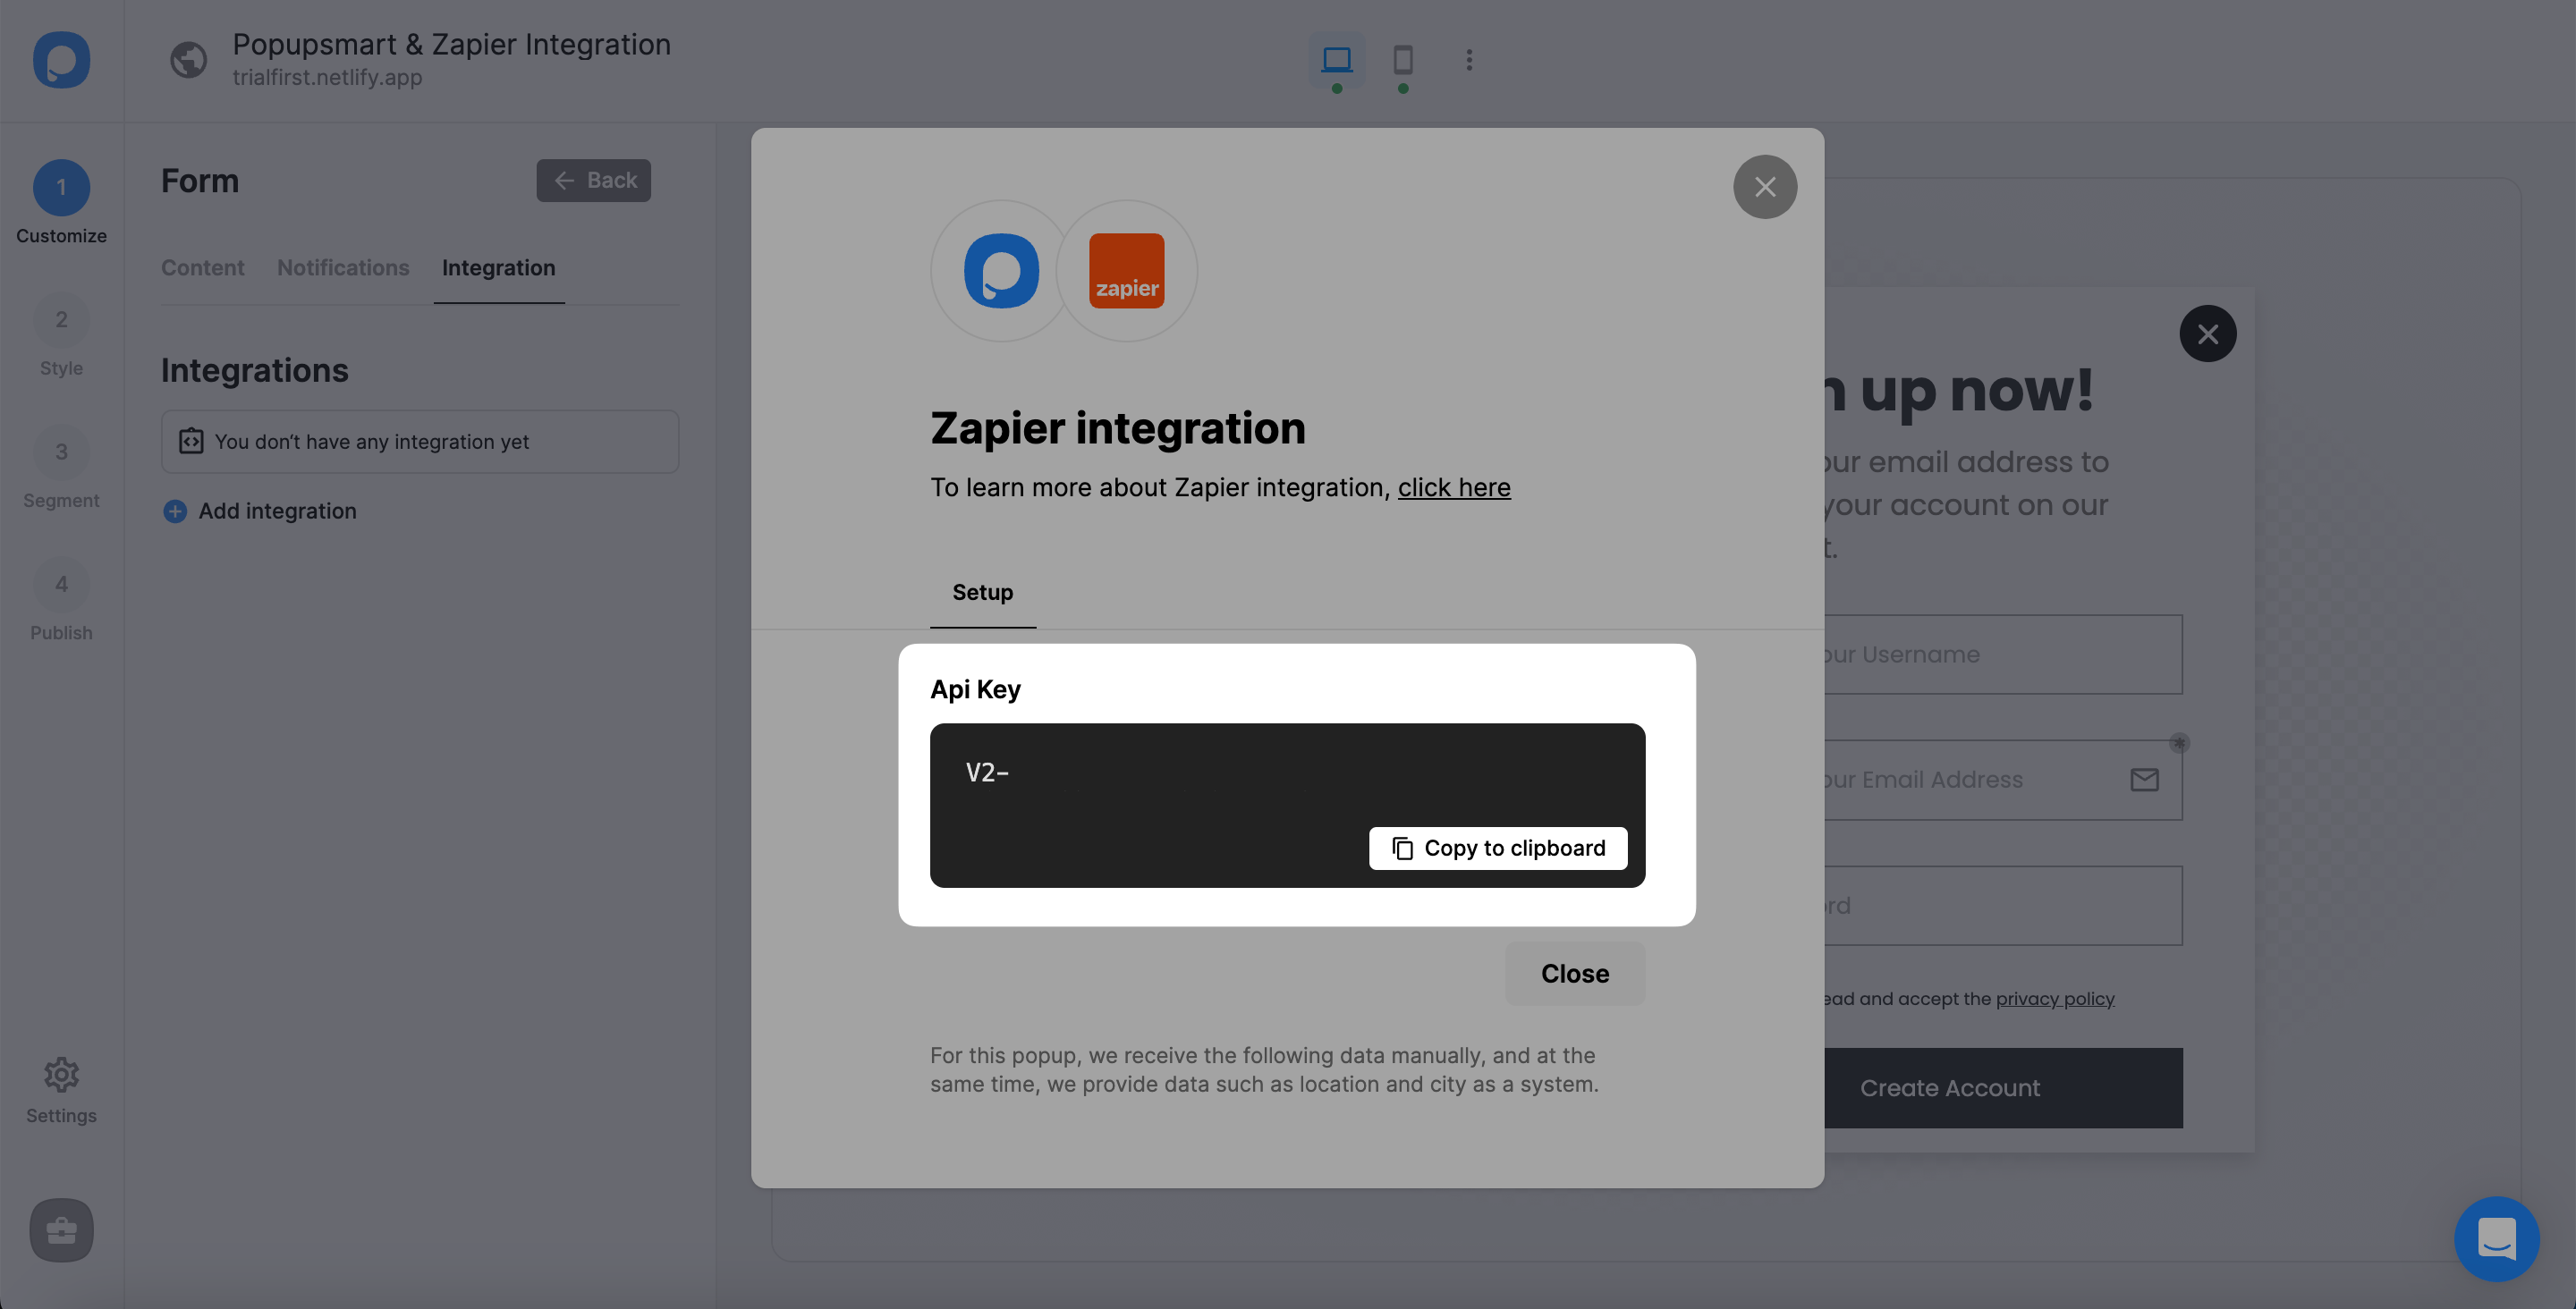
4. Copy the API for the process of connecting Popupsmart with Zapier.
5. Now, log in to your Zapier account with your required account information, and you will see the dashboard and the 'Make a Zap' section when you continue. There, you can make a zap easily.
Choose "Popupsmart." And then, choose the app you want to connect your Popupsmart account with to create a workflow.
Select the commands on the "When this happens..." and "then do this!" fields.
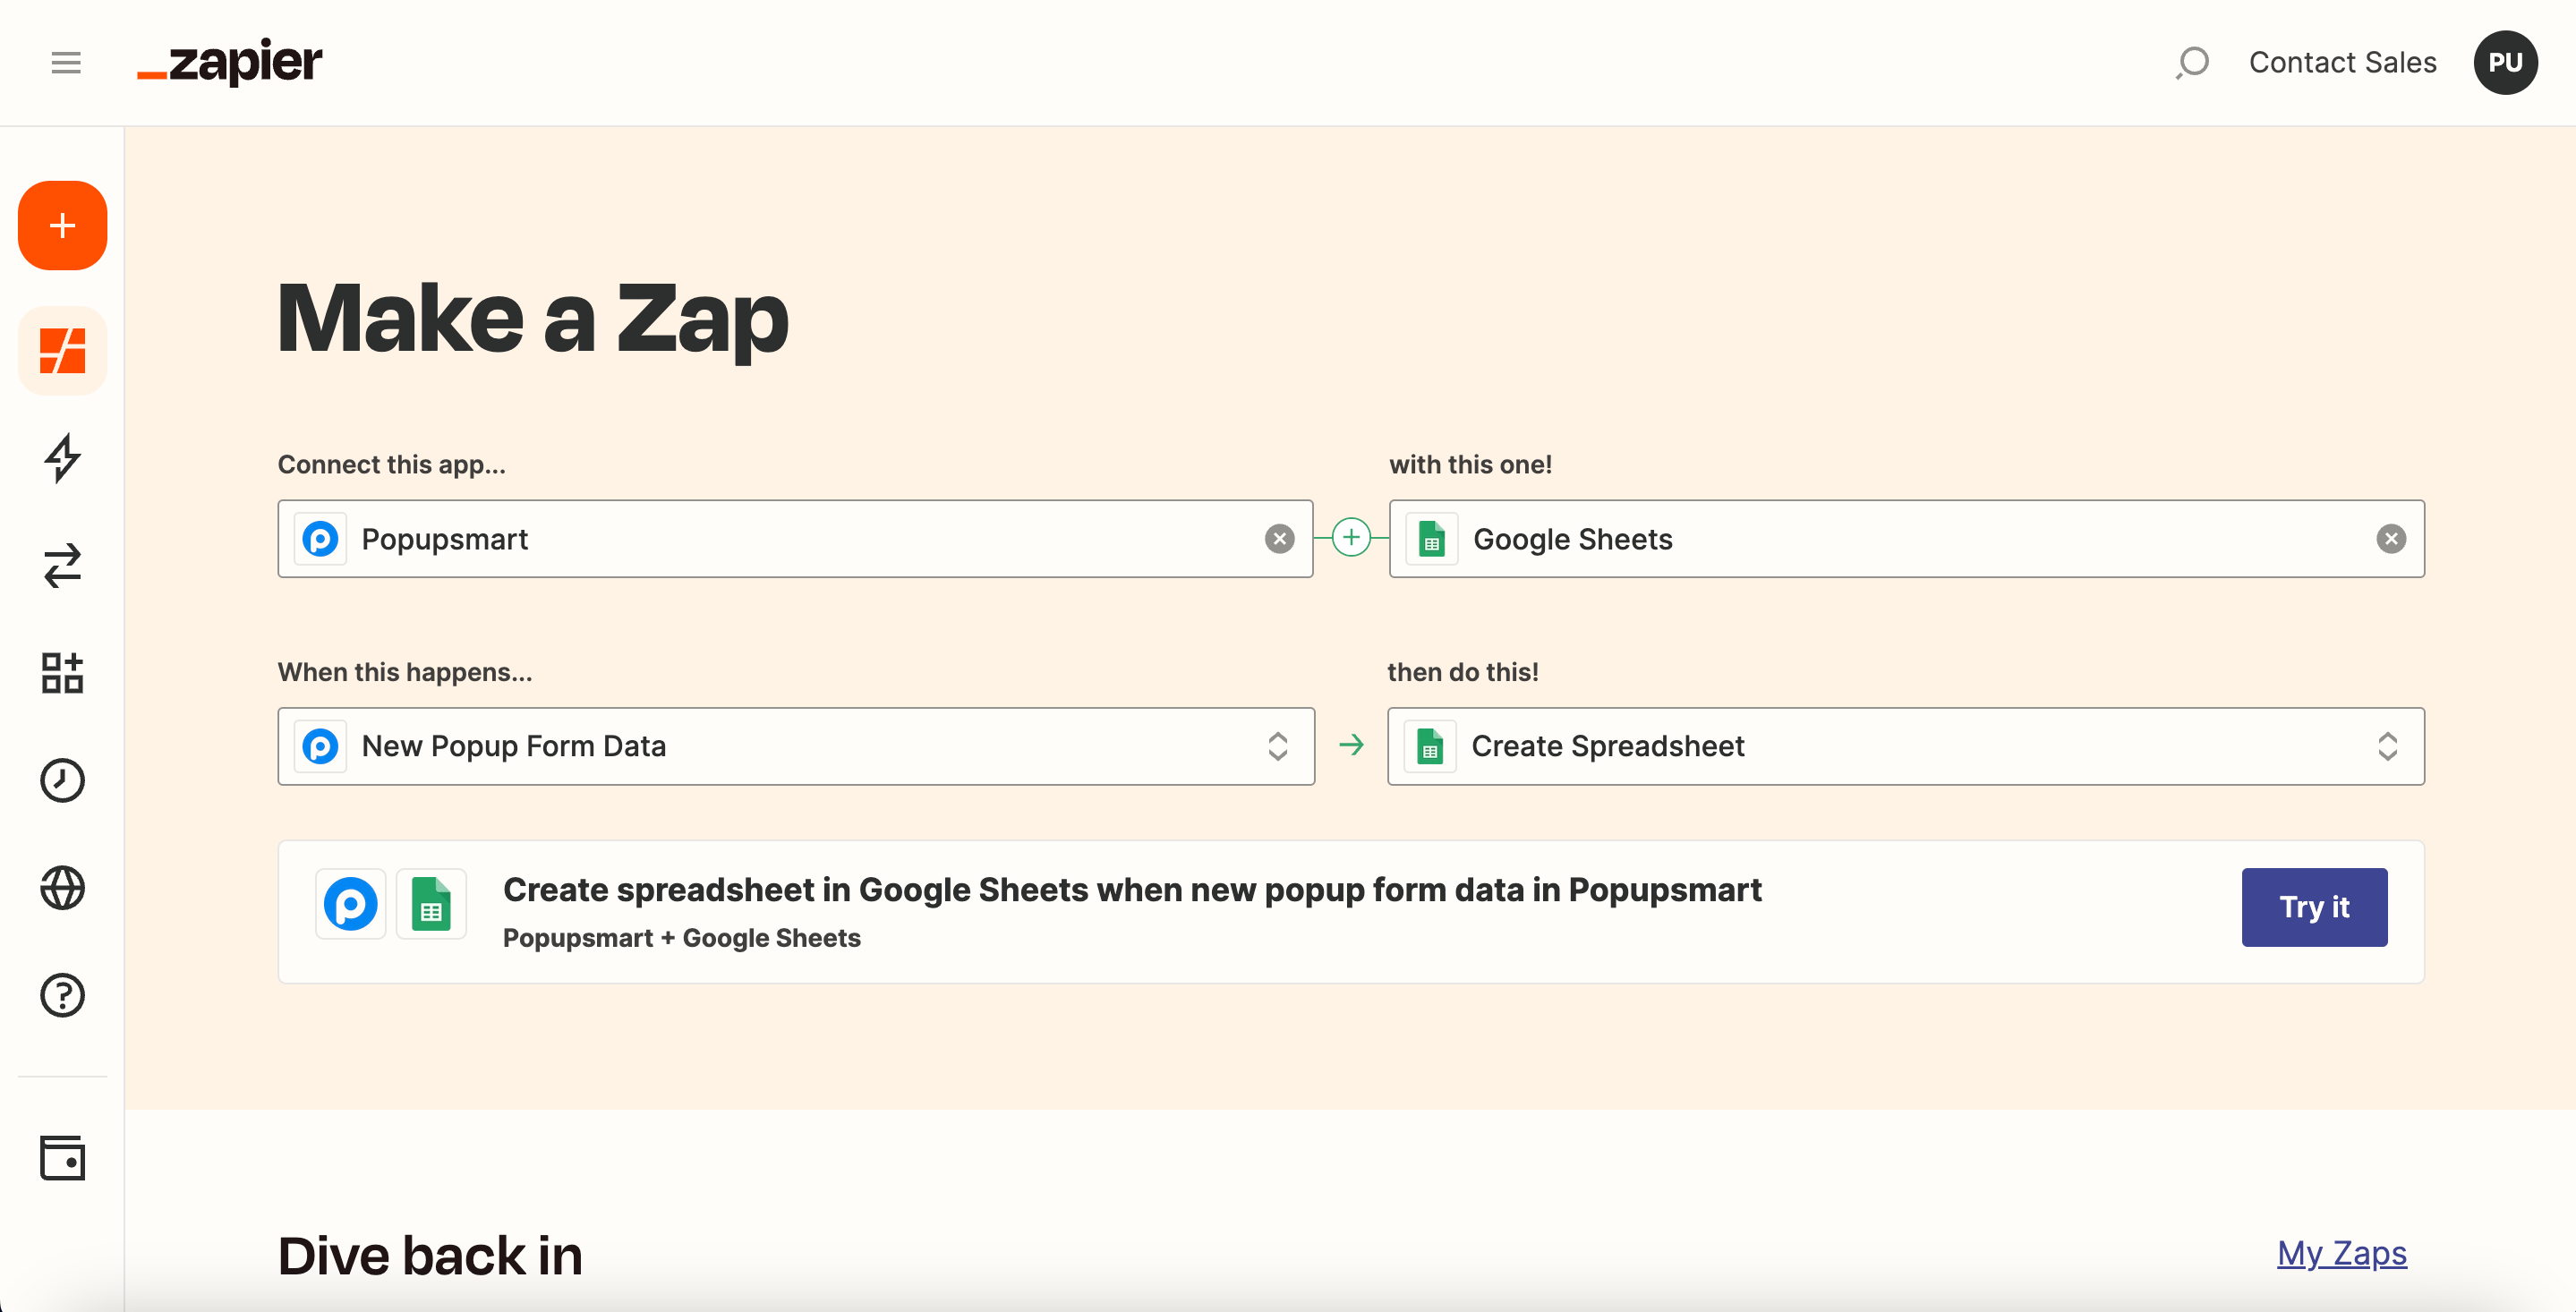
We want Google Sheets to create a spreadsheet automatically so the campaign owner gets new form data via our popup campaign.
At last, click "Try It" after you make all the arrangements.
6. To acquire the API Key and fill in this field, you need to navigate the Popupsmart dashboard. So click “Sign in.”
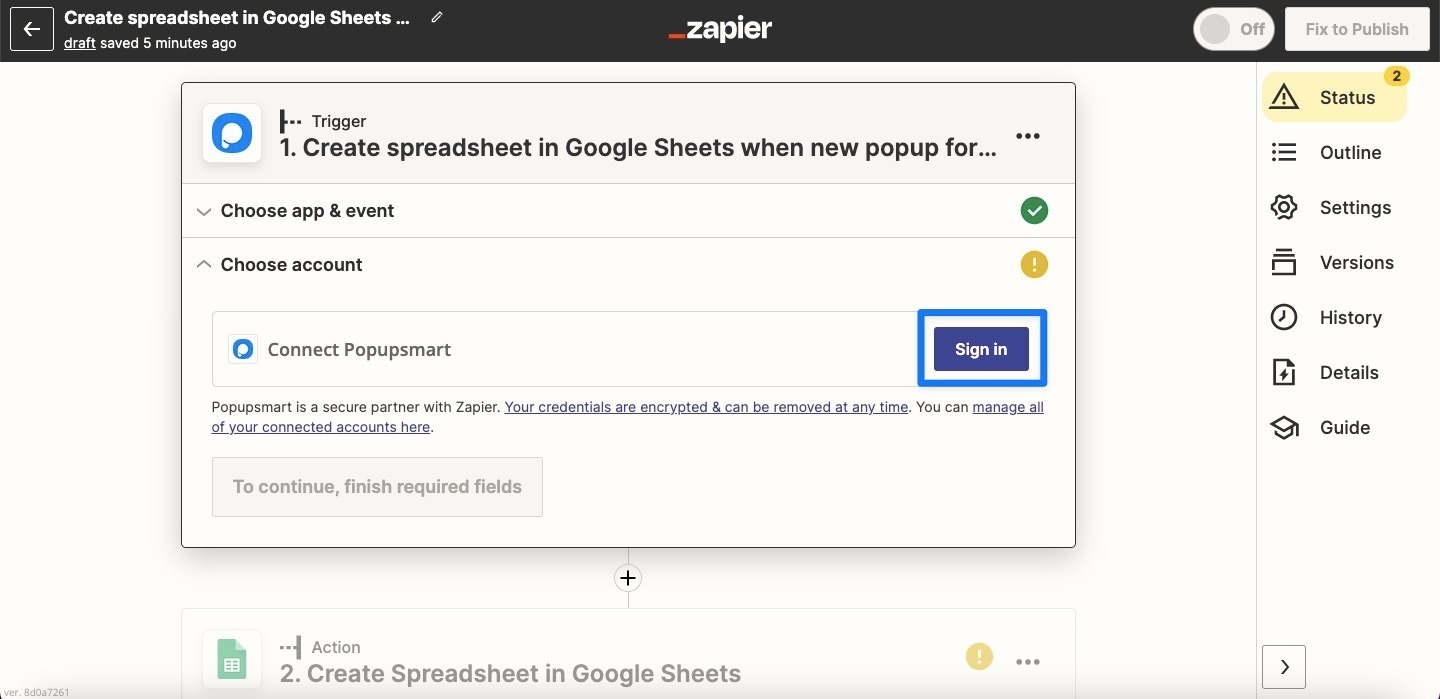
Know that you don’t have to sign in to Zapier for the second time.
7. To connect your Popupsmart account, you need to click connecting your account and fill in the blank with the API you take from your Popupsmart account.
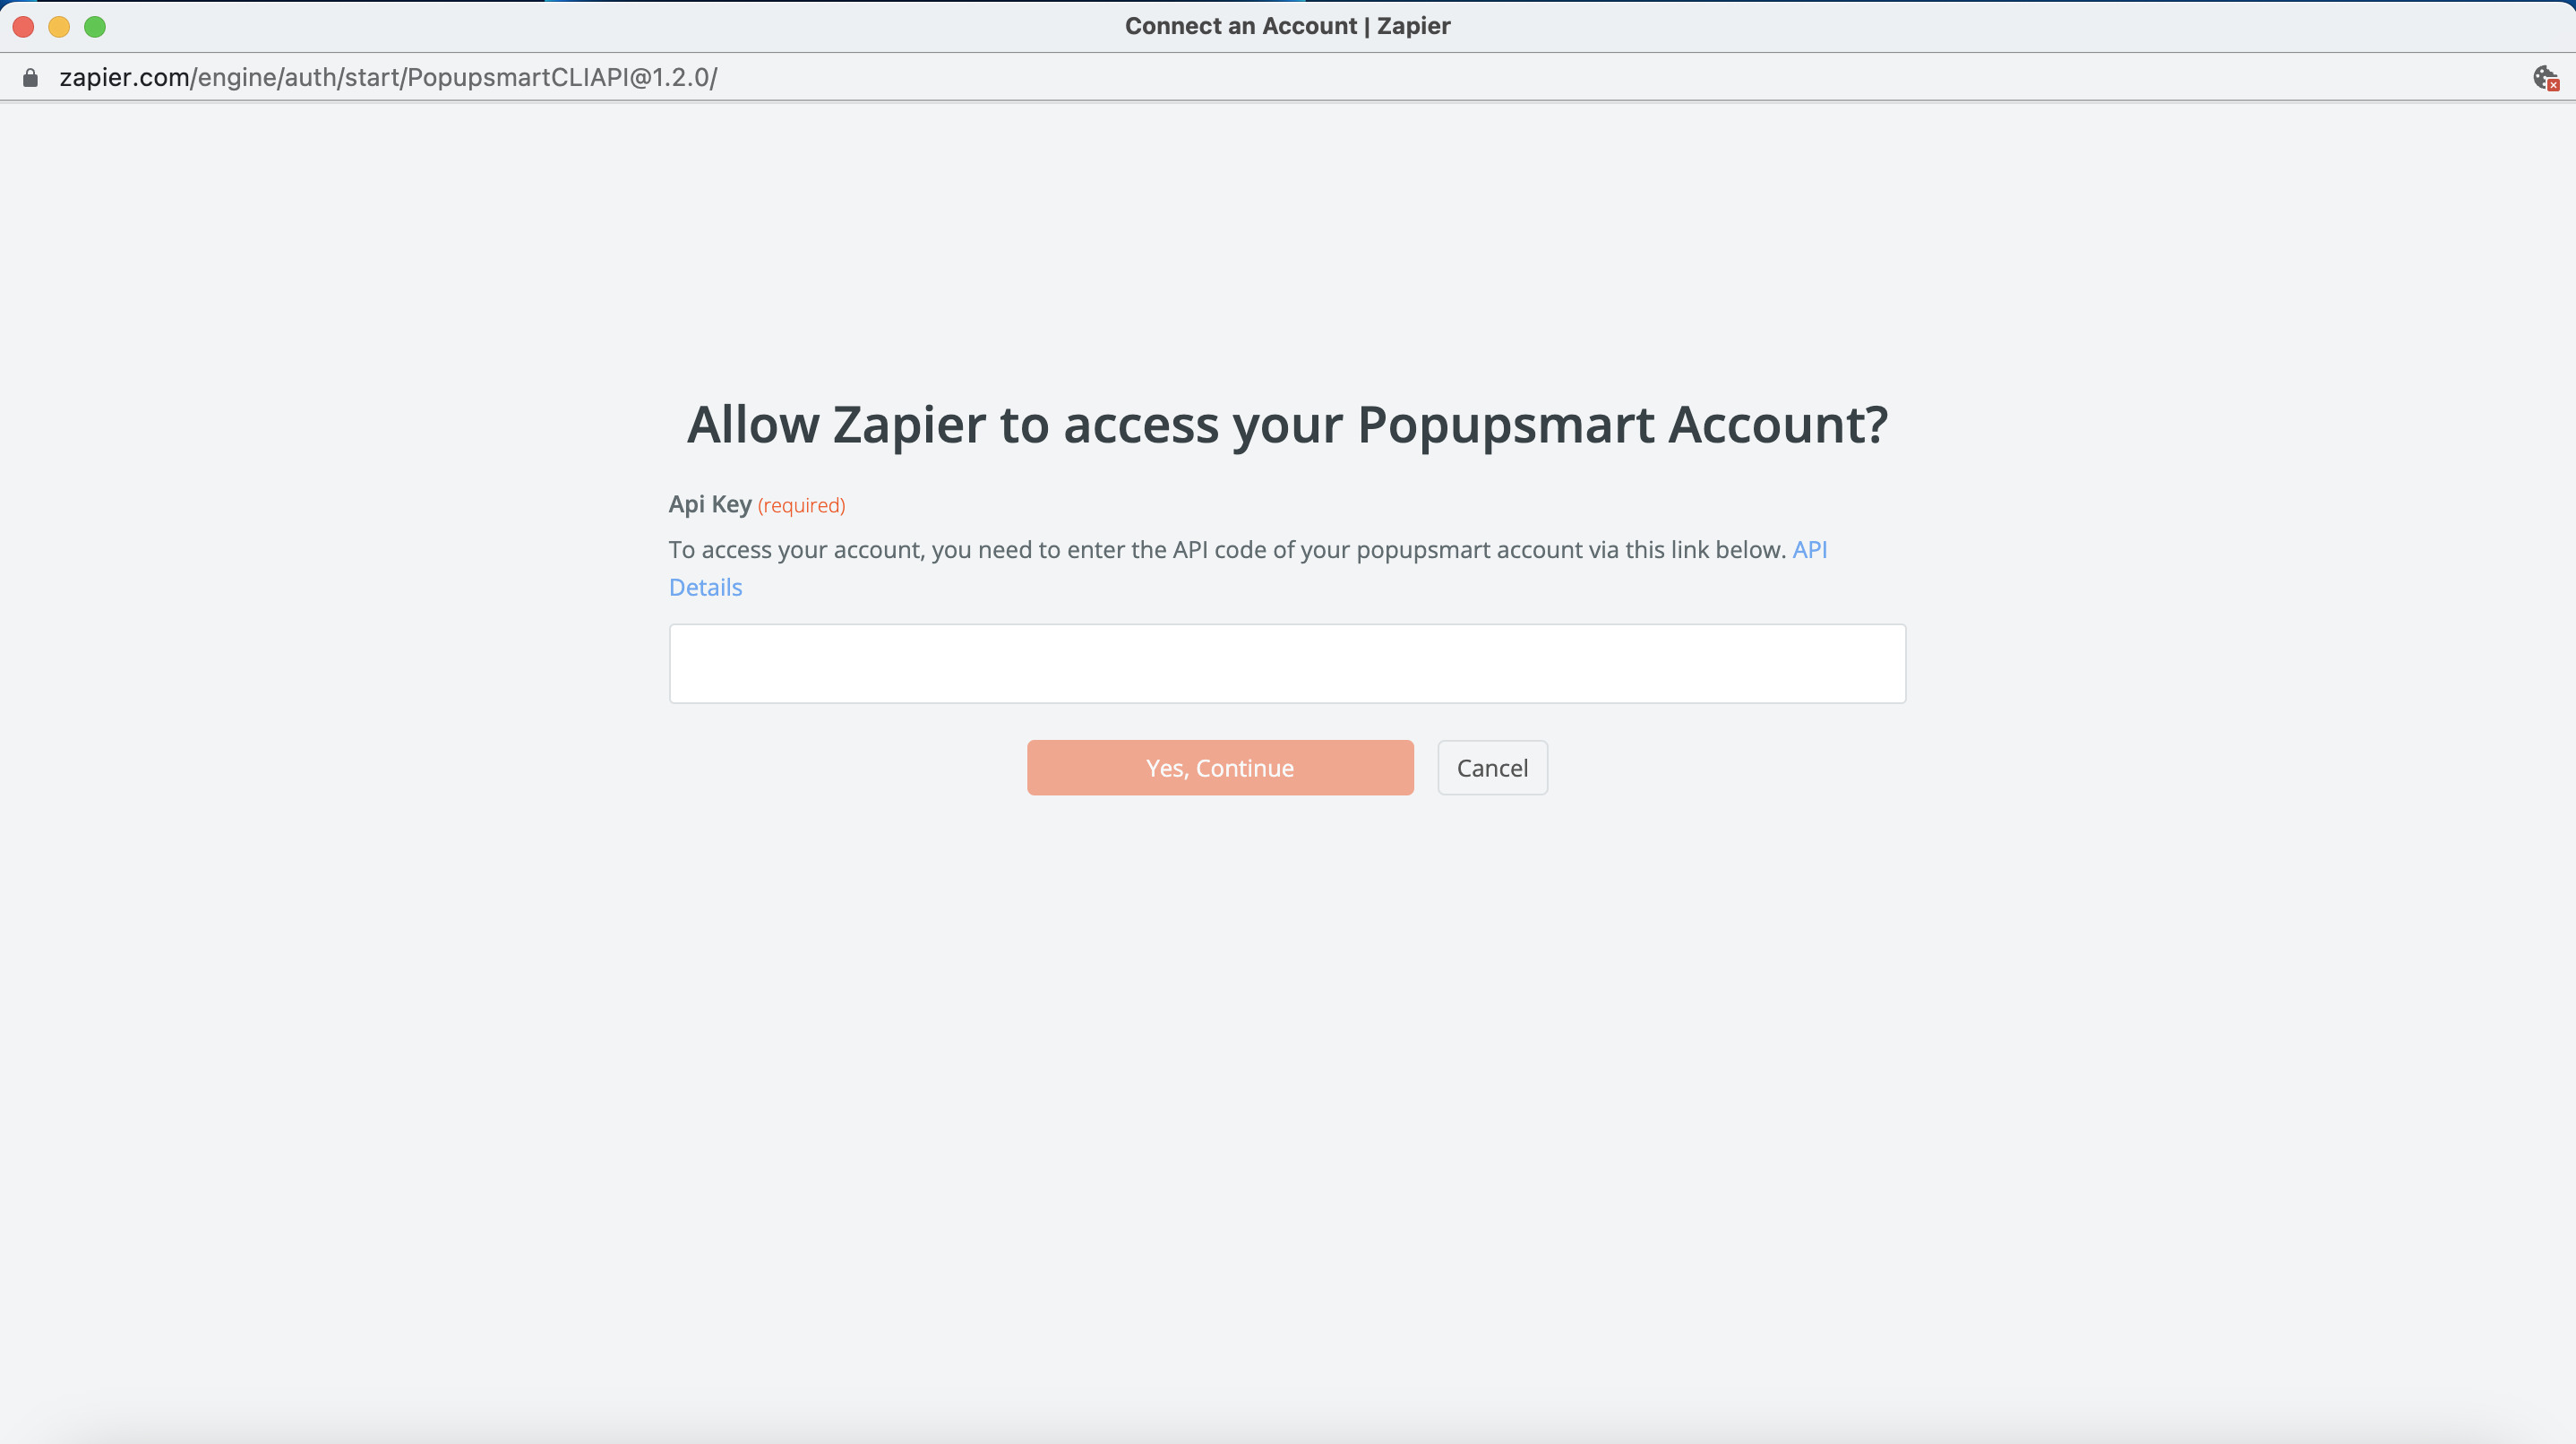
8. Paste the Zapier API Key you have copied and click "Yes, Continue."
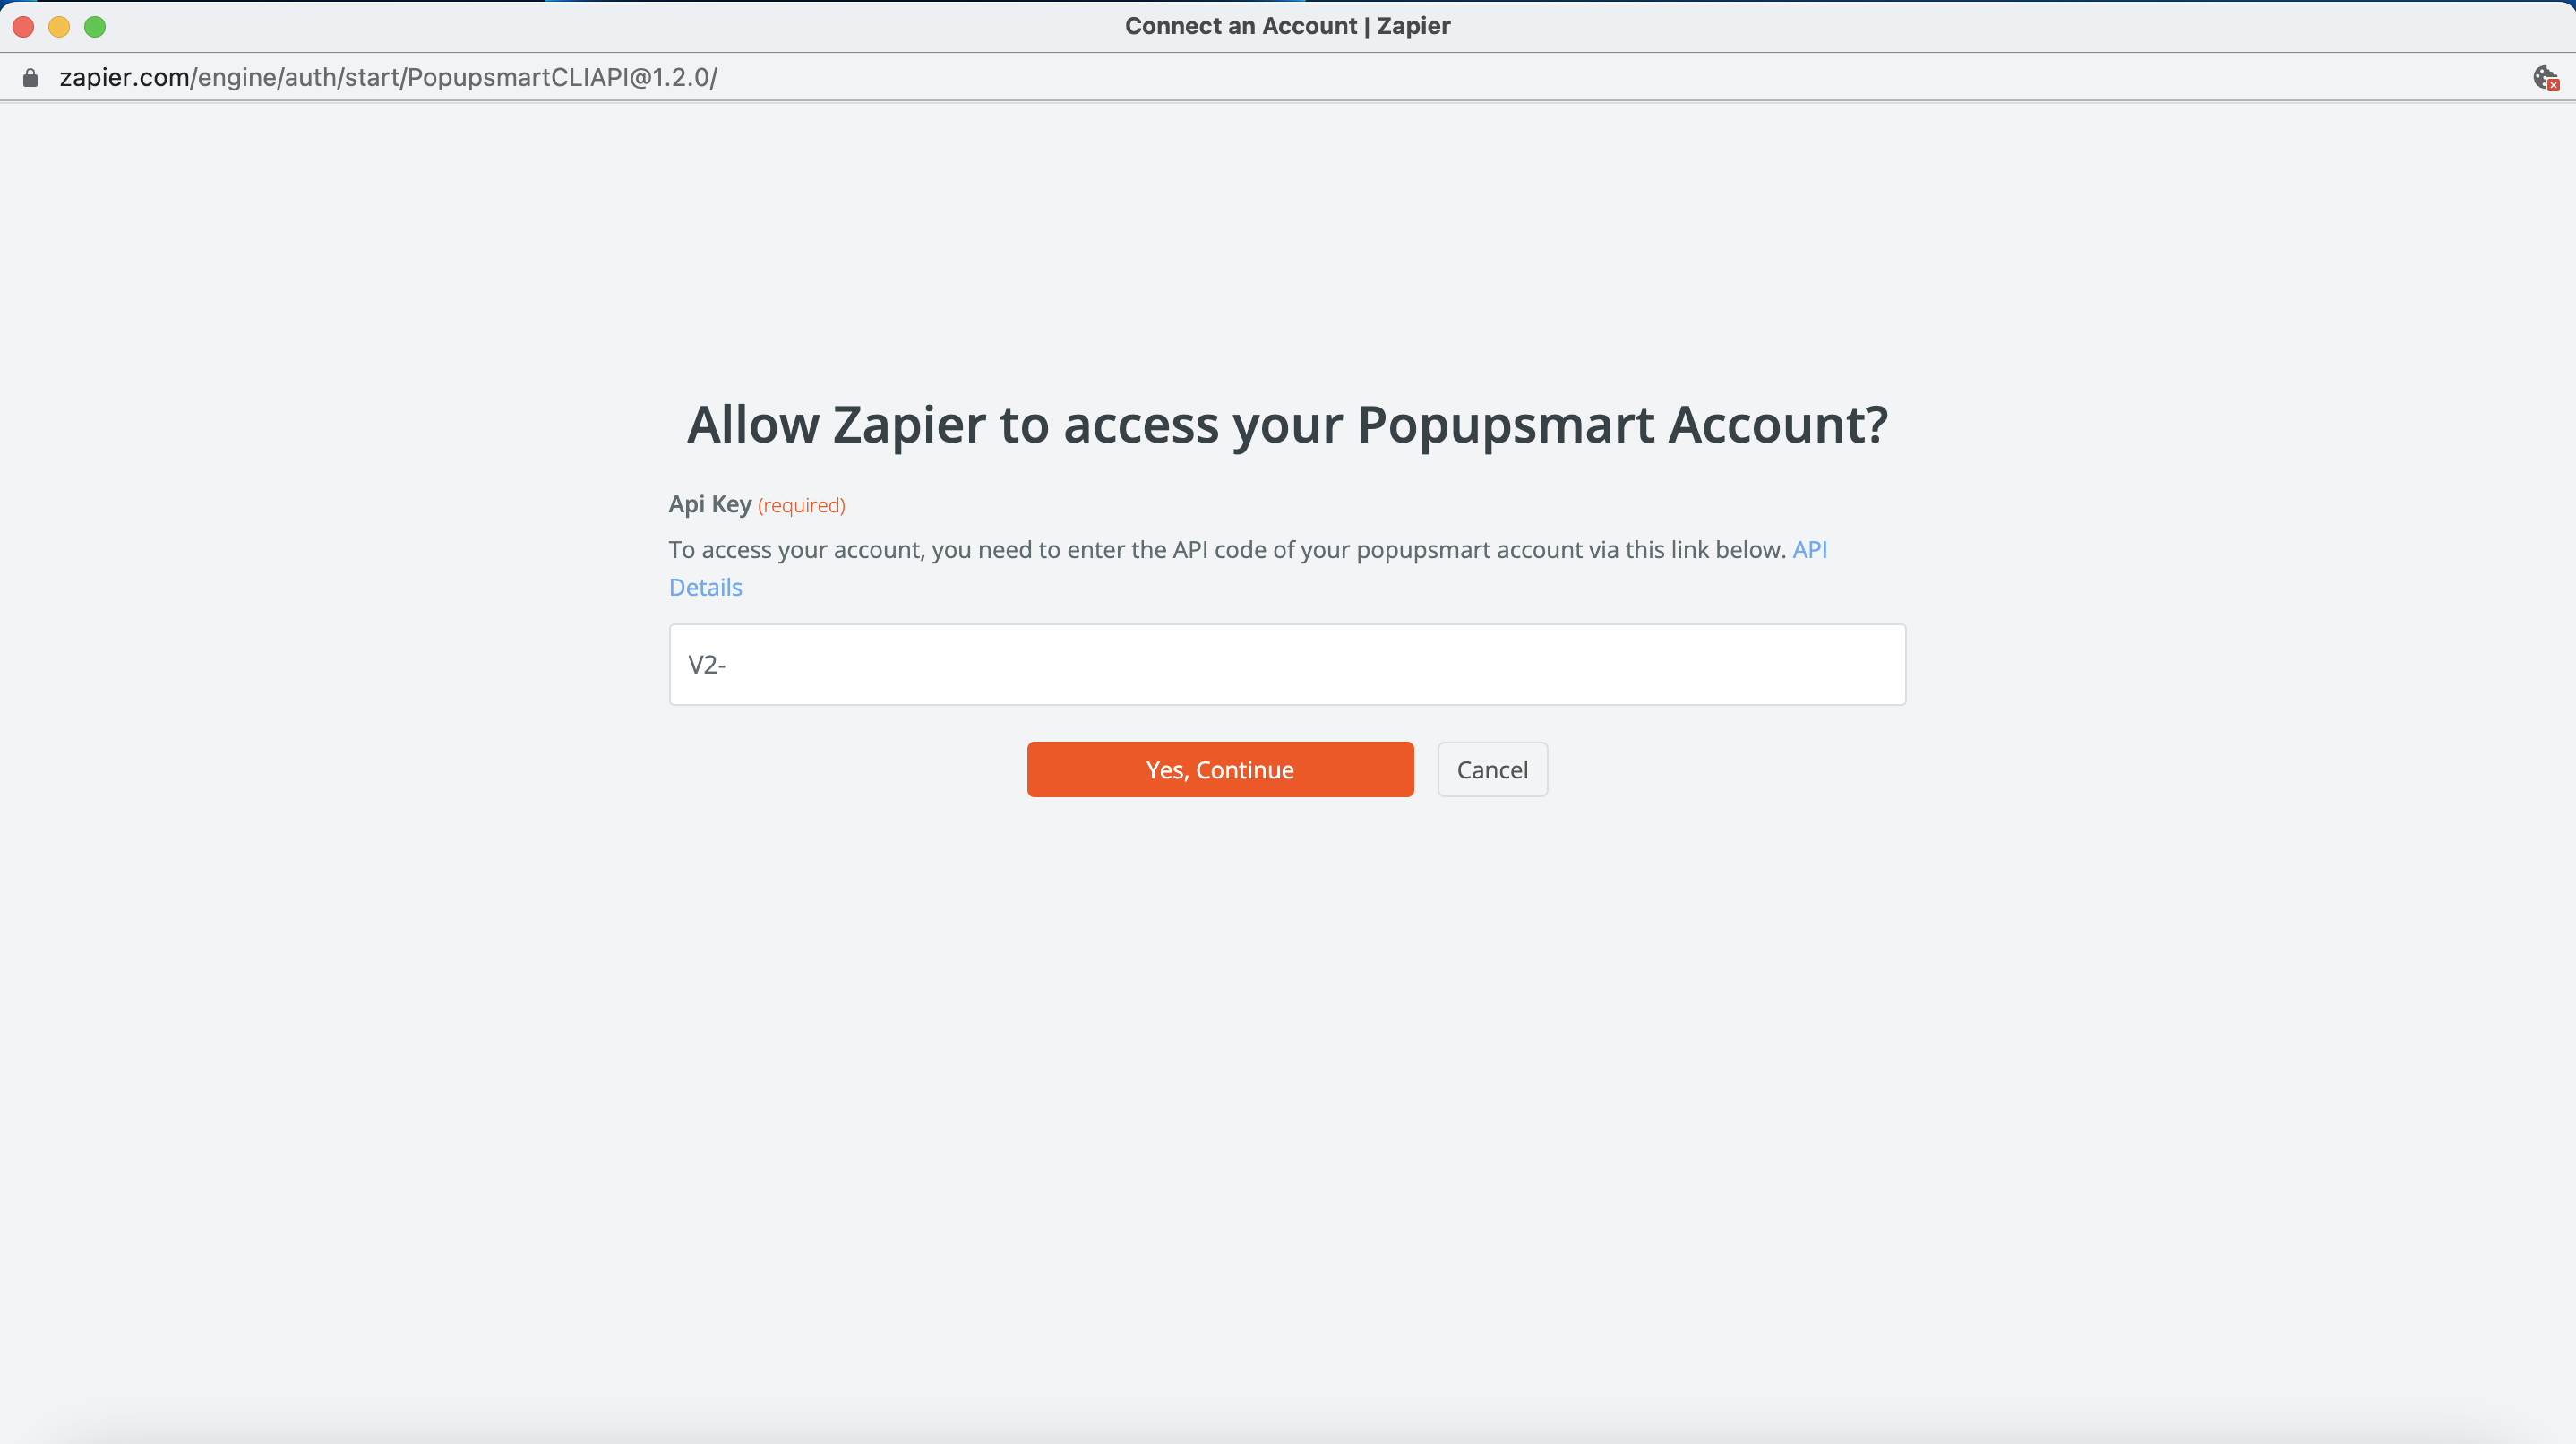
9. Click "Continue" after connecting your Popupsmart account.
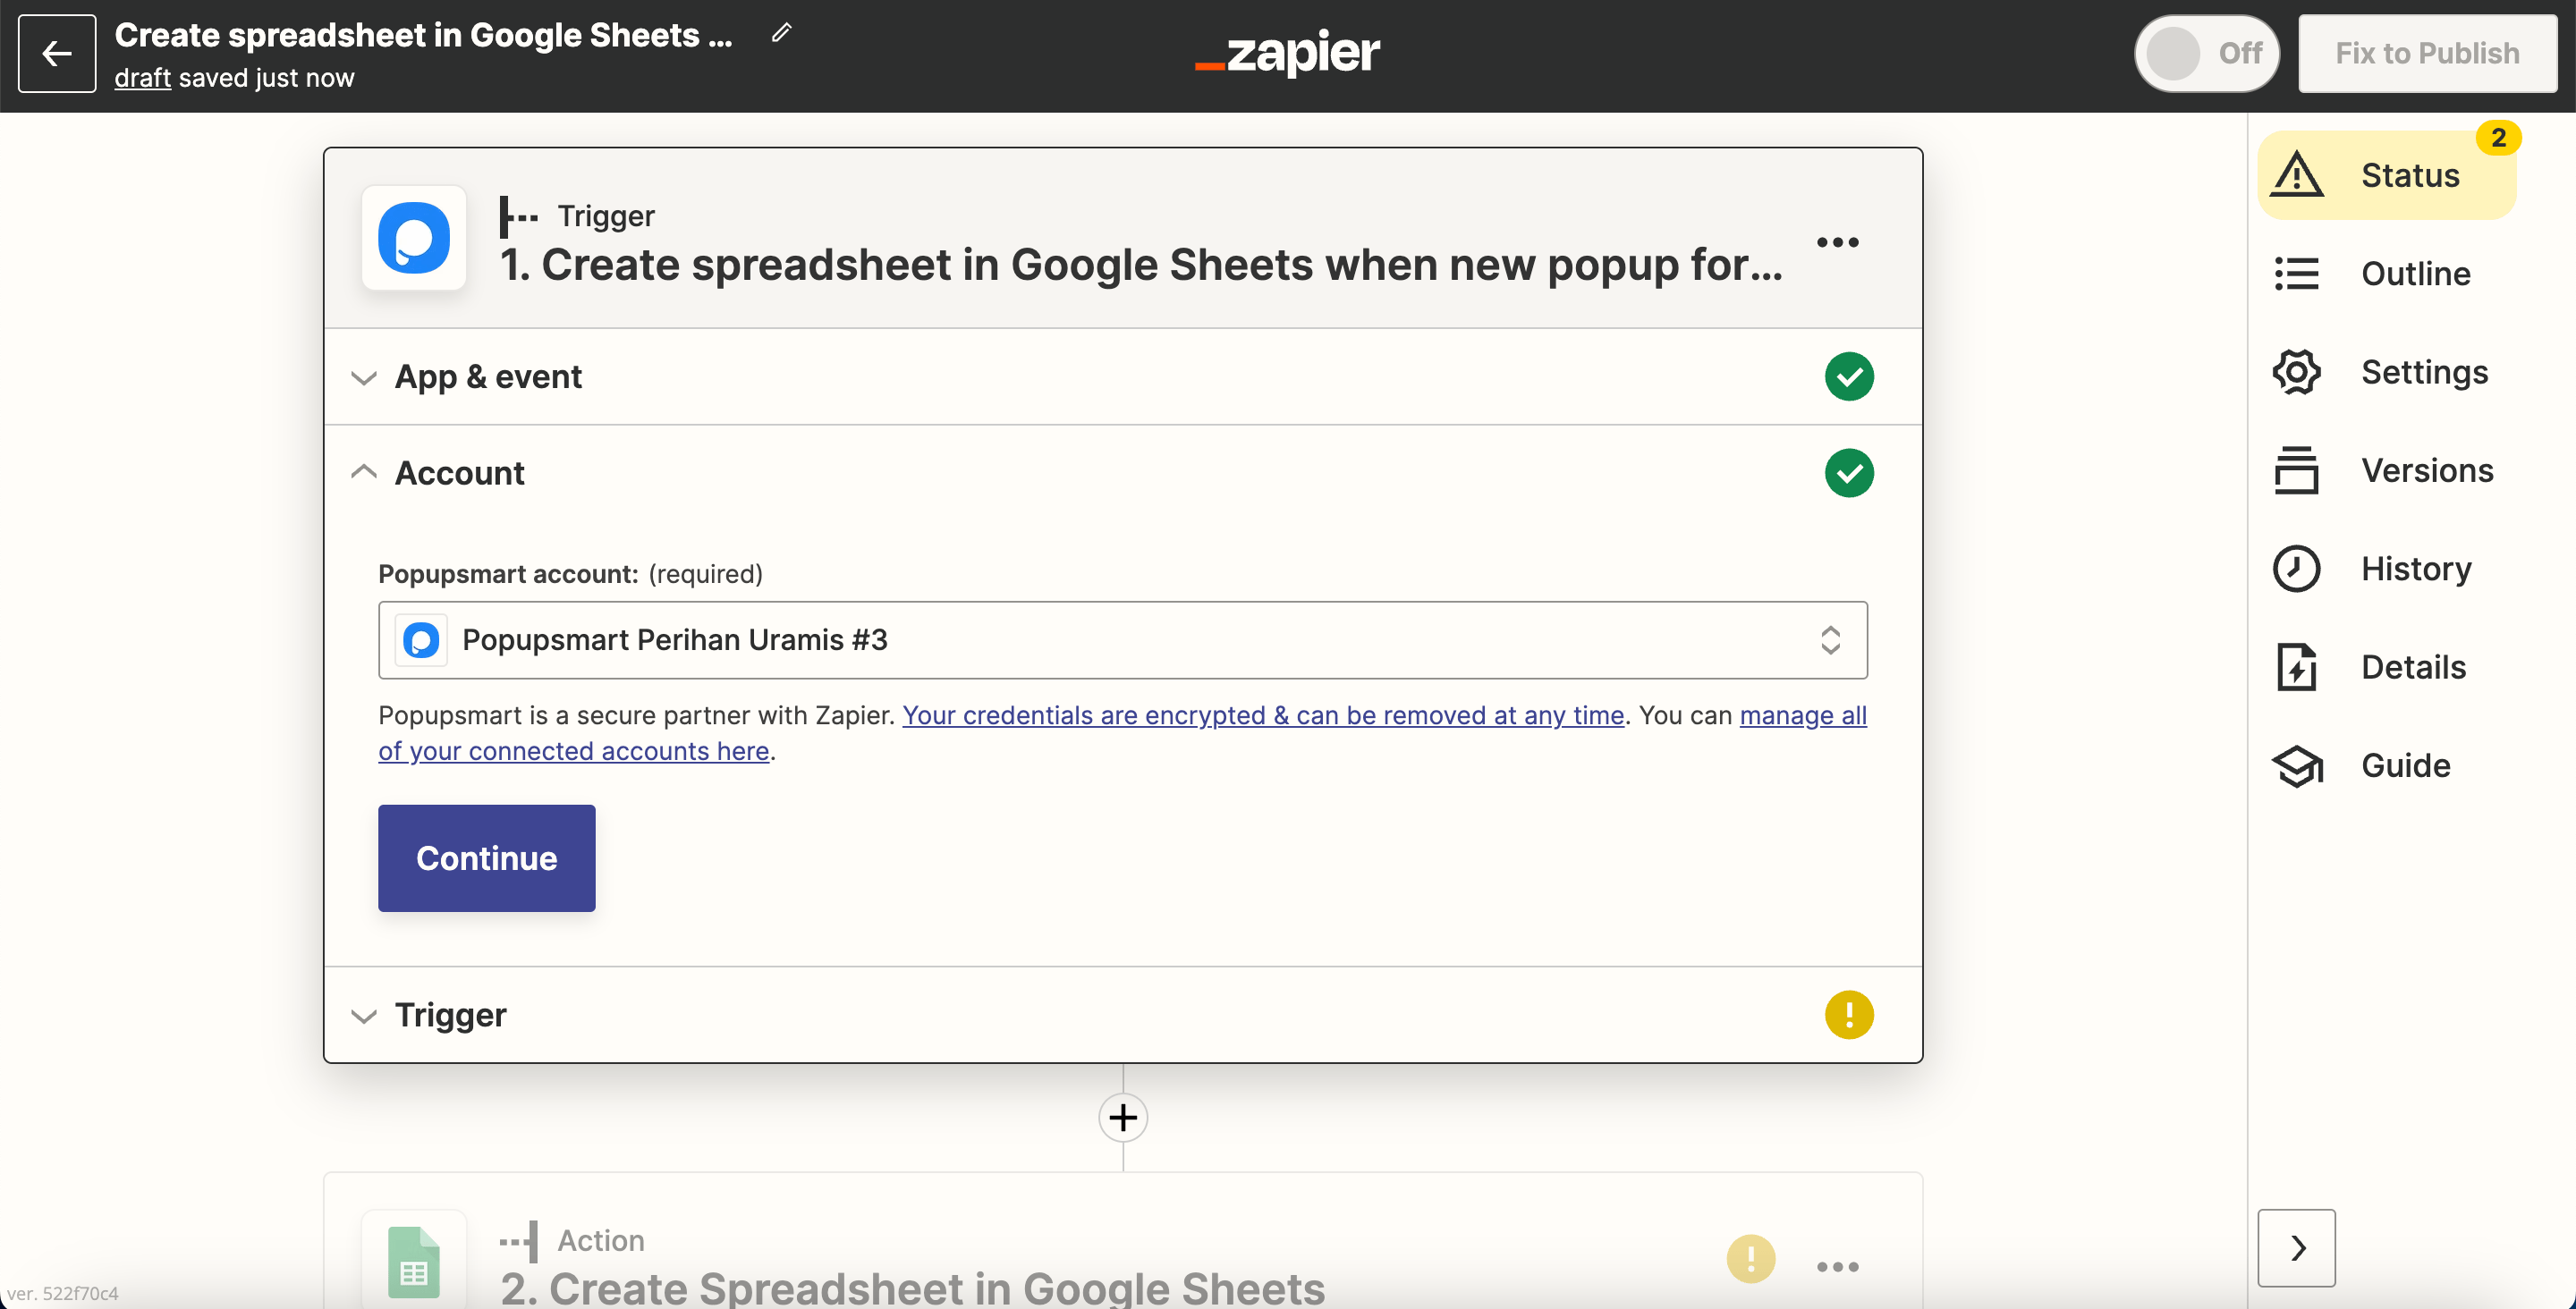
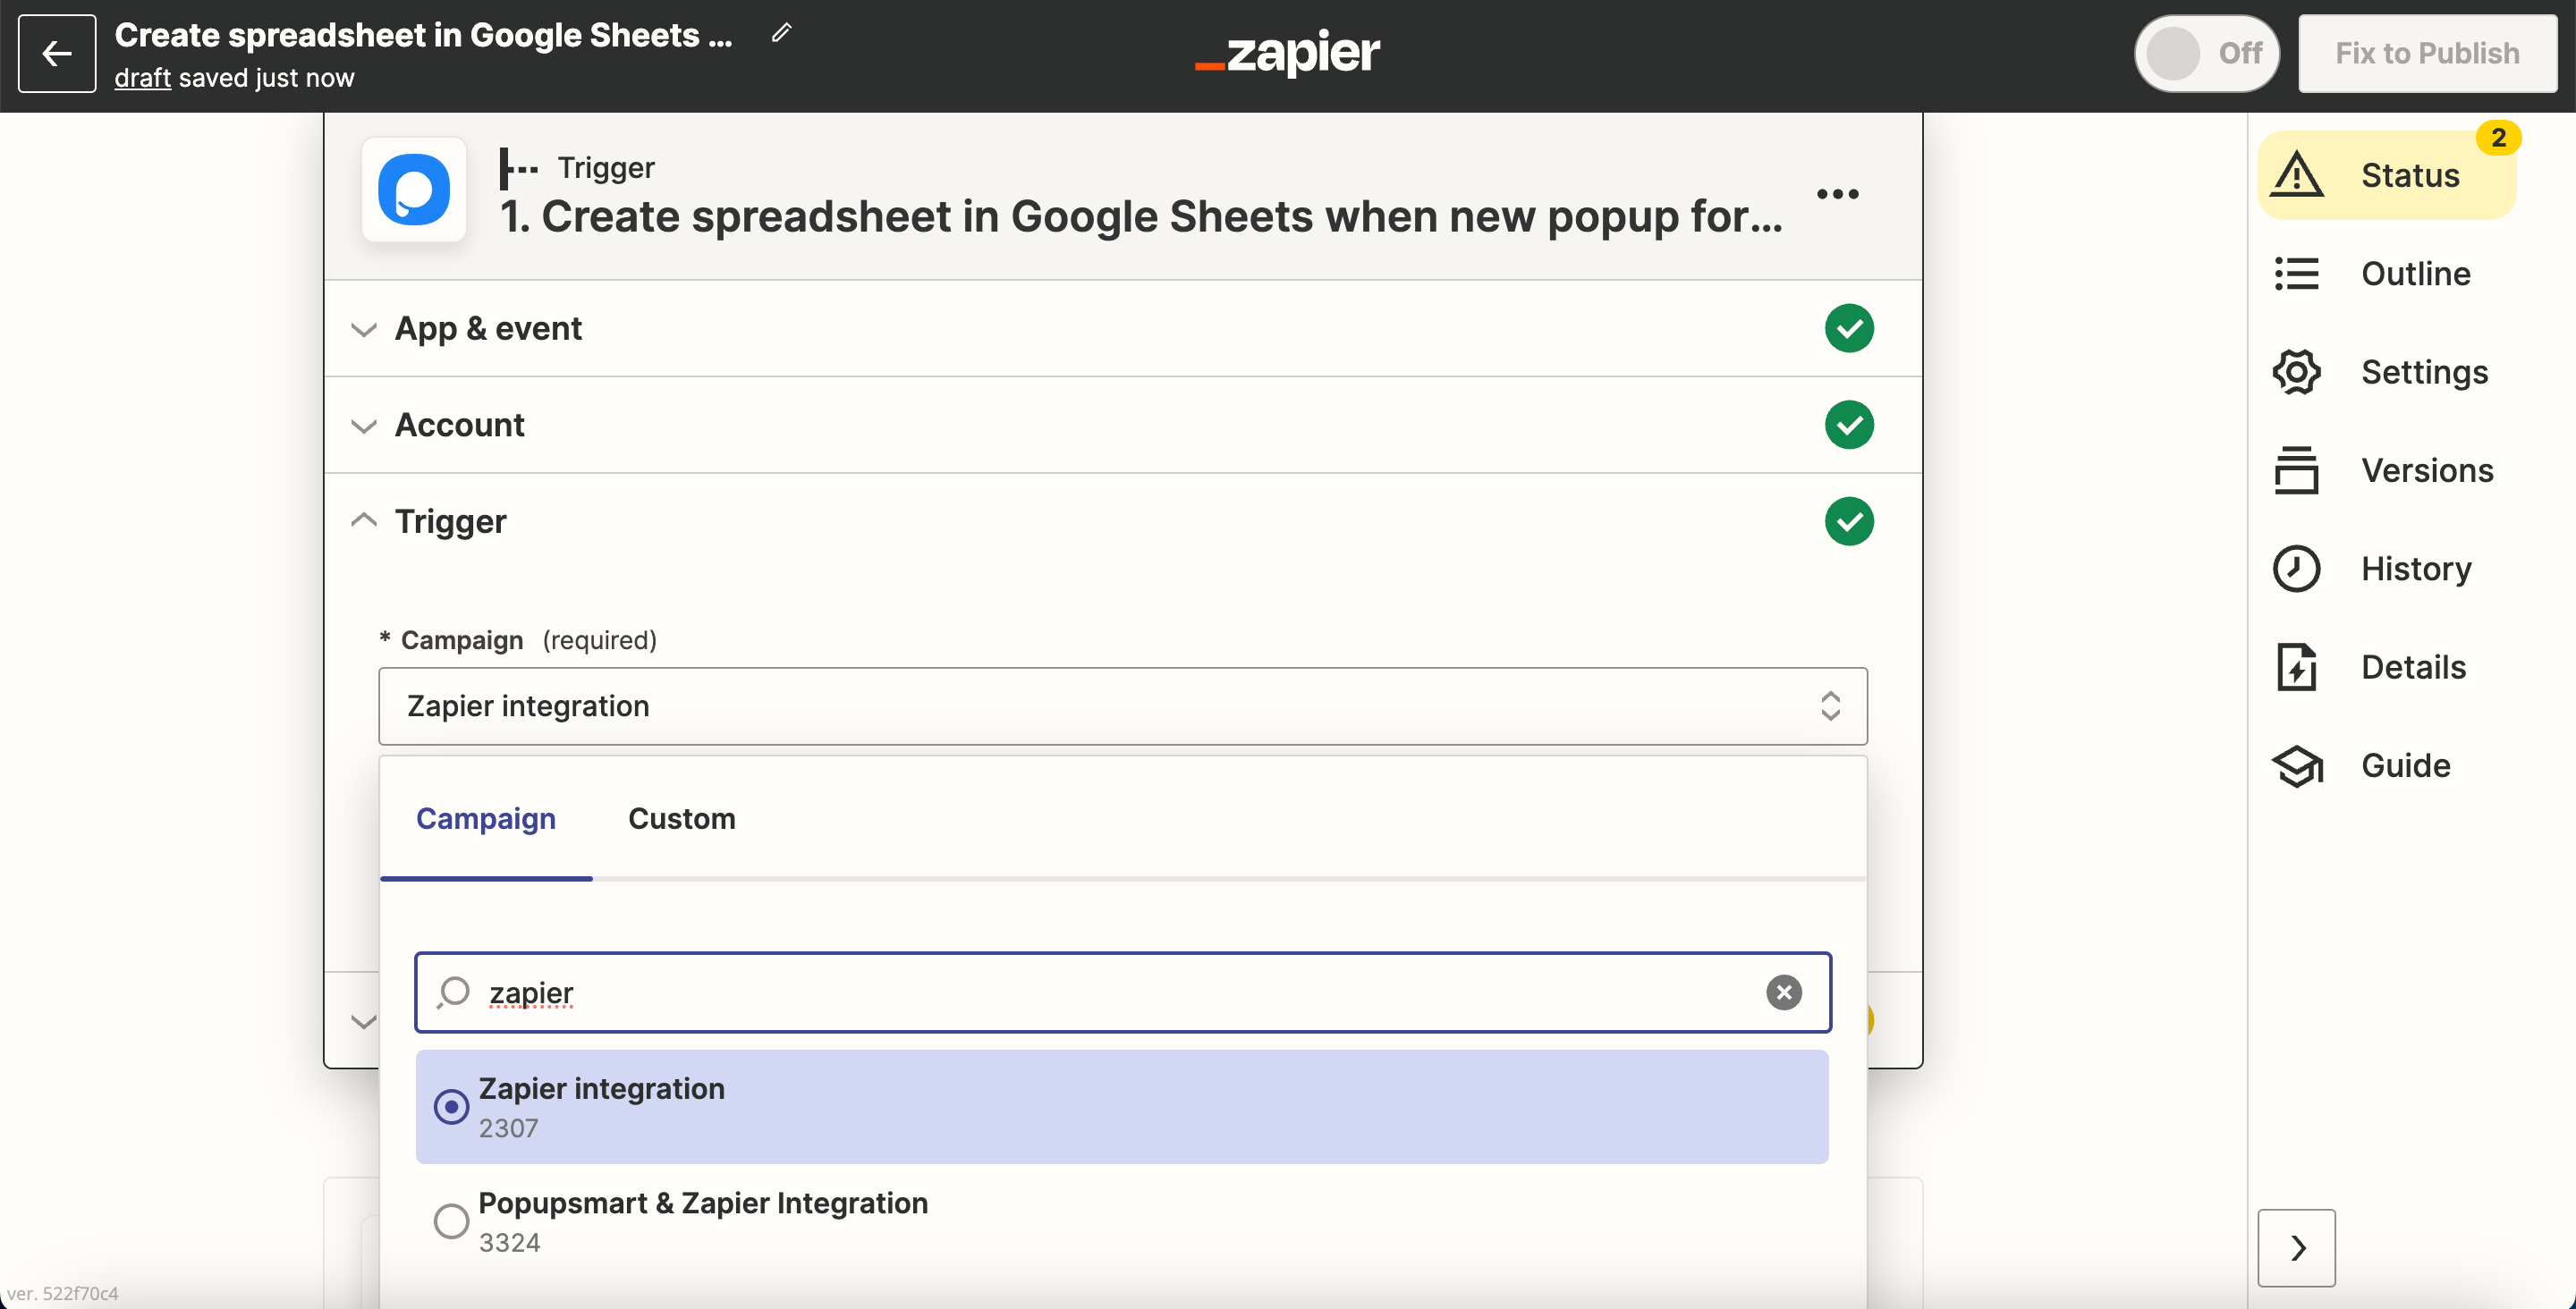
10. There, you will choose the target campaign and click "Continue."
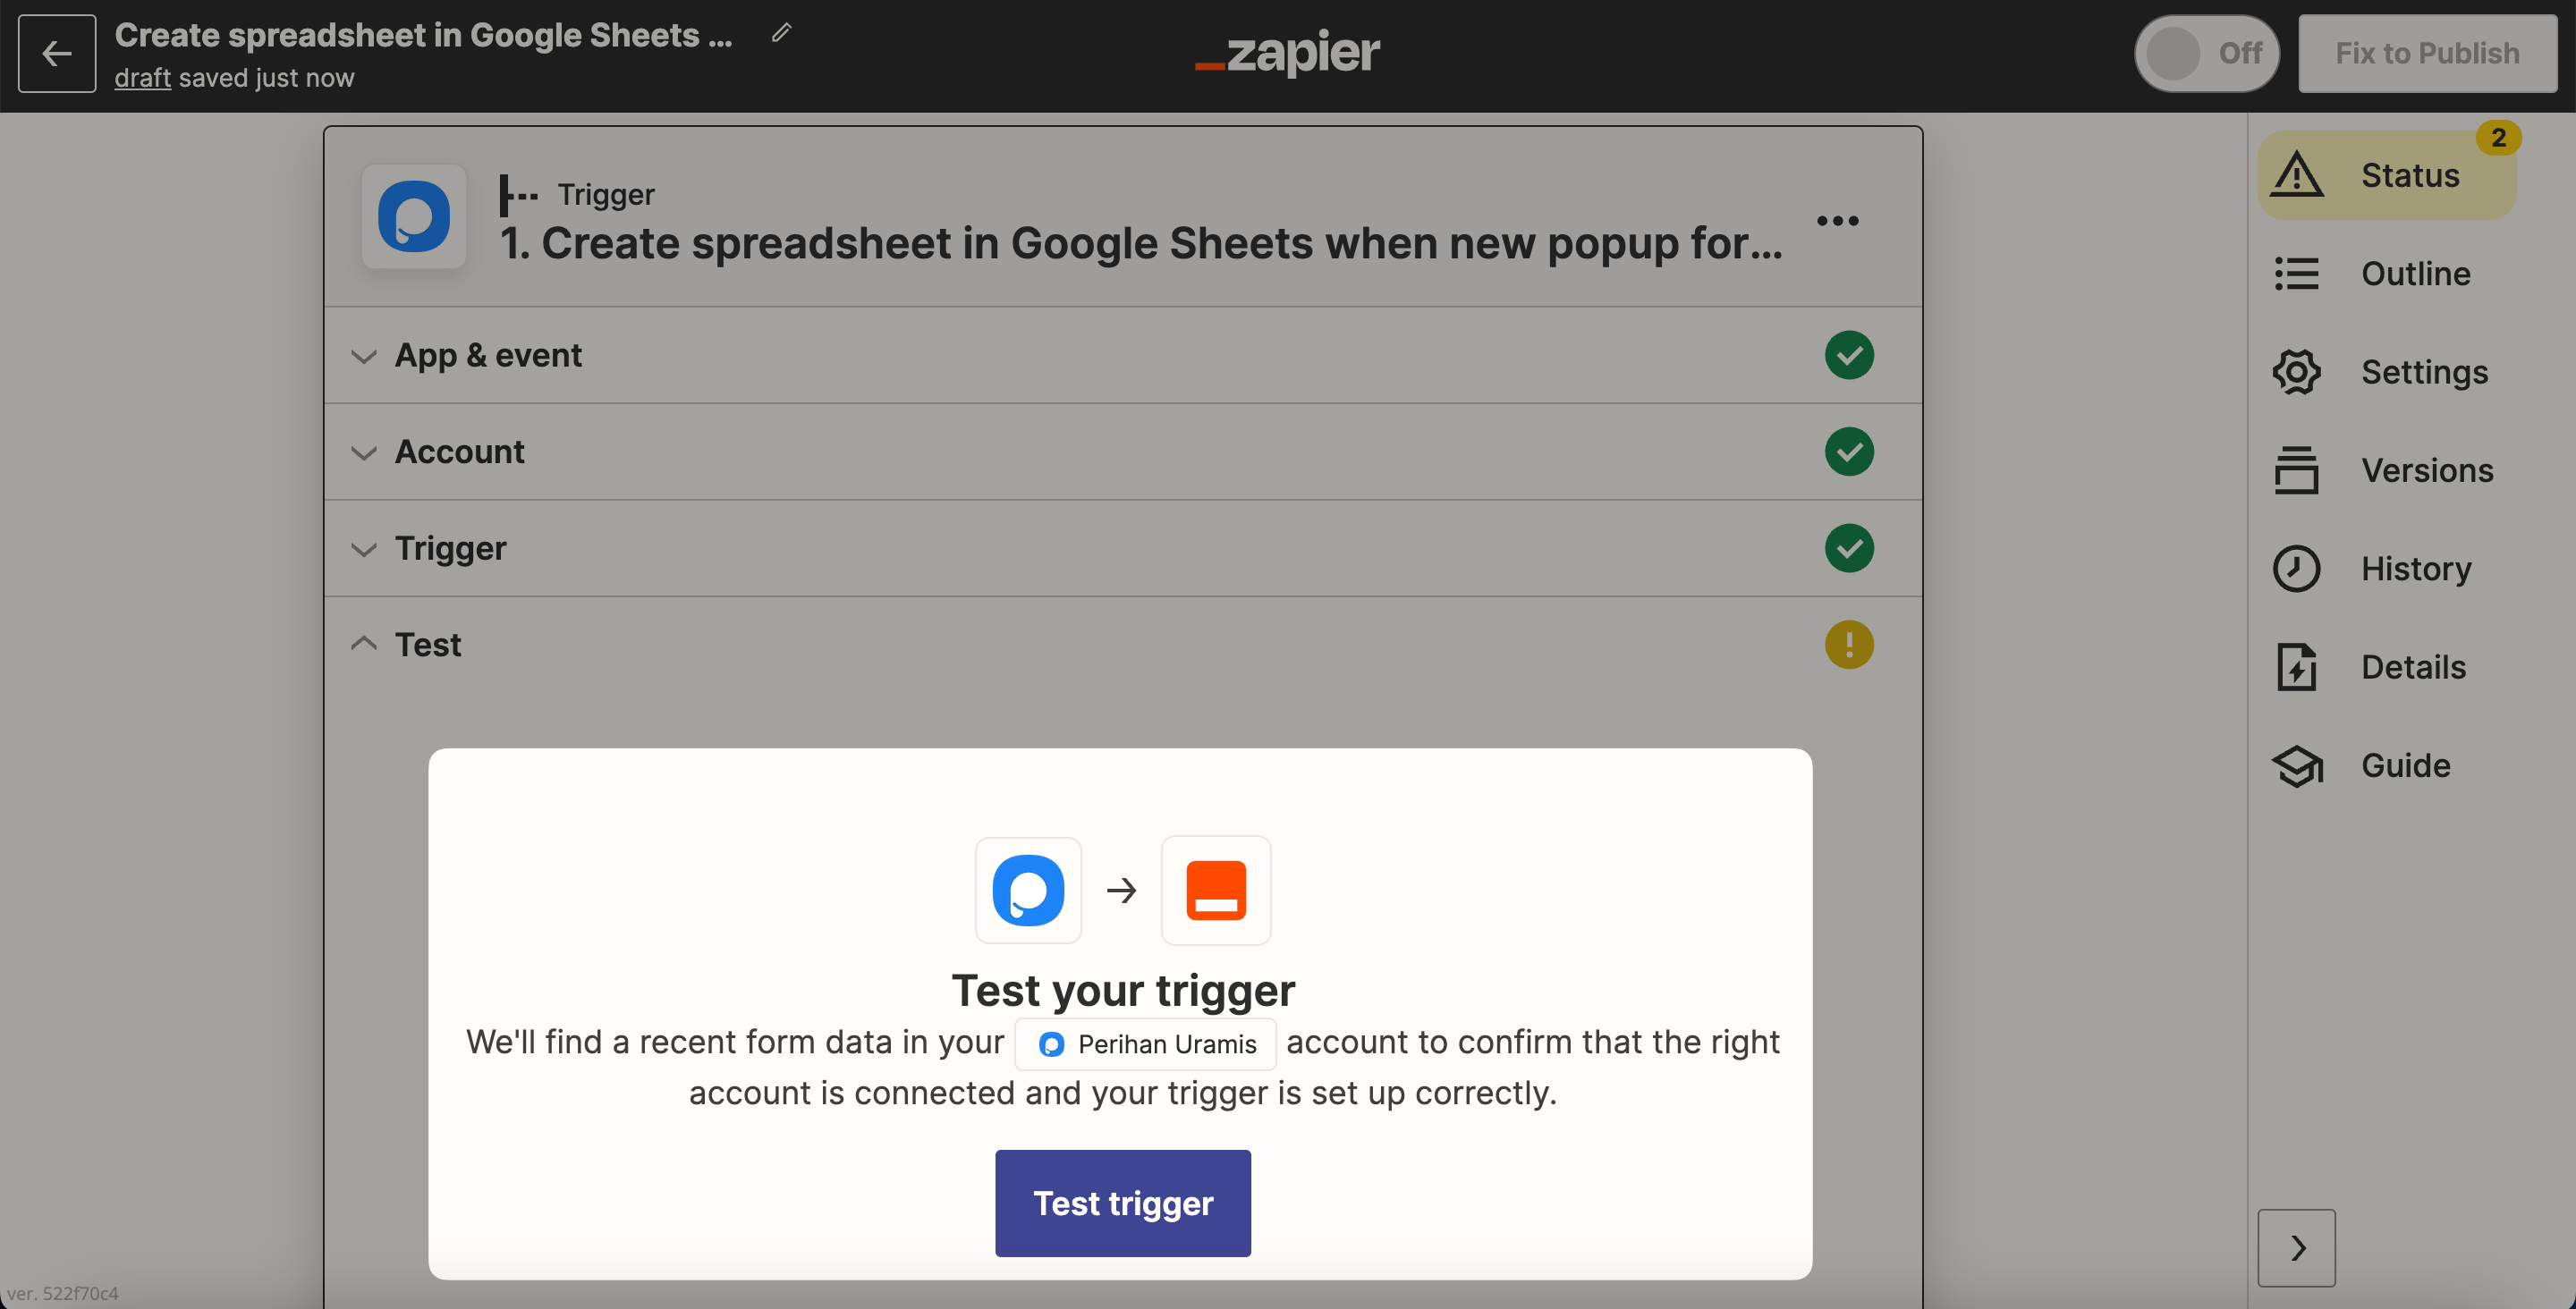
11. You need to test the trigger by clicking "Test trigger."
12. It needs to find data like in the example. Then, you need to click "Continue."
🔔 Note: You need to fill in the data after you publish the campaign at first. You should do it before you start the Zap on Zapier, as we have mentioned before.
13. Now, you need to "Sign in" to your account on the app you're connecting to.
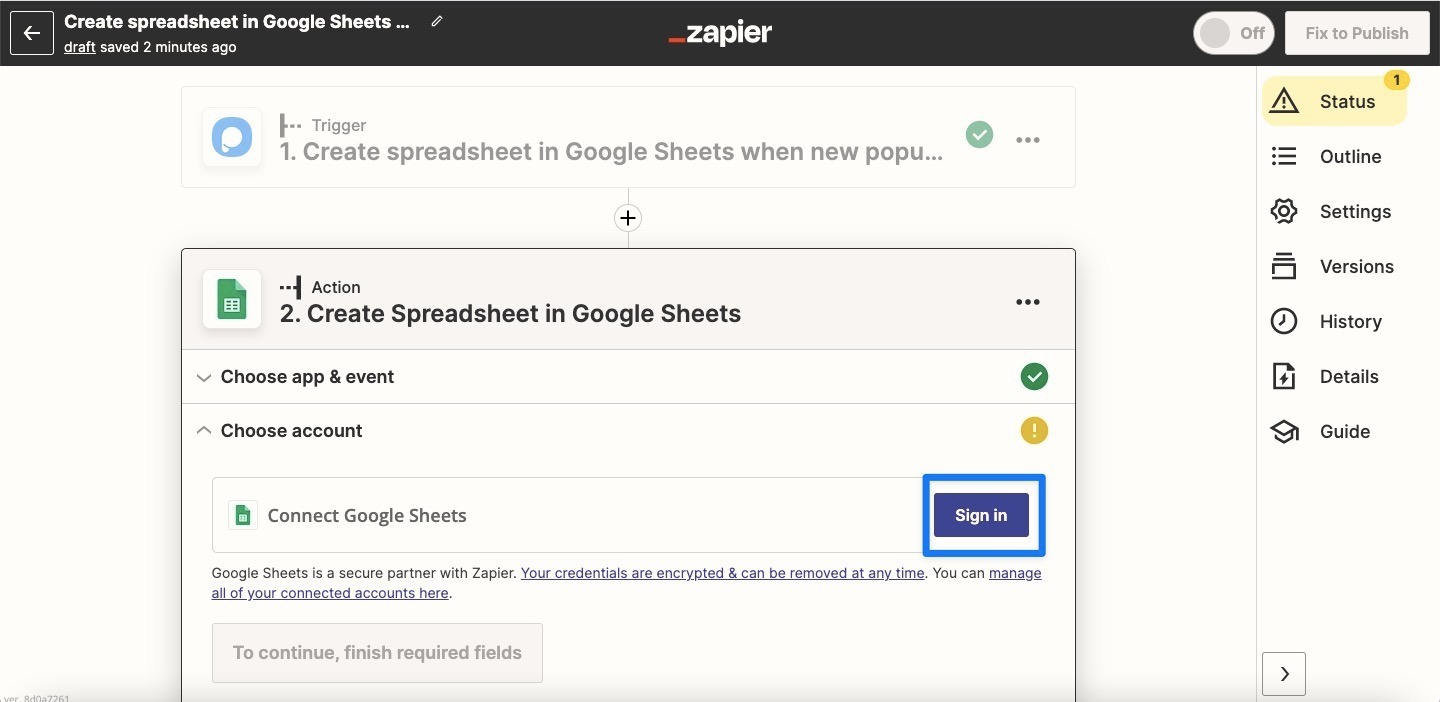
14. After you connect the account, you need to click "Continue."
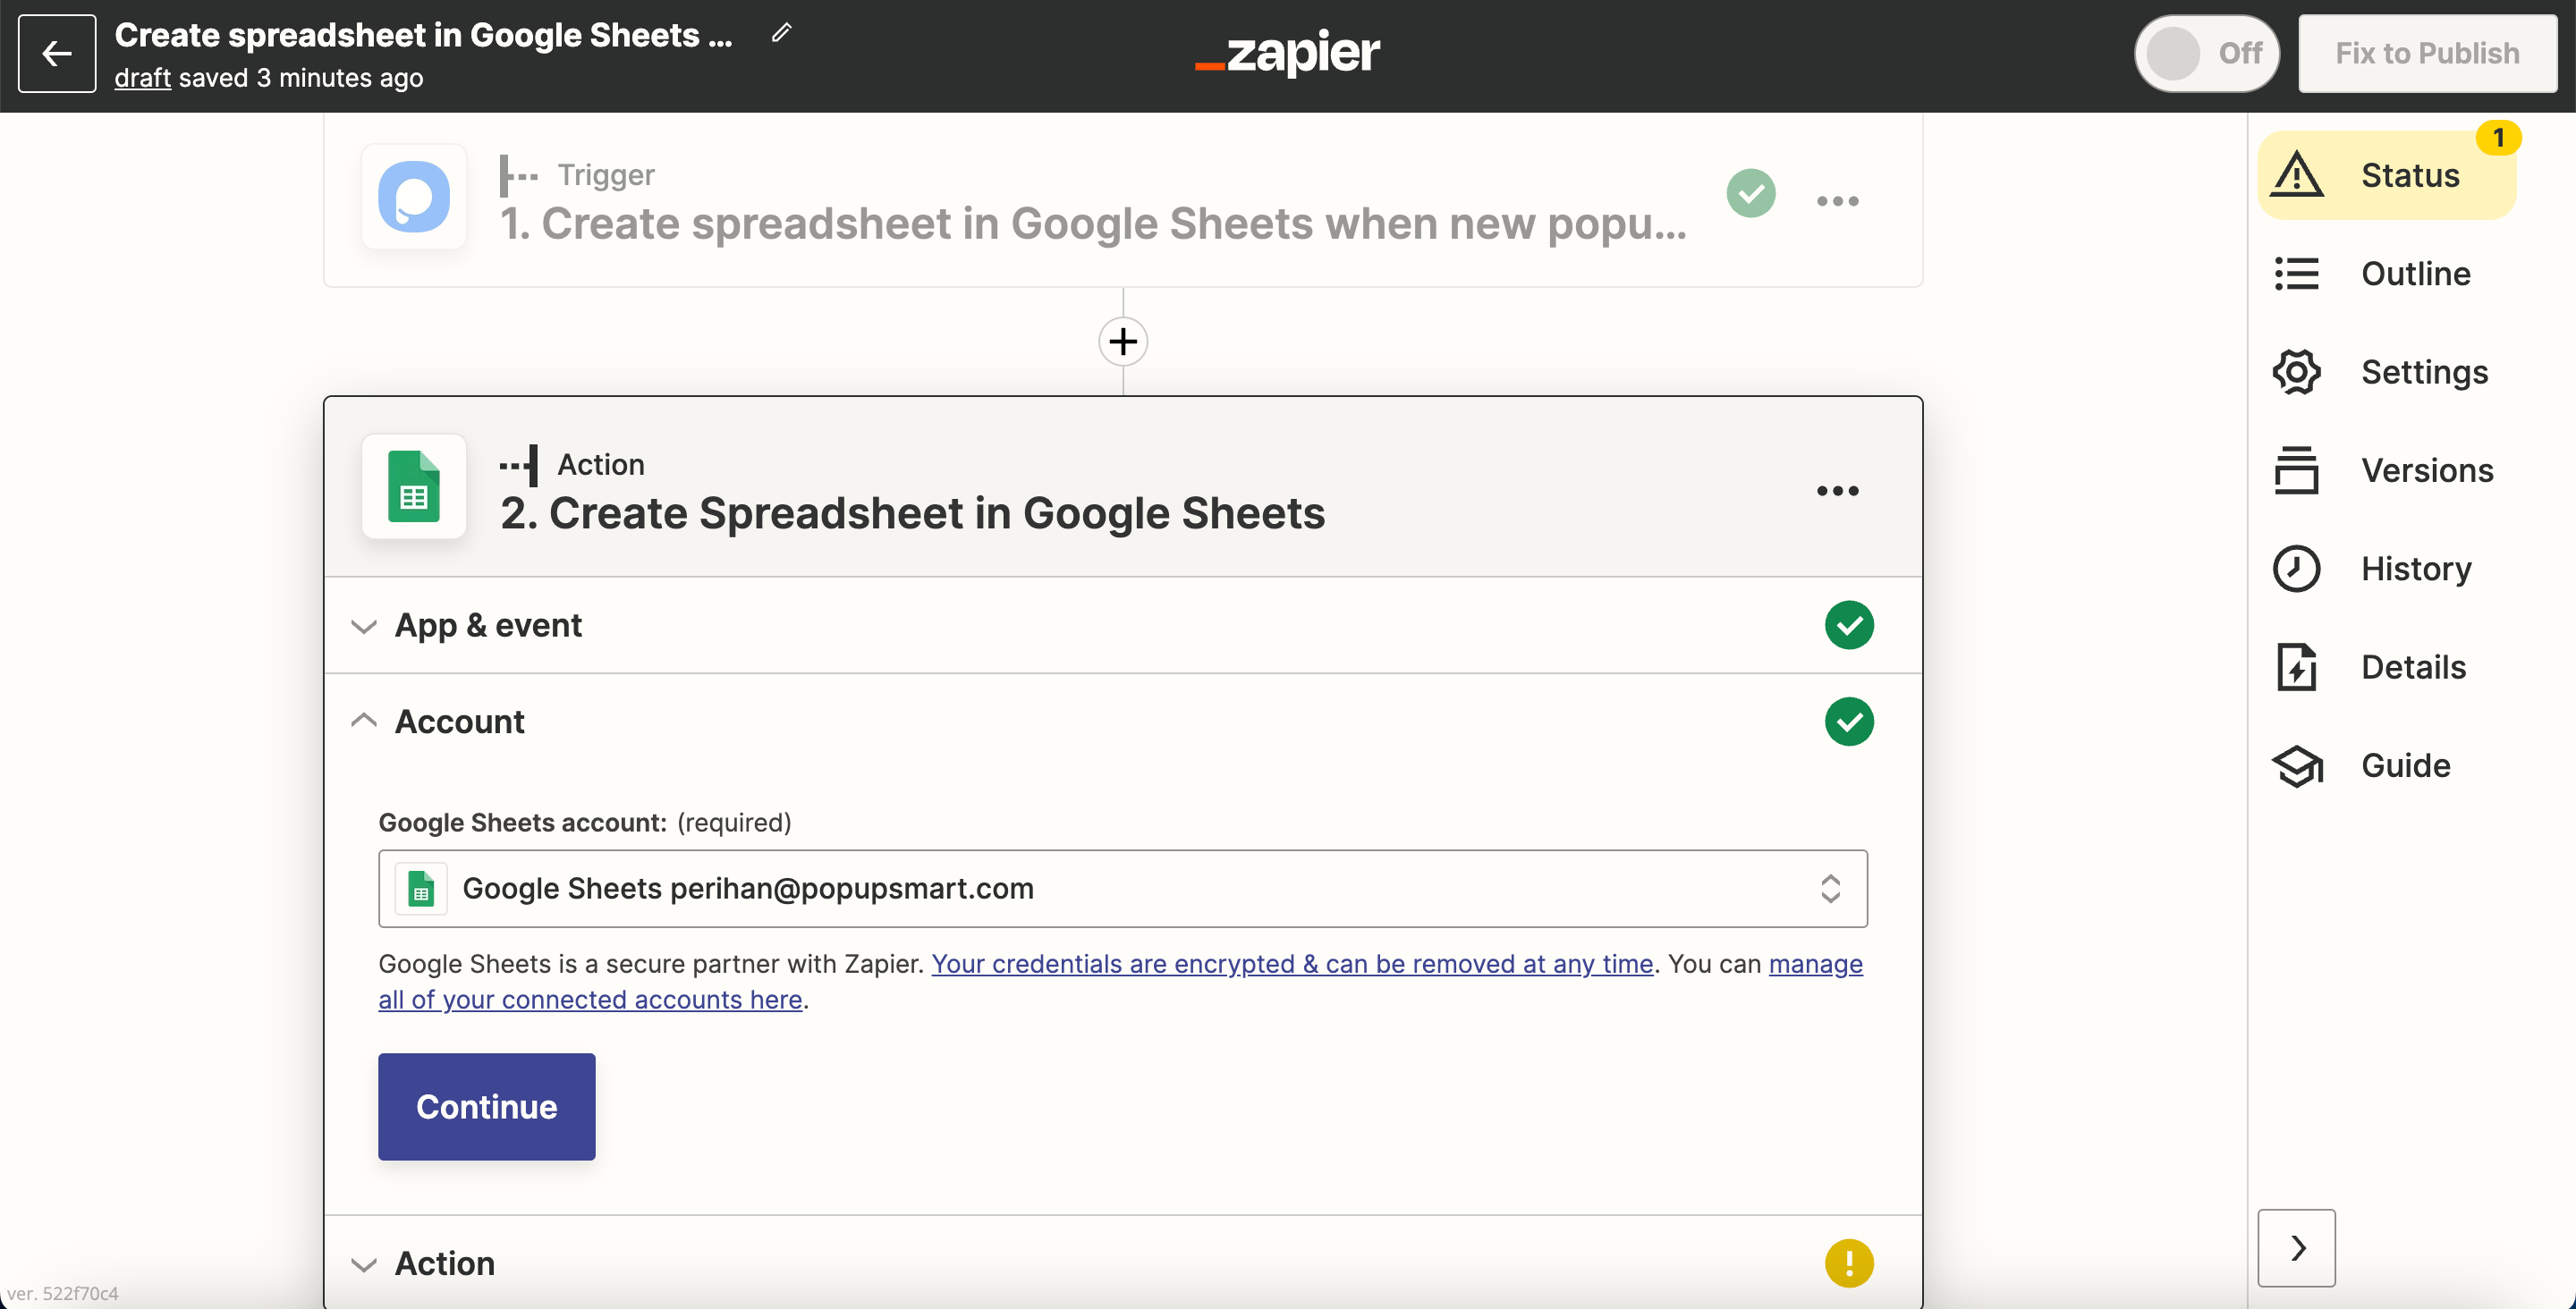
15. To set up the action, you need to choose the related fields and then click "Continue."
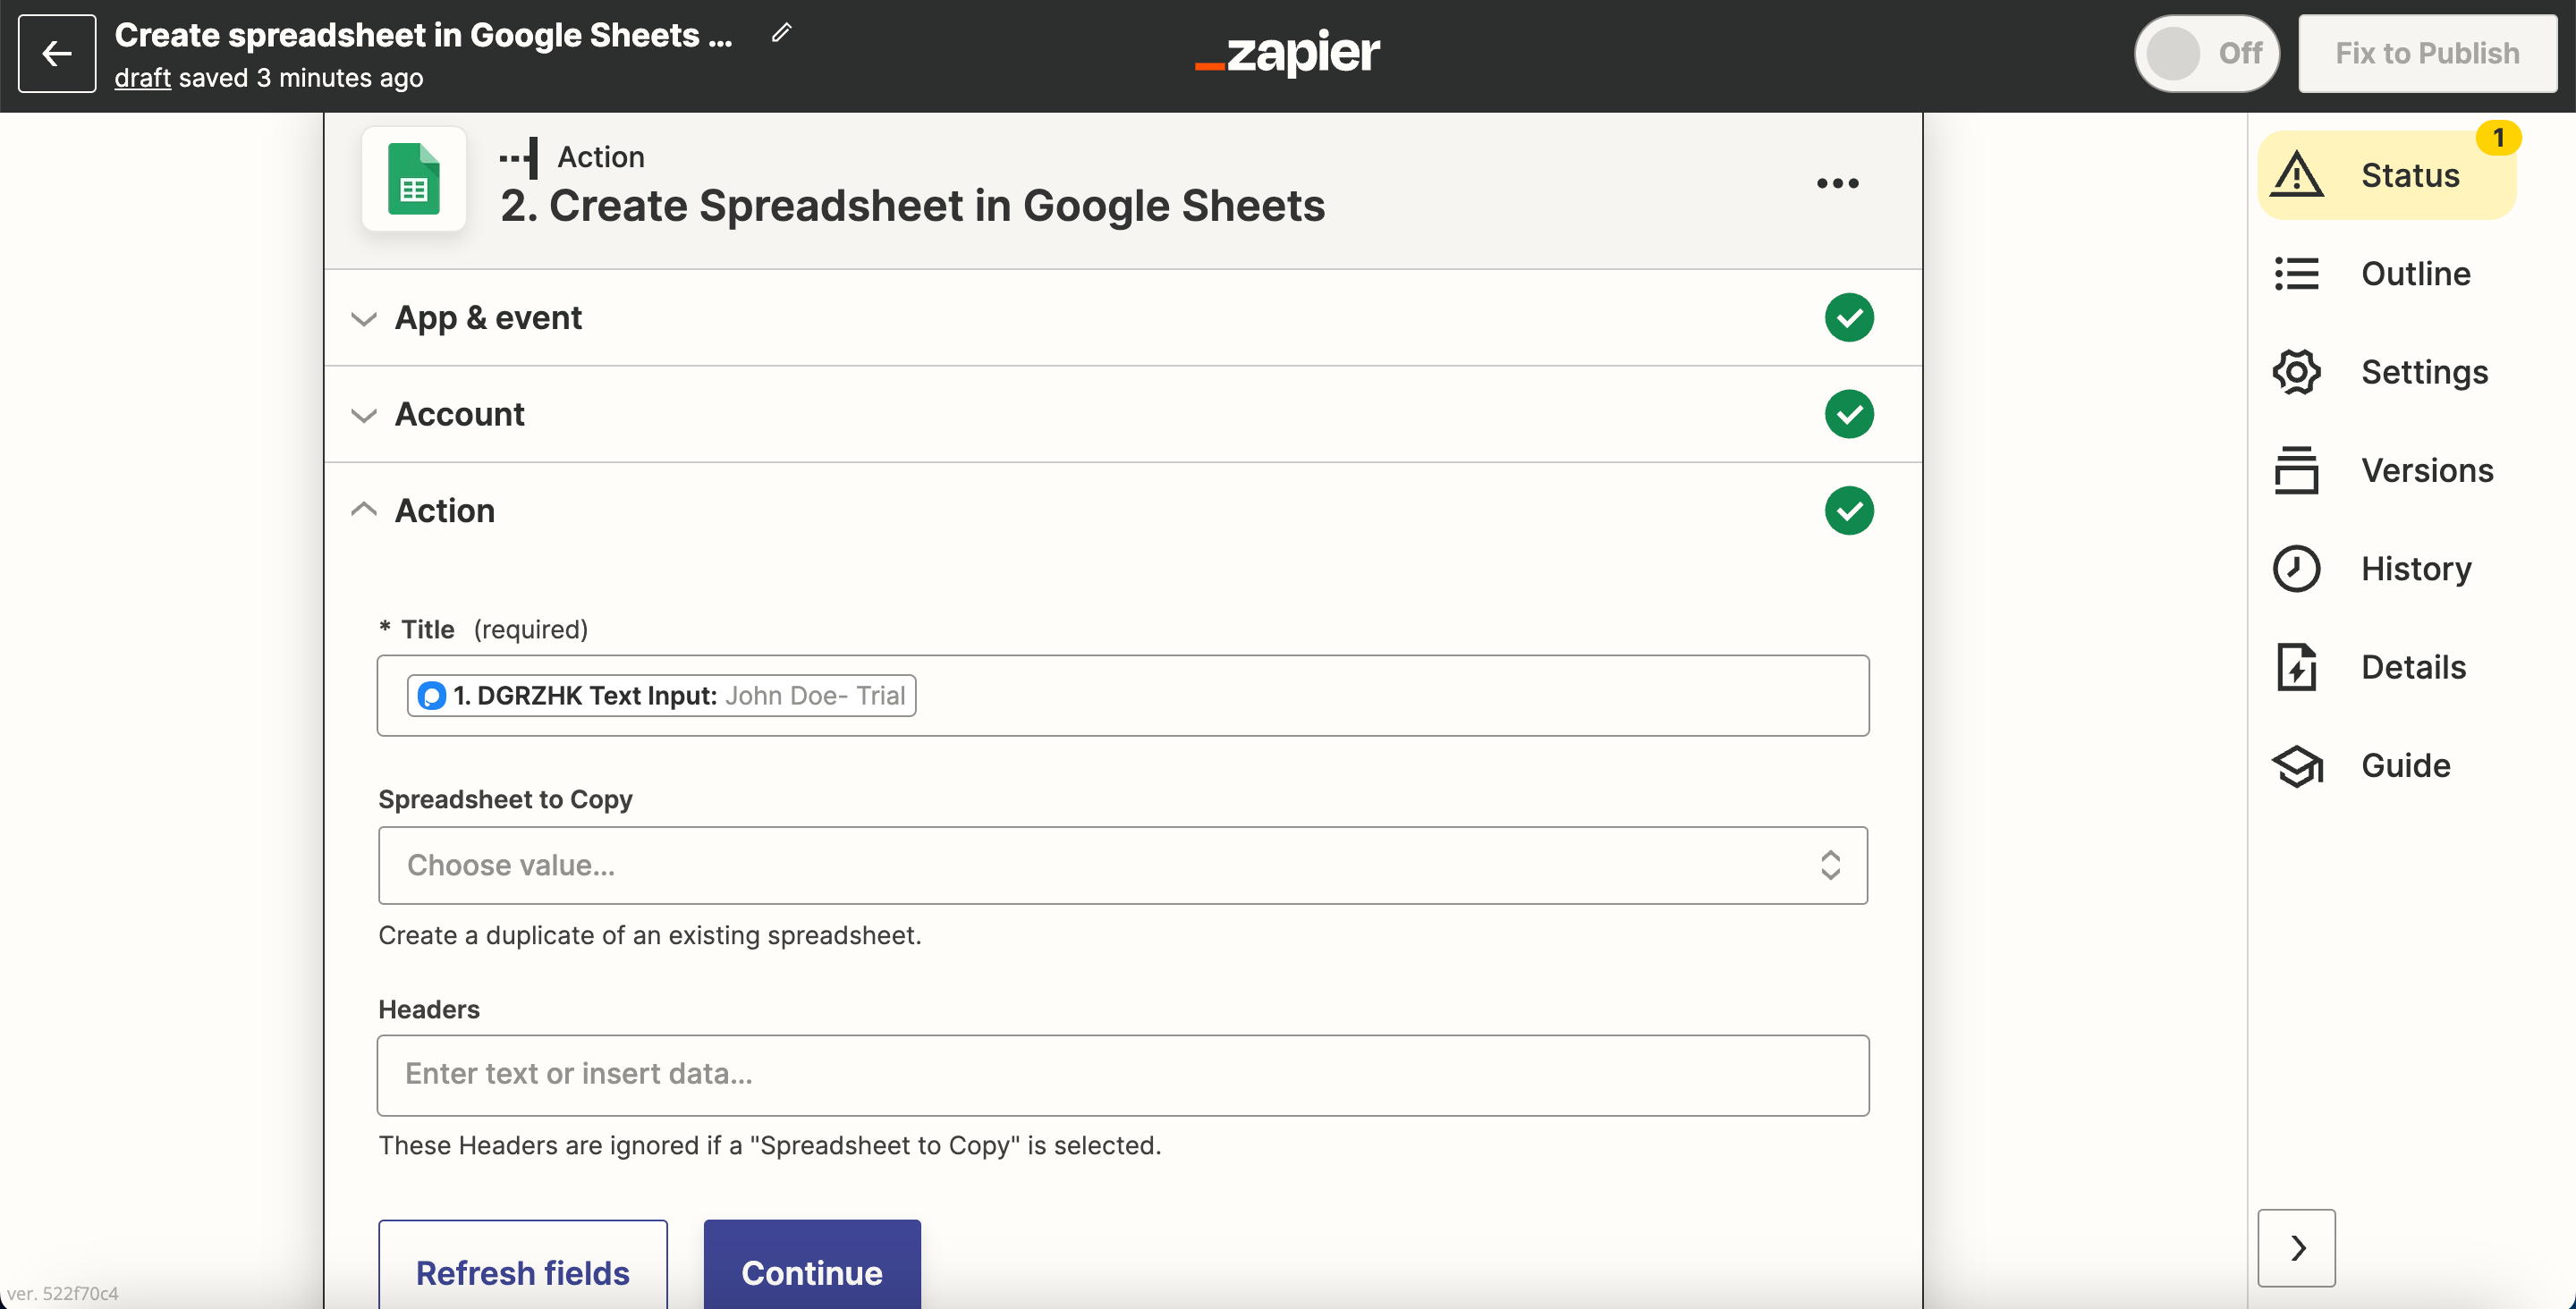
16. Testing your action is important, so we suggest you not skip the test and click "Test action."
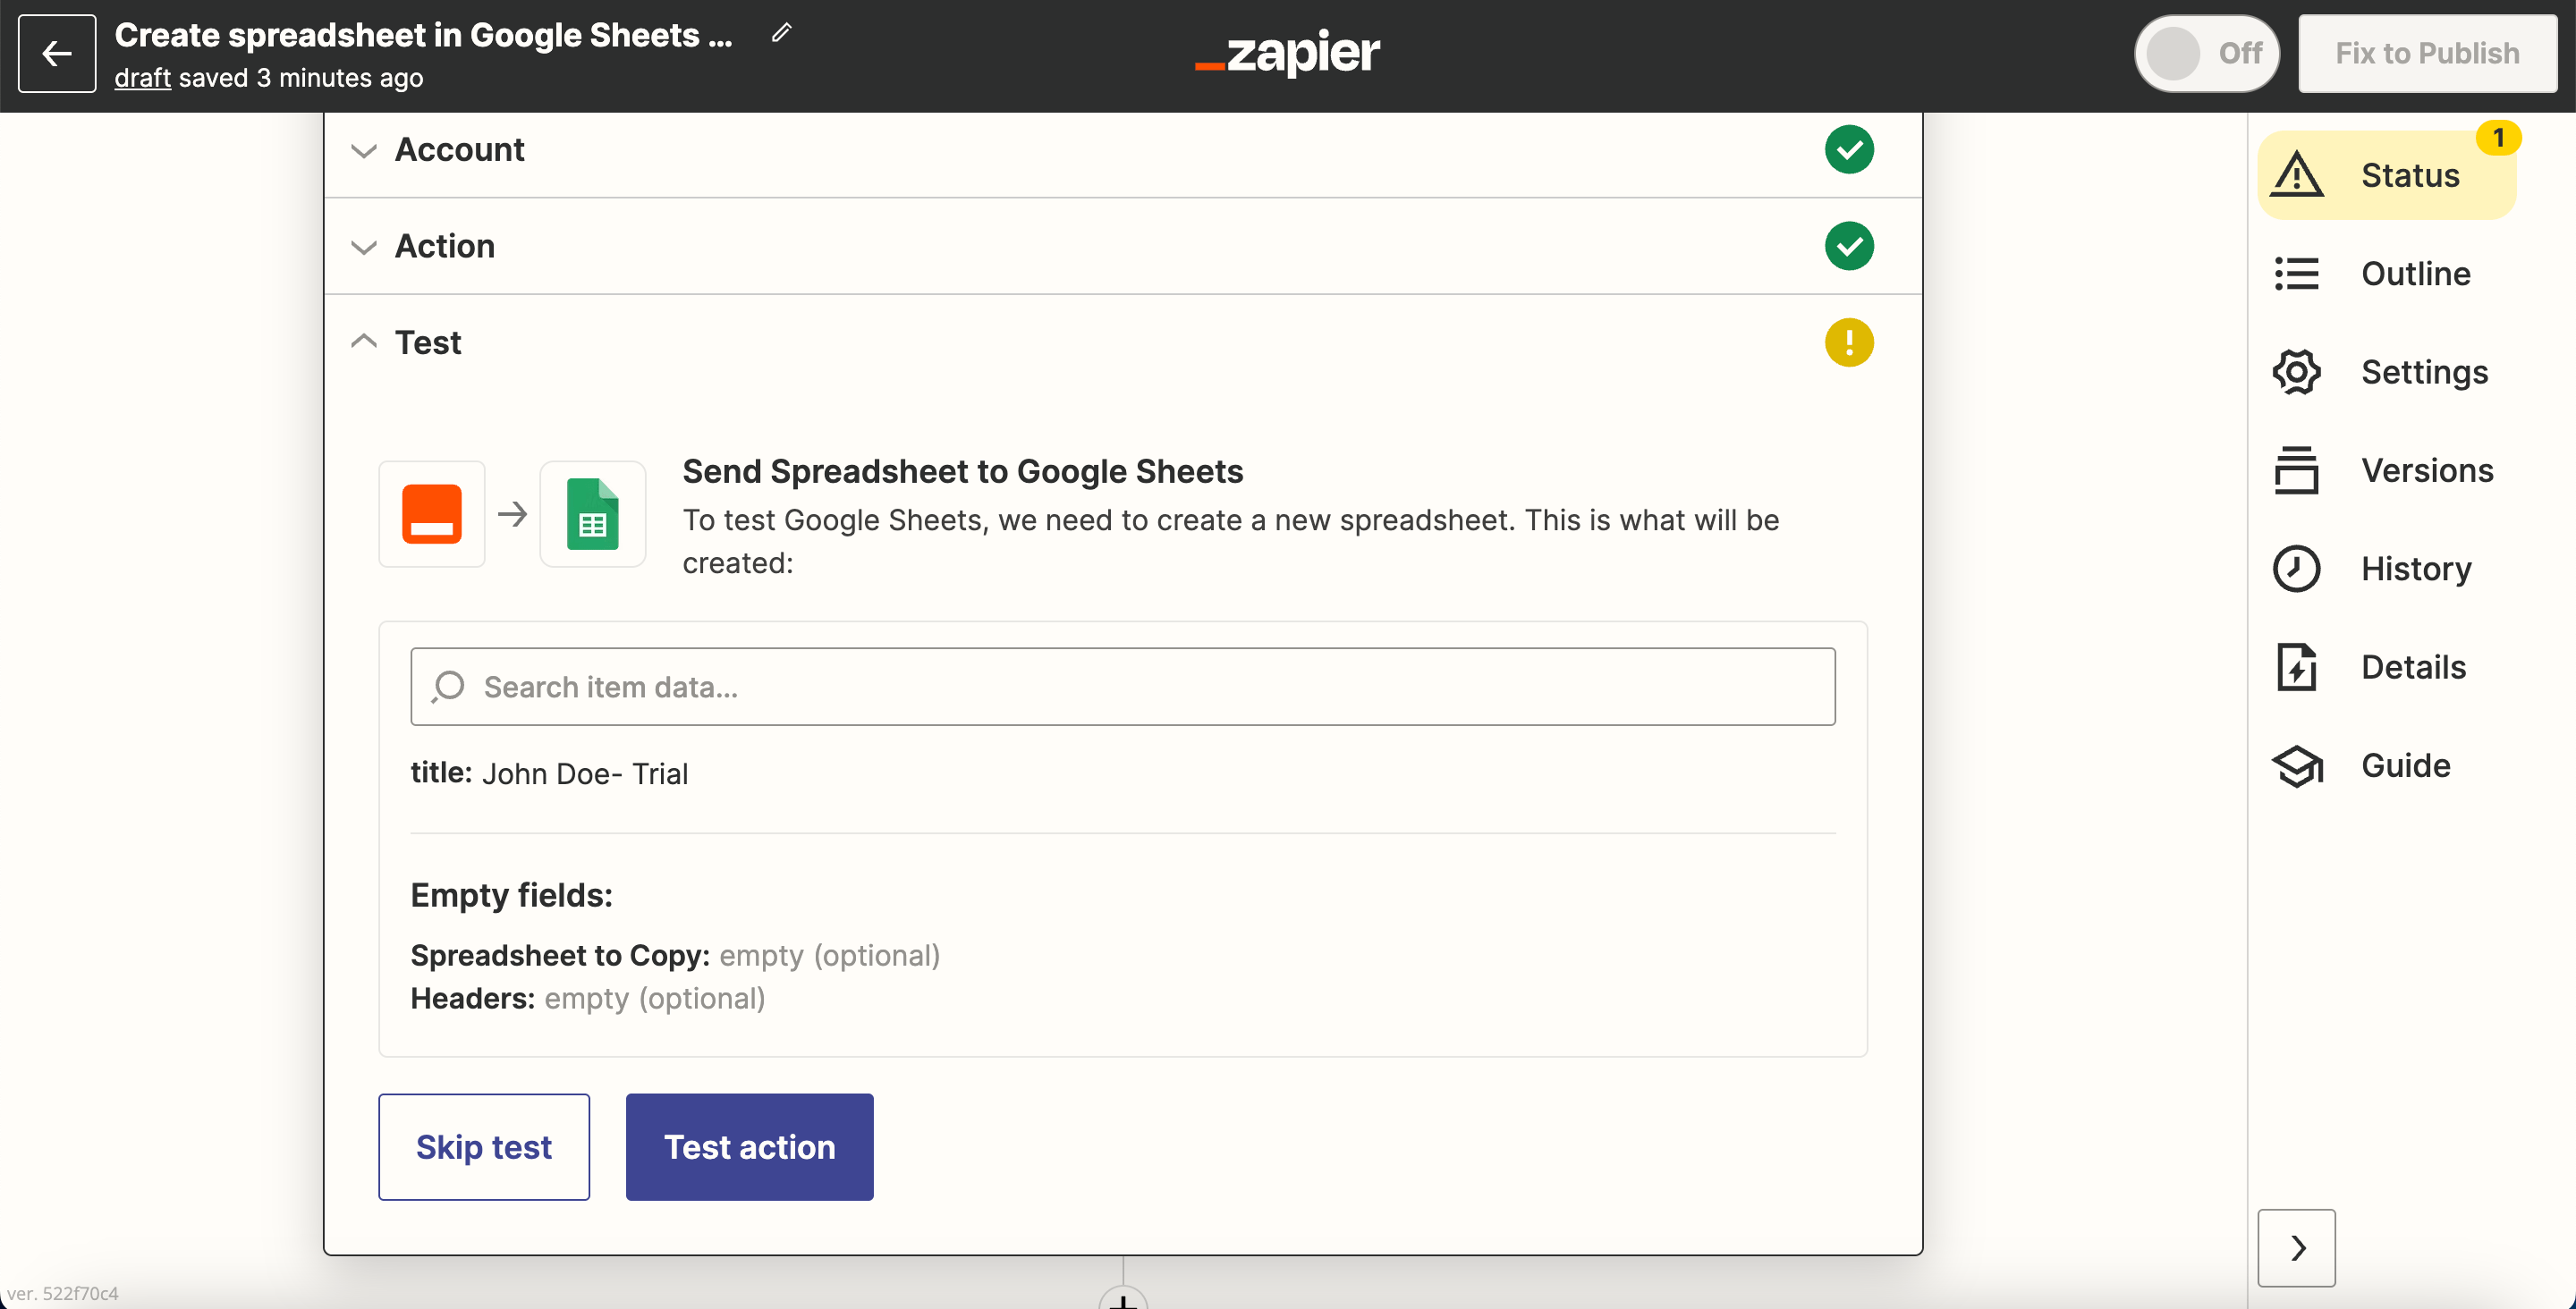
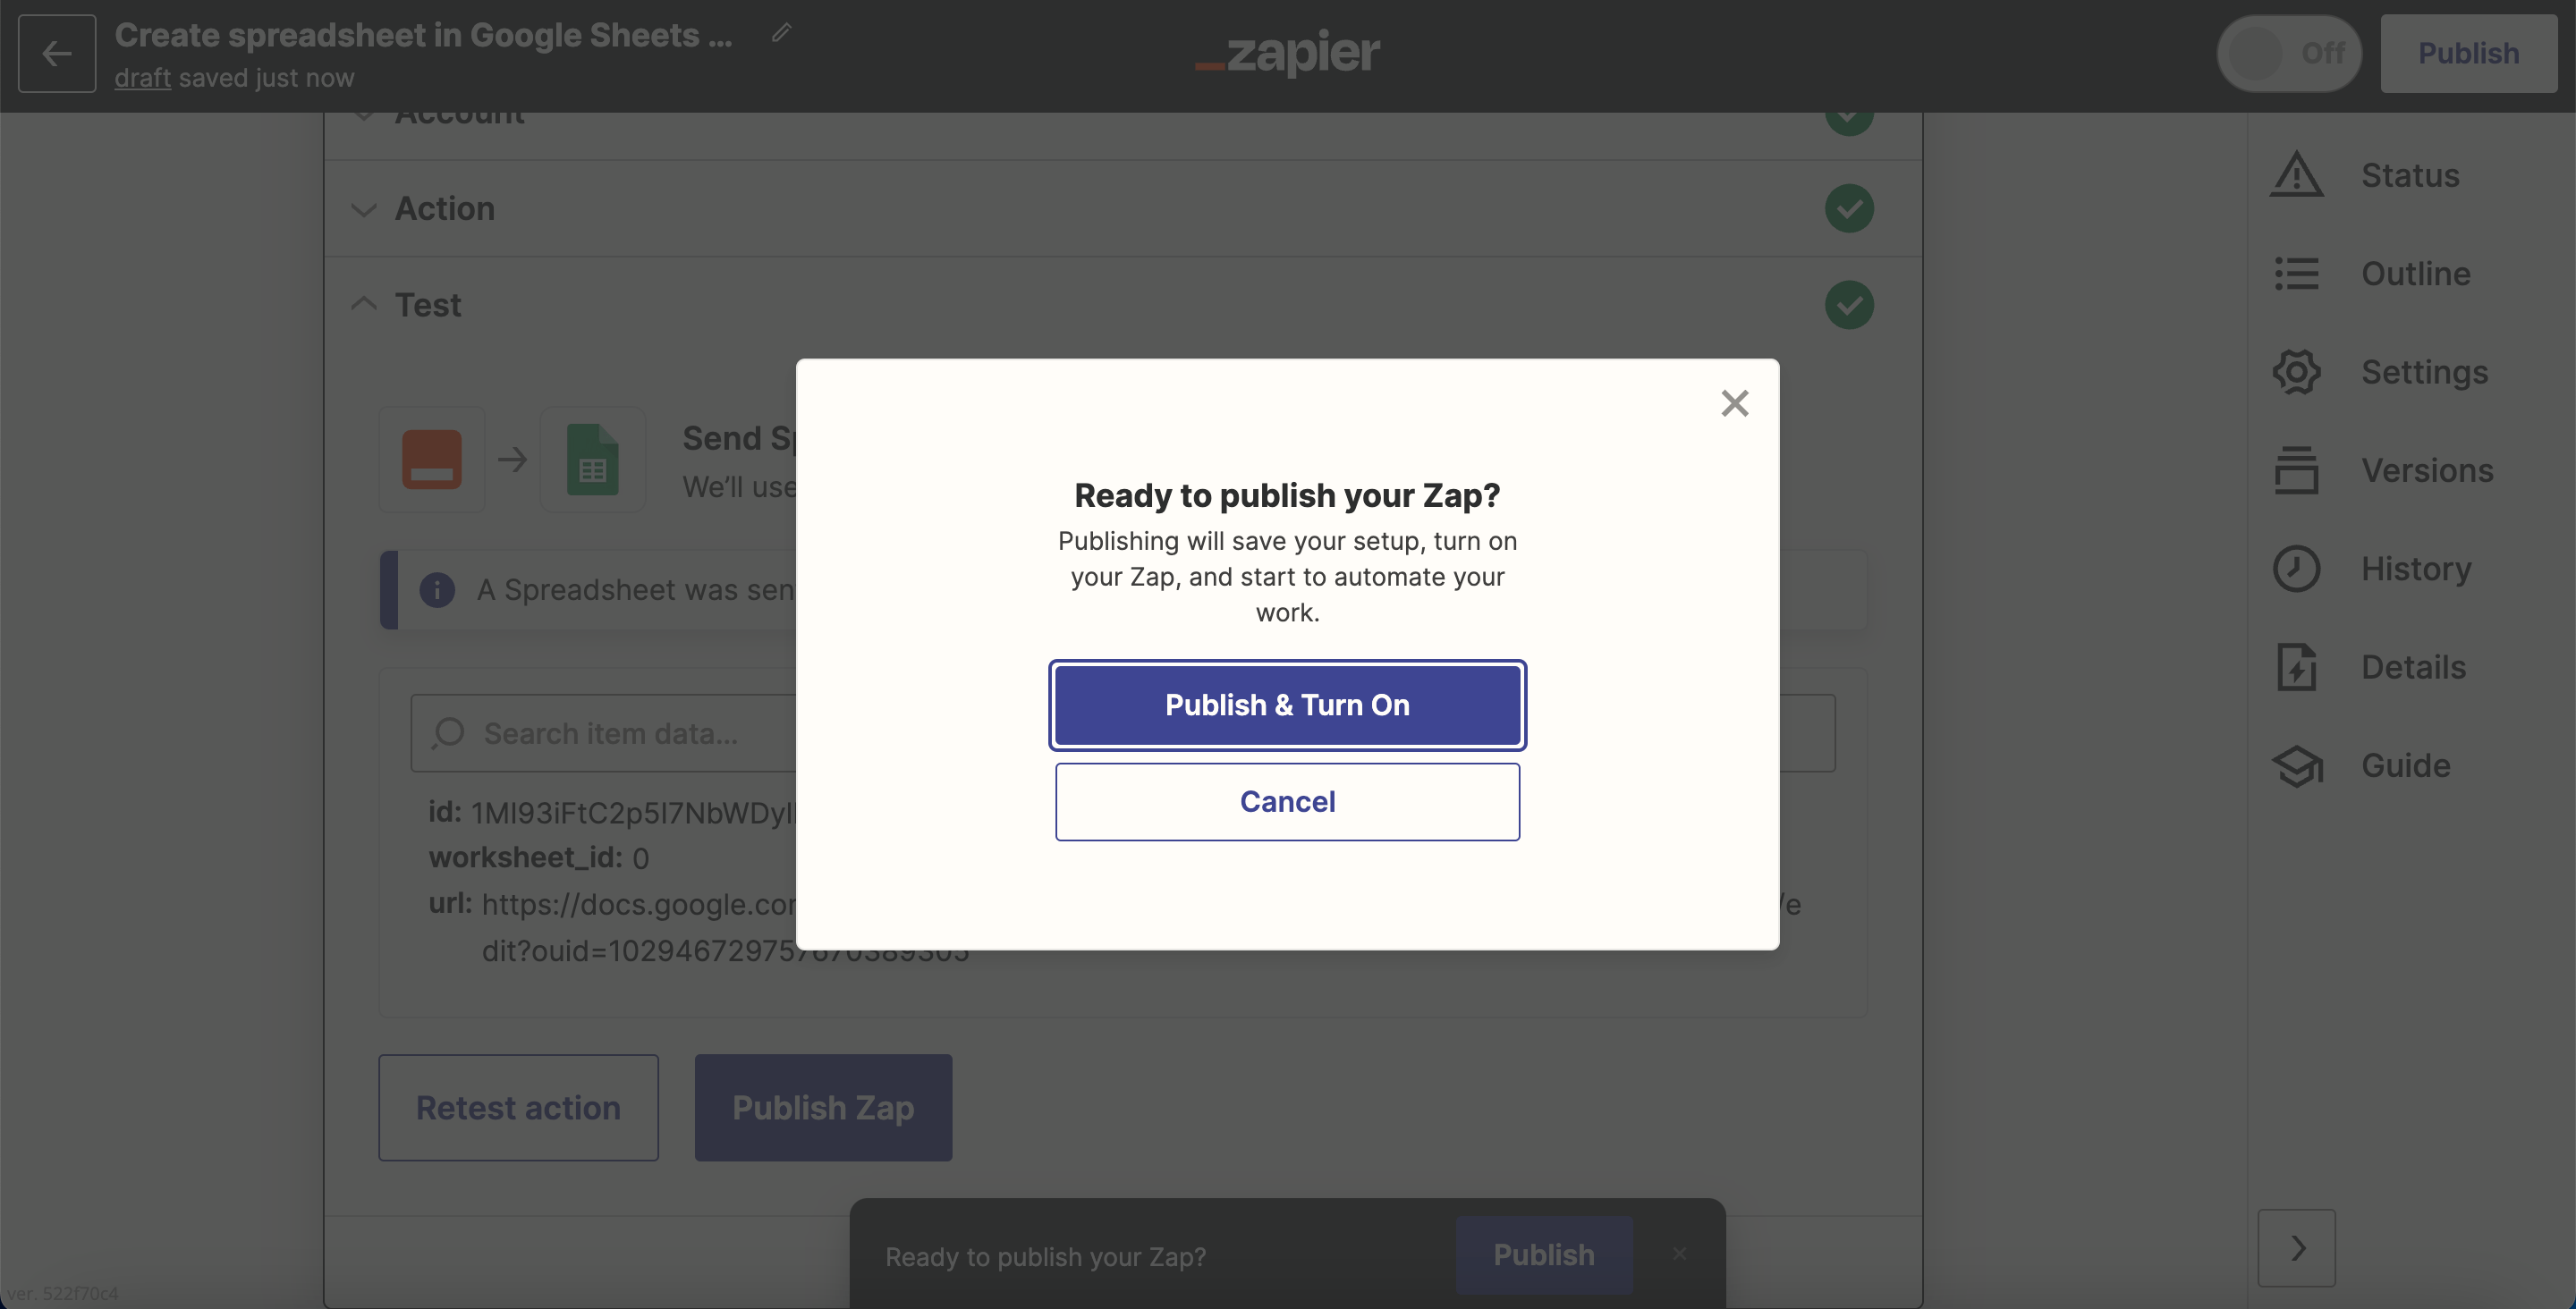
17. After the system directs you, you're ready to "Publish Zap."
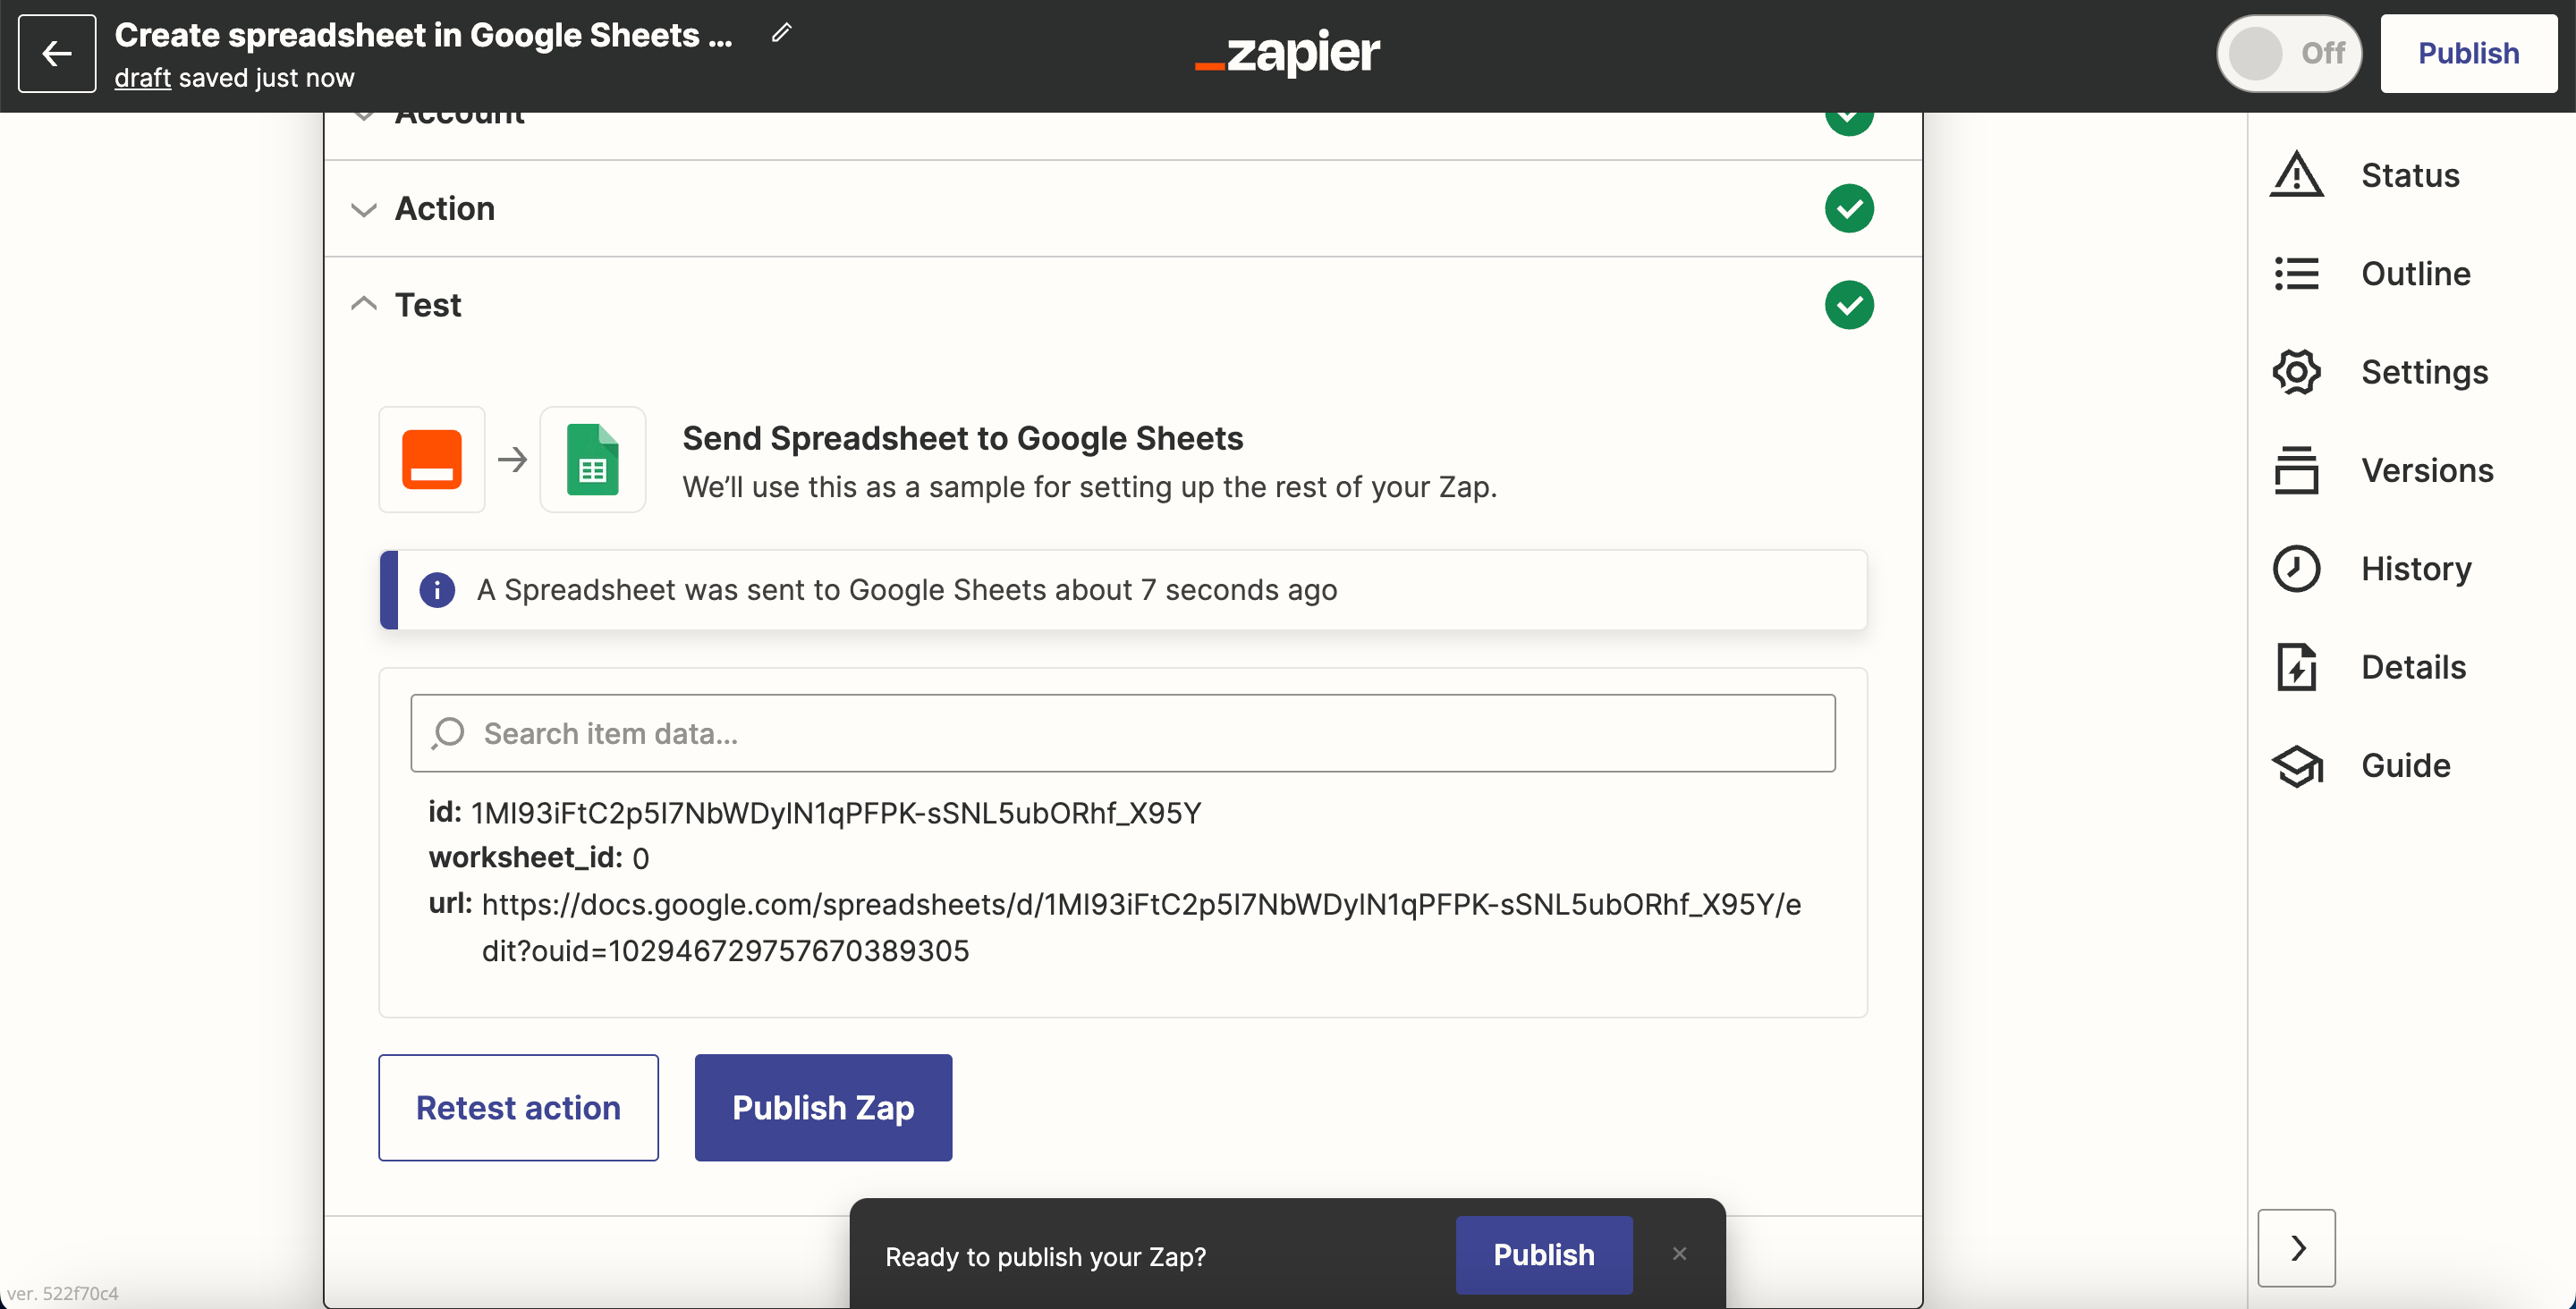
18. Click "Publish & Turn On" to finish.
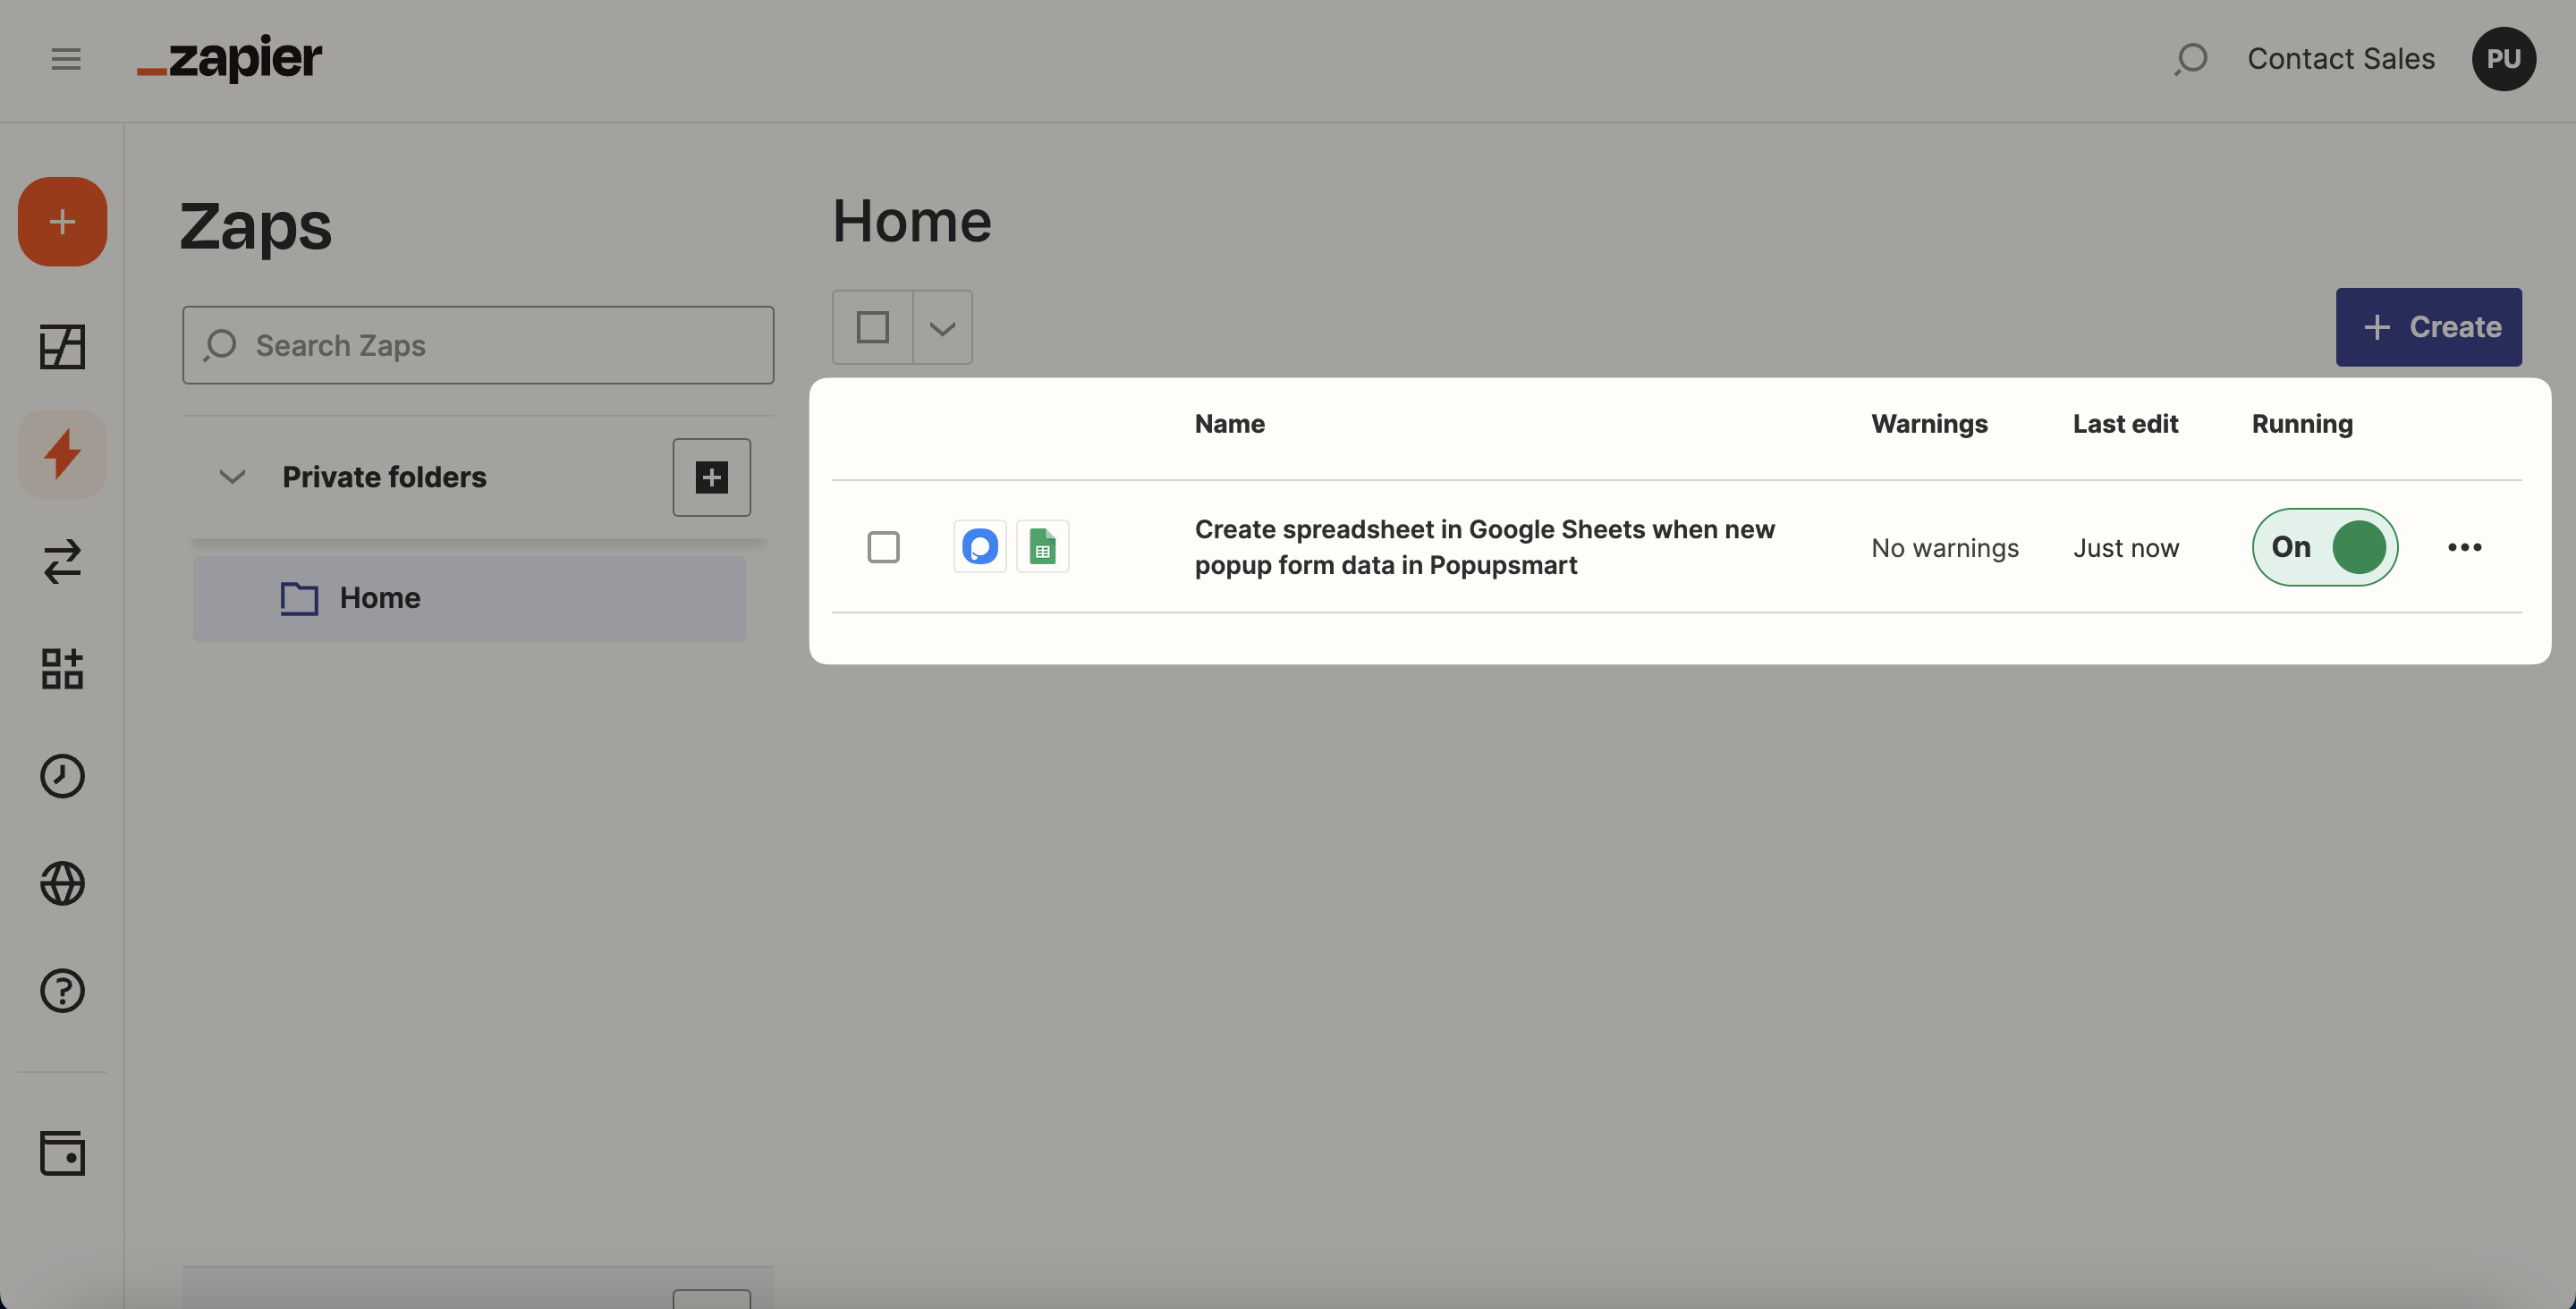
After reviewing your Zap, you can turn it on and off your Zap whenever you want.
❗️Note: Keep in mind that you can lead this process by choosing Settings as well. There, you can both make integration and configure all the general settings.
If you have any other questions about Zapier integration, feel free to mail us!


