Increase Sales Conversion
Can’t turn your site traffic into sales?
Reduce Cart Abandonment
Your customers abandoning their carts?
Promote Products & Offers
Make potential customers notice special offers.
Collect Form Submission
Struggling to collect form submissions?
Get More Phone Calls
Let them call you directly via popups.
Grow Email List
Having trouble growing your email list?
Gamify Your Campaign
Choose your offer and let the game begin.
Make Announcement
Make sure important news unmissed.
Increase User Engagement
Keep visitors & customers on your site longer.
Collect Feedback & Surveys
Can’t draw attention to your surveys?
Facilitate Social Sharing
Grow social media followers and likes!
# How to Set up Popupsmart with Google Tag Manager
There are three different ways to set up Popupsmart on your website by adding a provided single line of JavaScript code:
Setup with Google Tag Manager
Adding the code to your website is a one-time requirement, so you won’t need to repeat this process again.
Follow the steps below to set up Popupsmart on your website using Google Tag Manager.
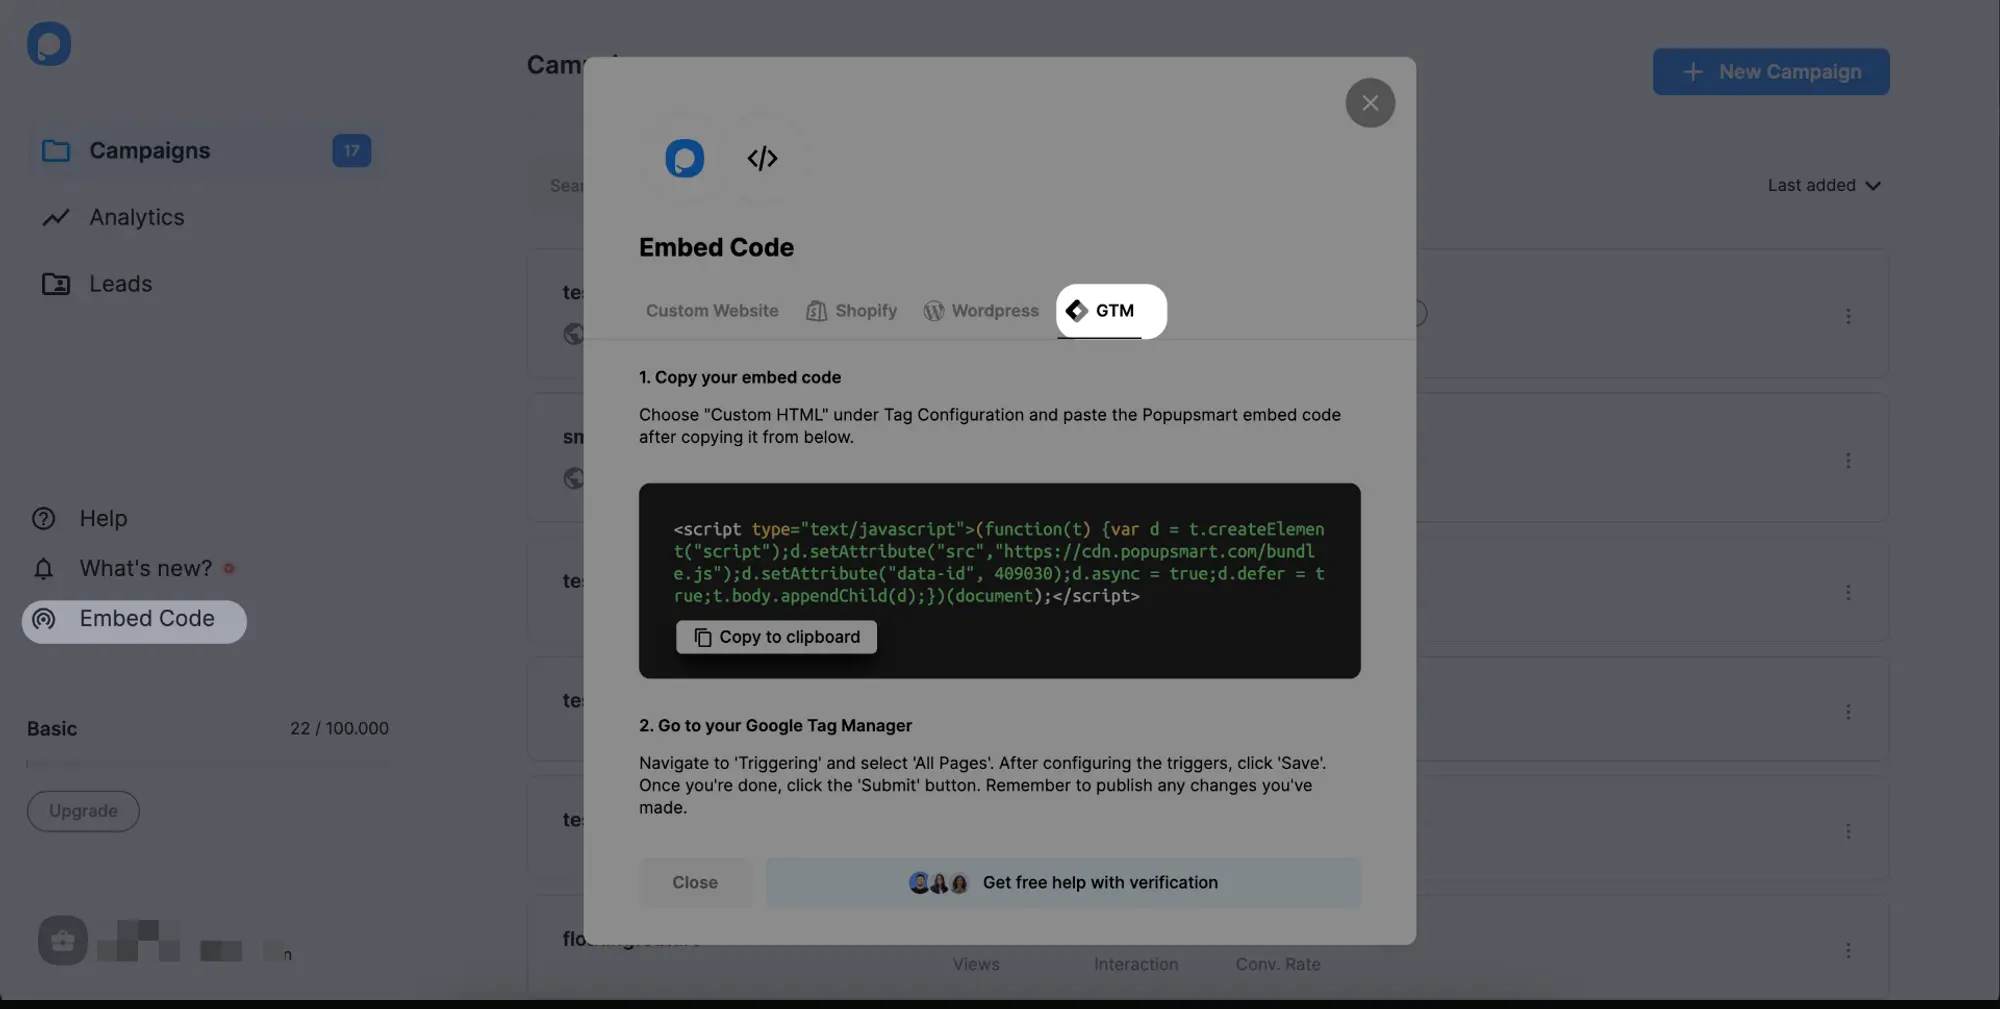
1. Log in to your Popupsmart account and go to your dashboard. Click on "Embed Code", which is located on the left sidebar. Then, copy your unique Popupsmart embed code from the GTM tab.
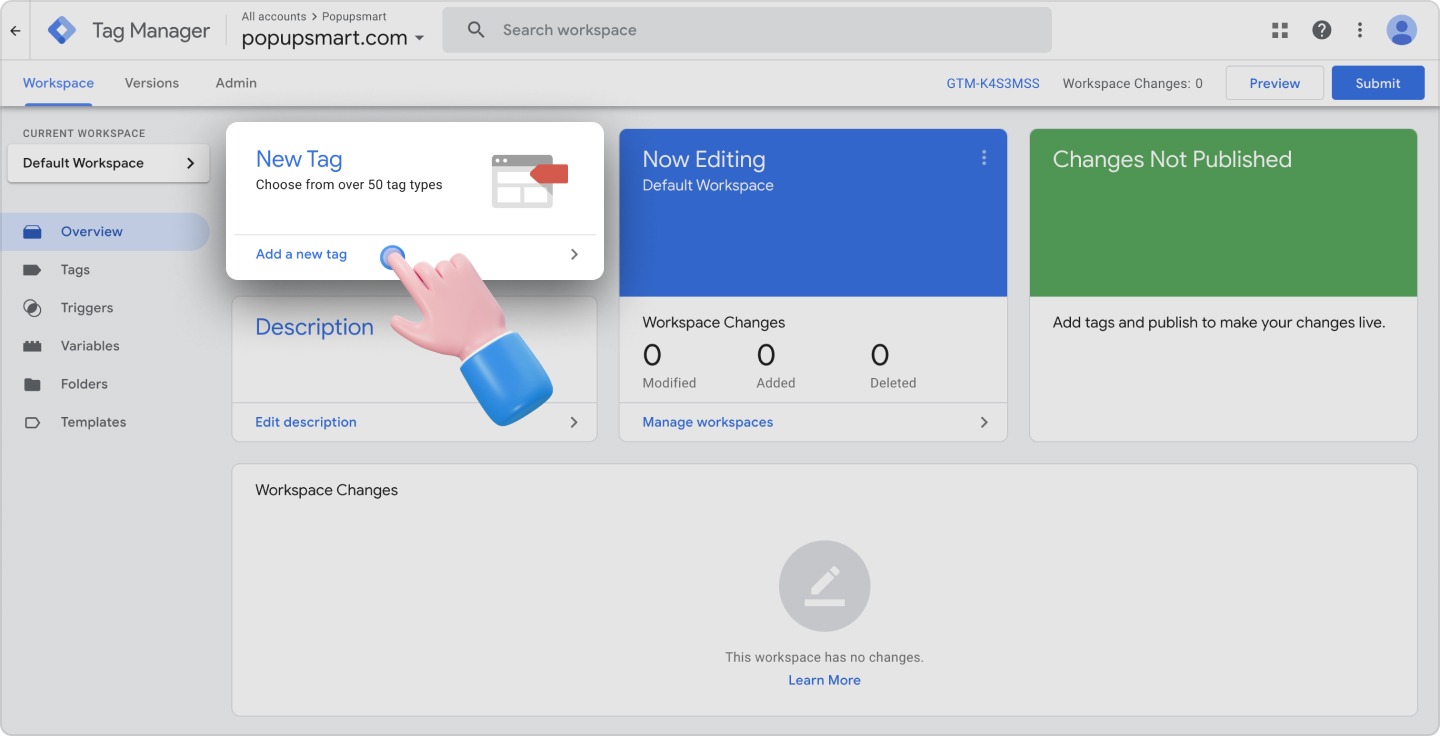
2. Go to your Google Tag Manager and click “Add a new tag.”
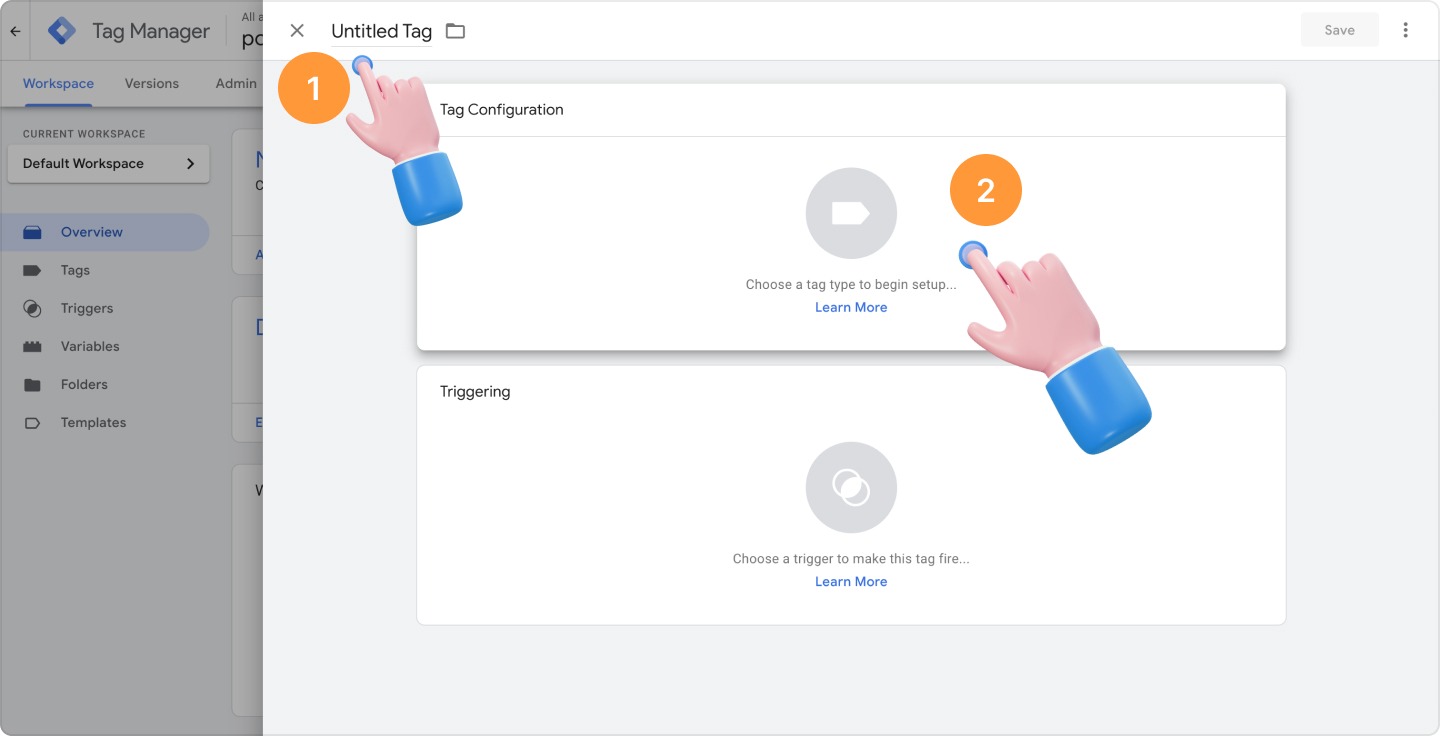
3. Give your tag a name and click “Tag Configuration.”
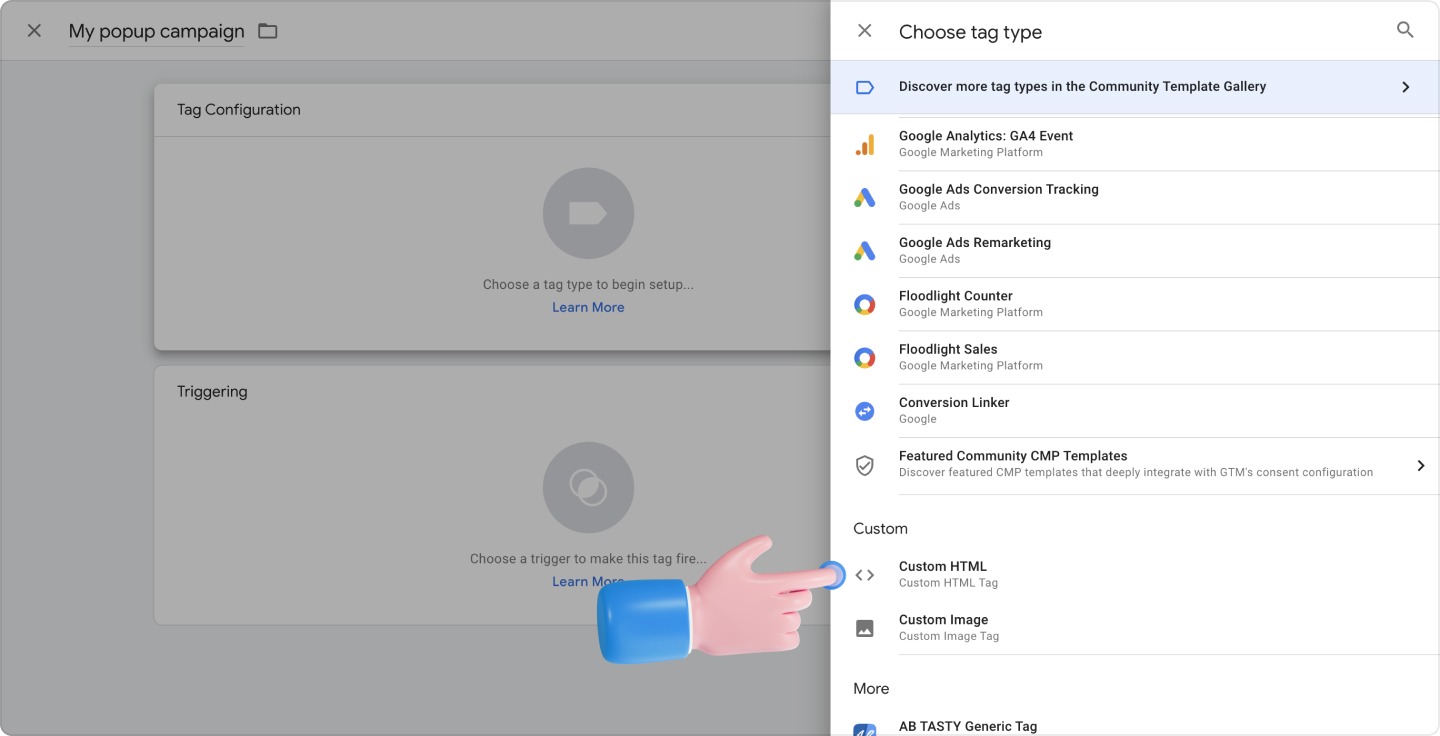
4. Select "Custom HTML" to enter your embed code.
5. Next, paste the Popupsmart embed code inside the HTML field.
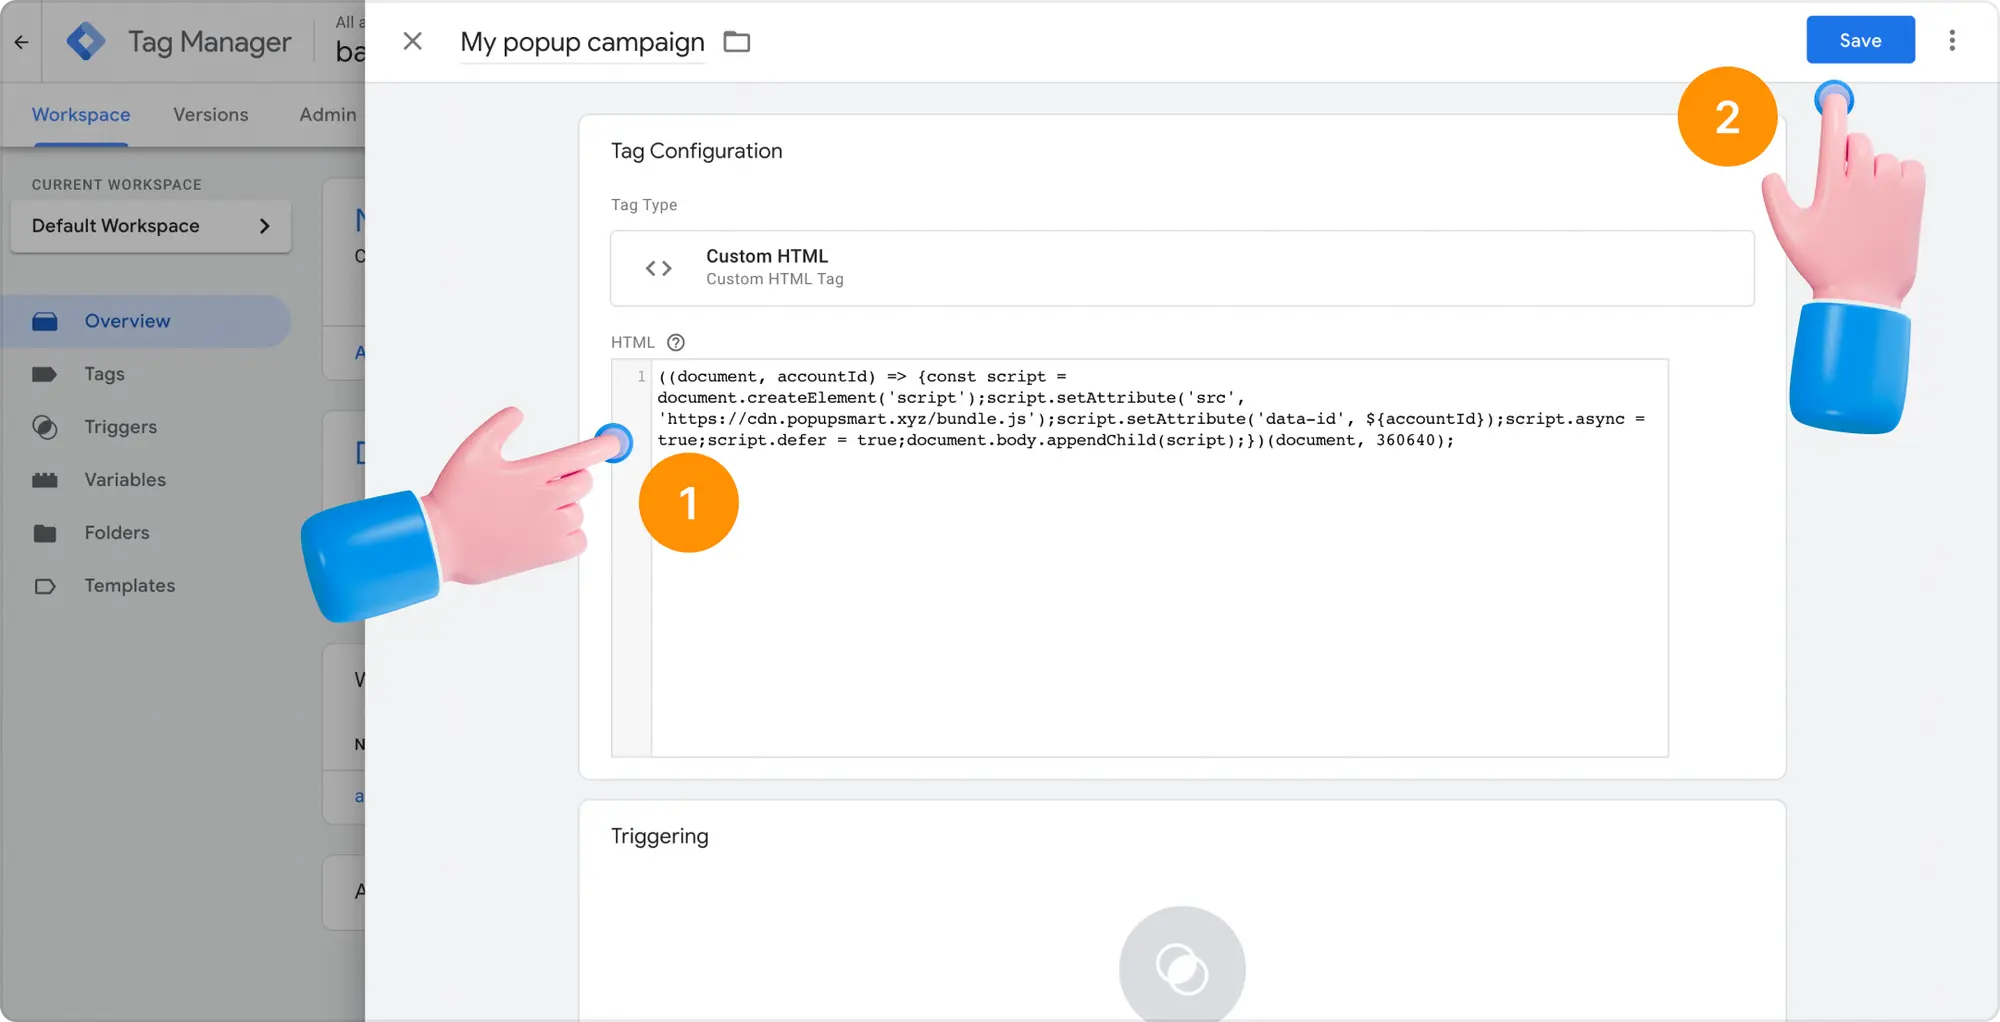
6. Click on Triggering and select All Pages to allow Popupsmart to work on all your web pages. This way, you can add a popup to any of them without further configurations.
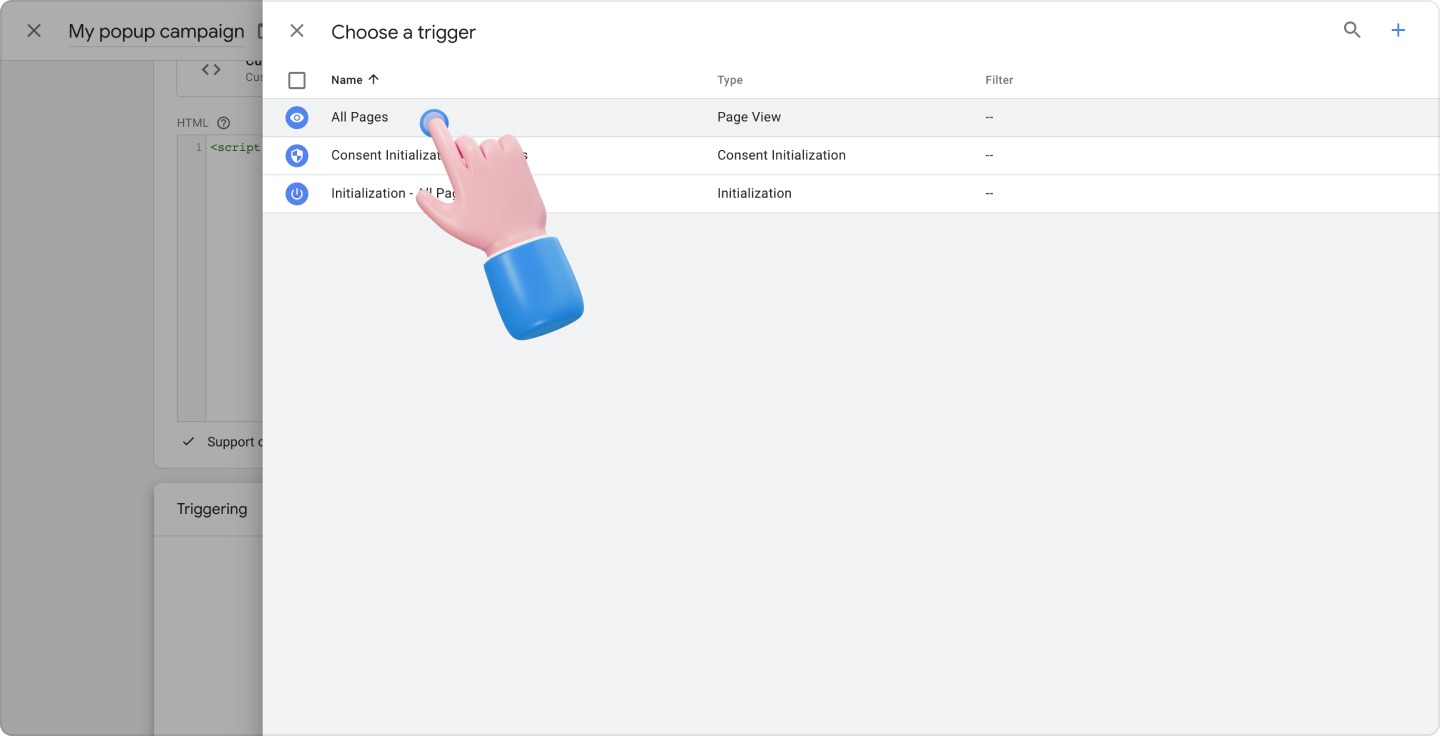
If you select All Pages, our system counts the pageviews of the whole website regardless of which page you added the popup to.
✅ Important: A pageview is the amount of total page view requests from your added websites.
❗️If you plan to use your pageview limit efficiently, you may choose to show popups on only selected page/s and not just anywhere on your website. In this case, instead of adding the embed code to your whole site, add it to specific pages using Google Tag Manager.
• To target specific pages, edit “Trigger” and click on the “+” icon in the upper-right corner of the screen.
![]()
• Edit “Trigger Configuration” and click “Page View”.
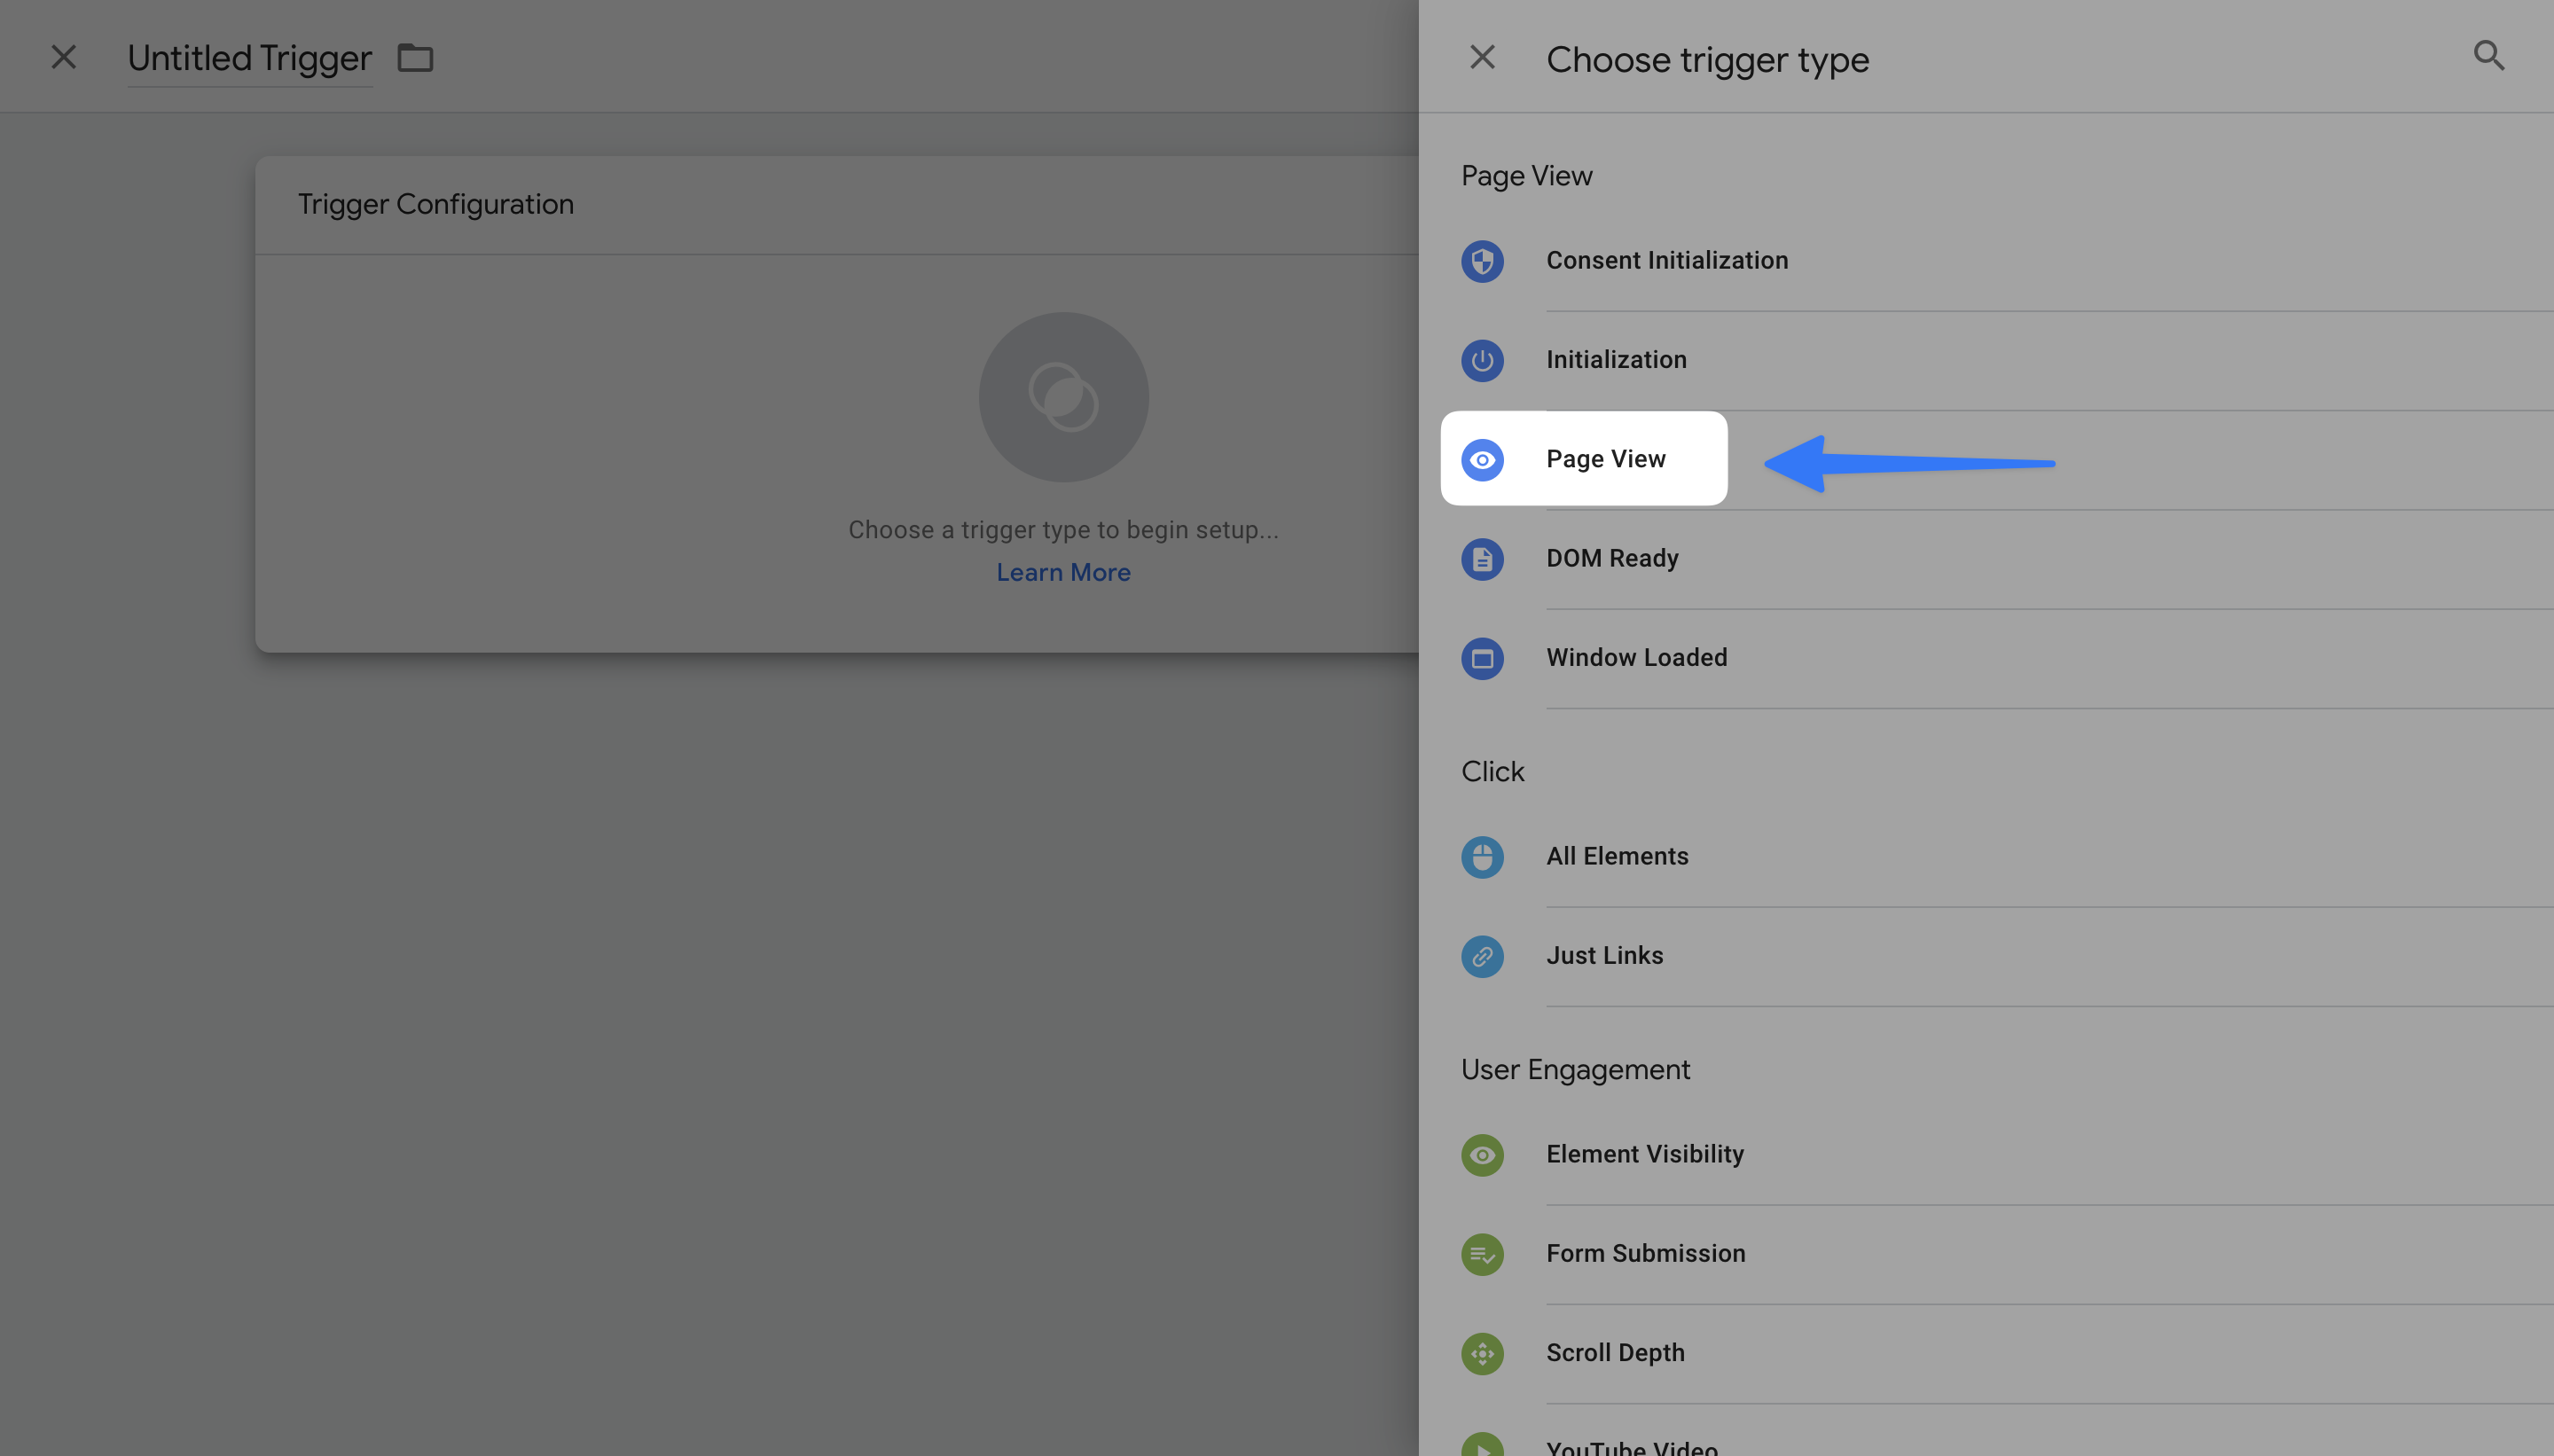
• Click "Some Page Views", choose the event that fires the trigger, and click “Save”.
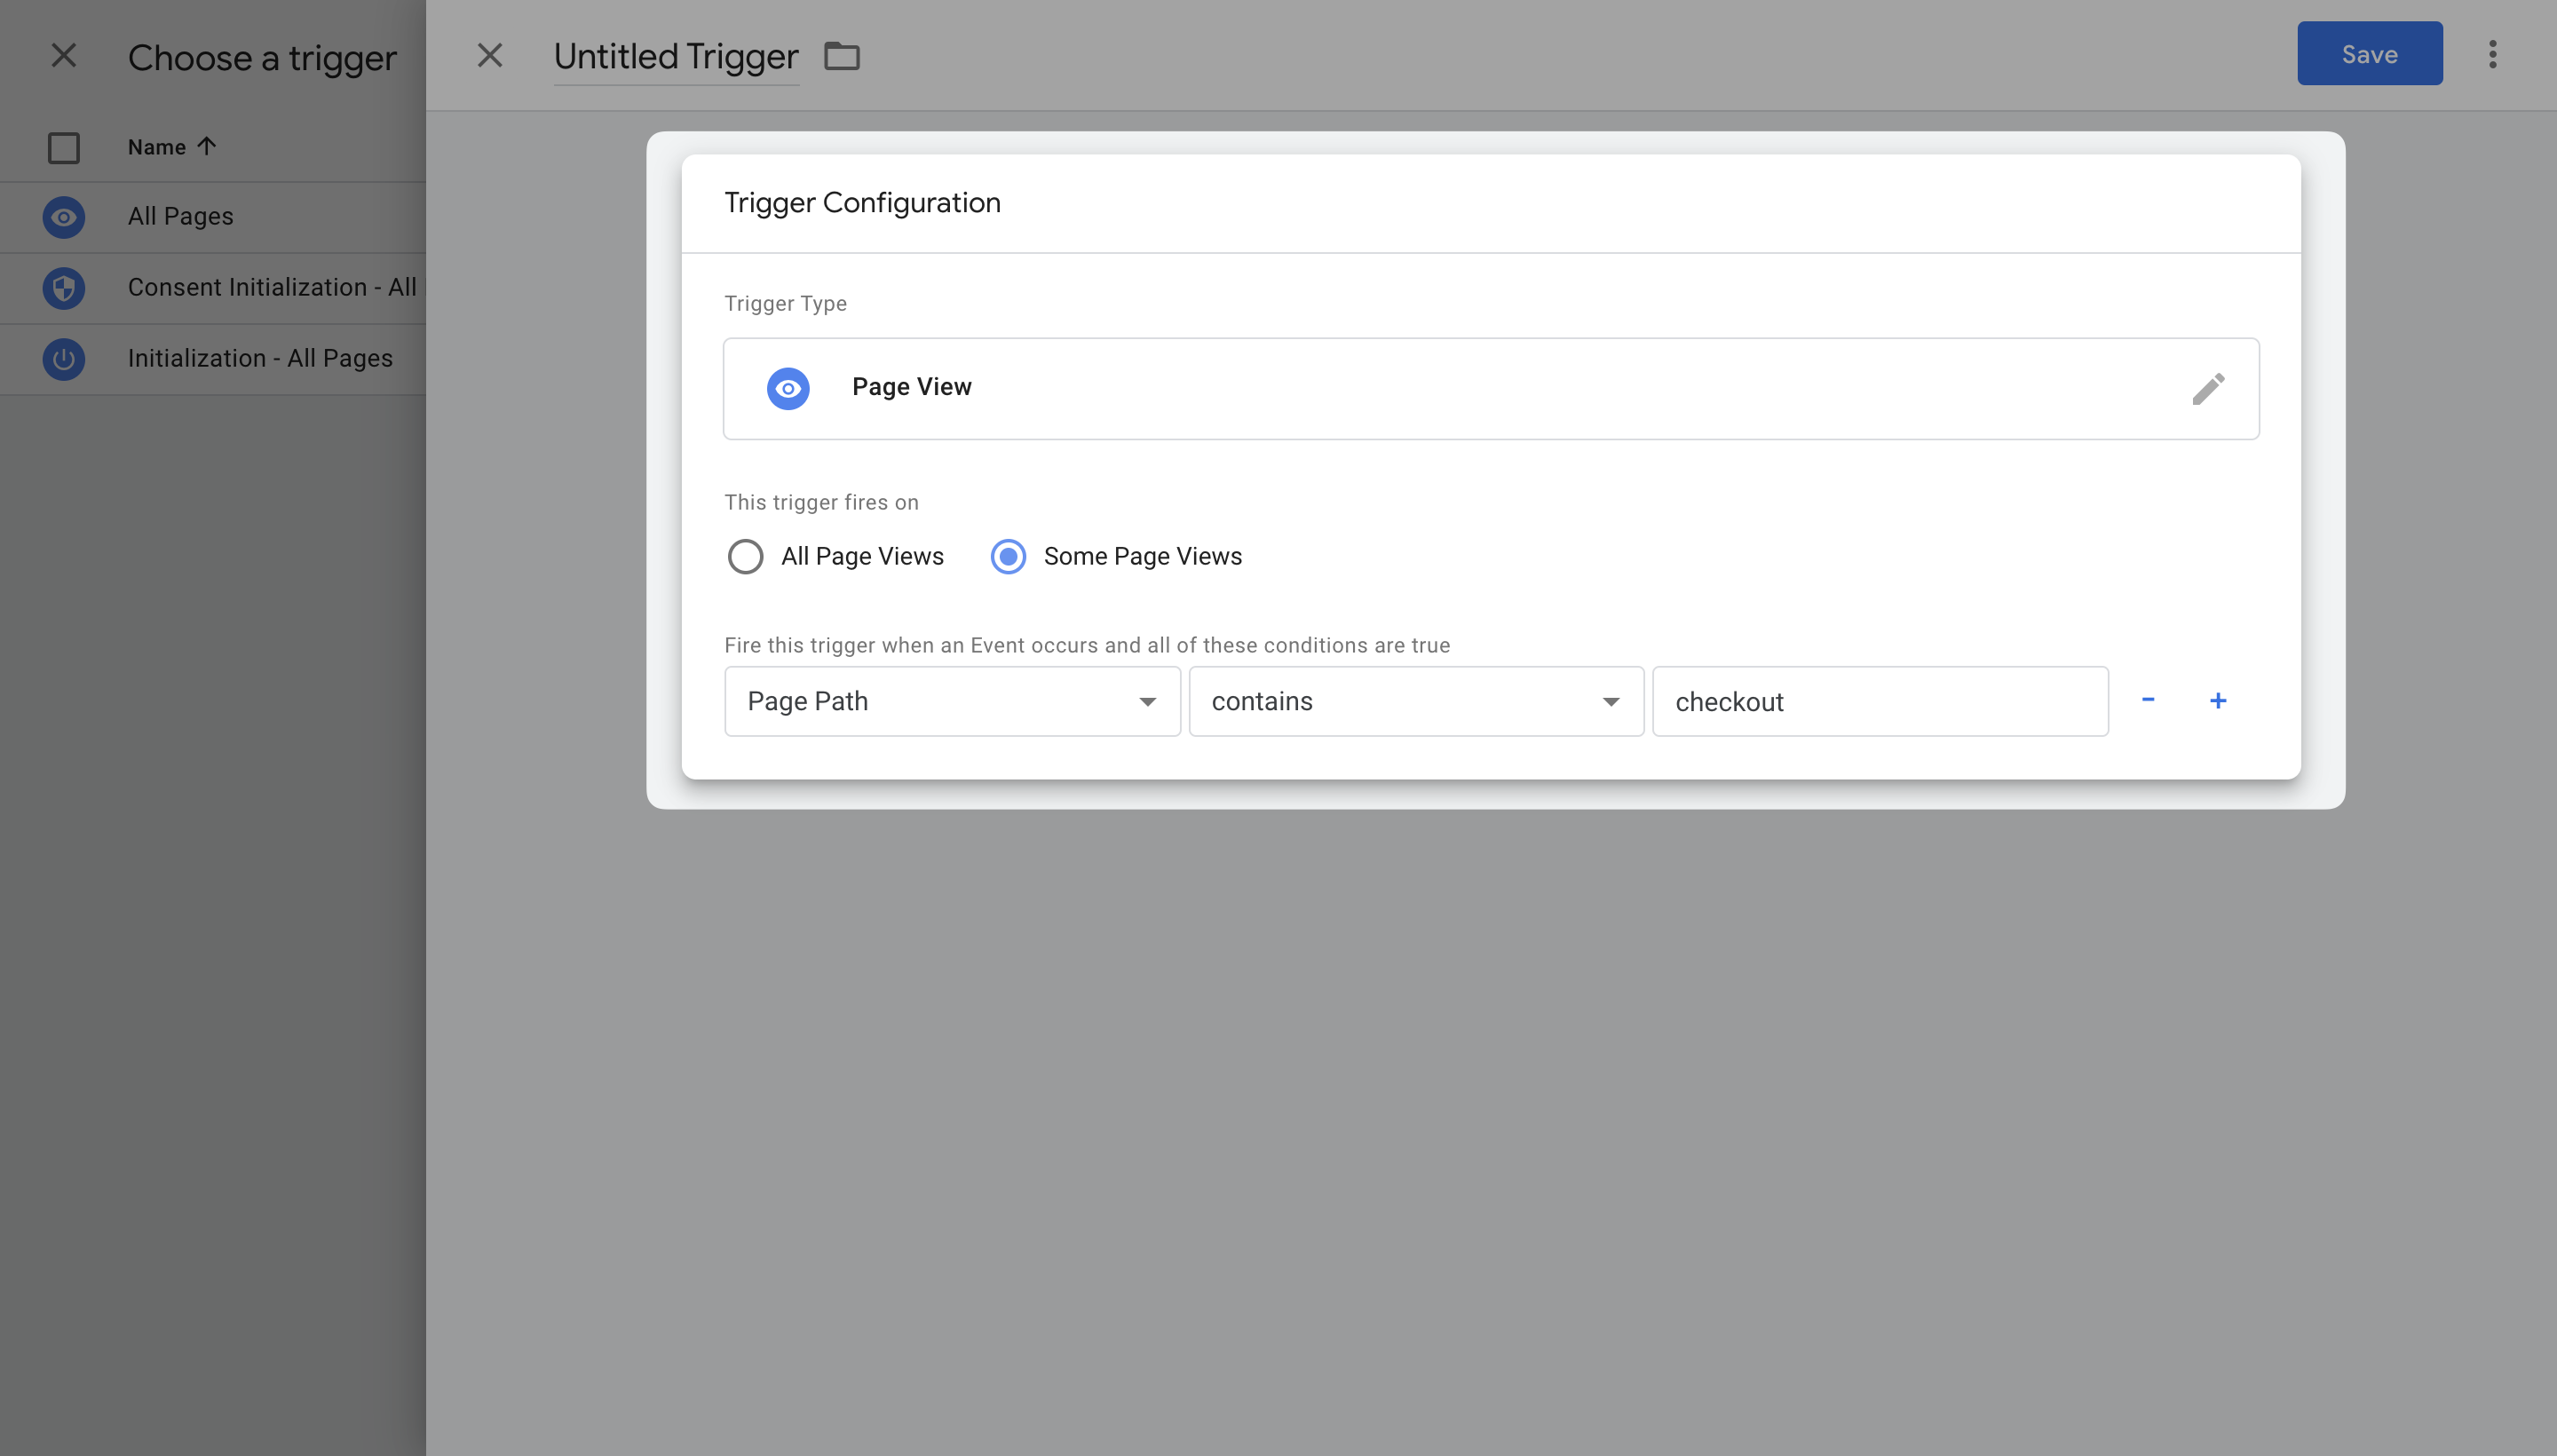
• To add more than one page, click "+" or delete a condition with "-" next to each trigger.
✳️ Note that if you make these configurations instead of All Pages, you won’t be able to show popups on the pages that weren’t specified in GTM. In that case, you must manually add those pages among the triggers.
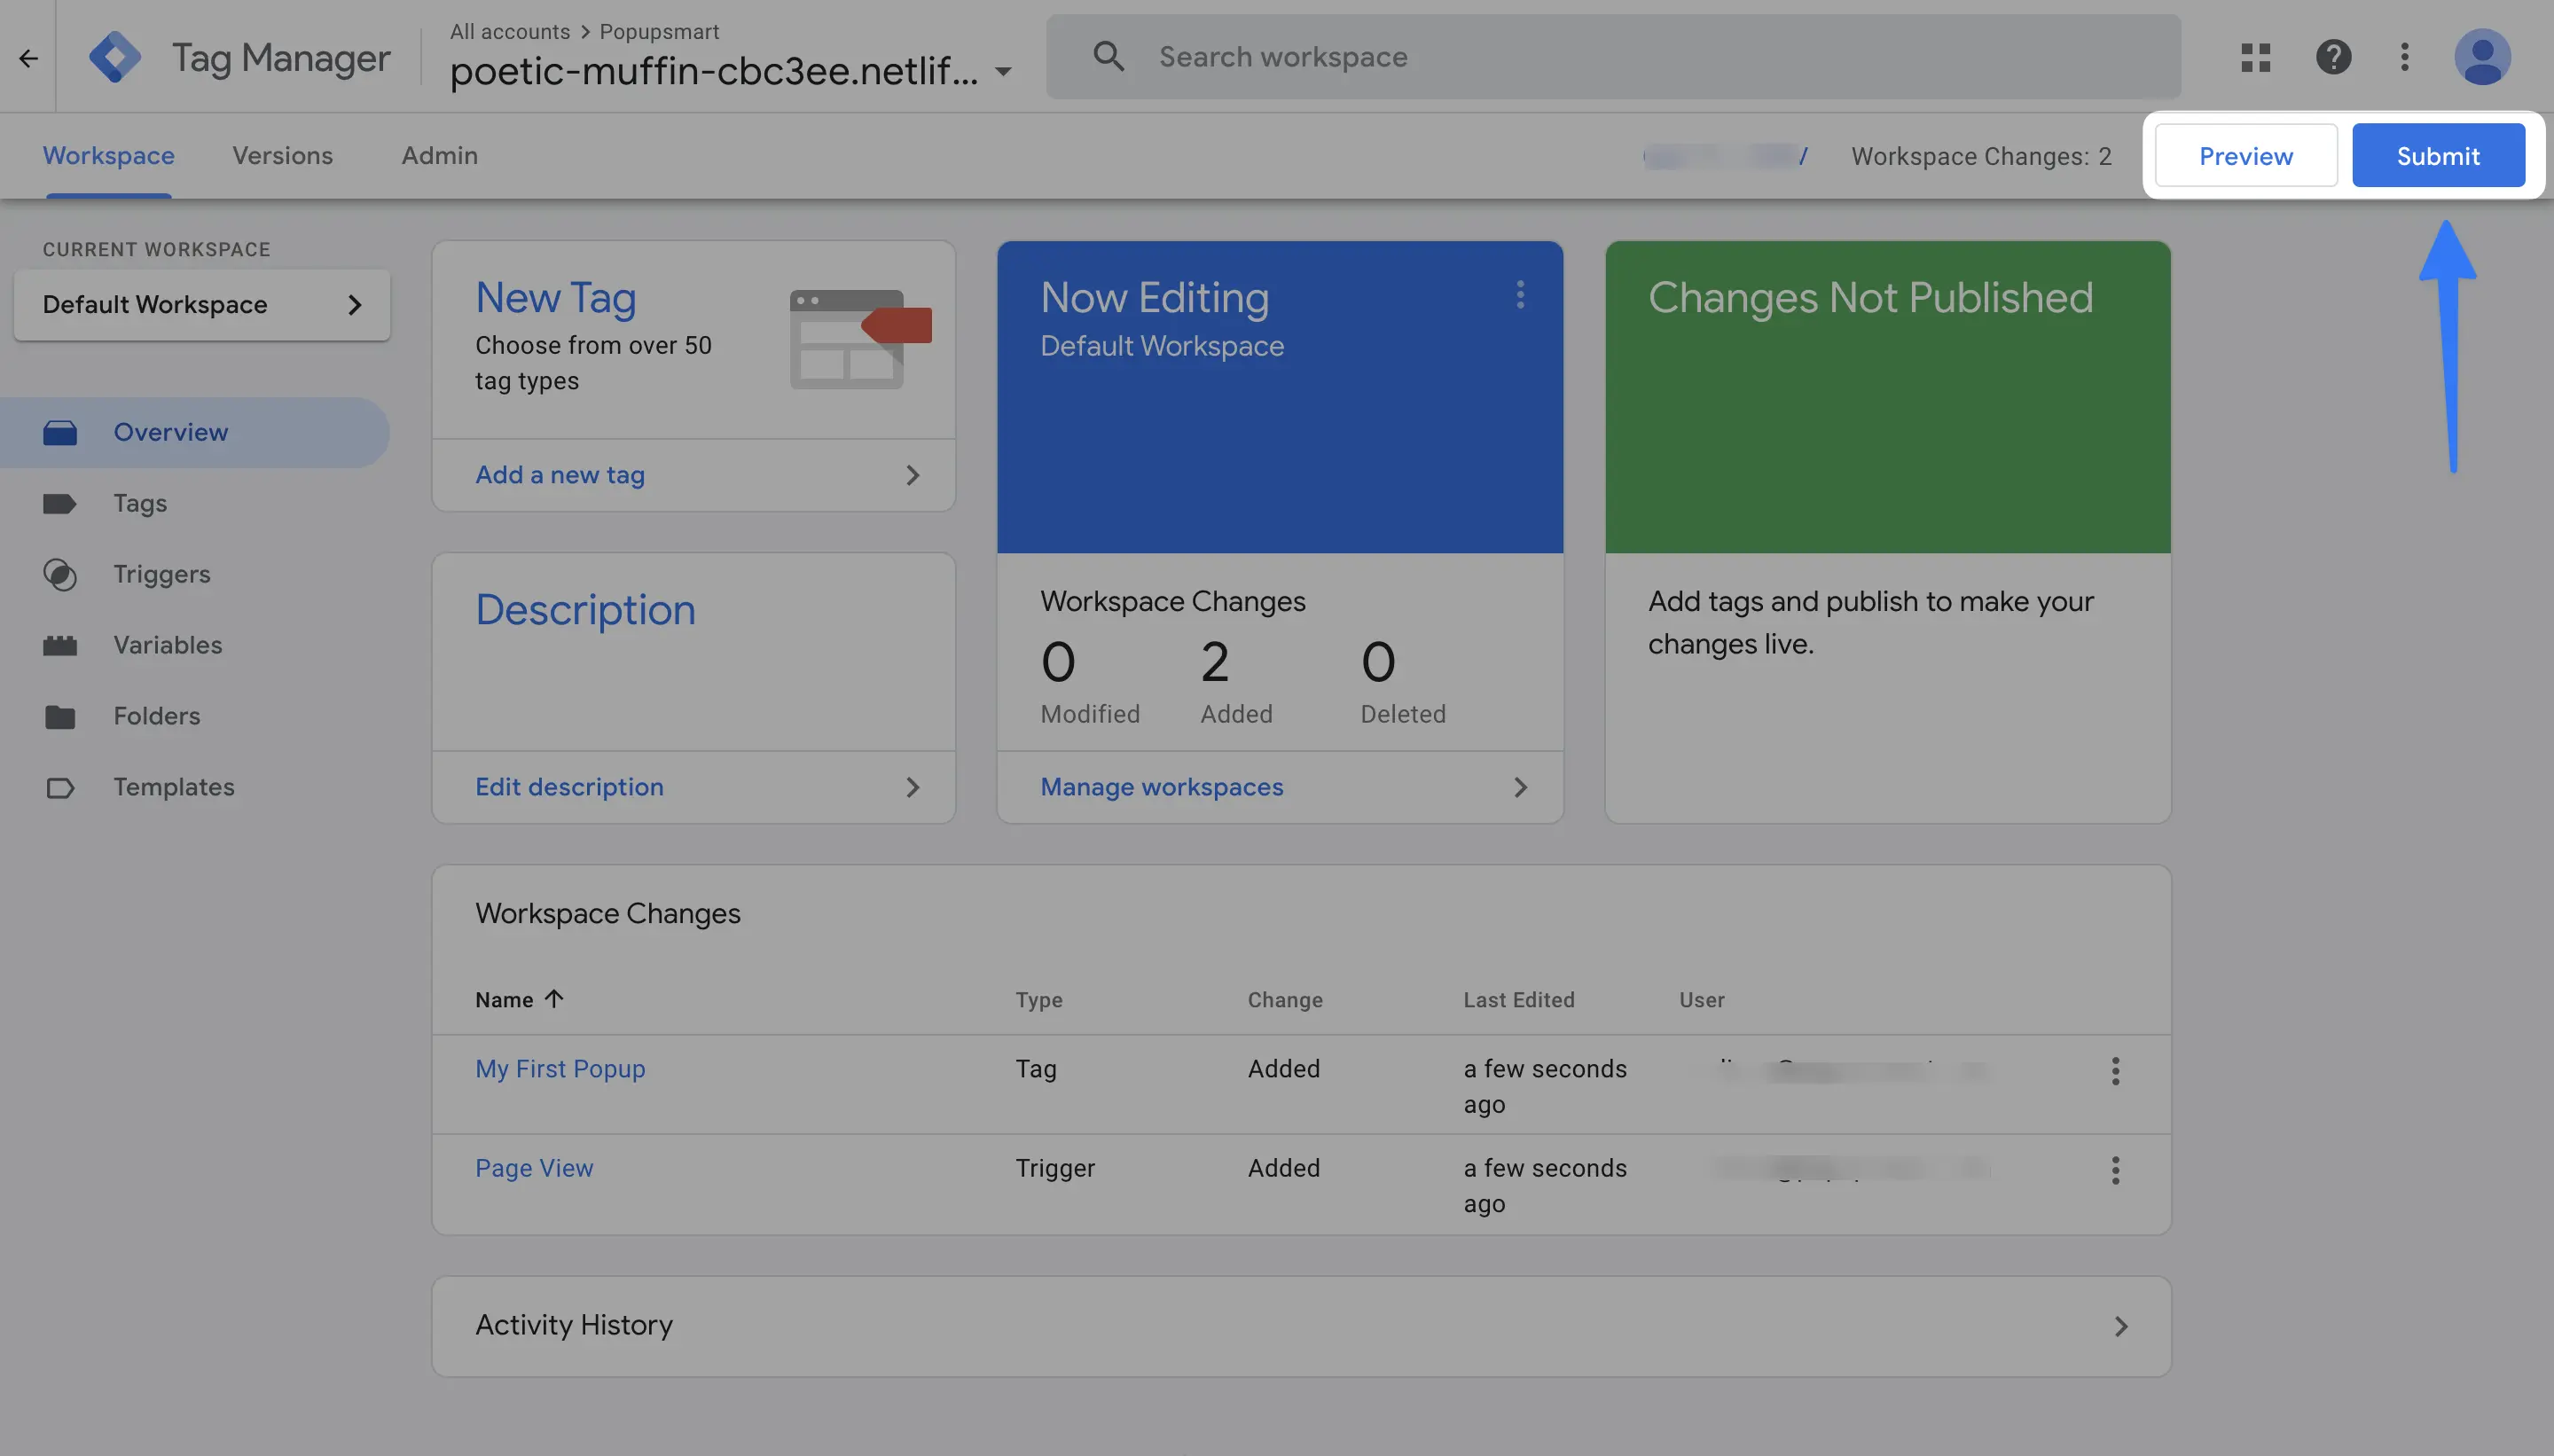
7. Once you have configured the triggers, click the Submit button.
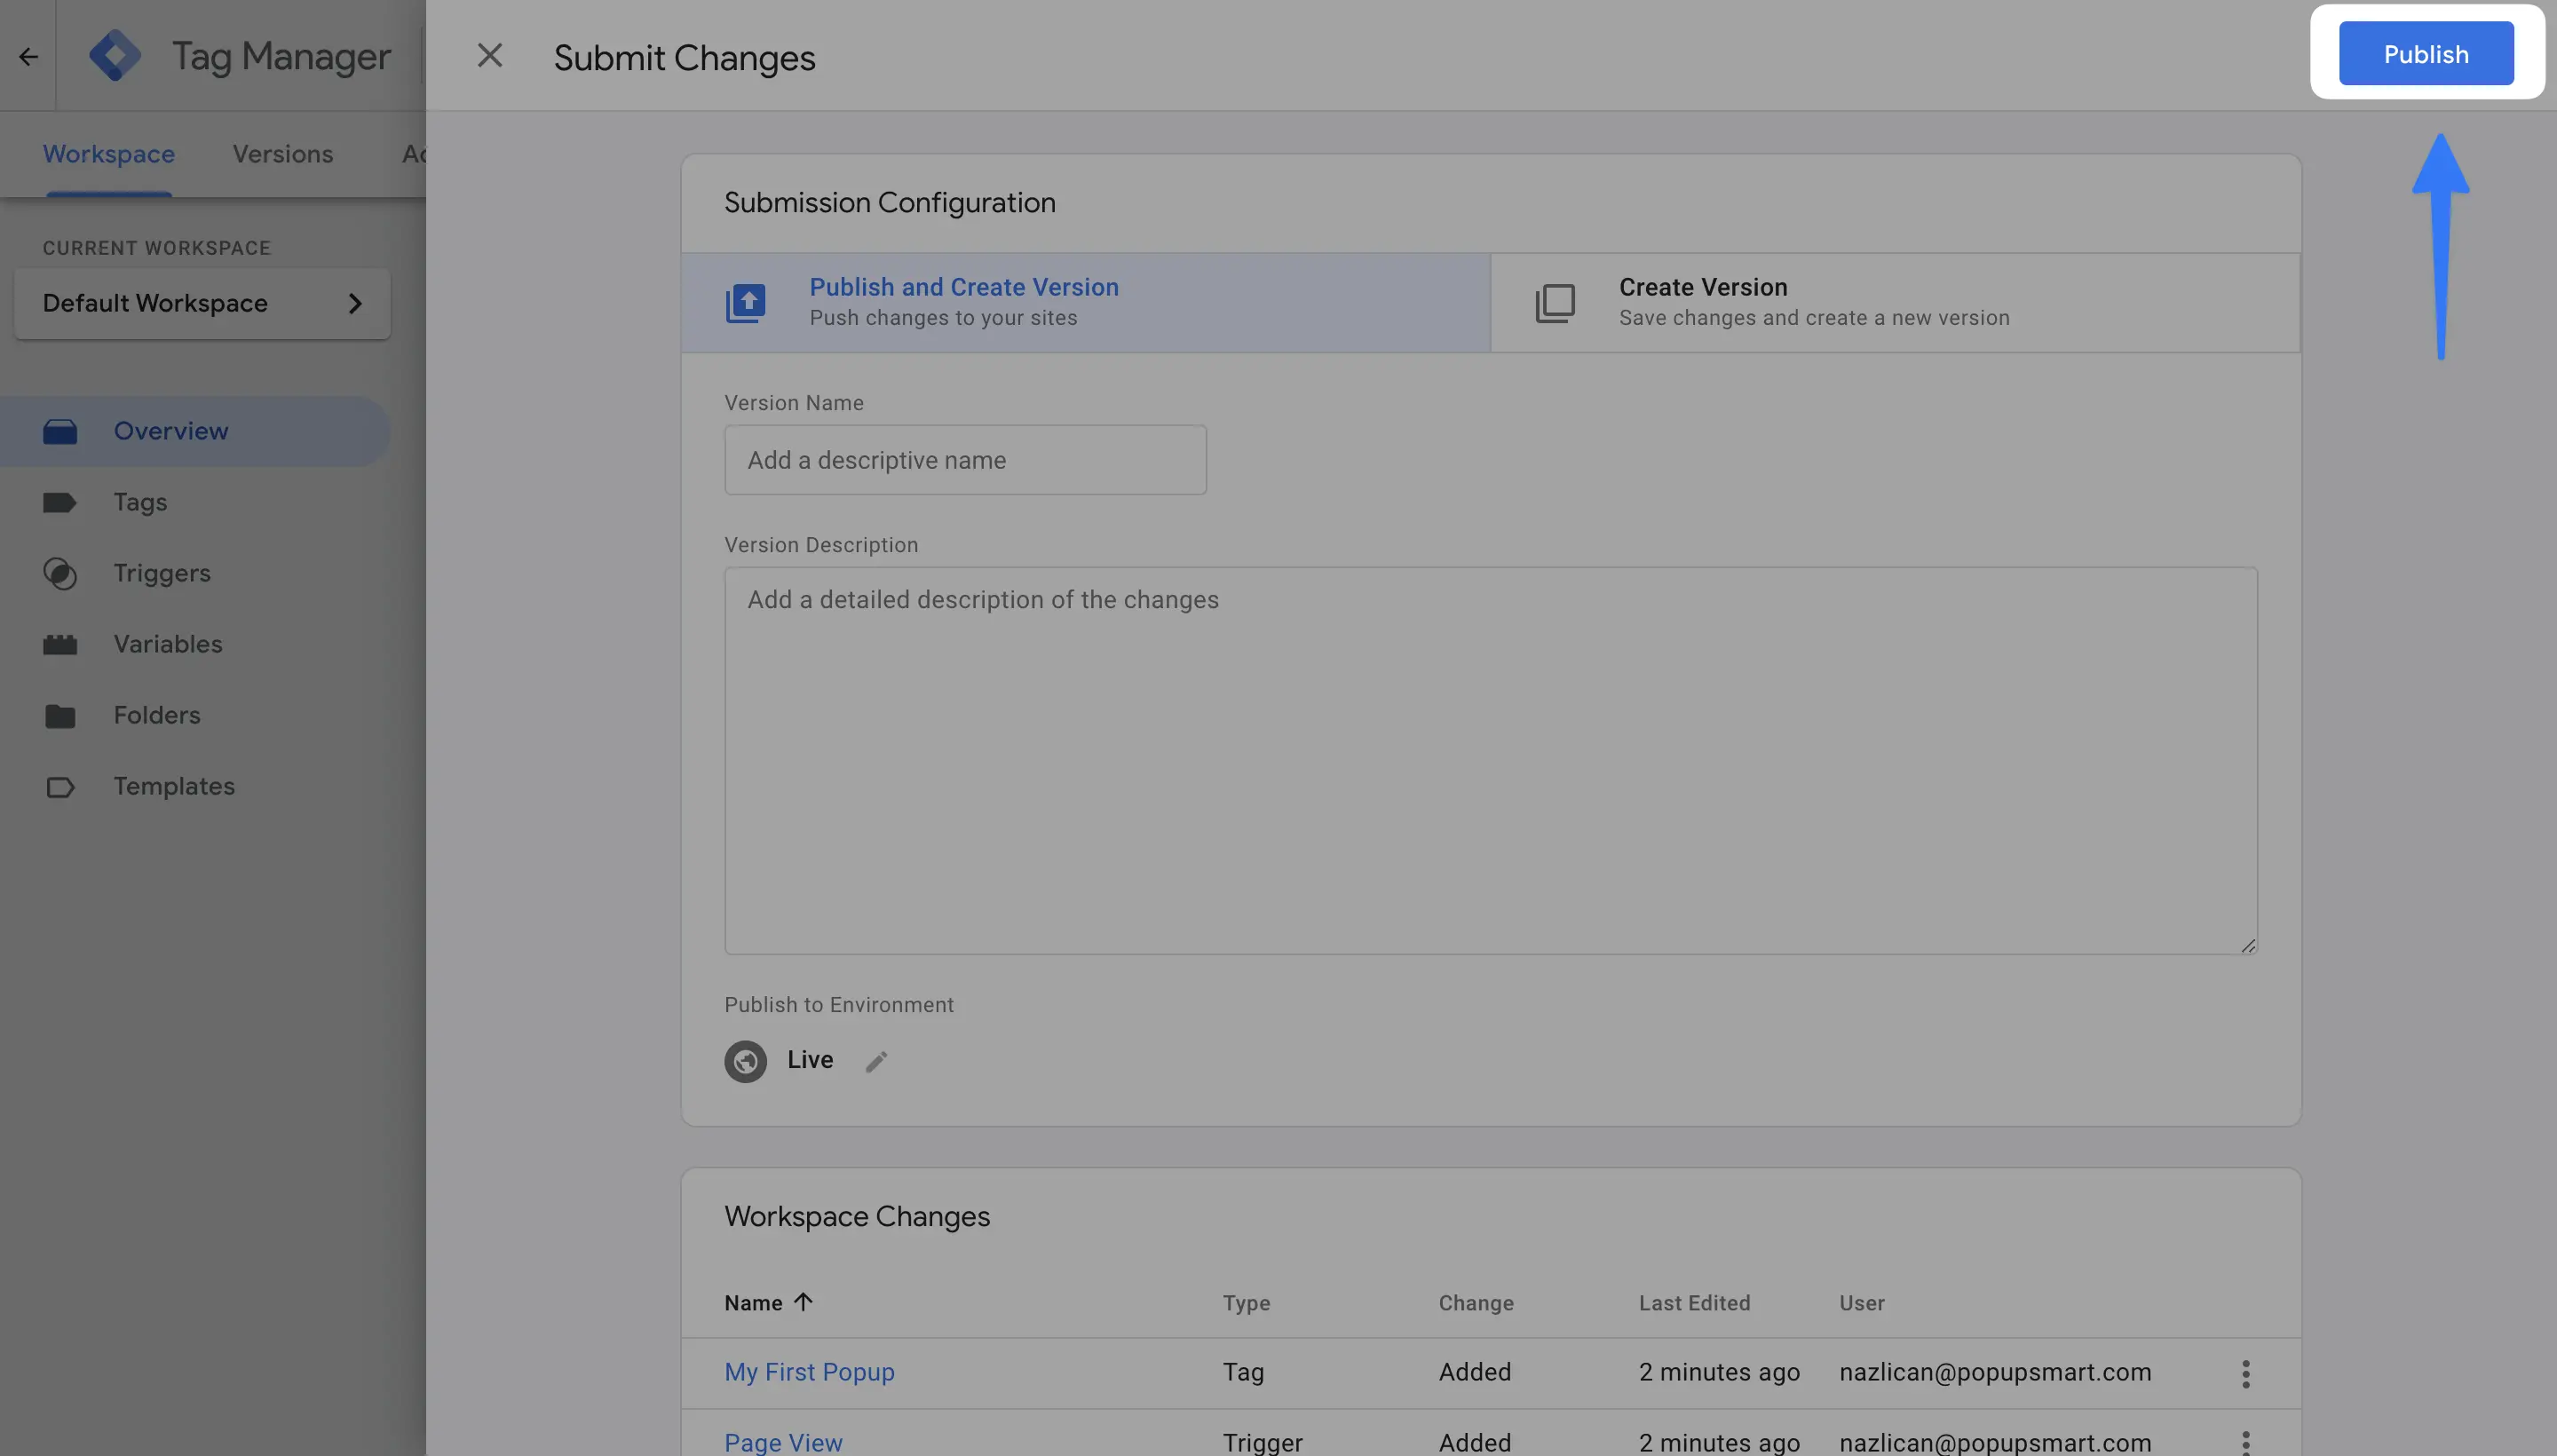
8. Publish the changes from the following screen.
💡Note: If you have an ad blocker on your browser, GTM verification is not going to work. Disable the ad blocker first to verify your website.
Still have some questions about embedding Popupsmart code to Google Tag Manager?
Feel free to contact us via email or live chat!


