Increase Sales Conversion
Can’t turn your site traffic into sales?
Reduce Cart Abandonment
Your customers abandoning their carts?
Promote Products & Offers
Make potential customers notice special offers.
Collect Form Submission
Struggling to collect form submissions?
Get More Phone Calls
Let them call you directly via popups.
Grow Email List
Having trouble growing your email list?
Gamify Your Campaign
Choose your offer and let the game begin.
Make Announcement
Make sure important news unmissed.
Increase User Engagement
Keep visitors & customers on your site longer.
Collect Feedback & Surveys
Can’t draw attention to your surveys?
Facilitate Social Sharing
Grow social media followers and likes!
# How to Add Fonts on Popupsmart
With Popupsmart’s comprehensive customization options, it’s simple to alter the appearance of your popup campaigns to reflect your brand identity.
These choices include adding additional Google fonts to the built-in font faces for your campaign.
Additionally, with the aid of custom CSS, you can utilize your own custom font family or add new Google fonts.
# Adding Google Fonts
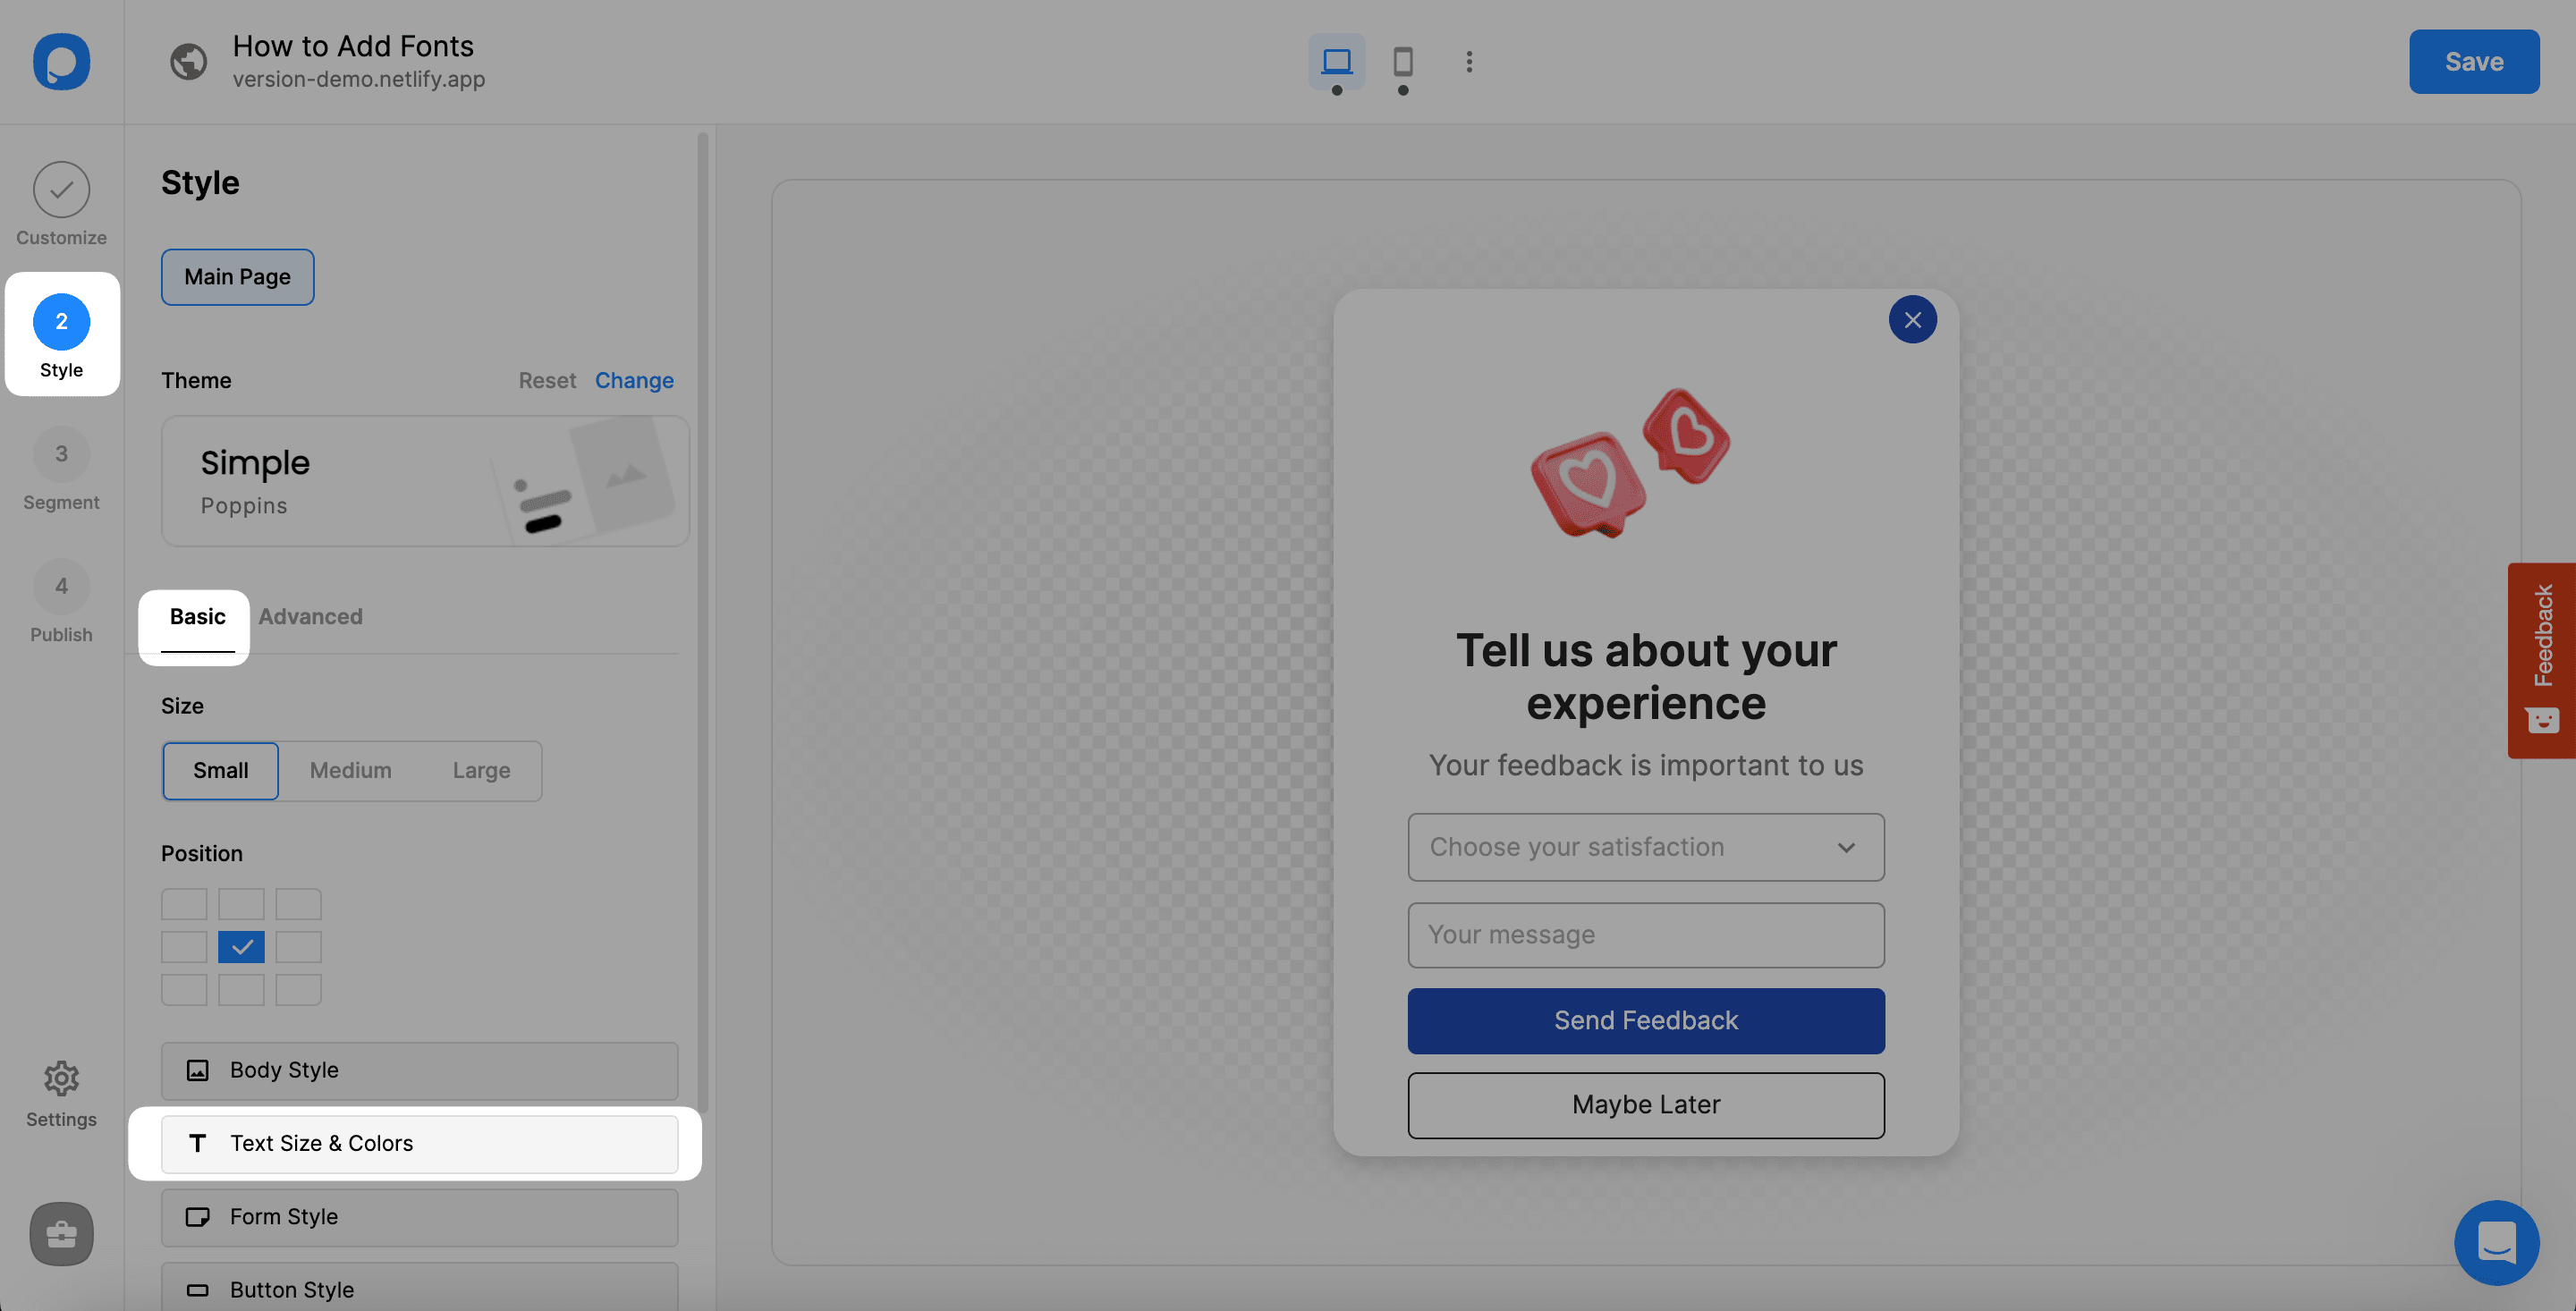
1. Move to the Style step of your campaign and choose Text Size & Colors under the Basic section.
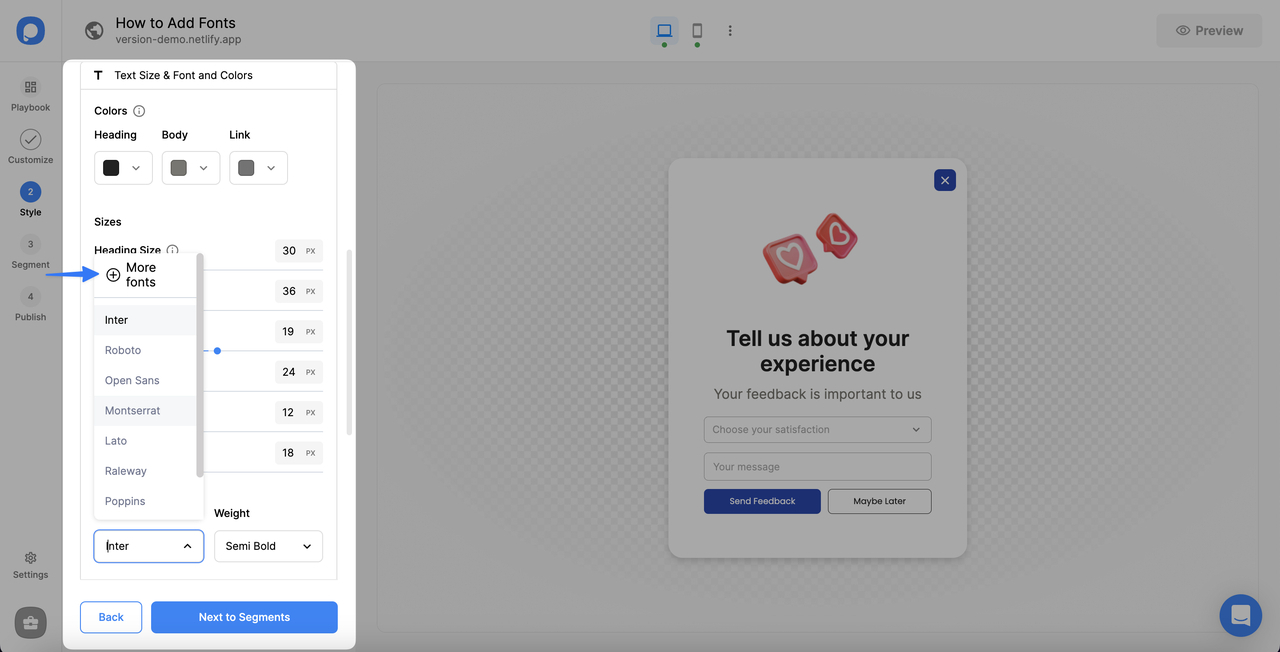
2. Under the Text Size & Colors, arrange the fonts of your elements by adding More fonts.
3. It is possible to search or choose among Google fonts. So feel free to find what you exactly need with your brand.
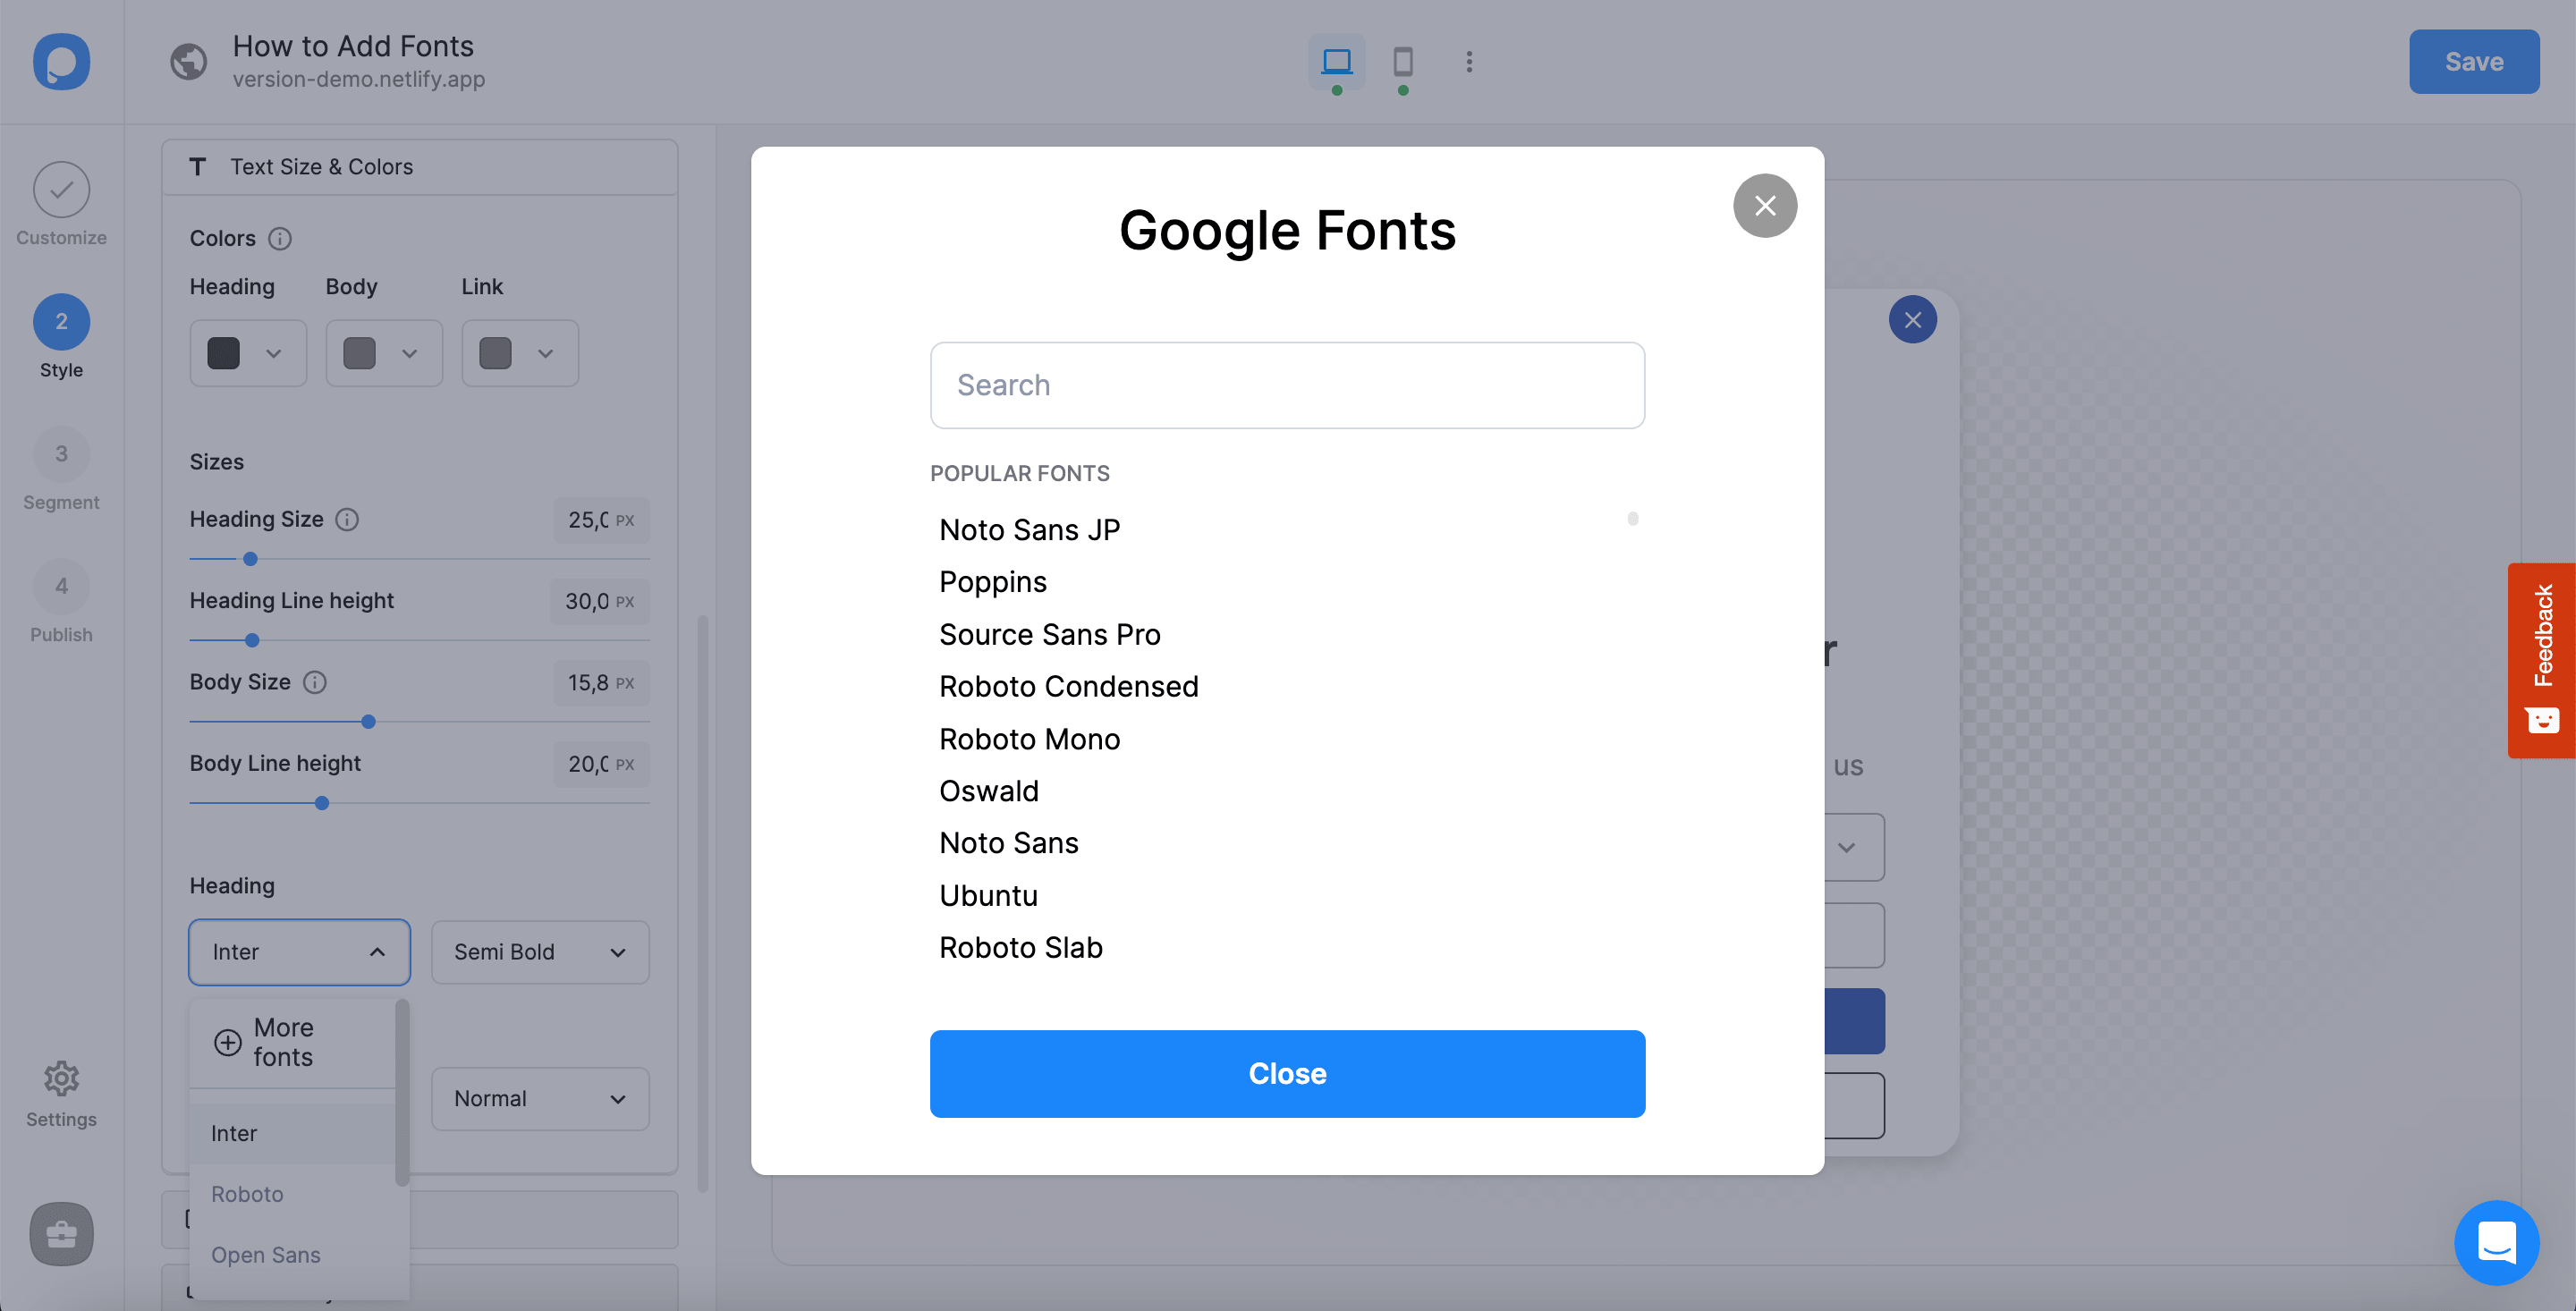
Each font you click on will be added to the prior Font Family dropdown menu.
Close the opening modal window once you’re done.
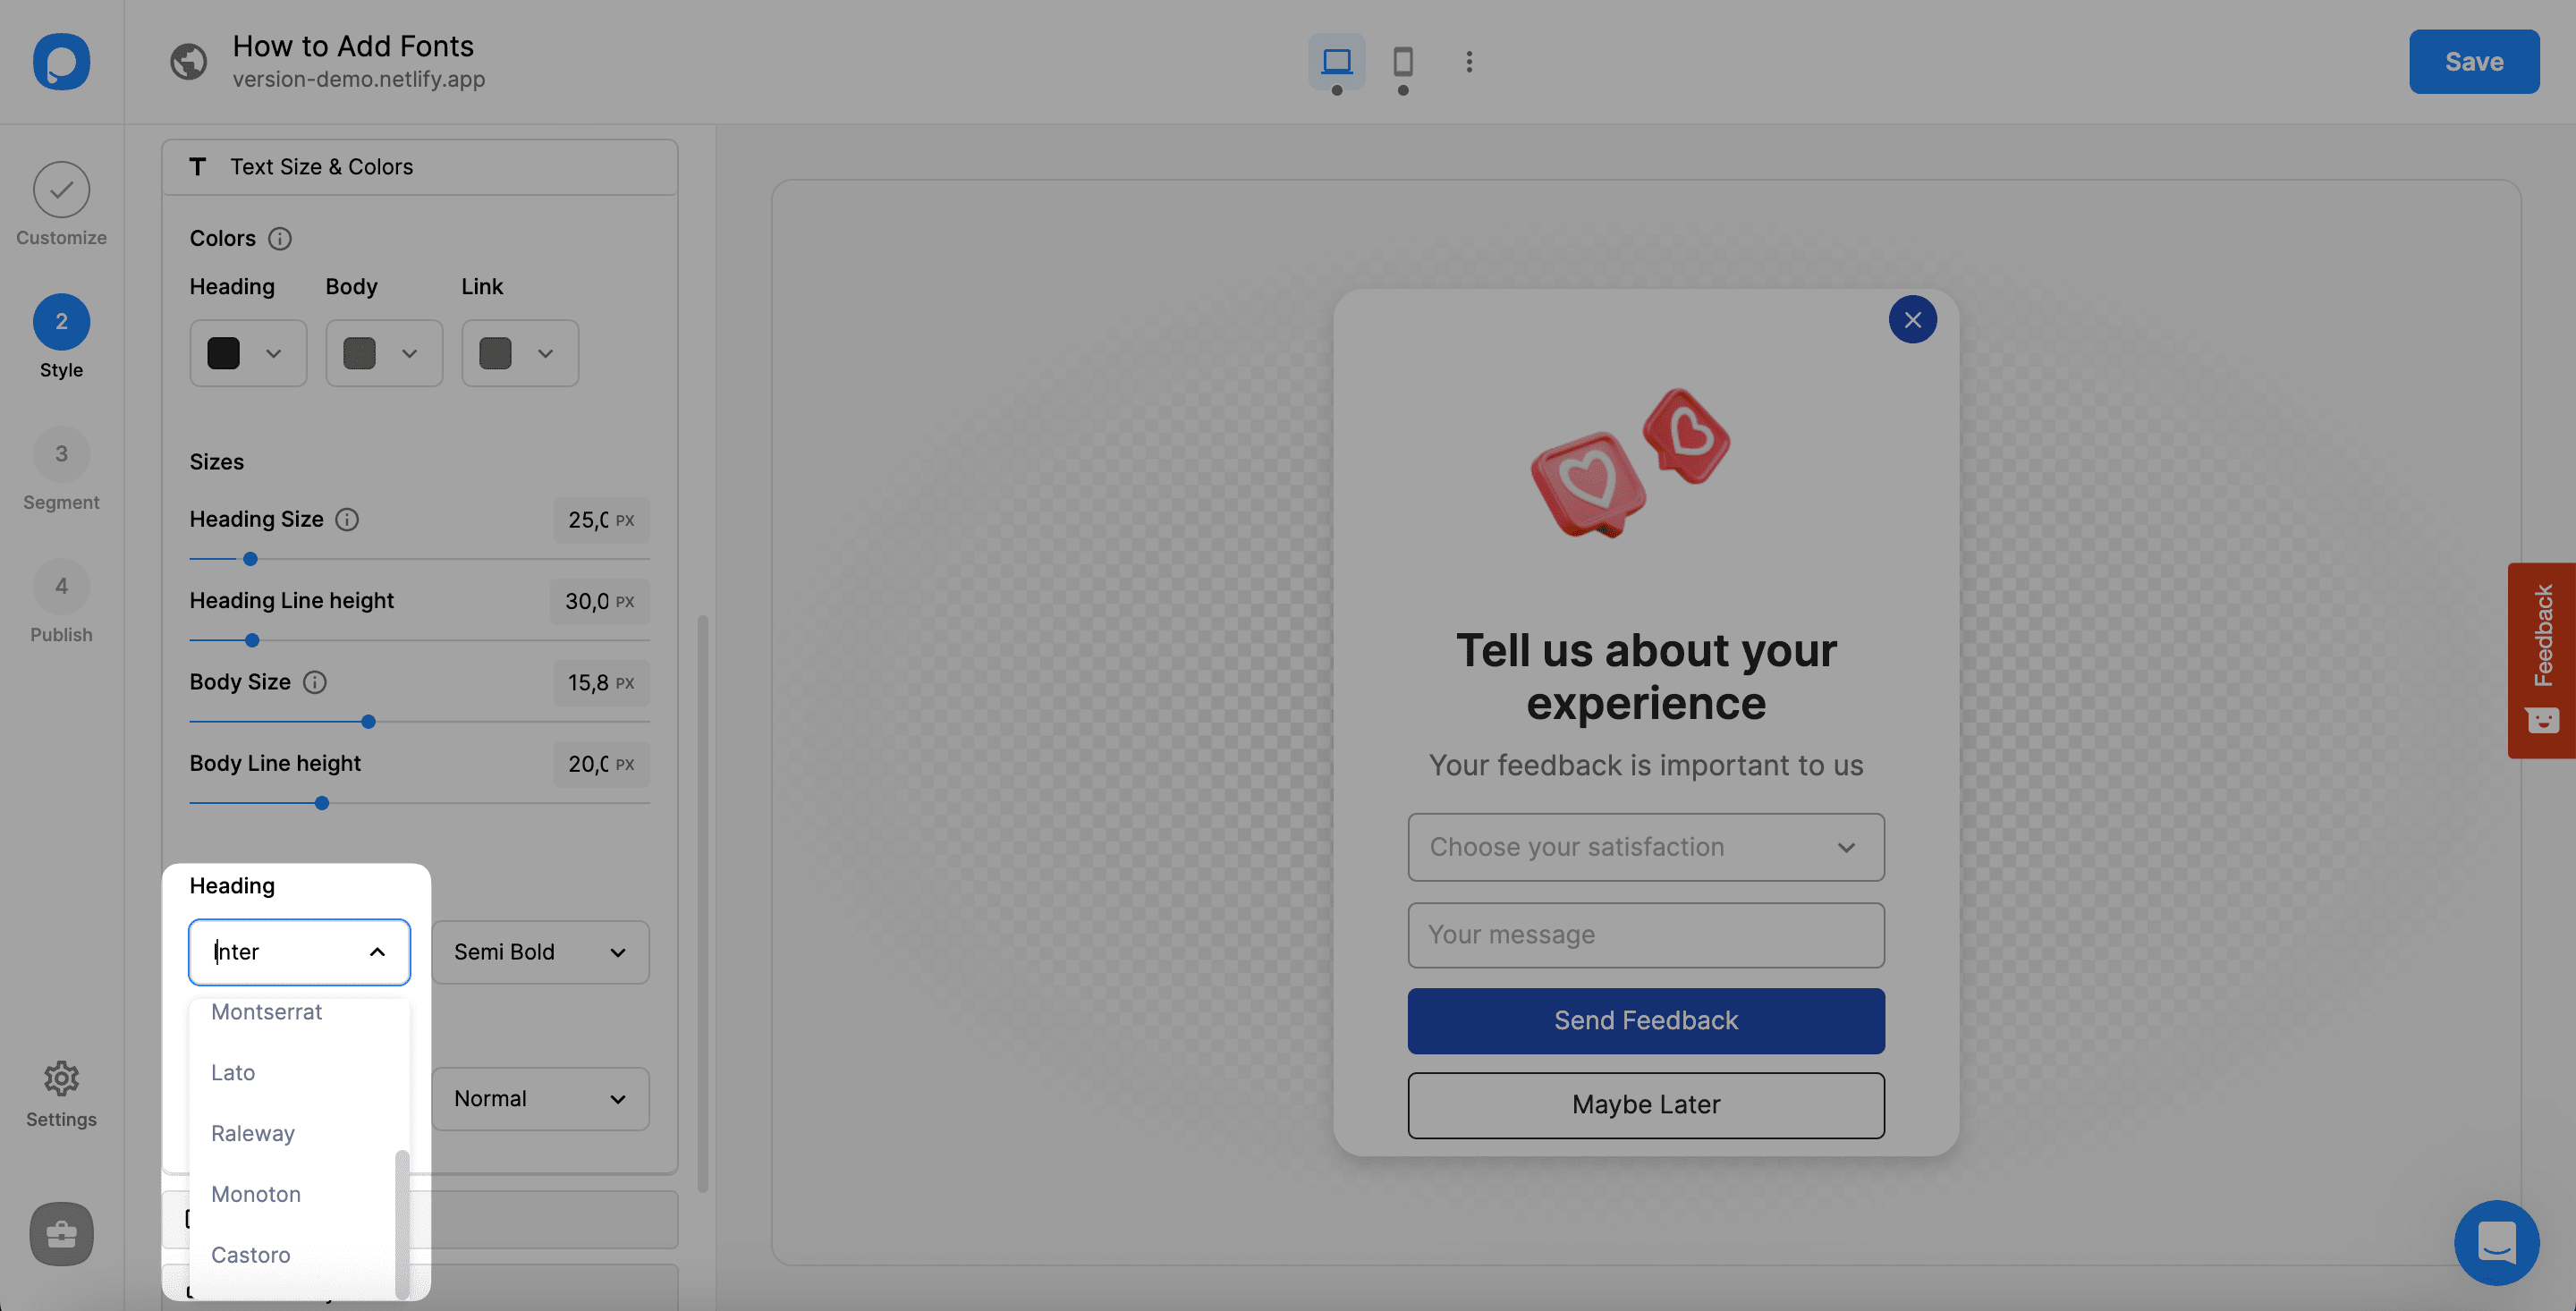
Newly added fonts will be listed under the Font Family dropdown menu you first checked.
4. Then, you will see the fonts you selected under the “Font Family” menu. Select the font you want to use, and click the “Save & Publish” buttons when you finish.
# Adding Custom Fonts Using CSS
Popupsmart allows you to customize your popups with custom CSS so that you can add your custom Google Fonts.
Keep in mind that this action might require minimum coding knowledge.
Using custom fonts for your popup campaigns is ideal for:
• Keeping your popup designs consistent with your brand’s identity
• Matching your website’s overall design with your campaign
Follow the steps below to add a custom font to your campaign.
1. On the “Style” section, click Advanced to reach elements and arrange their Custom CSS.
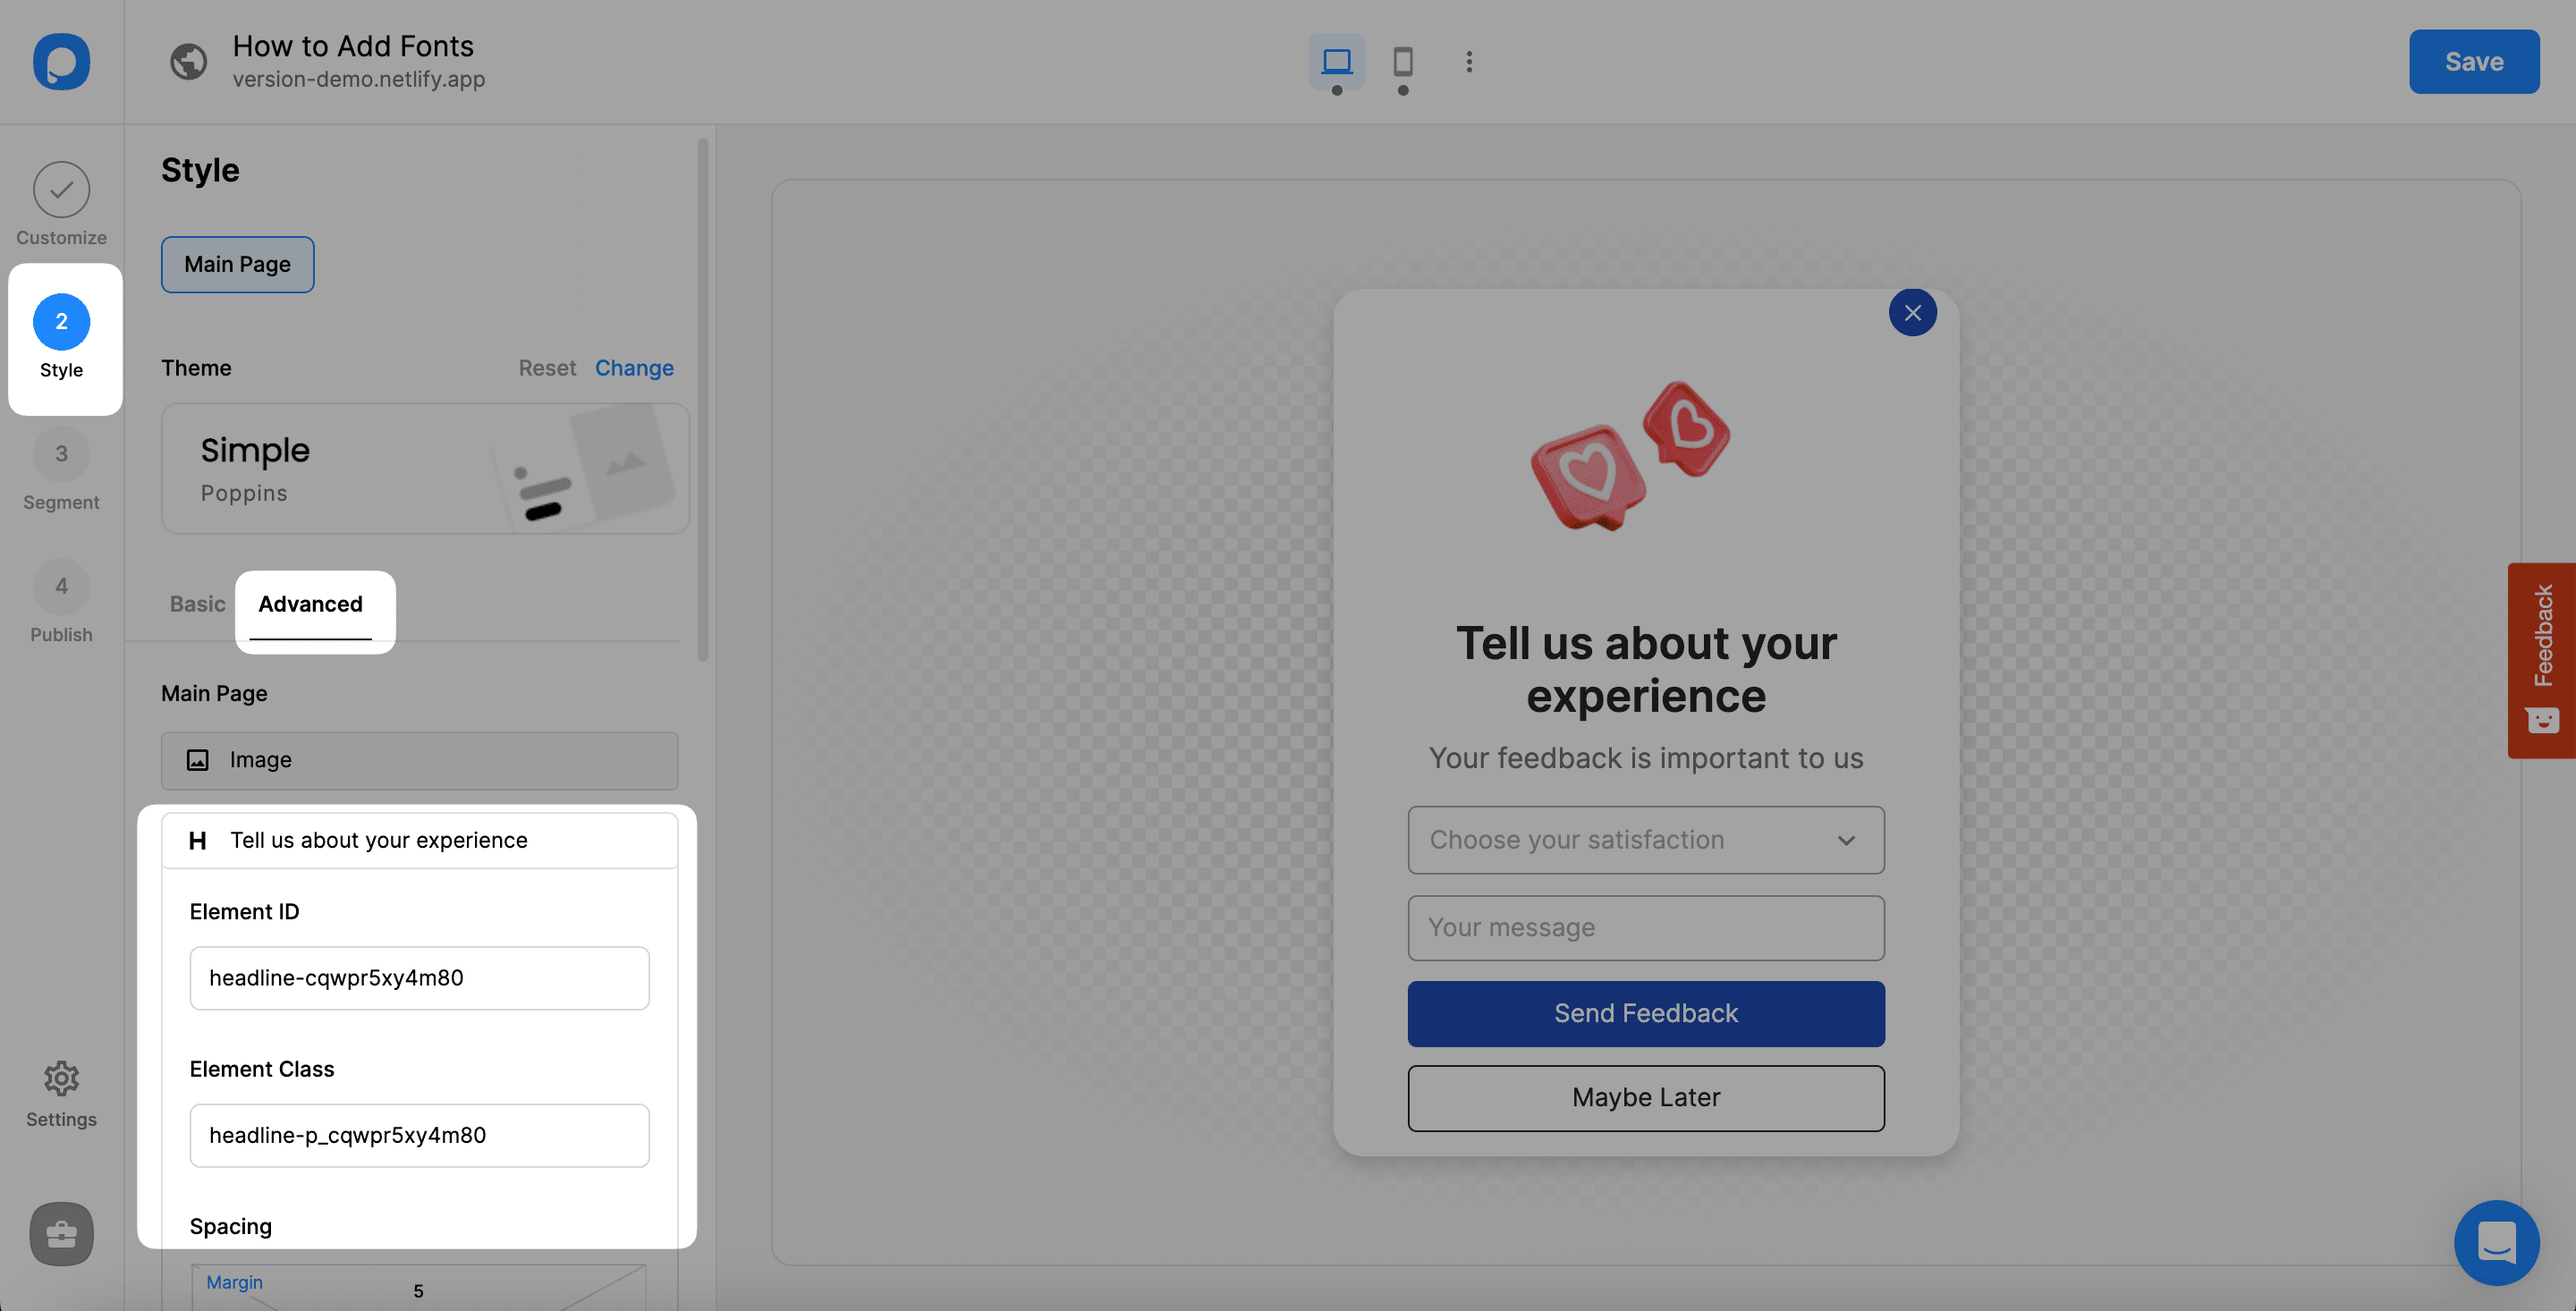
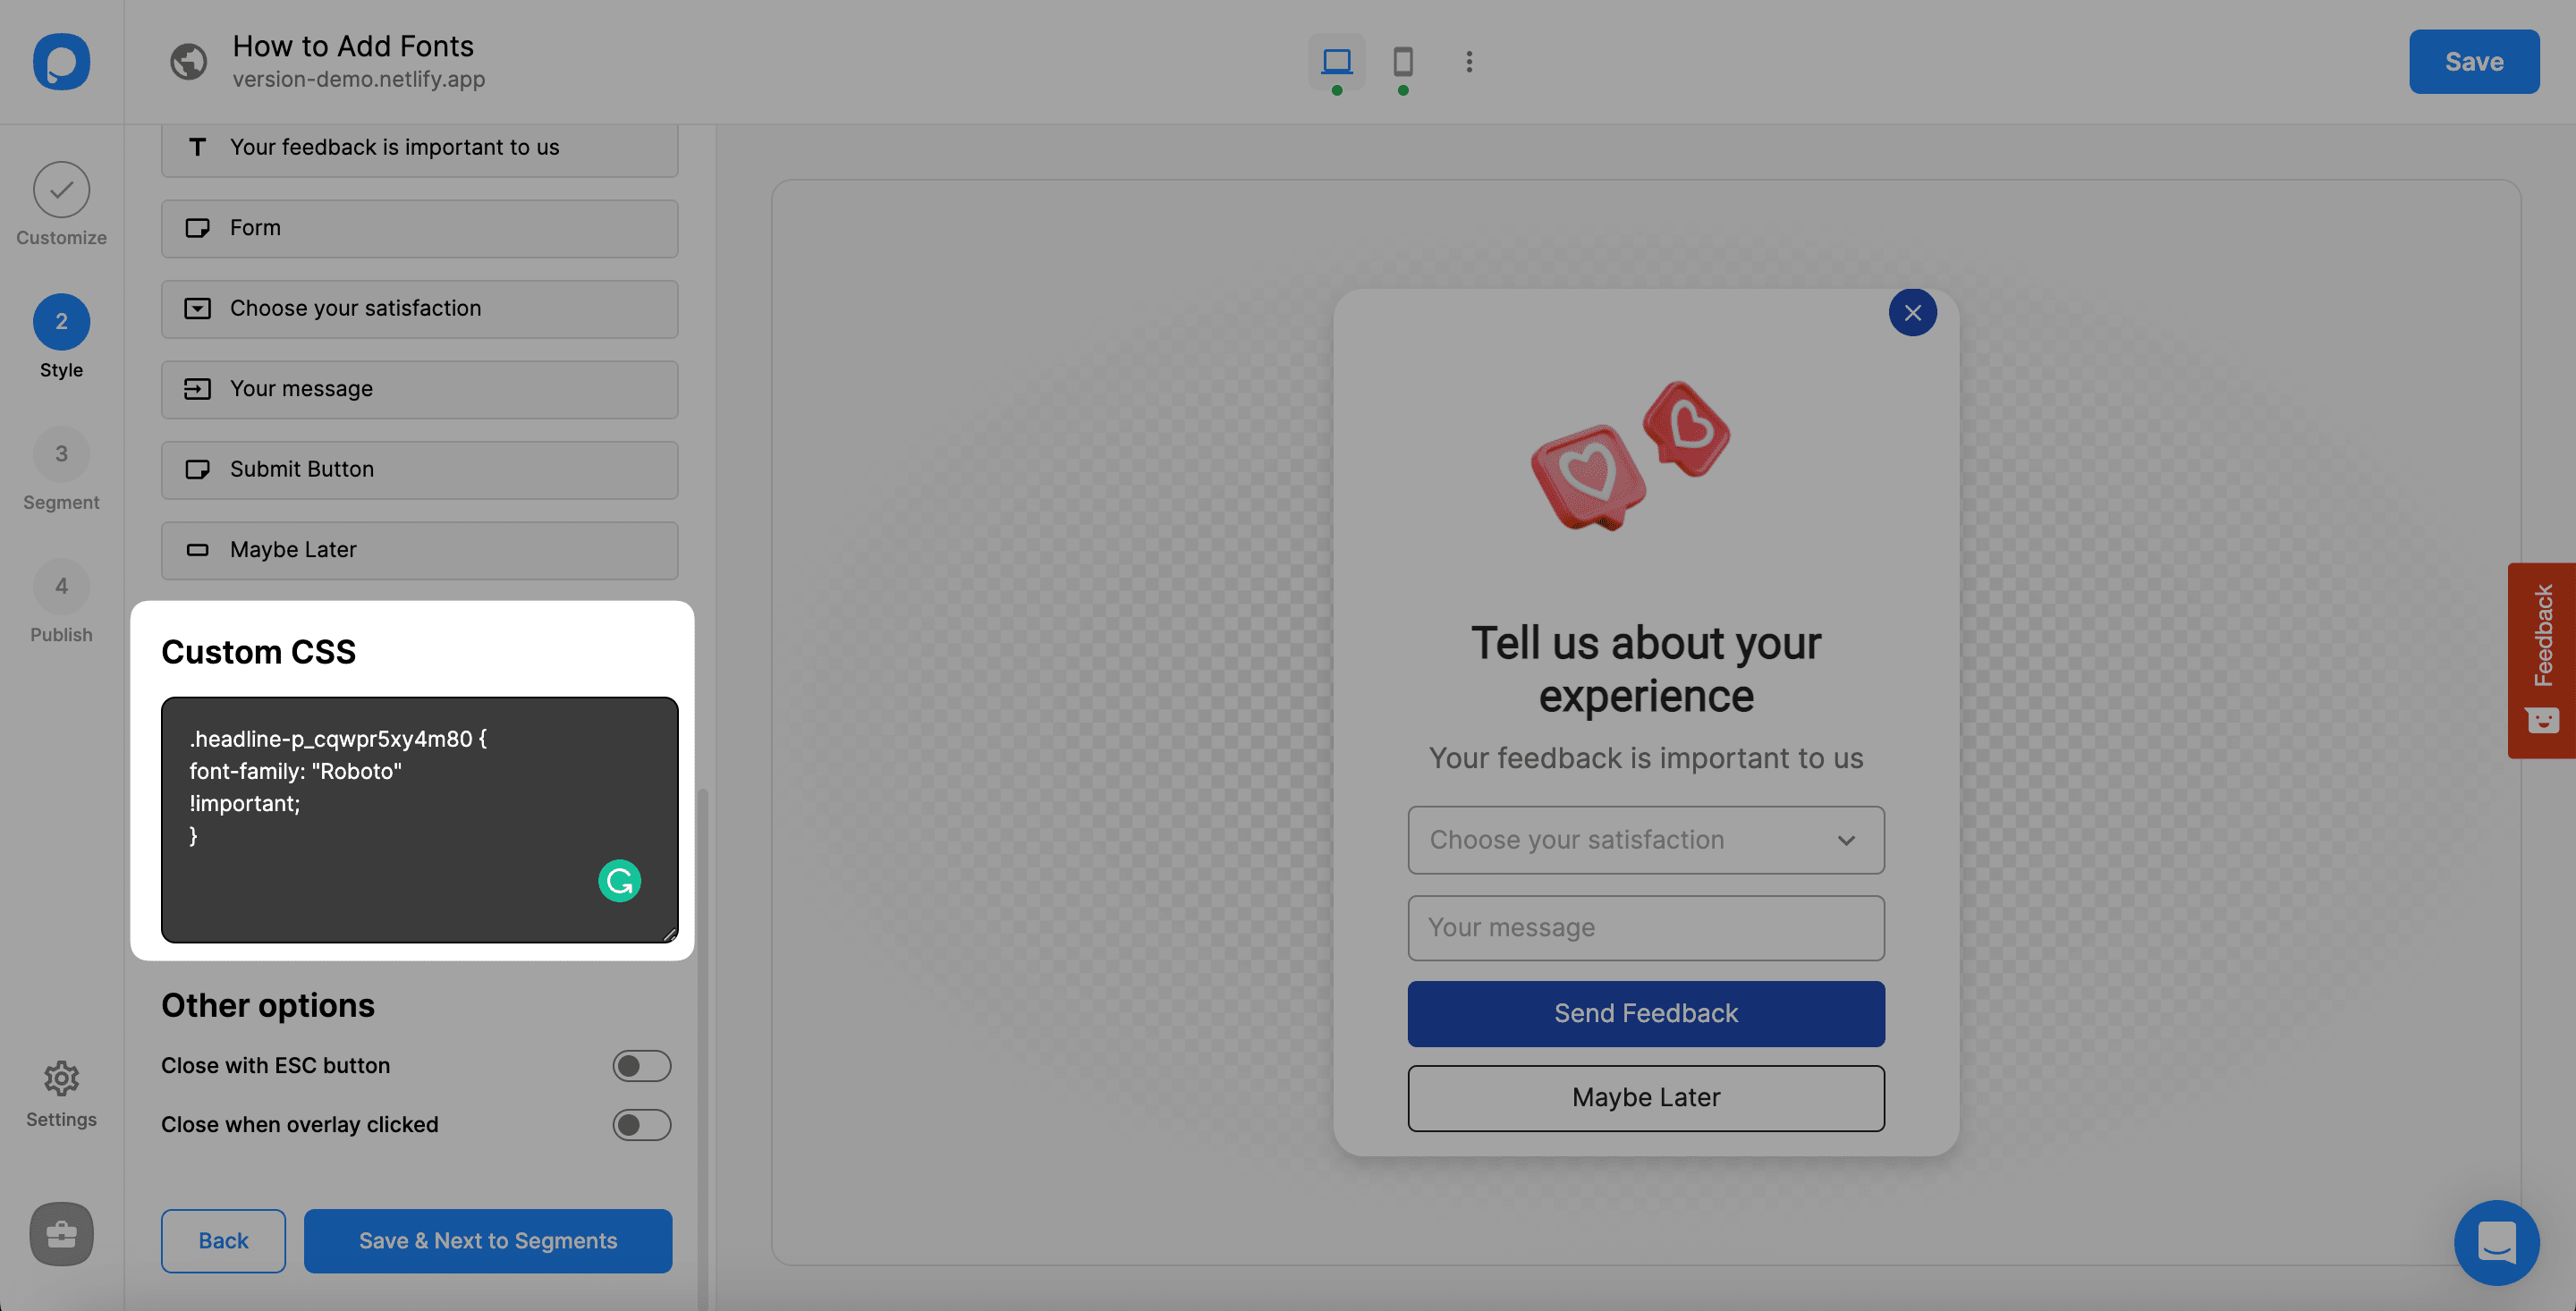
2. After you reach the details of the elements, scroll down to the Custom CSS field. Then, copy-paste and format the CSS code snippet as you like. It needs to look like this:
.headline-p_cqwpr5xy4m80 {
font-family: "Roboto"
!important;
}
2
3
4
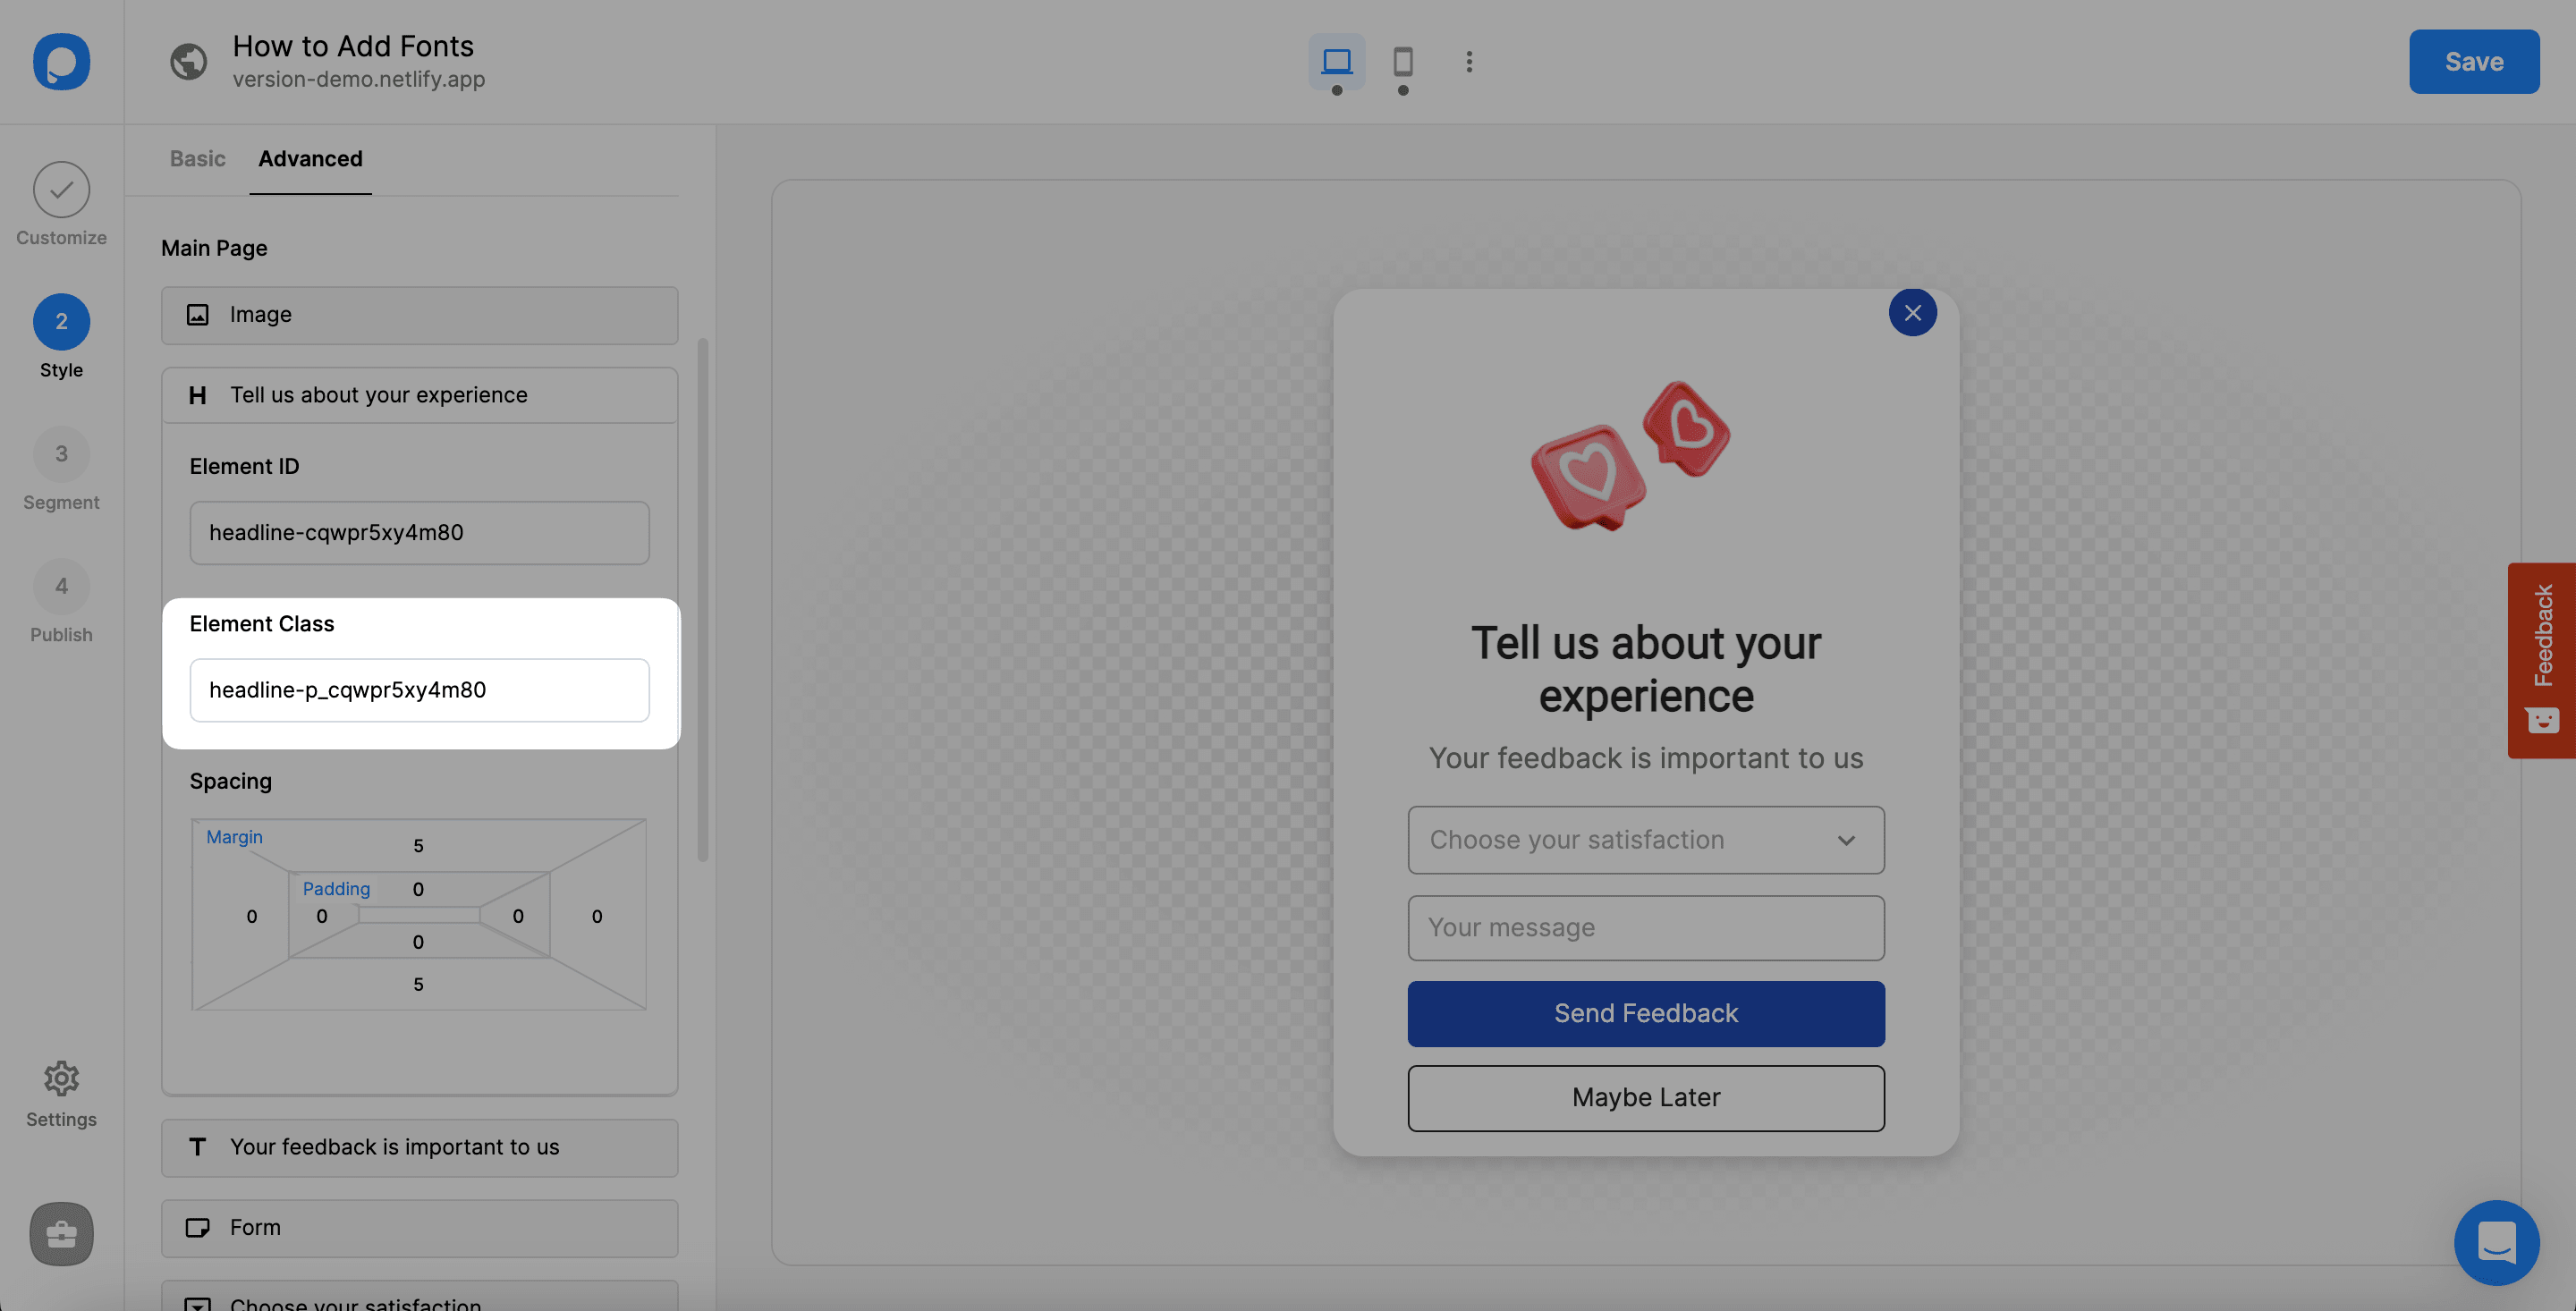
3. You need to change the first part based on your element class.
Go to the "Headline" if you want to change the "headline-p_cqwpr5xy4m80" part, which is the headline's element class.
Check your element's element class and add it before the font-family part.
• Specify the font family of your choice where it says "Roboto."
• Note that there has to be !important after the font family specification.
4. Save any new changes you make. Then, move on to Publish to see your popup live. That’s all!
See Can I Add Custom CSS to My Popup? for more details about custom CSS.
If you have any questions about adding fonts to your popup campaigns, feel free to contact us!


